How to List on eBay for Beginners: A Step-by-Step Guide
Generating summary...
Listing your first item on eBay doesn’t have to feel like navigating a maze blindfolded. Sure, there are fees to understand, categories to pick, and shipping options that can make your head spin—but here’s the thing: most beginners overthink the process and miss the actual magic of eBay. The platform thrives on trust signals, clear communication, and smart optimization, not perfection. I remember when I listed my first vintage camera; I spent three hours agonizing over whether to use “vintage” or “retro” in the title, only to realize later that buyers cared far more about the detailed condition description and multiple high-quality photos I’d included. What separates successful eBay sellers from those who list once and never return isn’t some secret formula—it’s understanding the mechanics, planning strategically, and iterating based on real performance data. In this guide, you’ll learn exactly how to list on eBay as a beginner, from setting up your seller account to optimizing listings for maximum visibility, all while keeping fees manageable and building buyer confidence from day one.
TL;DR – Quick Takeaways
- Plan before you list – Research pricing, understand fee structures, and prepare a repeatable template to save time and reduce errors
- Photos and specifics drive visibility – Clear, honest images and complete item details improve search ranking and buyer trust
- Start with free listings – Most beginners get free insertion fee allowances; final value fees only apply when items sell
- Optimize continuously – Use Seller Hub metrics to refine titles, categories, and pricing based on real impressions and conversion data
- Stay compliant – Monitor eBay policy updates and understand regional regulations to avoid listing removals or account issues
Getting Started on eBay
Before you rush to snap photos of that box of collectibles gathering dust in your garage, take a moment to understand the landscape you’re stepping into. eBay operates on a model that balances accessibility for casual sellers with powerful tools for serious merchants, and knowing which path fits your goals will save you time and money upfront.
Understand the platform and selling options
eBay offers two primary seller tracks: private seller accounts and store subscriptions. Private sellers typically enjoy a monthly allowance of free insertion fee listings (the number varies by region and promotional periods), which means you can list items without paying upfront. Once you exceed your free allowance, insertion fees kick in, though these are modest compared to final value fees—the percentage eBay takes when your item sells. Store accounts, on the other hand, charge a monthly subscription but dramatically increase your free listing quota and reduce final value fee rates on many categories. For a beginner testing the waters, starting as a private seller makes sense; if you’re planning to list dozens of items monthly, a store subscription can pay for itself quickly. According to eBay’s fee structure for private sellers, final value fees range from around five to twelve percent depending on category, with additional regulatory operating fees in certain regions.
The key difference between account types boils down to scale and fee optimization. Private accounts are perfect for occasional selling—perhaps you’re clearing out a closet or selling a few items you’ve outgrown. Store accounts shine when volume increases, since the monthly fee unlocks lower transaction costs and access to advanced marketing tools like promoted listings analytics. Think of it like gym memberships: if you only work out once a month, pay-per-visit makes sense, but if you’re there three times a week, the monthly plan saves you money. Similarly, if you anticipate listing thirty or more items each month, crunch the numbers on a store plan versus paying insertion fees and higher final value rates as a private seller.
Set goals and choose a niche
One of the biggest mistakes beginners make is listing random items without a coherent strategy. While eBay supports selling almost anything legal, building trust and visibility happens faster when buyers see you as a specialist. Pick a narrow niche—vintage electronics, branded clothing, collectible toys, or refurbished gear—and focus your early listings there. Why? Because niche expertise allows you to write more compelling descriptions, price more accurately, and build a reputation that encourages repeat customers and positive feedback. I’ve seen sellers who dabble in ten different categories struggle to gain traction, while sellers who carved out a niche in retro gaming consoles or designer handbags quickly developed loyal followings and higher conversion rates.
Align your niche with realistic traffic and sales goals. If you’re aiming to generate supplemental income, maybe you list five to ten items weekly and monitor which categories bring the best return on time invested. If you’re testing a side business concept, set a three-month target (say, fifty listings and a specific revenue number) and choose a niche with strong demand but manageable competition. Adobe’s guide to starting an eBay store emphasizes the importance of branding and consistency; even as a beginner, using a consistent naming convention, logo, and return policy makes your store feel professional and trustworthy from the first listing.
Planning Your Listings (Strategy First)
Jumping straight into creating listings without a plan is like packing for a trip without checking the weather—you might get lucky, but you’ll probably end up underprepared. Smart sellers invest time in research, pricing strategy, and operational setup before they ever click “List an item.” This upfront work pays dividends in fewer revisions, fewer customer questions, and better conversion rates.
Research and pricing strategy
Competitor research is non-negotiable. Search for items similar to yours using eBay’s completed listings filter (under Advanced Search) to see what actually sold versus what sat unsold for weeks. Pay attention to the condition descriptions, photo quality, and pricing of successful listings. If ten similar vintage cameras sold between eighty and one hundred dollars, pricing yours at one hundred fifty without a compelling differentiator (mint condition, rare color variant, or original packaging) will likely result in zero sales. Factor in your costs: if final value fees average around ten percent and shipping runs fifteen dollars, a one hundred dollar sale nets you roughly seventy-five dollars after fees but before item cost and packaging. Realistic pricing means accounting for all these elements before setting your Buy It Now price or auction reserve.
Consider how promoted listings fit into your visibility strategy. eBay’s promoted listings work on a cost-per-click model: you set an ad rate (a percentage of the final sale price), and you only pay that rate if a buyer clicks your promoted listing and completes a purchase within thirty days. For beginners, promoted listings can jump-start visibility in crowded categories, but they also reduce your net profit. If your margin is already thin, it’s smarter to optimize your organic listing first—title keywords, complete item specifics, competitive pricing—before layering on paid promotion. According to eBay’s recent final value fee updates, understanding these fee layers helps you set prices that remain profitable even after promotions.
| Pricing Factor | Consideration | Impact on Profit |
|---|---|---|
| Final Value Fee | 5-12% depending on category | Directly reduces net proceeds |
| Shipping Cost | Passed to buyer or absorbed | Free shipping can boost conversion but cuts margin |
| Promoted Listings | Optional ad rate (e.g., 5% of sale) | Increases visibility but reduces profit if overused |
| Insertion Fees | Waived for free listings; small fee after allowance | Minimal impact for low-volume sellers |
Operational setup
Branding might sound like overkill for a beginner, but even basic consistency builds buyer confidence. Choose a store name (even if you don’t have a formal store subscription yet) that’s memorable and relevant to your niche. Create a simple logo using free tools—nothing fancy, just clean and professional—and use that logo across your listings and any promotional materials. Draft clear return and shipping policies and copy-paste them into every listing. This template approach saves time and ensures buyers know what to expect, which reduces disputes and improves feedback scores. Think of your operational setup as the invisible scaffolding: buyers don’t consciously notice it when it’s done well, but they definitely notice when it’s missing.
Prepare a repeatable listing template that includes standard sections: title structure (brand, item type, key features, condition), photo checklist (front, back, close-up of flaws, packaging), item specifics (size, color, model number, year), shipping details (handling time, carrier, tracking), and return policy. Having this template ready means you can list new items in ten to fifteen minutes instead of an hour, which becomes critical when you’re scaling from five listings to fifty. Understanding how to list your company in business directories follows a similar principle: consistency and completeness build authority and trust, whether you’re listing a business or a product.
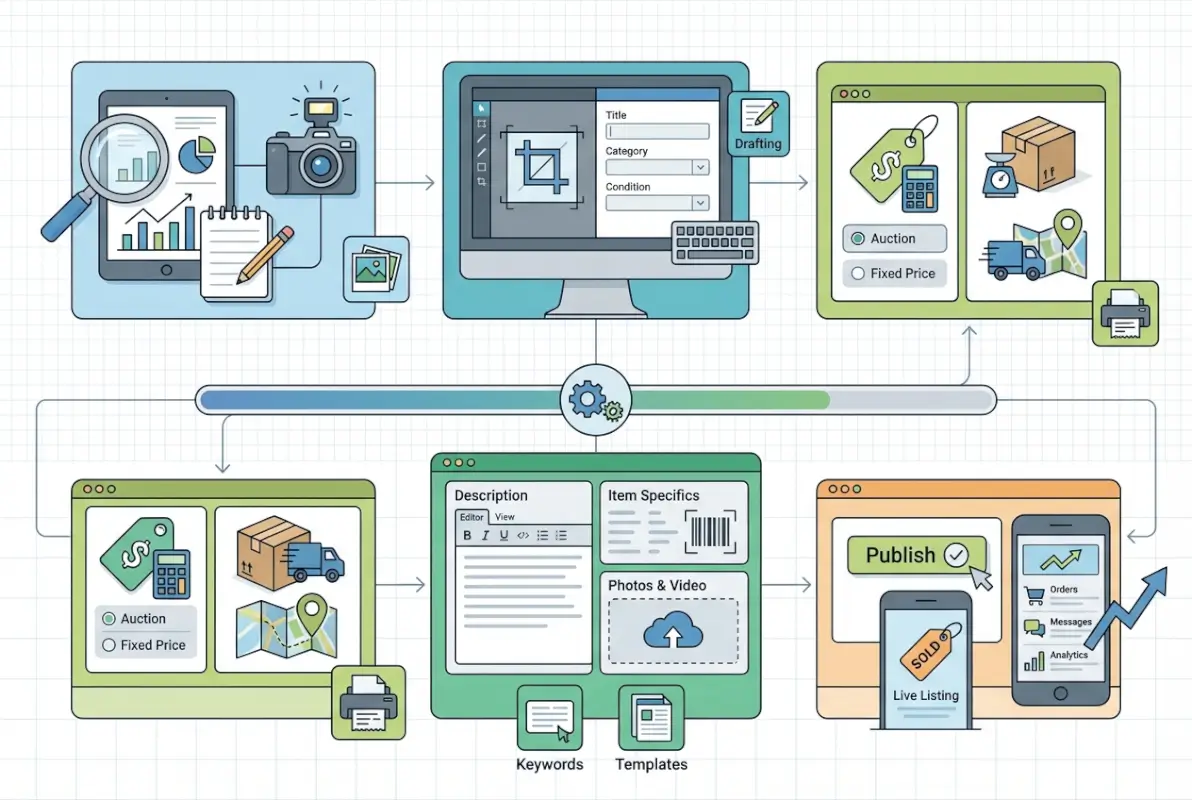
Step-by-Step Listing Creation (Hands-On)
Now we get to the mechanics—the actual process of creating a listing from scratch. This is where your planning pays off, because each step flows logically into the next. Follow this workflow and you’ll avoid the common pitfalls that trip up beginners, like missing item specifics or choosing the wrong category.

Step 1: Gather item details
Start by collecting every relevant detail about your item. Write down the brand, model number, size, color, condition, and any unique identifiers (serial numbers, edition info, manufacturing year). Search for the item on eBay to see which category most similar listings use; eBay’s search algorithm considers category placement heavily, so picking the right one improves visibility. Item specifics—those dropdown fields like “Brand,” “Size Type,” “Condition”—aren’t optional if you want to rank well in search. Fill out every field eBay offers, even if some feel redundant. Buyers filter search results by these specifics, and incomplete listings simply won’t appear in those filtered views.
Title and subtitle decisions happen here too. eBay allows up to eighty characters in your main title, and you should use most of them with relevant keywords that buyers actually search. Avoid gimmicks like “L@@K” or excessive punctuation; instead, pack in descriptive terms: brand, model, size, color, condition, and maybe one standout feature. Subtitles cost extra unless you’re on certain store plans, so only use them if you have a critical detail that didn’t fit in the main title. Condition notes deserve careful attention: “gently used” is vague, but “gently used, light scratches on back, fully functional, includes original box” sets clear expectations and reduces return requests.
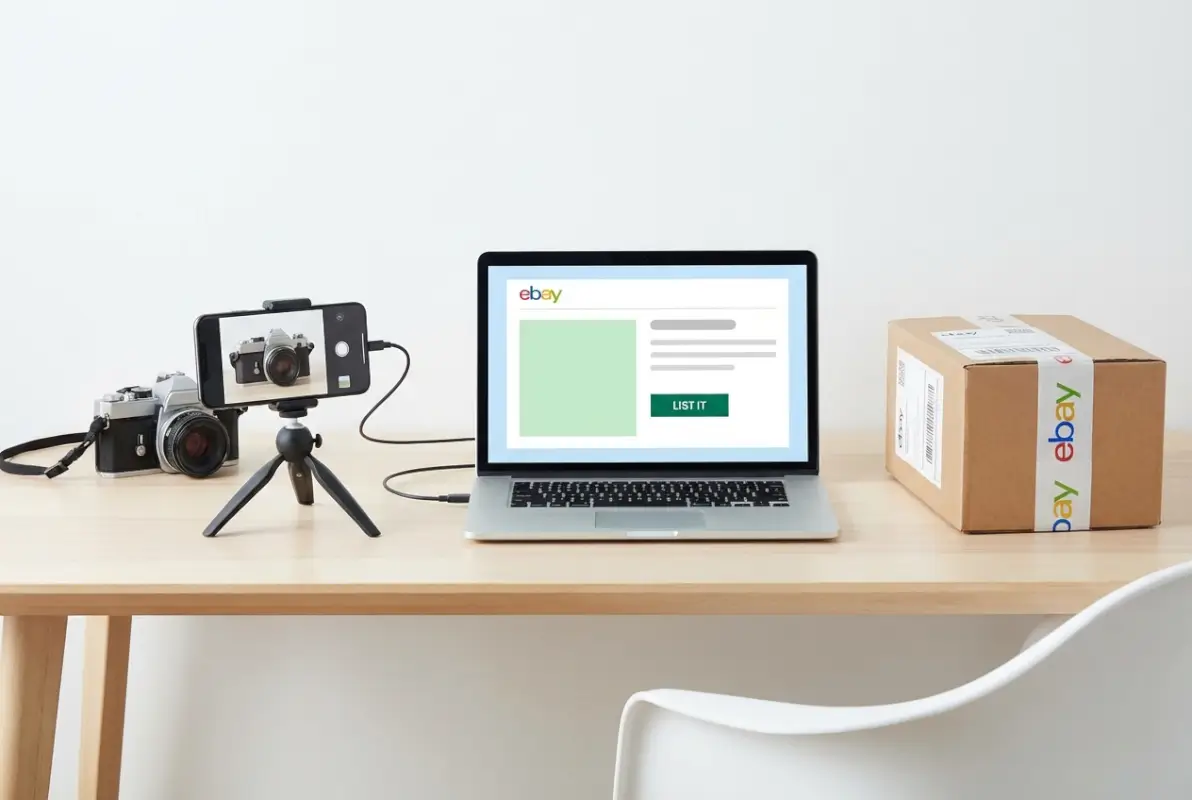
Step 2: Photos and presentation
Photos are your silent salespeople. You can write the most compelling description in the world, but if your photos are blurry, dimly lit, or show the item on a cluttered background, buyers will scroll past. Use natural daylight whenever possible—it reveals true colors and reduces harsh shadows that artificial light can create. Take multiple angles: front, back, sides, top, bottom, and close-ups of any flaws or wear. If the item has text, serial numbers, or labels, photograph those too. Buyers trust sellers who document condition honestly, and transparency reduces disputes. I’ve found that including a photo of the item next to a common object (like a ruler or coin for scale) helps buyers visualize size, especially for smaller collectibles.
Aim for at least six to twelve photos per listing. eBay allows up to twelve free photos in most categories, so use them all. Consistency in backgrounds (a clean white or neutral surface) makes your listings look professional and allows the item to stand out. If you’re listing clothing, consider using a mannequin or flat lay rather than hanger shots; if you’re listing electronics, show the item powered on if applicable. Photo quality alone can lift your conversion rate by double-digit percentages because it signals that you care about presentation and transparency.
Step 3: Write a compelling title and description
Your title’s job is to get the click; your description’s job is to close the sale. In the title, lead with the most important keywords: brand name if it’s recognizable, item type, and key features. If you’re selling a Canon EOS camera, your title might be “Canon EOS Rebel T7 DSLR Camera 24.1MP WiFi Bundle with Lens Black.” Notice how it front-loads the brand, model, standout specs, and color. Avoid wasting characters on filler words like “Great Deal!” or “Must See!”—those don’t help buyers find your listing and don’t improve search ranking.
In the description, structure your information logically. Start with a brief overview, then bullet-point the key specs, followed by a detailed condition report, and end with shipping and return policy. Use plain language and be honest about flaws—buyers appreciate transparency and it protects you from return disputes. If the item has a scratch, say “minor scratch on bottom edge, does not affect functionality, shown in photo 8.” This approach builds trust and filters out buyers who expect perfection. According to eBay’s official listing guide, clear and accurate descriptions are the foundation of positive buyer experiences and strong seller ratings.
Step 4: Choose listing type and pricing
You have three main listing formats: auction-style, fixed-price (Buy It Now), and multi-quantity fixed-price. Auction listings start at a low price and buyers bid over a set duration (typically seven or ten days). They can create urgency and sometimes drive prices above market value for rare items, but they also risk selling below your cost if bidding is weak. Fixed-price listings let you set a price and accept offers if you enable that option; they’re ideal for items with established market values. Multi-quantity listings are for sellers who have several identical items (like new-in-box products) and want to sell them all under one listing. For beginners, fixed-price is usually the safest bet because it offers predictability and you can adjust pricing based on market response without waiting for an auction to end.
Pricing psychology matters here. If comparable items sell for ninety-nine dollars, listing at ninety-seven or ninety-five can attract price-sensitive buyers filtering by maximum price, but don’t undercut yourself so much that you erode profit for no strategic reason. Enable “Best Offer” if you’re open to negotiation; many buyers prefer to haggle, and accepting an offer slightly below your list price can still be more profitable than relisting repeatedly. Category selection ties into pricing too—some categories have lower final value fees, so if your item could reasonably fit two categories, check which one offers better economics.
Step 5: Set shipping, returns, and payment options
Shipping strategy directly impacts both buyer behavior and your bottom line. You can offer calculated shipping (where eBay calculates cost based on buyer location and package weight), flat-rate shipping, or free shipping with the cost baked into your item price. Free shipping tends to improve conversion because buyers perceive it as a better deal, even if the item price is slightly higher to compensate. However, offering free shipping on heavy or oversized items can wipe out your profit if you don’t price accurately. Set a realistic handling time—one to three business days is standard—and make sure you can meet it consistently. Late shipments hurt your seller metrics and can lead to negative feedback.
Returns policy is a balancing act. Accepting returns (typically within thirty days) increases buyer confidence and improves your search ranking, but it also means you’ll occasionally deal with return requests. Specify who pays return shipping—seller-paid returns are more buyer-friendly but costlier for you; buyer-paid returns protect your margin but may deter cautious buyers. Payment methods are largely automated through eBay’s managed payments system, which handles credit cards, debit, PayPal, and other options on your behalf. You’ll receive funds directly to your linked bank account, typically within a few days of the sale. This streamlined approach simplifies accounting but does mean eBay controls the payment flow, which includes holding funds temporarily for new sellers until you build a track record.
Step 6: Review and list
Before you hit the “List item” button, eBay shows you a fee summary. Review it carefully—this is your last chance to catch mistakes like selecting the wrong category or forgetting to enable free shipping. If you’re within your free listing allowance, the insertion fee should show as zero, but you’ll see an estimated final value fee based on your item price. That fee is only charged if the item sells, so don’t panic if it looks high—just confirm that your net proceeds (sale price minus fees minus shipping cost) still leave you with an acceptable profit. Once you’re satisfied, list the item and make note of the listing ID and end date (or lack thereof for Good ‘Til Cancelled fixed-price listings). Congratulations—you’ve just completed your first eBay listing. Now the real work begins: monitoring performance and optimizing.
Optimizing Your Listings for Visibility and Trust
Getting a listing live is only half the battle. Optimization is what separates listings that languish on page five of search results from those that appear in the top ten and convert browsers into buyers. Small tweaks to titles, photos, item specifics, and policies can yield outsized improvements in impressions, clicks, and sales.
Titles, subtitles, and keywords
Title optimization is part science, part art. You want to include high-volume search terms (words buyers actually type into the search bar) while also making the title readable and informative. Use eBay’s search bar autocomplete to discover popular search phrases—if you start typing “vintage camera,” eBay will suggest “vintage camera 35mm,” “vintage camera canon,” etc. These suggestions reflect real buyer searches, so incorporating them can improve your ranking. Front-load the most important keywords: brand, model, item type. Put secondary details (color, size, condition) toward the middle or end. Avoid keyword stuffing—titles like “Canon Camera Canon EOS Rebel Canon DSLR Canon” look spammy and don’t perform better. Natural, descriptive titles win.
Subtitles cost extra unless you’re on a store plan, and they appear below the main title in search results. Use subtitles sparingly and only for critical information that didn’t fit in the eighty-character main title—like “Original Box & Accessories Included” or “Rare Limited Edition Color.” Subtitles can marginally improve click-through rate, but they’re not worth the cost unless that extra detail truly differentiates your listing from competitors. Test with and without subtitles on similar items to see if the added cost pays for itself in faster sales or higher final prices.
Photos and visuals
We covered photo basics earlier, but optimization goes deeper. Consistent lighting and backgrounds across all your listings create a cohesive brand feel—buyers start to recognize your style, which builds subconscious trust. Show flaws honestly: a close-up of a scratch with a note in the caption (“Minor scratch, see photo 7”) prevents disputes and signals transparency. If you’re selling collectibles, include a photo of the item’s packaging or any certificates of authenticity. For electronics, show power-on tests or function indicators (like a screen displaying an image or a device connected to power).
Photo order matters too. Lead with the most compelling image—usually a clean, well-lit shot of the item’s front or primary feature. Many buyers don’t scroll through all twelve photos, so make sure the first three tell the story. Use photo captions (eBay allows brief text under each image) to highlight features or explain what the photo shows. This redundancy helps buyers who skim quickly and reinforces key selling points without forcing them to read the full description.
Item specifics and categories
Completing every available item specific is one of the easiest, most impactful optimizations beginners overlook. eBay’s algorithm heavily weights item specifics when ranking search results, and buyers use these fields to filter listings. If a buyer searches for “men’s running shoes size 10 blue” and filters by size and color, your listing won’t appear unless you’ve filled those specifics accurately. Treat item specifics like a checklist: brand, size, color, condition, material, style, model number, year, and any category-specific fields (like “Type” for electronics or “Era” for vintage clothing). Even fields that seem redundant or obvious should be filled out—it takes thirty seconds and can double your visibility.
Category selection also influences search ranking. eBay’s algorithm assumes you’ve placed your item in the most relevant category, so if you list a smartphone in “Electronics > Cell Phones & Accessories > Cell Phones & Smartphones” instead of a more generic category, you’ll rank higher in buyer searches within that specific path. If you’re unsure which category to use, search for similar items and note where the best-performing listings are categorized, then follow suit. Mis-categorization not only hurts visibility but can also confuse buyers and increase the chance they’ll pass over your listing.
Shipping speed and packaging
Fast handling time and reliable shipping carriers build trust and improve your seller metrics. If you can ship within one business day, say so—many buyers filter search results by handling time, and one-day handling can give you an edge over sellers who take three to five days. Use tracking on every shipment, even low-value items; tracking protects you against “item not received” claims and gives buyers peace of mind. Package items securely: bubble wrap, sturdy boxes, and plenty of padding prevent damage in transit and reduce return requests. For fragile or high-value items, consider insurance and signature confirmation.
Shipping cost transparency also matters. If you charge calculated shipping, make sure your package weight and dimensions are accurate so buyers see realistic costs before they purchase. Hidden or inflated shipping fees (like charging twenty dollars to ship a small item that actually costs eight dollars) will hurt your reputation and drive buyers away. Free shipping with cost built into the item price tends to convert better, especially when buyers compare multiple listings side-by-side. Experiment with both approaches and track which yields better conversion and profit margins for your niche.
Policies and trust signals
Clear, buyer-friendly policies are trust signals that lift conversion rates. A thirty-day return policy (even if buyer pays return shipping) reassures hesitant buyers and often tips the scale when they’re choosing between two similar listings. State your policies clearly in the listing: “We accept returns within 30 days of delivery. Buyer pays return shipping. Item must be in original condition. Refund issued within 3 business days of receiving return.” This specificity eliminates ambiguity and sets expectations. Positive feedback history is another trust signal—encourage satisfied buyers to leave feedback by including a polite note in your packaging or follow-up message. Just like listing your business on Yelp, building a track record of positive reviews compounds over time and becomes a competitive moat that newcomers struggle to replicate.
Fees, Payments, and Promotions (Financial Basics for Beginners)
Understanding eBay’s fee structure isn’t glamorous, but it’s essential if you want to price competitively and maintain healthy profit margins. Fees can feel opaque at first—insertion fees, final value fees, promotional fees, regulatory fees—but once you break them down, they’re manageable and predictable.

Insertion vs. final value fees
Insertion fees are what eBay charges to list an item, and for most beginners, these are waived up to a monthly allowance (often fifty to two hundred free listings depending on region and account type). Once you exceed your free listings, insertion fees range from a few cents to a few dollars per listing, varying by category and listing format. Fixed-price listings that remain active for thirty days (Good ‘Til Cancelled) incur insertion fees monthly if they’re relisted, but most beginners won’t hit this threshold early on. Final value fees are the bigger cost: a percentage of the total sale price (item price plus shipping if the buyer pays shipping) that eBay takes when your item sells. According to eBay’s fee breakdown for private sellers, final value fees typically range from around five to twelve percent, with some categories like musical instruments or collectibles at the lower end and electronics or fashion at the higher end.
For example, if you sell a pair of sneakers for one hundred dollars with ten dollars shipping, and the final value fee for that category is ten percent, eBay charges ten percent of one hundred ten dollars (eleven dollars) plus the thirty-cent per-order fee. Your net proceeds are ninety-eight dollars seventy cents before accounting for your item cost, packaging, and actual shipping expense. Always calculate your net before listing to avoid unpleasant surprises. If your margin is too thin, either raise your price, reduce shipping cost, or reconsider whether the item is worth selling on eBay versus another platform.
Payment processing and currency considerations
eBay’s managed payments system consolidates payment processing, meaning buyers pay eBay directly and eBay deposits your proceeds into your linked bank account after deducting fees. This system simplifies accounting and eliminates the need for third-party processors, but it also means eBay controls the timing of payouts—typically funds arrive within two business days, though new sellers may experience holds until tracking shows delivery. Currency considerations come into play if you sell internationally; eBay can handle currency conversion, but exchange rates and conversion fees may slightly reduce your proceeds. Review your payout statements carefully to understand exactly what you’re netting after all fees and conversions.
Managed payments also means eBay includes sales tax collection where applicable, so you don’t have to manually calculate or remit tax in most jurisdictions. This is a huge convenience, but make sure your pricing accounts for the fact that buyers in certain regions will see tax added at checkout. If your one hundred dollar item is listed with free shipping, a buyer in a state with eight percent sales tax will pay one hundred eight dollars, but you still receive one hundred dollars minus eBay’s fees—eBay remits the tax to the appropriate authority on your behalf.
Promotions and advertising
Promoted listings are eBay’s pay-per-click advertising option. You set an ad rate (a percentage of the final sale price, often two to ten percent), and your listing may appear higher in search results or in dedicated promoted slots. You only pay the ad rate if a buyer clicks your promoted listing and completes a purchase within thirty days. For beginners, promoted listings can accelerate visibility, especially in crowded categories where organic ranking is tough to achieve quickly. However, stacking a promoted listing fee on top of final value fees and shipping costs can erode profit quickly, so use this tool selectively. Test promoted listings on your best-performing items first—those with strong photos, complete item specifics, and competitive pricing—since promotion amplifies what’s already working rather than fixing fundamental listing issues. According to eDesk’s eBay fee analysis, promoted listings are most cost-effective when your organic listing is already optimized and you’re aiming for incremental sales rather than relying on ads to compensate for weak listings.
Store subscriptions vs. no-store options
Store subscriptions unlock reduced final value fees, higher free listing allowances, and advanced marketing tools. eBay offers several store tiers (Starter, Basic, Premium, Anchor, Enterprise), each with escalating monthly costs and benefits. For beginners, the Starter store often makes sense around the twenty-to-fifty-listing-per-month mark, since the monthly fee (typically around five to twenty dollars depending on region) pays for itself in saved final value fees and increased free listings. Run the math: if you’re listing fifty items monthly at a category with a ten percent final value fee as a private seller versus an eight percent fee with a Starter store, and each item sells for fifty dollars on average, the fee savings alone can exceed the store subscription cost.
Store benefits extend beyond fees. You gain access to markdown manager (for running sales and promotions), advanced listing tools, and better analytics in Seller Hub. These tools help you iterate faster and optimize more effectively. If you’re serious about building a sustainable eBay business, a store subscription is an eventual necessity, but there’s no harm in starting without one to test demand and refine your process. Similar to choosing the right business directory apps, selecting the right eBay account tier is about matching tools to your growth stage and avoiding over-investment before you’ve validated your model.
Managing Listings, Orders, and Customer Service
Once your listings are live and sales start rolling in, the focus shifts to fulfillment and customer service. Great post-sale experiences drive positive feedback, repeat buyers, and long-term success. Mediocre or poor experiences can tank your seller rating and make future sales harder.
Post-sale best practices
Ship promptly and communicate proactively. As soon as a buyer completes their purchase, send a friendly message thanking them and confirming your handling time. When you print the shipping label and drop off the package, upload tracking immediately so the buyer can monitor delivery. If you encounter any delays (weather, carrier issues, out-of-stock situations for multi-quantity listings), message the buyer right away with an explanation and a realistic revised timeline. Buyers appreciate transparency and are far more forgiving when you keep them informed versus leaving them in the dark.
Package items securely and consider including a small thank-you note or branded insert—nothing elaborate, just a personal touch that reminds the buyer you’re a human seller who values their business. This costs almost nothing but significantly boosts the chance they’ll leave positive feedback and return for future purchases. Track your seller metrics in Seller Hub: defect rate, late shipment rate, tracking upload rate. eBay rewards sellers with strong metrics by boosting their search ranking and offering benefits like Top Rated Seller status, which comes with fee discounts and visibility perks.
Handling returns and disputes
Returns are part of the game, and handling them gracefully protects your reputation. When a buyer opens a return request, respond within twenty-four hours with clear instructions. If the return is due to your error (wrong item shipped, item not as described), offer a prepaid return label and a full refund. If the return is buyer’s remorse and your policy states buyer pays return shipping, communicate that politely and provide your return address. Inspect returned items promptly and issue refunds as soon as you confirm the item is in the condition you sent it. Delays or disputes over refunds lead to negative feedback and potential eBay intervention.
For disputes where a buyer claims an item is significantly not as described or never arrived, provide evidence: photos of the item before shipping, tracking showing delivery, detailed listing screenshots. eBay’s resolution center usually sides with sellers who have clear documentation and a track record of accurate listings. If you lose a dispute, learn from it—maybe your photos didn’t show a flaw clearly, or your description was ambiguous. Continuous improvement in listing accuracy reduces disputes over time. I’ve seen sellers who treat returns as opportunities to impress buyers with fast, hassle-free resolutions; those sellers build loyal followings that offset the occasional return cost.
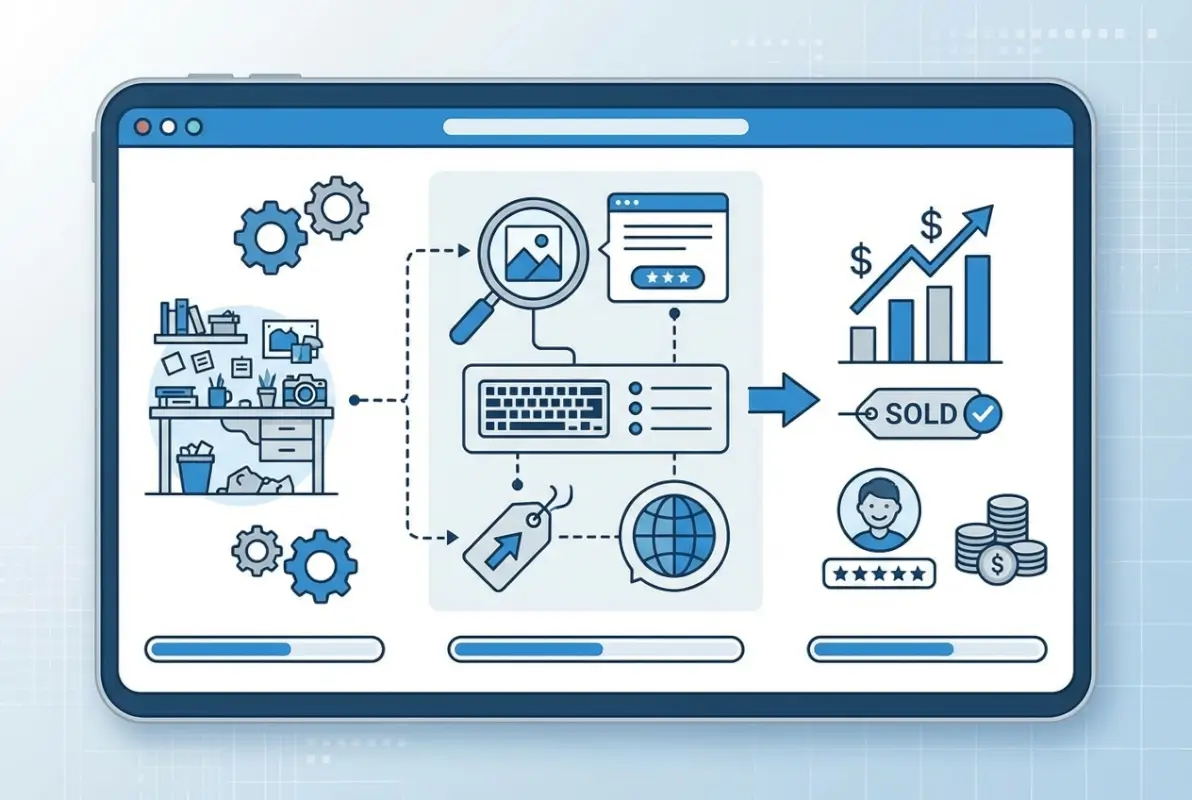
Performance metrics and seller tools
Seller Hub is your command center for monitoring listing performance. Check your traffic report to see how many impressions, views, and watchers each listing receives. Low impressions suggest poor search visibility (optimize title, category, item specifics); high impressions but low clicks suggest weak photos or pricing; high clicks but low conversion means your description, shipping, or return policy may need work. Track conversion rate by listing and niche—some categories naturally convert better than others, and identifying your winners lets you double down on what’s working.
Iterate weekly: adjust pricing on slow-moving listings, add more photos or detail to high-impression listings that aren’t converting, and test promoted listings on items that show strong organic engagement. Seller Hub also shows your feedback score and recent reviews—monitor these closely and address any negative feedback quickly by reaching out to the buyer to resolve issues. eBay’s seller performance dashboard highlights metrics like transaction defect rate (returns, canceled orders, negative feedback); keeping this below one percent is critical for maintaining good standing and unlocking seller benefits.
Compliance, Safety, and Best Practices
Selling on eBay isn’t a Wild West free-for-all; there are rules, regulations, and best practices that protect both buyers and sellers. Ignoring these can result in listing removals, account suspensions, or legal headaches. Stay informed and compliant to build a sustainable, low-risk business.
Regulatory and consumer protection considerations
Online marketplaces are subject to consumer protection laws and regulations that vary by region. In the United States, the INFORM Consumers Act (effective mid-2023) requires platforms to collect and verify certain information from high-volume third-party sellers (those with two hundred or more discrete sales or five thousand dollars in aggregate sales within twelve months). While eBay handles much of this compliance on the platform side, you should be aware that as your volume grows, you may be required to provide additional identity and contact information to remain compliant. According to the FTC’s guidance on the INFORM Consumers Act, this legislation aims to increase transparency and reduce the sale of stolen or counterfeit goods by making sellers more identifiable.
Even if you’re below the high-volume threshold, basic consumer protection principles apply: don’t misrepresent items, honor your stated return policy, and ship items as described. In some regions, you may be required to display certain business information (like VAT numbers in the EU or business registration details in other jurisdictions). Check eBay’s Seller Center for region-specific requirements and consult local regulations if you’re unsure. Compliance isn’t just about avoiding penalties—it builds trust with buyers and differentiates you from less scrupulous sellers.
Fraud prevention and counterfeits
eBay’s Verified Rights Owner (VeRO) program empowers intellectual property holders to report listings that infringe trademarks, copyrights, or patents. If you list counterfeit goods—knowingly or unknowingly—your listing can be removed and your account suspended. To stay safe, only sell items you can verify as authentic. If you’re sourcing inventory from wholesalers or liquidation lots, ask for certificates of authenticity or purchase invoices. Avoid vague language like “replica” or “inspired by” for items that aren’t officially licensed; these listings are often flagged and removed.
Buyers can also attempt fraud (e.g., claiming an item wasn’t received when tracking shows delivery, or returning a different item than they purchased). Protect yourself by always using tracking, photographing items before shipping, and keeping detailed records. If a buyer opens a suspicious claim, escalate to eBay’s resolution center with your evidence. eBay has tools to detect patterns of fraudulent behavior on both buyer and seller sides, and providing thorough documentation helps them make fair decisions. Building a reputation for honest, accurate listings and prompt communication is your best defense against both false claims and genuine disputes.
Platform changes you should monitor
eBay regularly updates its fee structures, listing policies, and seller tools. In early 2025, eBay announced adjustments to final value fees in several categories; some went up, some went down, depending on category-specific economics. These changes can affect your pricing strategy and profitability, so bookmark eBay’s Seller Updates page and review it monthly. Similarly, policy changes around returns, shipping requirements, or item specifics can impact how you list and fulfill orders. Ignorance of policy changes isn’t an excuse if your account faces penalties, so staying current is part of being a professional seller.
Join eBay seller communities (forums, Facebook groups, Reddit threads) where experienced sellers share insights and alert each other to platform changes. These communities are invaluable for troubleshooting issues, learning optimization tactics, and keeping a pulse on what’s working in real time. Just as knowing essential business directory categories helps you position your business effectively, understanding eBay’s evolving landscape helps you adapt quickly and maintain a competitive edge.
Frequently Asked Questions
How much does it cost to list on eBay as a beginner in 2026?
Most beginners receive a monthly allowance of free insertion fee listings, often fifty or more depending on region and promotions. Once you exceed this allowance, insertion fees apply per listing but are typically modest. Final value fees (five to twelve percent of the total sale price) are charged when an item sells, along with a thirty-cent per-order fee. Promoted listings cost extra if you opt into advertising, based on a percentage you set.
Do I pay a final value fee on eBay if I use eBay managed payments?
Yes, final value fees still apply under managed payments. eBay calculates the fee as a percentage of the total transaction (item price plus buyer-paid shipping if applicable) and deducts it from your payout. Managed payments also includes a thirty-cent per-order fee. The fee percentage varies by category, so check eBay’s current fee schedule for your specific items.
What are promoted listings and when should I use them?
Promoted listings are eBay’s pay-per-click advertising where you set an ad rate percentage. You only pay this rate if a buyer clicks your promoted listing and completes a purchase within thirty days. Use promoted listings once your organic listing is optimized—strong photos, complete item specifics, competitive pricing—to gain incremental visibility in crowded categories. Avoid relying on promotions to fix poor listing quality.
What are the essential steps to create a strong eBay listing?
Gather all item details and fill out every relevant item specific. Take multiple high-quality photos showing all angles and any flaws. Write a clear, keyword-rich title and honest description. Choose the appropriate category and listing format. Set competitive pricing, transparent shipping, and a fair return policy. Review the fee summary before publishing and monitor performance in Seller Hub to iterate and improve.
Are there regulatory or safety requirements I should know when selling on eBay?
The INFORM Consumers Act requires online marketplaces to collect and verify seller information for high-volume sellers (two hundred-plus sales or five thousand dollars in aggregate within twelve months). Even below that threshold, consumer protection laws require accurate listings, honoring stated policies, and avoiding counterfeit goods. Regional regulations may impose additional disclosure or registration requirements, so check eBay’s Seller Center for guidance specific to your location.
How can I reduce fees or maximize visibility as a new seller?
Stay within your free listing allowance to avoid insertion fees. Optimize listings to improve organic search ranking, reducing the need for promoted listings. Consider a store subscription once you reach higher monthly volume, as store plans lower final value fees and increase free listing quotas. Complete item specifics, use high-quality photos, and write clear titles to boost impressions and conversion without paid promotion.
Where can I find official guidance on listing steps and fees?
Visit eBay’s Seller Center at ebay.com/sellercenter for up-to-date fee schedules, policy changes, and step-by-step listing guides. eBay also publishes seller updates highlighting recent changes, such as the final value fee adjustments announced in early 2025. Bookmark these resources and check them regularly to stay compliant and informed.
Should I start with auction or fixed-price listings?
Fixed-price (Buy It Now) listings are generally safer for beginners because they offer predictable pricing and immediate sales. Auctions can work well for rare or high-demand items that may attract bidding wars, but they risk selling below your cost if bidding is weak. Test both formats with a few listings and track which yields better profit and conversion for your niche.
How important is seller feedback when you’re just starting?
Extremely important. Buyers trust sellers with established positive feedback, and eBay’s algorithm gives ranking preference to sellers with strong feedback scores and low defect rates. Encourage satisfied buyers to leave feedback by providing great service and including a polite note in your packaging. Even a handful of positive reviews can significantly boost buyer confidence and conversion rates.
Can I sell internationally as a beginner?
Yes, but it adds complexity. International shipping costs more, customs documentation is required, and returns become logistically challenging. Start by selling domestically to simplify fulfillment and build your feedback score. Once you’re confident, enable international shipping selectively—perhaps to nearby countries or regions where demand for your niche is strong. eBay’s Global Shipping Program can simplify international logistics by handling customs and final delivery on your behalf.
Take Action and Start Listing
You’ve now seen the full arc from setting up your eBay seller account to optimizing listings, managing fees, and handling customer service like a pro. The key takeaway? Listing on eBay isn’t about perfection—it’s about clarity, consistency, and iteration. Your first listing won’t be flawless, and that’s okay. What matters is getting it live, learning from real buyer behavior, and refining your approach week by week. I’ve watched beginners who obsessed over every detail burn out before listing their tenth item, while sellers who embraced a “test and learn” mindset quickly scaled to dozens of successful listings. The difference wasn’t talent or resources; it was willingness to act and adapt.
Start small: pick five to ten items you can list this week. Use the step-by-step workflow outlined here—gather details, take quality photos, write honest descriptions, complete item specifics, set fair pricing and shipping, and publish. Monitor your Seller Hub metrics daily for the first few weeks to see which listings gain traction and which need adjustment. Join an eBay seller community to crowdsource advice and stay updated on platform changes. Bookmark resources on building credibility and backlinks that apply to your broader online presence, since eBay success often complements a multi-channel sales strategy.
Remember that every successful eBay seller started exactly where you are now—staring at that “Create listing” button and wondering if they were doing it right. The answer is yes, as long as you’re honest, detail-oriented, and willing to learn from each listing. Dive in, ship promptly, communicate clearly, and watch your feedback score and sales grow. The opportunity is there—now go claim it.
Was this article helpful?