Using an XLS File to Populate an Online Directory: 6 Simple Steps

Generating summary...
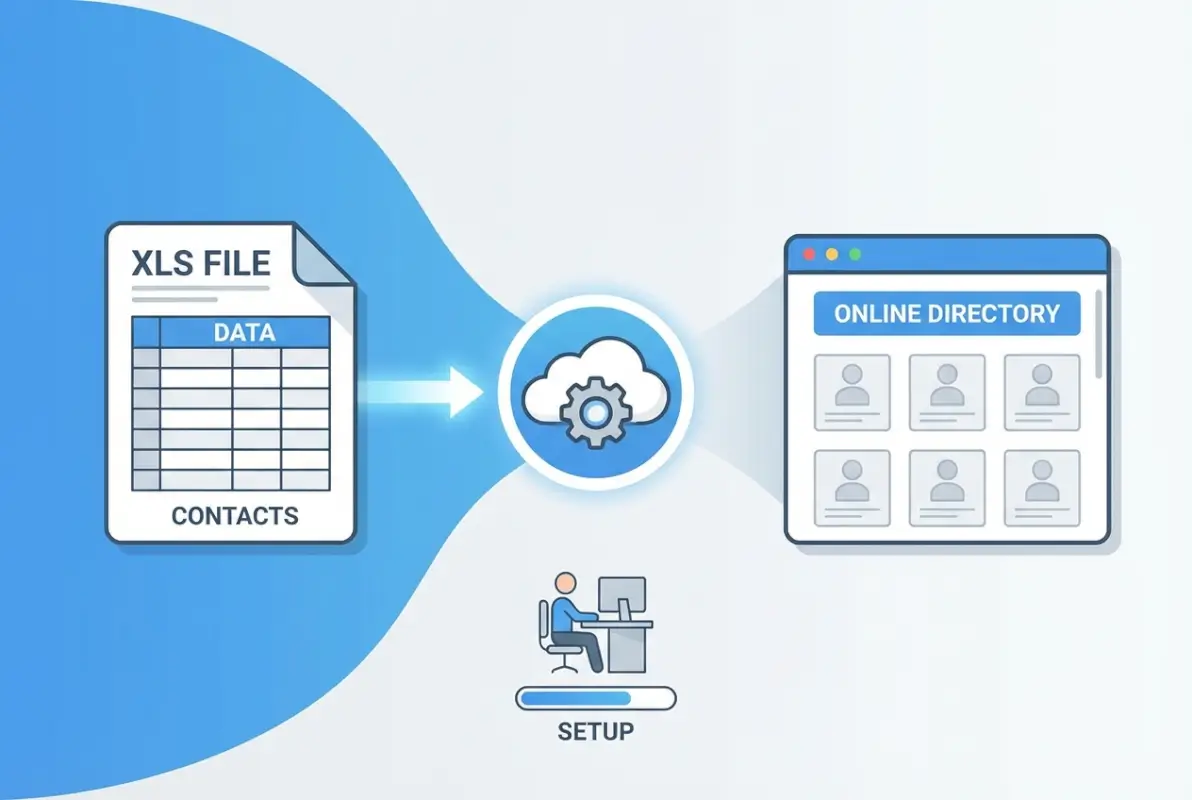
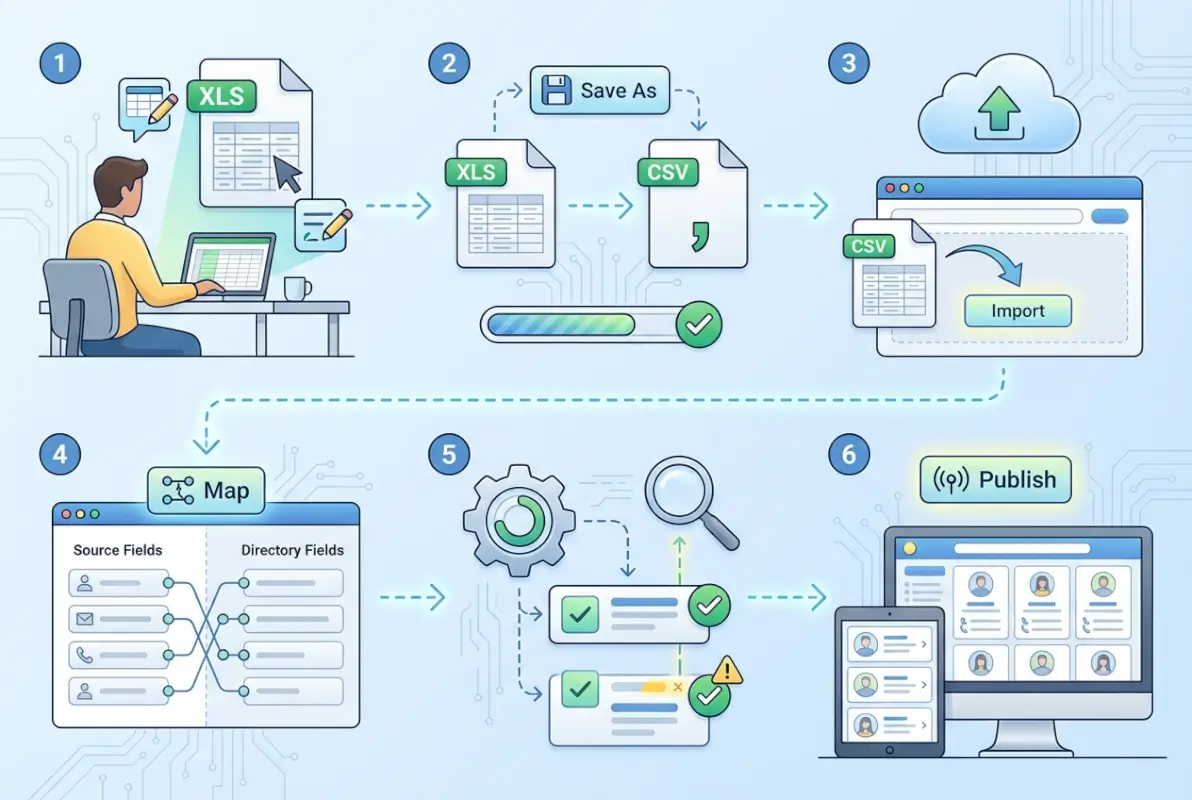
If you’ve ever manually copied and pasted hundreds of business listings from a spreadsheet into a directory, you know the pain: typos creep in, fields get mismatched, and hours vanish into tedious data entry. Here’s the good news—modern CMS platforms and directory tools let you skip that grind entirely by importing XLS or XLSX files directly. Whether you’re launching best business listing sites for global exposure or building a niche directory with TurnKey Directories, bulk import workflows turn a week-long slog into a controlled, repeatable process that finishes in minutes. The trick isn’t just uploading a file and hoping for the best; it’s building a tight, six-step system that catches errors before they hit your live site, keeps your data clean, and lets you publish with confidence.
Most teams underestimate the planning phase (and pay for it later with broken links and duplicate records). In my experience working with directory publishers, the difference between a smooth launch and a post-import cleanup nightmare comes down to one thing: treating your spreadsheet like a database schema from day one. When you map columns to CMS fields before you import, normalize address formats and category labels, and run validation hooks during the upload, you sidestep the common pitfalls that turn a “quick import” into a weekend debugging session.
TL;DR – Quick Takeaways
- Plan your schema first – Map every spreadsheet column to a directory field and define unique keys before import to avoid mismatched data and duplicates.
- Cleanse data upfront – Normalize addresses, phone numbers, and categories in your XLS file so your CMS doesn’t reject half the rows or create messy records.
- Test in staging – Upload a small batch to a preview environment, verify field mappings, and catch errors before pushing thousands of records live.
- Automate validation – Use CMS import hooks or scripts to check required fields, URL formats, and category taxonomies during the upload process.
- Maintain governance – Schedule periodic data refreshes, document your workflow, and set role-based permissions to prevent regressions over time.
Step 1 — Plan Your XLS Structure and Directory Schema
Before you touch a single cell in Excel, list every field your directory needs: business name, street address, city, state, ZIP, phone, email, website URL, category, description, logo image path, and any custom attributes (operating hours, certifications, social links). Then open your CMS or directory platform—whether that’s TurnKey Directories, Nuxeo, or a custom WordPress plugin—and compare your field list to the CMS data model. Every column in your spreadsheet must map one-to-one to a CMS field, and every required CMS field must have a matching column with no blanks.
Most import failures trace back to this step: a missing “category” column, a “phone” field that the CMS expects in E.164 format but your spreadsheet stores as plain text, or a unique identifier (like a slug or business ID) that isn’t defined anywhere. According to Nuxeo’s directory import guide, specifying a unique key column prevents accidental duplicates and enables safe re-imports when you need to update records later. I’ve seen teams skip this and end up with three copies of the same listing because the CMS couldn’t tell which rows were updates versus new entries.
Define Required Directory Fields (Name, Address, Category, Contact, etc.)
Start by asking: what makes a listing complete? For most business directories, that’s business name (required), primary address line, city, state or region, postal code, country (if international), phone number, email, and at least one category or industry tag. Optional fields might include website URL, logo image path, hours of operation, social media handles, or a short description. Write these down in a simple table—column name, data type (text, number, date, URL), whether it’s required, and any validation rules (e.g., “email must contain @” or “category must match a predefined list”).
Use that table to create your first worksheet in Excel. The top row is your header, with each cell labeled exactly as the CMS expects it—case-sensitive, no extra spaces. If your CMS calls the field “business_name” not “Business Name,” match that casing now to avoid mapping headaches later. Below the header, add one sample row with realistic test data: a fictional business with all fields filled in correctly, including edge cases like a hyphenated company name or an international phone number with a country code.
Map Spreadsheet Columns to Directory Data Model and CMS Fields
Open a new tab in your workbook and build a mapping reference: Column A lists your Excel header names, Column B lists the corresponding CMS field ID or slug, and Column C notes the data type and any transformations needed (e.g., “convert phone to (555) 555-5555 format” or “split full address into street, city, state”). This sheet becomes your single source of truth during import. When the CMS upload wizard asks you to “map columns,” you’ll drag and drop or select from dropdowns, but having this reference handy speeds the process and prevents mistakes.
If your directory uses online directory pricing tiers or multiple listing levels (free, featured, premium), add a “listing_tier” column to your spreadsheet and map it to whatever field controls that in your CMS. Some platforms let you assign categories or tags via a comma-separated list in one cell; others require separate columns for primary category and secondary tags. Check your CMS documentation (or vendor support) to confirm the expected format—this is where small differences in CSV versus XLSX handling can trip you up if you’re not careful.
Step 2 — Cleanse and Normalize Your XLS Data
Raw data is messy: addresses formatted twelve different ways, phone numbers missing area codes, category labels that don’t match your taxonomy, and empty cells scattered through required columns. If you import that chaos directly, you’ll spend hours fixing records one by one on the live site (or worse, publish broken listings your users see). The solution is to normalize everything in Excel before you upload, using a mix of formulas, find-and-replace, and simple validation rules that flag problems while they’re still easy to fix.
Start with addresses. If your directory serves the U.S., decide on a standard format—USPS-style with Title Case for street names, abbreviated “St” and “Ave,” two-letter state codes, and five- or nine-digit ZIP codes. Use Excel’s UPPER, LOWER, and PROPER functions to unify casing, then a find-and-replace pass to swap “Street” for “St,” “Avenue” for “Ave,” and “Road” for “Rd.” For international directories, Microsoft’s bulk upload guidance recommends storing addresses as separate fields (street, city, region, postal code, country) so your CMS can handle region-specific formatting and geocoding correctly.
Normalize Values (e.g., Address Formats, Category Taxonomies)
Categories cause the most post-import cleanup work because free-text entry lets users type “Restaurant,” “Restaurants,” “Food & Dining,” and “Dining” when you really need a single canonical tag. Export your CMS category list, add a new column in your worksheet called “category_normalized,” and use VLOOKUP or conditional formulas to match each raw category value to an allowed term. If a row has “Plumbing Services” but your CMS taxonomy only includes “Plumbing,” flag it for manual review or auto-correct it. Some platforms let you create category aliases or synonyms during import; if yours does, prepare that mapping in advance.
Phone numbers are another common mess. Decide whether you want (555) 555-5555, 555-555-5555, or +1-555-555-5555 format, then use Excel’s TEXT function or a custom formula to reformat every number. Strip out letters (some listings include “ext” or “x” for extensions), remove extra spaces, and validate that U.S. numbers have exactly ten digits or that international numbers start with a country code. A quick formula like =LEN(SUBSTITUTE(A2," ",""))=10 can flag rows where the digit count is wrong.
Handle Missing/Duplicate Records and Standardize Phone/Email Formats
Scroll through your worksheet and highlight rows with blank required fields in bright yellow. If “business_name” or “city” is empty, that row will fail import or create a junk record. Either fill in the missing data from another source, mark the row for manual follow-up, or delete it entirely before you upload. For duplicates, sort by business name and address, then scan for consecutive rows that look identical. If you’re updating an existing directory, duplicates might mean you’re about to create a second listing for the same business—use your unique key column to match existing records instead.
Email validation is straightforward: every cell in the “email” column should contain an “@” and a domain extension. A formula like =IF(ISERROR(FIND("@",B2)),"Invalid","Valid") flags bad entries. For URLs, check that each starts with “http://” or “https://”—some CMS platforms auto-prepend the protocol, others reject URLs that lack it. If you’re importing hundreds of listings, a quick Python or JavaScript script can run these checks faster than manual review, but Excel’s built-in data validation and conditional formatting work fine for datasets under a few thousand rows.
Step 3 — Prepare Import File(s) for the Target CMS/Directory Software
Once your data is clean, you must package it in the format your CMS or directory platform expects. Most systems accept CSV for simplicity and speed, while others support XLSX directly to preserve formulas or multi-sheet context. Check your platform’s documentation to understand file-size limits, supported encodings, and any required metadata columns.
Build a master import template that mirrors the exact column order and naming conventions your CMS requires. Include validation comments in a header note row (which you’ll delete before upload) to remind future users of allowed values, character limits, and required fields. This template becomes the single source of truth for every recurring import.
Pay close attention to encoding: save all files as UTF-8 (without BOM) to avoid garbled characters in international names and addresses. Use comma delimiters by default unless your CMS specifies tab or pipe separators. Test special characters—accents, ampersands, and quotes—in a pilot row to confirm they render correctly after import.
Decide on CSV vs. XLSX per CMS Requirements and Performance Considerations
CSV files are lightweight and universally supported, making them ideal for large directories with tens of thousands of records. XLSX offers richer metadata—cell colors, formulas, multiple sheets—but may trigger longer processing times or memory overhead during import. Evaluate your CMS’s import engine: web-based tools often cap XLSX at a few thousand rows before recommending CSV.
If you maintain separate sheets for categories, tags, or nested attributes, export each sheet as its own CSV and import sequentially. This staged approach reduces complexity and lets you validate parent entities (categories) before child records (listings). Always keep the original XLSX as your master archive, exporting fresh CSVs only when data changes.
Create Import Templates and Validation Rules
Define a validation checklist for every column: data type (text, number, date), maximum length, regex patterns for phone or email, and enumerated allowed values for dropdowns or taxonomies. Store this checklist alongside your template so collaborators can self-validate before submitting a file. Pre-import validation catches 80 percent of errors before they reach the CMS.
Embed simple formulas in a “Validation” sheet within your master XLSX: use COUNTIF to flag duplicate IDs, LEN to highlight over-length fields, and IFERROR to spot malformed URLs or emails. Review this sheet after every data update to ensure compliance before export. Document any transformations—such as concatenating first and last name into a single “Full Name” column—in a changelog tab.
| File Format | Max Rows (Typical) | Encoding | Best For |
|---|---|---|---|
| CSV | 100,000+ | UTF-8 | Large directories, automated pipelines |
| XLSX | ~10,000 | UTF-8 | Multi-sheet workflows, rich metadata |
| Tab-delimited TXT | 50,000+ | UTF-8 | Legacy systems, scripted imports |
Compatibility Notes: Encoding, Delimiters, and Special Characters
International directories demand UTF-8 encoding to preserve diacritics, Cyrillic, and CJK characters. Avoid Windows-1252 or ISO-8859-1, which corrupt non-ASCII text. When exporting from Excel, choose “CSV UTF-8 (Comma delimited)” rather than plain “CSV” to ensure proper encoding on both Windows and macOS.
If your data includes commas within field values—such as “Acme, Inc.”—either wrap those fields in double quotes or switch to a pipe (|) or tab delimiter. Test a sample row containing commas, quotes, and line breaks to confirm your CMS parser handles escaping correctly. Document the chosen delimiter in your template’s instruction sheet so future contributors don’t inadvertently break the format.
Step 4 — Execute the Bulk Import with Validation Hooks
With your file prepared, initiate the import workflow inside your CMS or directory software. Most platforms offer a guided upload wizard: you’ll select the file, map columns to database fields, and preview a sample of parsed records. Use this preview to confirm that dates, categories, and URLs appear in the expected format before proceeding.

Enable any built-in validation hooks your platform provides—required-field checks, duplicate-key detection, or foreign-key constraints for category IDs. These hooks halt the import if critical errors are detected, preventing orphaned records or schema violations. Review the validation summary carefully; even warnings about minor formatting issues can cascade into user-facing display bugs.
Run the import in a staging or sandbox environment first. This lets you iterate on column mappings, test URL redirects, and verify image paths without polluting your live directory. Compare record counts and spot-check five to ten entries across different categories to ensure geographic regions, contact details, and metadata all import cleanly.
Import Workflow Within the CMS or Directory Software
After uploading, the platform parses your file row by row, transforming each into a directory entry or updating an existing record matched by a unique key (ID, slug, or email). Configure the import mode—insert-only, update-only, or upsert—to match your workflow. Insert-only is safest for new directories; upsert is ideal for recurring syncs from a master XLSX.
Map each spreadsheet column to the corresponding CMS field using dropdown selectors or a JSON configuration file. Double-check taxonomy fields: if your XLSX lists “Retail” but the CMS expects “retail” (lowercase), the import may silently create a duplicate category or fail validation. Save your mapping as a reusable profile so subsequent imports require only a file swap.
Use Staging or a Preview Environment to Verify Results Before Going Live
Never import directly into production for the first run. A staging site or preview database mirrors your live schema but isolates mistakes. After the import completes, browse several directory pages, test search and filter widgets, and confirm that images and external links resolve correctly. Check for layout breaks caused by unexpectedly long business names or addresses.
Invite a colleague to perform a blind review: ask them to search for specific listings, verify contact information, and click through to detail pages. Fresh eyes catch issues—missing categories, transposed phone numbers—that you might overlook. Document any corrections in a shared spreadsheet so you can patch the master XLSX before the next refresh.
Error Handling: Common Import Errors and Quick Remediation Steps
Typical errors include mismatched data types (text in a numeric field), foreign-key violations (referencing a non-existent category ID), and character-encoding corruption. Review the import log line by line, noting the row number and column name for each failure. Export the failed rows to a separate CSV, fix the issues in your master XLSX, and re-import only the corrected records.
For encoding problems, re-save the file with explicit UTF-8 encoding and re-upload. For foreign-key errors, confirm that parent entities (categories, tags) exist before importing child records, or switch to a two-pass import: categories first, then listings. Keep a changelog of every fix so you can automate validation rules in future imports and prevent recurring issues.
| Error Type | Cause | Remediation |
|---|---|---|
| Data type mismatch | Text in a number/date column | Cleanse in Excel; re-export |
| Foreign-key violation | Category ID not found | Import parent entities first |
| Encoding corruption | Non-UTF-8 save | Re-save as UTF-8; re-upload |
| Duplicate key | Two rows share unique ID | Deduplicate in source XLSX |
Step 5 — Post-Import Verification and Data Hygiene
After a successful import, verify that every record landed correctly and matches your expectations. Start by comparing the total record count in the CMS to the row count in your source file (minus any header rows). A mismatch signals skipped rows, duplicate rejections, or silent failures that require investigation.
[KBIMAGE_5]Spot-check a stratified sample: select records from the beginning, middle, and end of your file, and across multiple categories or geographic regions. Confirm that business names, addresses, phone numbers, email addresses, and URLs all display without truncation or encoding errors. Open external links in a new tab to verify they resolve to the intended destination.
Run automated validation scripts—custom Python, Node.js, or CMS plugins—to scan for broken image URLs, malformed email addresses, and phone numbers missing area codes. Flag any anomalies in a report and route them back to your data steward for correction in the master XLSX. Schedule these checks to run daily or weekly, catching regressions introduced by manual edits or subsequent imports.
Spot-Check a Representative Sample of Records
Choose at least 1 percent of your total records, ensuring coverage across all categorical dimensions: industry type, location, membership tier, or publication status. For a 5,000-record directory, that means reviewing fifty entries. Use a randomization function in Excel (=RAND()) to generate an unbiased sample, then export those IDs and pull them up in the CMS.
Verify that rich-text fields (descriptions, bios) render HTML correctly without escaped tags or broken formatting. Check that category assignments appear in breadcrumbs and filter widgets. Confirm that any custom fields—social media handles, operating hours, or certification badges—populate in the correct display slots. Document discrepancies in a shared tracker so the team can prioritize fixes.
Run Post-Import Validation Scripts to Catch Anomalies
Automated scripts save hours of manual review. A simple link-checker script can crawl every URL field and log HTTP status codes: flag any 404s or timeouts for immediate correction. Use regex patterns to validate email formats and phone numbers, highlighting entries that deviate from your standard (e.g., missing country code or invalid TLD).
For image fields, verify that each path resolves to a live asset. If your directory supports user-uploaded logos, check file sizes and dimensions to ensure they meet display requirements and won’t cause layout shifts. Integrate these scripts into your CI/CD pipeline or schedule them as nightly cron jobs, emailing a summary report to the data team each morning.
| Validation Check | Tool/Method | Frequency |
|---|---|---|
| Broken links | Python requests or cURL script | Daily |
| Email format | Regex in SQL or scripting language | Weekly |
| Image availability | Headless browser or HTTP HEAD | Daily |
| Category assignment | CMS API query + count check | After each import |
Reconciliation: Compare Pre-Import Counts with Live Records
Build a reconciliation dashboard that compares expected versus actual record counts by category, region, or status. For example, if your XLSX contained 300 “Retail” listings but the CMS shows only 285, investigate the fifteen missing entries. Check import logs for errors, confirm that category slugs matched exactly, and verify that no records were silently deduplicated.
Automate this reconciliation by exporting a summary CSV from the CMS after each import and diffing it against your source file using a script or pivot table. Highlight new, updated, and missing records in color-coded columns. Share this report with stakeholders to maintain transparency and quickly address data-quality gaps.
Maintenance: Schedule Periodic Data Refreshes from the Source XLSX
Establish a cadence for refreshing directory data—monthly, quarterly, or event-driven (e.g., after a trade show). Document the refresh procedure in a runbook: where the master XLSX lives, who has edit permissions, the export and validation steps, and the import command or UI workflow. Assign a data steward to own each refresh cycle and review the reconciliation report.
Version your master XLSX using a naming convention like Directory_YYYY-MM-DD.xlsx and archive previous versions in a cloud folder with retention policies. This history lets you roll back to a known-good state if a refresh introduces errors. Over time, track metrics—import duration, error counts, post-import corrections—to identify process improvements and justify investments in automation.
FAQ: Frequently Asked Questions
How do I prepare an Excel file for a directory import?
Start with a single, clear header row that matches your directory schema. Remove empty rows, normalize formatting (addresses, phone numbers), validate required fields, and save a test sample. Ensure UTF-8 encoding and that unique identifiers (like email or ID) are present to prevent duplicates during import.
Can I import directly from Excel or do I need CSV?
Most CMS platforms accept both XLSX and CSV, though CSV often offers better compatibility and faster processing for large datasets. Check your platform’s documentation: some require CSV with specific delimiters and UTF-8 encoding. Testing both formats with a small sample helps identify the best fit for your workflow.
What are common import errors and how can I fix them quickly?
Common errors include missing required fields, mismatched column names, encoding issues, and invalid data types. Fix them by cross-checking your headers against the CMS template, ensuring UTF-8 encoding, validating email and URL formats, and trimming whitespace. Always run a small test batch first to catch issues early.
How can I prevent duplicates during a bulk import?
Use a unique identifier column (email, ID, or slug) and enable duplicate-checking in your CMS import settings. Before import, deduplicate your spreadsheet using Excel’s Remove Duplicates tool or a script. Configure your CMS to skip or update existing records based on the unique key, rather than creating new entries.
How often should directory data be refreshed from the source XLSX?
Refresh frequency depends on data volatility. For highly dynamic directories (events, inventories), consider weekly or bi-weekly updates. For stable directories (company listings, resources), quarterly refreshes often suffice. Document your import workflow and schedule automated checks to maintain accuracy without manual overhead.
Do I need a staging environment for bulk imports?
A staging environment is strongly recommended, especially for large imports. It lets you validate mappings, spot errors, and test workflows without affecting live data. Even a simple preview mode or draft state within your CMS can catch formatting issues, broken links, and missing fields before publishing to production.
What CMS features support bulk CSV/Excel imports for directories?
Look for built-in import modules, field-mapping interfaces, validation hooks, and rollback or versioning capabilities. Many modern CMS platforms (WordPress with plugins, Drupal, custom solutions) offer CSV/XLSX importers with pre-built templates. Confirm support for UTF-8, custom taxonomies, and relationship fields before committing to a platform.
How should I map Excel columns to CMS fields when the schema changes?
Maintain a mapping document that pairs Excel column headers with CMS field names and data types. When the schema evolves, update your mapping, adjust column headers or add transformation scripts, and test with a subset of records. Version-control your templates to track changes and simplify rollback if needed.
Conclusion: Take Action on Your Directory Workflow
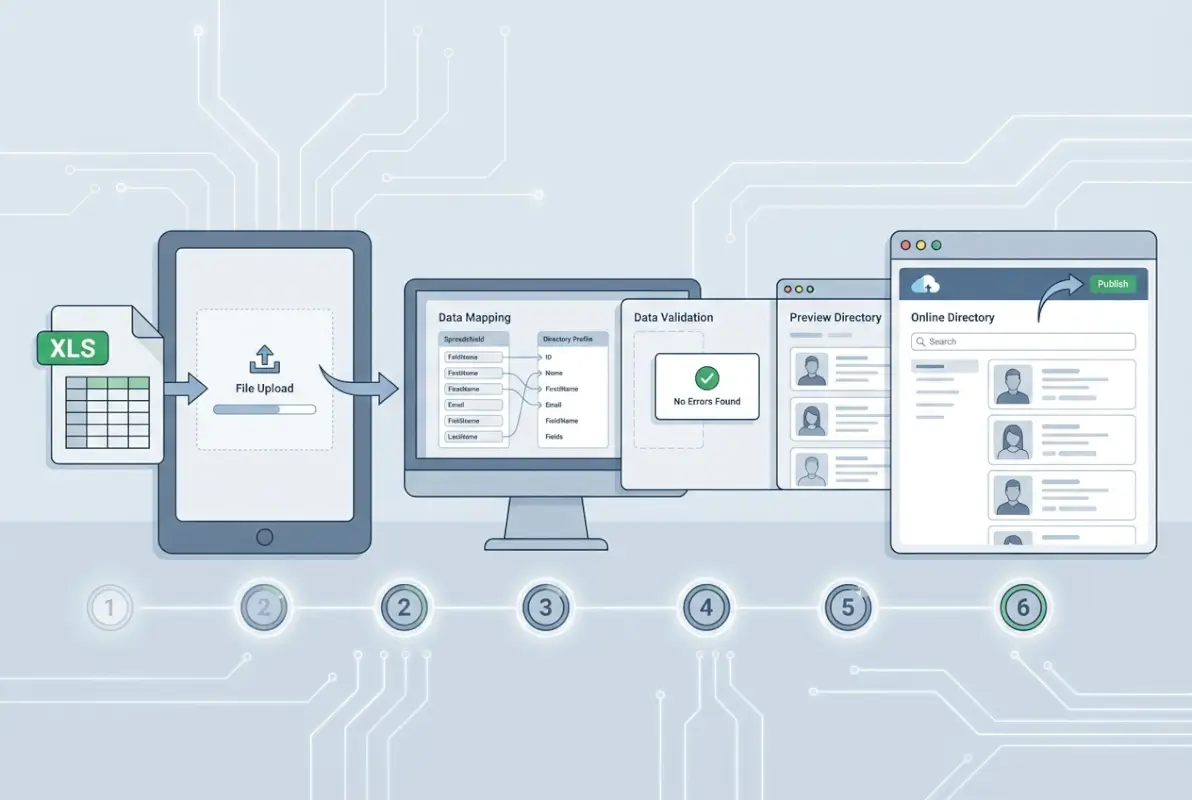
You now have a repeatable, six-step blueprint to transform an XLS or XLSX file into a fully populated online directory—one that balances speed with data integrity. By planning your schema upfront, cleaning and normalizing records before import, validating in a staging environment, and establishing governance for ongoing updates, you’ll sidestep the chaos that often accompanies bulk data operations.
The competitive edge lies not just in moving data faster, but in maintaining quality at scale. When your import workflow includes validation hooks, reconciliation checks, and clear mapping documentation, you reduce post-publish firefighting and build confidence across editorial and technical teams. Automation handles the repetitive heavy lifting; governance ensures the rules stay consistent as your directory grows.
Ready to streamline your next directory launch?
Start with a small pilot: pick 50–100 records, map your columns, run a test import in staging, and document every hiccup you encounter. Refine your template, automate the validation steps, and scale up once you’ve proven the workflow. The time you invest now in process design pays dividends every time you need to refresh, expand, or migrate your directory data.
Turn spreadsheet chaos into directory confidence—one validated import at a time.
For deeper technical guidance on CSV population workflows, consult the Nuxeo CSV directory guide, Microsoft’s bulk upload documentation, Gridly’s XLSX import reference, and practical examples from Directbase and their bulk import blog series. These resources offer real-world templates, validation scripts, and troubleshooting tips that complement the six-step framework outlined here.
Was this article helpful?