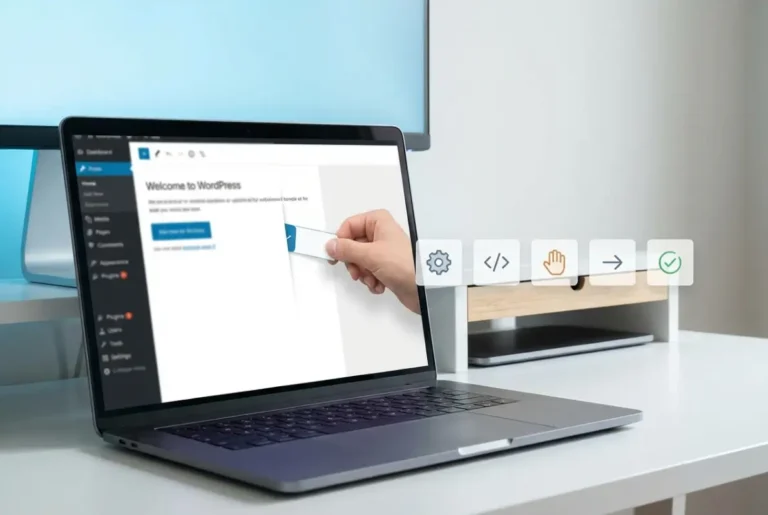
How to Debug a WordPress Plugin with XDebug: A Developer’s Guide

Generating summary...
Ever spent hours chasing a mysterious fatal error that could have been caught in seconds? WordPress plugin development can feel like navigating through a maze blindfolded when you’re relying solely on error logs and var_dump() statements. The difference between a frustrated developer and a confident one often comes down to having the right debugging tools at their disposal.
XDebug represents a paradigm shift in WordPress plugin development, transforming chaotic trial-and-error sessions into precise, methodical problem-solving. This powerful PHP extension doesn’t just show you what went wrong—it reveals exactly where, when, and why your code behaves unexpectedly. While many developers still struggle with primitive debugging methods, mastering XDebug can compress hours of detective work into minutes of targeted investigation.
TL;DR: Quick Takeaways
- XDebug transforms debugging from guesswork into precise code inspection with breakpoints and stack traces
- Installation varies by system but requires PHP compatibility checks and proper php.ini configuration
- IDE integration with PHPStorm, VS Code, or NetBeans multiplies debugging effectiveness
- Remote debugging enables troubleshooting staging environments through SSH tunnels
- Common plugin issues like fatal errors, AJAX failures, and hook problems become manageable
- Security matters—never enable XDebug on production servers
Why Debug WordPress Plugins with XDebug?
XDebug stands as the gold standard for PHP debugging, offering three core capabilities that revolutionize WordPress development: interactive breakpoints, comprehensive stack traces, and performance profiling. Unlike traditional debugging methods that interrupt your workflow with cryptic error messages, XDebug provides a controlled environment where you can pause execution at any point and examine your application’s internal state.
The pain points of plugin development without proper debugging tools are all too familiar. You’ve probably experienced the frustration of a white screen of death with no clear indication of what triggered it, or spent countless hours adding echo statements throughout your code only to remove them later. These primitive approaches not only waste time but often introduce new bugs in the process.
When you embrace XDebug for WordPress plugin debugging, you gain several transformative benefits. Speed becomes your ally as you can instantly identify problematic code sections without lengthy investigation periods. Accuracy improves dramatically since you can inspect actual variable values and execution paths rather than making educated guesses. Most importantly, your downtime reduces significantly because issues get resolved faster, keeping your development momentum intact.
For developers working on complex plugins or maintaining legacy codebases, XDebug serves as an invaluable diagnostic tool. This comprehensive XDebug guide for WordPress demonstrates how professional developers leverage these capabilities to maintain high-quality code standards while accelerating their development cycles.
Installing XDebug for WordPress Development
Before diving into XDebug installation, you’ll need to verify your PHP version compatibility and locate your php.ini configuration file. Most modern WordPress installations run PHP 7.4 or higher, which works seamlessly with XDebug 3.x. To find your php.ini location, create a temporary PHP file containing <?php phpinfo(); ?> and look for the “Loaded Configuration File” path.
The installation process offers several approaches depending on your development environment. PECL (PHP Extension Community Library) provides the most straightforward method for most systems:
pecl install xdebugAlternatively, you can use your system’s package manager or download pre-compiled binaries from the official XDebug website. The latest XDebug installation best practices recommend using package managers when possible for easier updates and dependency management.
After installation, confirm everything works correctly by checking phpinfo() output for an XDebug section. You should see configuration options and version information indicating successful installation. If XDebug doesn’t appear, you may need to manually add the extension directive to your php.ini file.
Installation on Different Operating Systems
macOS with Homebrew offers the smoothest installation experience for Mac developers. First, ensure you have Homebrew installed, then run:
brew install php
pecl install xdebug
For users running multiple PHP versions, specify your target version explicitly to avoid conflicts.
Windows users with WampServer or XAMPP can often enable XDebug through their control panels since these packages typically include the extension by default. Navigate to your WAMP/XAMPP PHP extensions menu and check the XDebug option. If it’s missing, download the appropriate DLL from the XDebug website and place it in your PHP extensions directory.
Linux distributions make installation straightforward through package managers:
# Ubuntu/Debian
sudo apt-get install php-xdebug

# CentOS/RHEL
sudo yum install php-xdebug
I’ve found that Ubuntu systems sometimes require additional configuration steps, particularly when using PHP-FPM instead of Apache’s mod_php. In such cases, you’ll need to restart both your web server and PHP-FPM service after making configuration changes, similar to how developers might need to restart services when working on complex projects like when they create plugin android step by step guide developers 4.
Configuring XDebug for Local Debugging
Essential php.ini settings form the foundation of effective XDebug configuration. The most critical setting is xdebug.mode, which determines XDebug’s operational behavior. For debugging WordPress plugins, set it to “debug” or “develop,debug” for additional development features:
xdebug.mode=debug
xdebug.start_with_request=yes
xdebug.client_host=localhost
xdebug.client_port=9003
xdebug.log=/tmp/xdebug.log
The xdebug.start_with_request directive tells XDebug to automatically attempt debugging connections on every request, eliminating the need for browser extensions or URL parameters during development. However, this can impact performance, so some developers prefer setting it to “trigger” and using IDE-specific methods to initiate debugging sessions.
After modifying your php.ini file, restart your web server and PHP-FPM (if applicable) to apply changes. Apache users can typically restart with sudo systemctl restart apache2, while Nginx users need to restart both Nginx and PHP-FPM services. To verify your configuration took effect, create a simple test script that sets a breakpoint and triggers your IDE’s debugger.
IDE Integration (PHPStorm, VS Code, NetBeans)
PHPStorm provides the most robust XDebug integration among popular IDEs. After installing XDebug, configure PHPStorm by navigating to Settings > PHP > Debug and ensuring the XDebug port matches your php.ini configuration (usually 9003). Create a new server configuration under Settings > PHP > Servers, specifying your WordPress installation’s document root and URL.
Setting up path mappings correctly is crucial for successful debugging. Map your local WordPress directory to the server path (typically the same for local development). For plugin-specific debugging, ensure your plugin directory mapping is accurate since PHPStorm needs to correlate your local files with the executing code.
VS Code users should install the “PHP Debug” extension, which provides excellent XDebug integration. Create a launch.json configuration in your .vscode folder:
{
    "version": "0.2.0",
    "configurations": [
        {
            "name": "Listen for XDebug",
            "type": "php",
            "request": "launch",
            "port": 9003,
            "pathMappings": {
                "/var/www/html": "${workspaceFolder}"
            }
        }
    ]
}
NetBeans offers solid XDebug support through its built-in PHP debugging features. Configure your project by right-clicking and selecting Properties > Run Configuration. Set the project URL to match your local WordPress installation and ensure the debugger port aligns with your XDebug configuration.
From my experience developing WordPress plugins, PHPStorm offers the most comprehensive debugging experience, though VS Code provides excellent functionality for developers seeking a lighter-weight solution. The choice often depends on your budget and feature requirements, much like how developers choose different approaches when they create online business directory simple steps.
Setting Up Remote Debugging
Remote debugging becomes necessary when you need to troubleshoot issues that only occur on staging servers or production-like environments. Unlike local debugging where everything runs on the same machine, remote debugging requires establishing a secure connection between your local IDE and the remote server running your WordPress installation.
SSH tunnels provide the most secure method for remote XDebug connections. This approach encrypts all debugging traffic and avoids exposing XDebug ports directly to the internet. To establish an SSH tunnel, use this command structure:
ssh -R 9003:localhost:9003 user@remote-server.comThis creates a reverse tunnel that forwards debugging connections from the remote server back to your local machine. Your remote php.ini configuration needs adjustment to use the tunnel:
xdebug.mode=debug
xdebug.start_with_request=trigger
xdebug.client_host=127.0.0.1
xdebug.client_port=9003
VPN connections offer an alternative approach for remote debugging, particularly in corporate environments where SSH access might be restricted. When using a VPN, update xdebug.client_host to point to your local machine’s VPN IP address rather than localhost.
Testing your remote connection requires patience and systematic verification. Start by setting a breakpoint in a simple theme file (like functions.php) rather than complex plugin code. Trigger the debugging session through your IDE, then access the remote WordPress site. If the connection succeeds, your IDE should pause execution at the breakpoint, allowing you to inspect variables and step through code.
Common Remote Debugging Pitfalls
Firewall configurations frequently block XDebug traffic, even when SSH tunnels are properly established. Most servers run restrictive firewall rules by default, blocking uncommon ports like 9003. Work with your server administrator to ensure the debugging port remains open for your IP address, or use SSH tunnels exclusively to bypass firewall restrictions entirely.
Mismatched ports between your IDE configuration and server settings cause connection failures that can be frustrating to diagnose. Double-check that your php.ini xdebug.client_port matches your IDE’s listening port. XDebug 3.x defaults to port 9003, while older versions used 9000, which can conflict with PHP-FPM installations.
IDE timeout settings often need adjustment for remote debugging since network latency can delay connection establishment. Increase your IDE’s debugging timeout to at least 30 seconds for remote connections. PHPStorm users can find this setting under Build, Execution, Deployment > Debugger, while VS Code users may need to adjust the “php.debug.timeout” setting.
When troubleshooting “No connection could be made” errors, start by verifying basic network connectivity between your local machine and the remote server. Use telnet or netcat to test port accessibility, and check XDebug’s log file for connection attempts. Sometimes the issue lies in DNS resolution, particularly when using custom hostnames or internal network addresses.
Debugging Common WordPress Plugin Issues with XDebug
Fatal “Call to undefined function” errors represent one of the most frequent plugin development challenges. XDebug’s stack trace functionality shines in these situations by showing you exactly where the undefined function call occurs and the complete execution path leading to the error. When your plugin crashes with this error type, set a breakpoint just before the problematic function call and examine the call stack to understand why the function isn’t available.
These errors often stem from missing plugin dependencies, incorrect file inclusion order, or conditional loading issues. Using XDebug, you can step through your plugin’s initialization process to verify that all required files load properly and functions get defined in the correct sequence.
AJAX endpoint failures can be particularly challenging to debug because they occur outside the normal WordPress page load cycle. XDebug allows you to set breakpoints in your AJAX handler functions and inspect the $_POST data, response headers, and execution flow. This capability proves invaluable when dealing with complex AJAX interactions that involve multiple plugins or theme compatibility issues.
To debug AJAX effectively, set breakpoints in your wp_ajax_* action handlers and trigger the AJAX request from your browser’s developer console or through normal user interactions. XDebug will pause execution, allowing you to examine the request data and step through your response generation code, similar to the debugging process developers use when they create plugin android step by step guide developers 3.
Hook execution order problems plague many WordPress plugins, especially when multiple plugins interact with the same hooks or filters. XDebug’s step-through debugging capability lets you trace exactly when your add_action and add_filter callbacks execute relative to other plugin code. Set breakpoints in your hook callbacks and observe the execution sequence to identify priority conflicts or unexpected interference.
Memory limit exhaustion issues often require XDebug’s profiling capabilities rather than interactive debugging. Enable profiling mode by setting xdebug.mode=profile in your php.ini file, then analyze the generated cachegrind files to identify memory-intensive code sections. This approach helps pinpoint exact functions or loops consuming excessive memory resources.
Real-World Debugging Walkthrough
Let’s examine a practical scenario: debugging a plugin that crashes during activation with a fatal error. This common issue typically involves problems in the activation hook callback, database operations, or missing dependencies.
Start by setting a breakpoint in your register_activation_hook callback function. When you activate the plugin through WordPress admin, XDebug should pause execution at your breakpoint. Step through the activation code line by line, examining variable values and watching for undefined constants or missing function calls.
In one recent debugging session, I encountered a plugin that failed activation due to an undefined PLUGIN_VERSION constant. The breakpoint revealed that the constant definition occurred after the activation hook registration, creating a timing issue. XDebug allowed me to trace the exact execution order and identify the root cause within minutes rather than hours of traditional debugging.
Walking through variable values during plugin activation often reveals configuration problems or environment-specific issues. Use XDebug’s variable inspector to examine database connection objects, WordPress globals, and your plugin’s internal state. Pay particular attention to array structures and object properties that might contain unexpected null values or incorrect data types.
This systematic approach to debugging applies to various plugin development scenarios, whether you’re troubleshooting activation issues or working on more complex projects that require methodical testing, such as when developers create online directory php developers guide 5.
Best Practices & Performance Considerations
The cardinal rule of XDebug usage is simple: never enable it on production servers. XDebug introduces significant performance overhead that can slow your live WordPress site to a crawl and potentially expose sensitive debugging information to visitors. Always maintain separate configurations for development, staging, and production environments, ensuring XDebug remains disabled where users access your site.
Selective profiling offers a compromise when you need performance insights without full debugging overhead. Configure XDebug to profile specific requests or URL patterns rather than every page load. Use trigger-based profiling that activates only when you append specific parameters to URLs, allowing you to gather performance data without impacting normal site operations.
Security considerations extend beyond simply disabling XDebug in production. When you do use XDebug, configure it securely by setting xdebug.discover_client_host=0 and explicitly specifying allowed client hosts. This prevents XDebug from accepting connections from unauthorized sources, which could potentially expose your application’s internal state.
Documenting your debugging workflow benefits team collaboration significantly. Create standardized procedures for setting up XDebug environments, share IDE configurations through version control, and maintain documentation of common debugging scenarios specific to your plugin or theme development process. This approach ensures consistent debugging practices across your development team and reduces setup time for new team members.
Checklist for Safe Debugging
Before deploying any code to production, verify that XDebug is completely disabled on your live servers. Check both php.ini configurations and any server-specific overrides that might accidentally enable debugging features. Many developers use environment-specific configuration files to prevent accidental XDebug activation in production.
Maintain clean, version-controlled php.ini files that can be easily deployed across different environments. Use environment variables or separate configuration files for development-specific settings like XDebug parameters. This approach prevents debugging configurations from accidentally reaching production servers during deployment processes.
Regular updates of XDebug to the latest stable release ensure you have access to bug fixes, security patches, and performance improvements. Subscribe to XDebug’s release announcements and test new versions in your development environment before upgrading. Some updates may require configuration adjustments, particularly when moving between major versions.
Consider implementing automated checks in your deployment process that verify XDebug status on production servers. Simple monitoring scripts can alert you if XDebug becomes accidentally enabled, helping you maintain security and performance standards across all environments, similar to quality assurance practices used when teams how to create your own online business directory simple steps.
Frequently Asked Questions
What is XDebug and how does it work with WordPress?
XDebug is a PHP extension that provides debugging and profiling capabilities for PHP applications, including WordPress. It works by allowing developers to set breakpoints in their code, inspect variables in real-time, and trace execution paths. For WordPress development, XDebug integrates seamlessly with your local development environment, enabling you to debug plugin and theme code interactively rather than relying on error logs or print statements.
How do I install XDebug on a local WordPress environment?
Installation varies by operating system but generally involves using PECL (pecl install xdebug), package managers (like apt-get install php-xdebug on Ubuntu), or enabling it through WAMP/XAMPP control panels. After installation, you’ll need to configure your php.ini file with appropriate XDebug settings and restart your web server. Verify installation success by checking phpinfo() output for XDebug configuration details.
How can I configure XDebug for remote debugging on a live server?
Remote debugging requires establishing secure connections between your local IDE and the remote server. The safest approach uses SSH tunnels (ssh -R 9003:localhost:9003 user@server.com) to encrypt debugging traffic. Configure your remote php.ini with xdebug.client_host=127.0.0.1 when using SSH tunnels, or use your local machine’s IP address for direct connections. Never enable remote debugging on actual production servers due to security and performance risks.
What are the most common WordPress plugin errors that XDebug can help solve?
XDebug excels at debugging fatal errors like “Call to undefined function,” AJAX endpoint failures, hook execution order problems, and memory limit issues. It’s particularly valuable for tracing complex plugin interactions, identifying variable scope problems, and understanding WordPress’s execution flow. XDebug’s stack traces and variable inspection capabilities make it easy to identify the root cause of plugin conflicts or compatibility issues.
Which IDEs work best with XDebug for WordPress development?
PHPStorm offers the most comprehensive XDebug integration with advanced features like remote debugging, profiling analysis, and sophisticated breakpoint management. VS Code provides excellent XDebug support through the PHP Debug extension and works well for most development needs. NetBeans includes solid built-in XDebug capabilities. The choice often depends on your budget, feature requirements, and personal preferences, with PHPStorm leading for professional development and VS Code offering a great free alternative.
Can XDebug impact my WordPress site’s performance?
Yes, XDebug significantly impacts performance and should never be enabled on production sites. It can slow page loading by 50% or more due to debugging overhead and memory usage. Use XDebug only in development environments, and consider trigger-based activation even there to minimize performance impact during normal development work. For production performance monitoring, use specialized tools designed for live site analysis instead.
Is it safe to use XDebug on staging servers?
While safer than production use, XDebug on staging servers requires careful configuration and security considerations. Use SSH tunnels or VPN connections to secure debugging traffic, restrict access to authorized developers only, and ensure staging servers aren’t publicly accessible. Many teams prefer using production-like data dumps in local environments rather than debugging directly on staging servers to maintain security.
How do I troubleshoot XDebug connection issues?
Start by verifying basic configuration: check that XDebug is properly installed (phpinfo() should show XDebug section), ensure port numbers match between php.ini and IDE settings (usually 9003 for XDebug 3.x), and confirm firewall rules allow debugging traffic. Check XDebug log files for connection attempts and errors. For remote debugging, verify SSH tunnels are established correctly and that network connectivity exists between your local machine and the remote server.
The journey from debugging frustration to development confidence starts with implementing XDebug in your WordPress plugin development workflow. Stop wasting hours on guesswork and primitive debugging methods—embrace the precision and efficiency that professional debugging tools provide. Set up XDebug in your development environment today, configure your IDE integration, and experience the transformative power of seeing exactly what your code does at every step of execution. Your future self will thank you for making this investment in your development capabilities.
Was this article helpful?