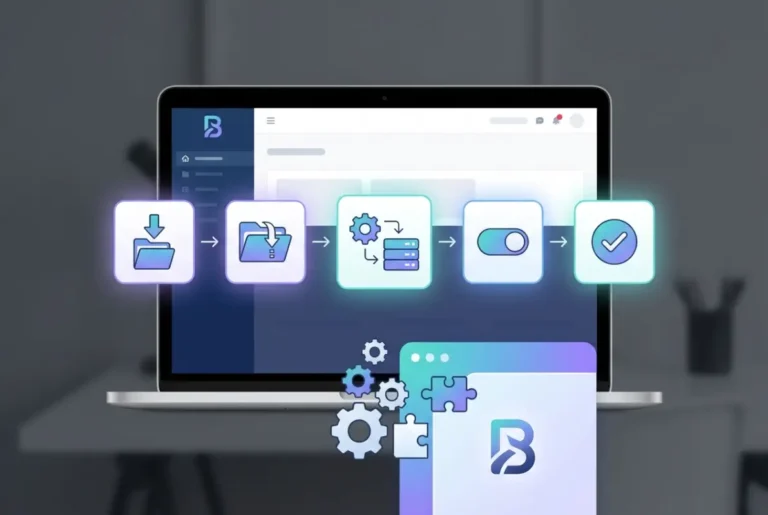
How to Install a Plugin in WordPress: A Beginner’s Guide
Generating summary...
If you’ve ever felt overwhelmed by the idea of adding functionality to your WordPress site, you’re not alone. Here’s something most tutorials won’t tell you upfront: installing a plugin in WordPress is actually one of the easiest technical tasks you’ll ever do on your website, yet it’s also one of the most powerful. In just a few clicks, you can transform a basic blog into a fully-functional online store, a membership site, or a booking platform. The real challenge isn’t the installation itself—it’s knowing which plugins to install, understanding the potential risks, and learning how to manage them properly once they’re active. Let’s cut through the confusion and get you installing plugins like a pro.
TL;DR – Quick Takeaways
- Three installation methods exist – WordPress dashboard (easiest), upload via ZIP file, or FTP (advanced)
- Not all plugins are safe – always check reviews, active installations, and last update date before installing
- More plugins don’t mean better performance – quality over quantity prevents site slowdowns
- Always backup before installing – especially when adding plugins that modify core functionality
- Free doesn’t mean inferior – many free plugins outperform premium alternatives for basic needs
Understanding WordPress Plugins: What They Are and Why They Matter
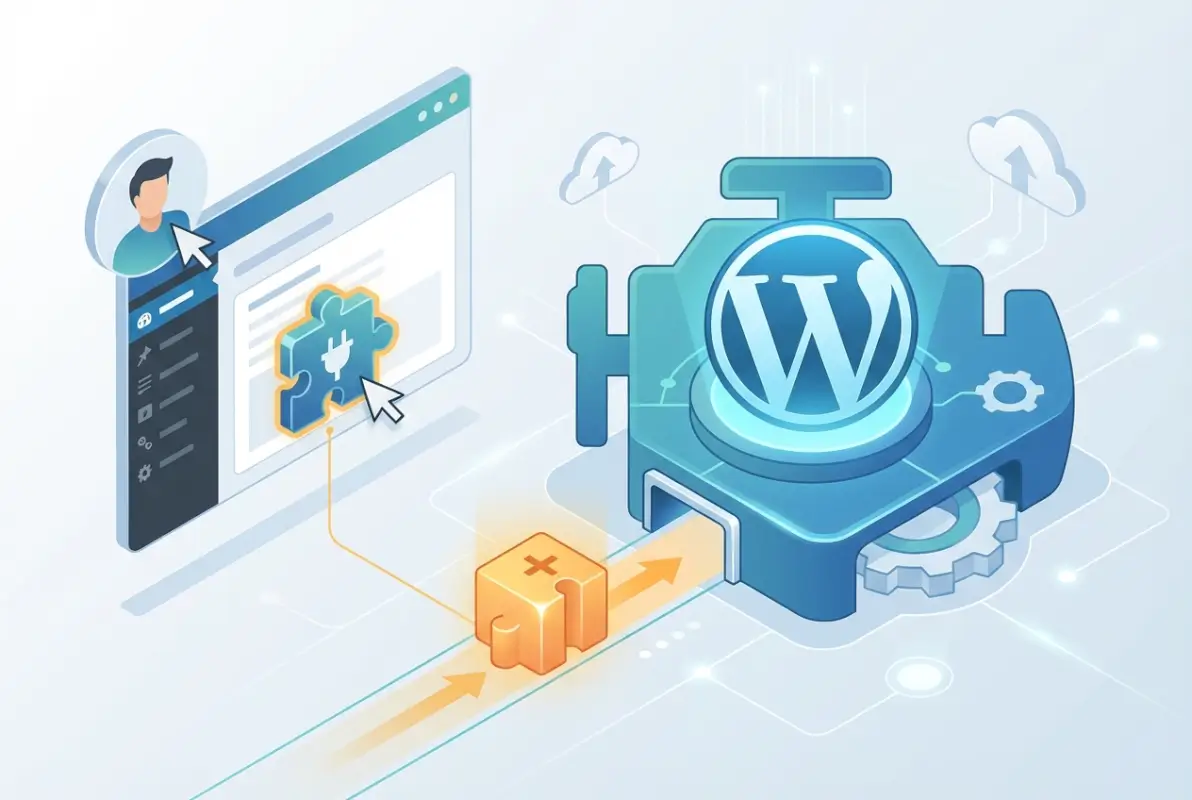
WordPress plugins are essentially pieces of software that extend the functionality of your WordPress website without requiring you to write a single line of code. Think of WordPress as a smartphone and plugins as the apps you install to make it do specific things. Want to add a contact form? There’s a plugin. Need to improve your site’s loading speed? There’s a plugin for that too.
The WordPress plugin directory currently hosts over 60,000 free plugins, with thousands more available through third-party marketplaces. This massive ecosystem means you can build almost anything without hiring a developer, but it also means you need to be selective about what you install.
Here’s something I learned the hard way: just because you can install unlimited plugins doesn’t mean you should. Each plugin adds code to your site, and poorly coded plugins can slow down your website, create security vulnerabilities, or even conflict with other plugins and crash your entire site. The key is finding that sweet spot between functionality and performance.
Method 1: Installing Plugins from the WordPress Dashboard
The WordPress dashboard method is by far the most popular way to install plugins, and for good reason—it’s intuitive, safe, and gives you access to the entire WordPress plugin repository without ever leaving your admin area. This method works for any plugin that’s hosted in the official WordPress directory.
Here’s the step-by-step process:
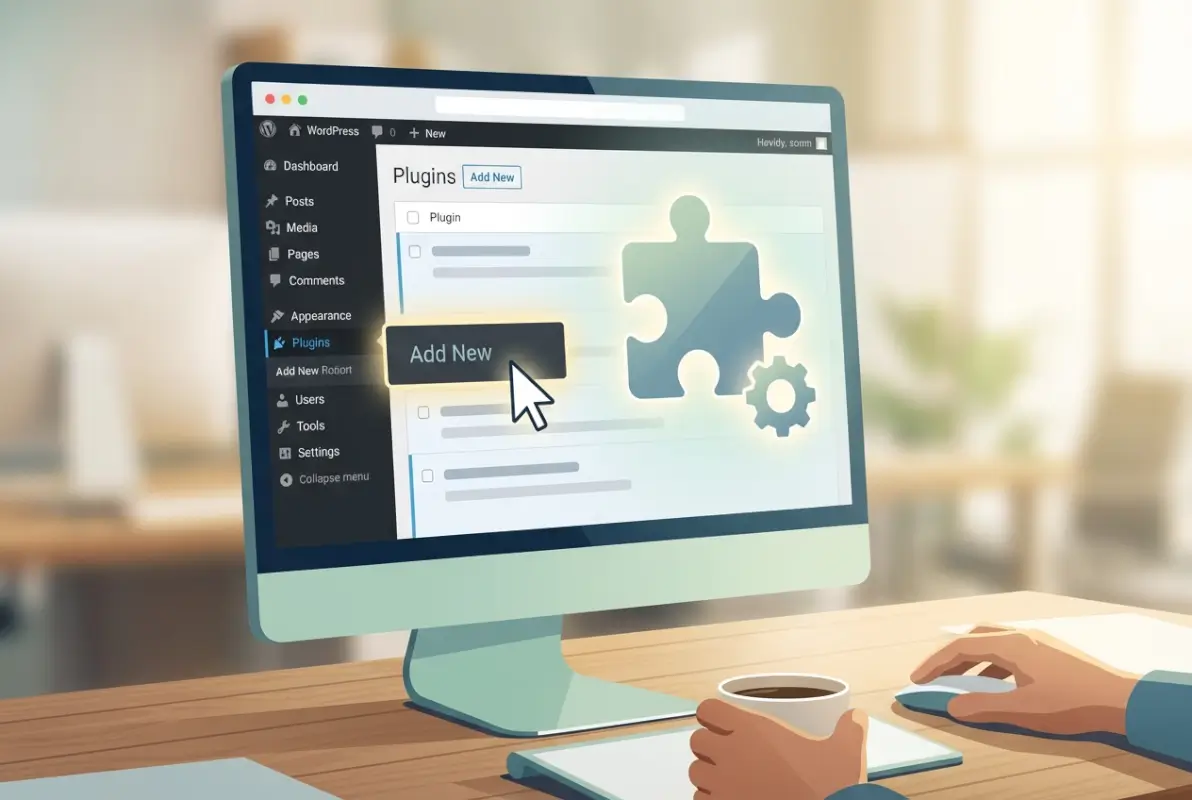
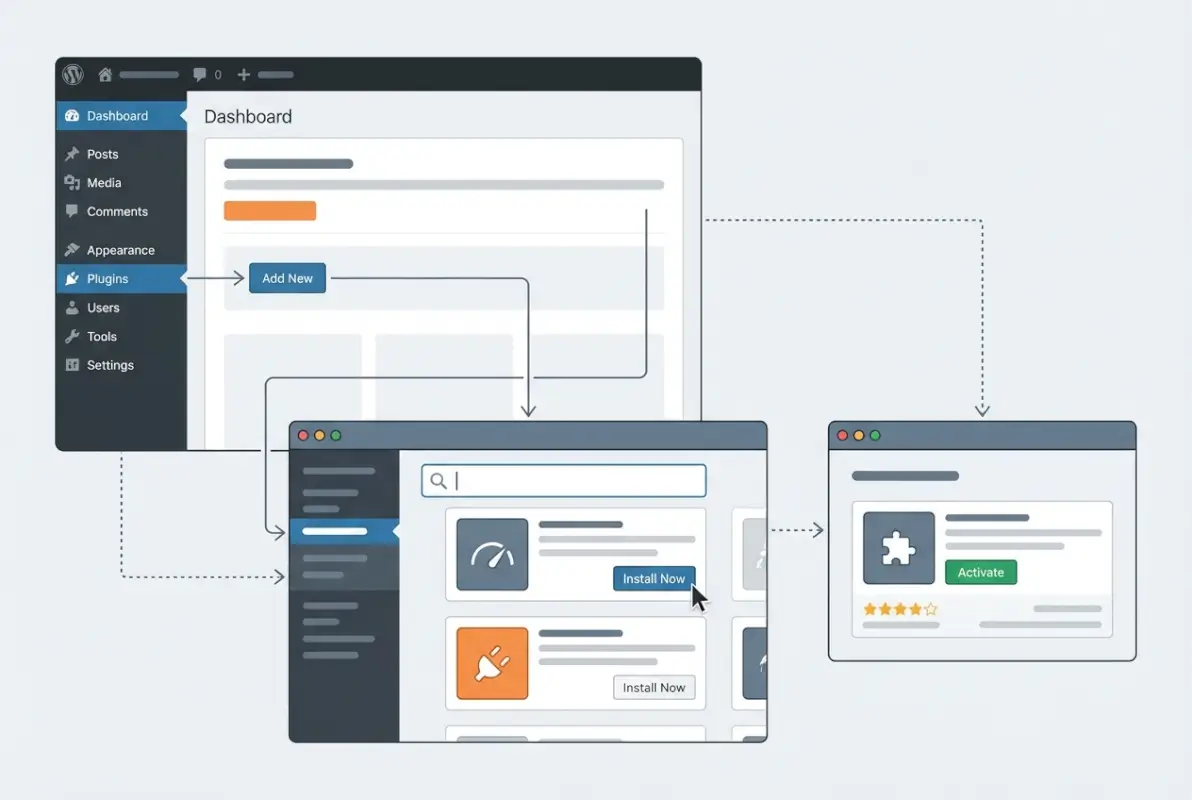
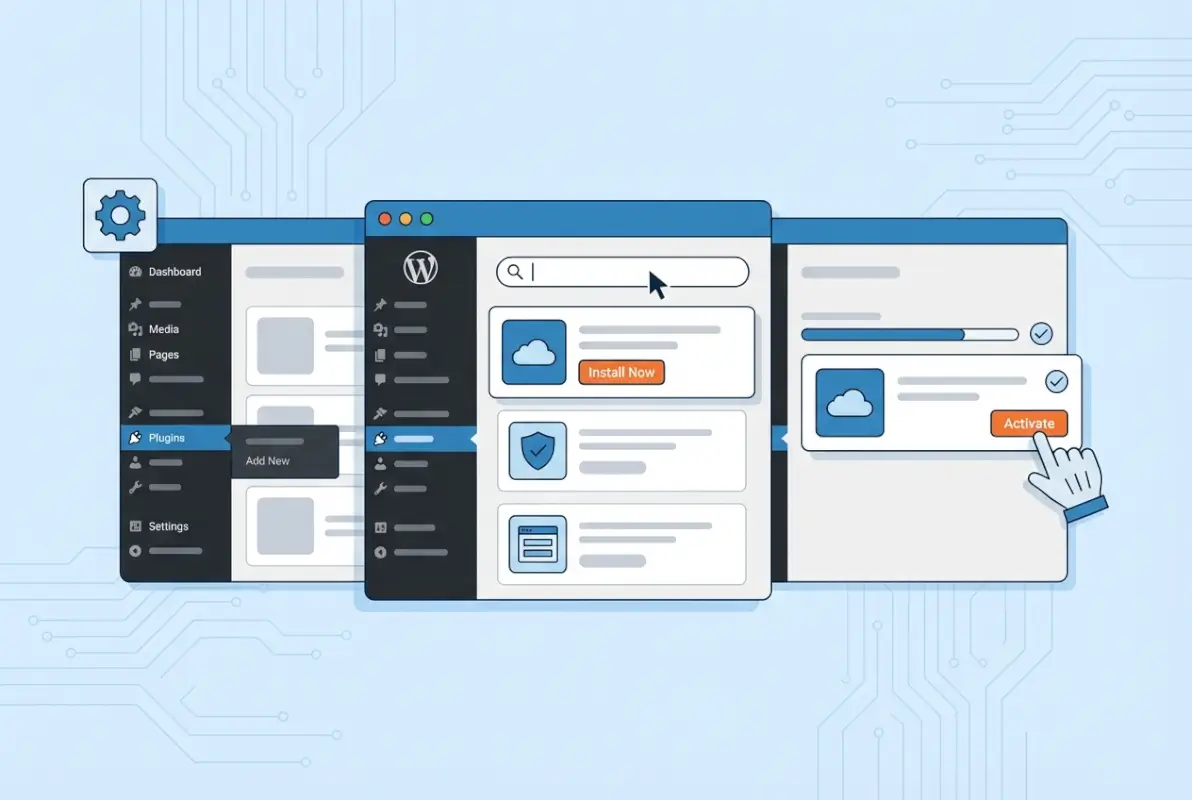
First, log into your WordPress admin dashboard by navigating to yourwebsite.com/wp-admin and entering your credentials. Once you’re in, look for the “Plugins” option in the left sidebar menu and hover over it—you’ll see a submenu appear. Click on “Add New” to access the plugin installation page.
The plugin search page displays featured plugins by default, but what you really want is the search bar in the upper right corner. Type in the name or functionality of the plugin you’re looking for. For example, if you need a contact form, you might search for “contact form” or a specific plugin name like “Contact Form 7.”
Once you’ve found the plugin you want, click the “Install Now” button. WordPress will download and install the plugin automatically—this usually takes just a few seconds. You’ll notice the button changes to “Installing…” and then “Activate.”
Here’s a critical point many beginners miss: installing a plugin doesn’t make it functional. You must click “Activate” after installation for the plugin to actually work on your site. Some plugins work immediately after activation, while others require additional configuration through their own settings pages.
Method 2: Uploading a Plugin ZIP File
Sometimes you’ll need to install a plugin that isn’t available in the WordPress directory—maybe you purchased a premium plugin, received a custom-coded solution, or downloaded a plugin from a third-party marketplace. This is where the ZIP file upload method comes in handy.
Start by obtaining the plugin file, which should be in ZIP format. Premium plugins typically provide a download link after purchase, while free third-party plugins usually have a download button on their website. Make sure you’re downloading from a reputable source—the official WordPress plugin repository is always the safest bet for free plugins.
Navigate to Plugins > Add New in your WordPress dashboard, just like in Method 1. But instead of searching, look for the “Upload Plugin” button at the top of the page, right next to the page title. Click it.
You’ll see a simple upload interface with a “Choose File” button. Click it and browse your computer for the ZIP file you downloaded. Select the file and click “Open,” then click the “Install Now” button.
WordPress will upload and install the plugin, displaying a progress bar during the process. Once complete, you’ll see a success message with an “Activate Plugin” link. Click it to make the plugin functional on your site.
I remember purchasing my first premium SEO plugin and spending twenty minutes trying to figure out why it wasn’t in the WordPress directory search. This upload method would have saved me all that frustration if I’d known about it from the start.
Method 3: Installing Plugins via FTP (Advanced Method)
The FTP (File Transfer Protocol) method is the most technical of the three installation approaches, but it’s incredibly useful in specific situations—like when your WordPress dashboard is inaccessible due to a plugin conflict, your hosting provider has disabled the dashboard installation feature, or you’re dealing with file permission issues.
To use this method, you’ll need an FTP client like FileZilla (which is free) and your FTP credentials from your web hosting provider. These credentials typically include a hostname (often your domain name or an IP address), username, password, and port number (usually 21).
Download and extract the plugin ZIP file on your computer—unlike the upload method, you do need to unzip it for FTP installation. You’ll get a folder containing the plugin files.
Open your FTP client and enter your connection credentials. Once connected, navigate to the following directory on your server: /wp-content/plugins/. This is where all WordPress plugins are stored.
Upload the entire extracted plugin folder into the plugins directory. The upload time varies based on the plugin size and your internet speed, but most plugins upload within a minute or two.
After uploading, the plugin files are on your server but not yet activated. Go to your WordPress dashboard, navigate to Plugins > Installed Plugins, and you’ll see your newly uploaded plugin in the list. Click “Activate” to make it functional.
Comparing the Three Installation Methods
Each installation method has its place, and understanding when to use each one will save you time and frustration. Let’s break down the key differences:
| Criteria | Dashboard Method | ZIP Upload | FTP Method |
|---|---|---|---|
| Technical Difficulty | Beginner-friendly | Easy | Advanced |
| Plugin Source | WordPress directory only | Any ZIP file | Any plugin files |
| Time Required | 30 seconds | 1-2 minutes | 3-5 minutes |
| Requires Additional Software | No | No | Yes (FTP client) |
| Works When Dashboard Fails | No | No | Yes |
| Best For | Most users, free plugins | Premium plugins | Troubleshooting, developer use |
For 95% of situations, the dashboard method is your best choice. It’s fast, safe, and includes automatic security checks from WordPress. The ZIP upload method becomes necessary when dealing with premium plugins or those not hosted in the official directory. Reserve the FTP method for emergencies or when you’re comfortable with server-level file management.
Essential Safety Checks Before Installing Any Plugin
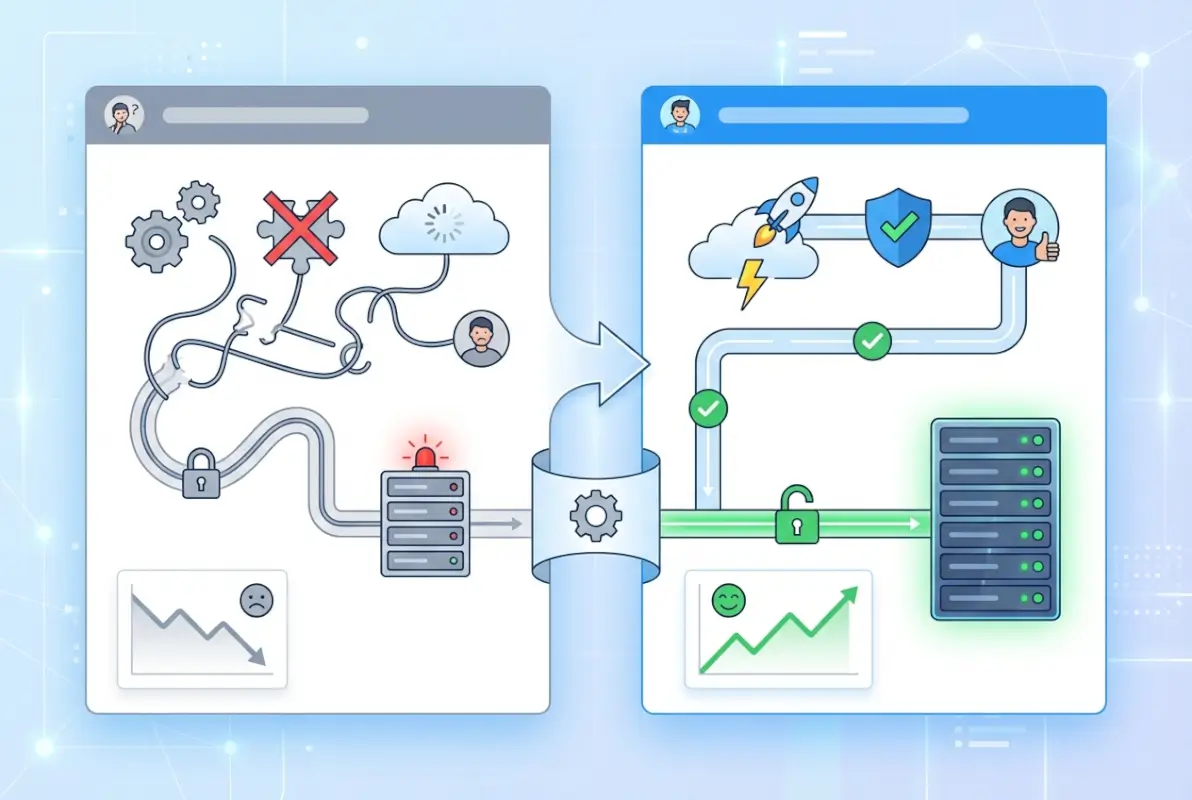
Installing plugins carelessly is one of the fastest ways to compromise your WordPress site’s security, performance, or stability. I’ve seen websites completely break because someone installed an outdated plugin that conflicted with their theme, it’s not pretty and can take hours to fix.
Before clicking that install button, run through this safety checklist:
Check the last update date. If a plugin hasn’t been updated in over two years, that’s a red flag. WordPress releases regular updates, and plugins need to keep pace to maintain compatibility and security. WordPress core releases happen frequently, and outdated plugins often become security vulnerabilities.
Review the active installation count. While a low number doesn’t automatically mean a plugin is bad, higher active installation numbers generally indicate more community testing and a more stable codebase. A plugin with 5 million active installations has been tested in countless different environments.
Read recent reviews. Don’t just look at the overall star rating, scroll down and read actual user reviews from the past few months. Are people reporting conflicts with specific themes or other popular plugins? Are there complaints about poor support or bugs? These insights are invaluable.
Verify WordPress compatibility. Each plugin listing shows which WordPress versions it has been tested with. If you’re running WordPress 6.0 but the plugin was only tested up to version 5.5, proceed with caution. It might still work, but there’s a higher risk of issues.
Check the support forum responsiveness. Click through to the plugin’s support forum and see how actively the developers respond to issues. A plugin with an engaged developer team is more likely to receive timely security patches and compatibility updates.
Post-Installation: Configuring and Managing Your Plugins
Installation is just the beginning. Many beginners think clicking “Activate” is the finish line, but proper plugin configuration is where the real value comes in. A poorly configured plugin can be worse than no plugin at all.
After activation, most plugins will either redirect you to a setup wizard or add a new menu item to your WordPress dashboard. Look for the plugin’s name in the left sidebar menu, or check under the “Settings” menu where many plugins place their configuration pages.
Take time to explore all the plugin’s settings before assuming it’s working correctly. Some plugins have sensible defaults that work immediately, but others require you to enable specific features, connect to external services, or configure important security settings.
Here’s a common mistake: activating multiple plugins that do similar things. If you install three different SEO plugins, they’ll likely conflict with each other, potentially canceling out their benefits or even harming your site’s performance. Stick to one plugin per function whenever possible.
Keep your plugins updated. WordPress makes this easy by showing update notifications in your dashboard. When you see that little red number next to “Plugins” in your sidebar, it’s showing how many updates are available. Click through and update them regularly, but consider doing this during low-traffic periods just in case something goes wrong.
Common Plugin Installation Problems and Solutions
Even when following instructions perfectly, you might encounter issues during plugin installation. Here are the most common problems and their solutions:
“Destination folder already exists” error: This happens when you try to install a plugin that’s already on your server. You’ll need to either delete the existing plugin first or rename its folder via FTP before installing the new version.
“Could not create directory” error: This indicates a file permissions problem on your server. Your WordPress installation doesn’t have write access to the plugins folder. Contact your hosting provider to fix the folder permissions, or use FTP to set the wp-content/plugins folder permissions to 755.
“The uploaded file exceeds the upload_max_filesize directive” error: Your server has a file size limit that’s smaller than the plugin you’re trying to upload. You’ll need to either increase your PHP upload limits (your host can do this) or use the FTP installation method instead.
White screen after activation: This usually means the plugin has a fatal error or conflicts with your theme or another plugin. Access your site via FTP, navigate to wp-content/plugins, and rename the plugin’s folder to deactivate it. Then contact the plugin developer for support.
“Plugin could not be activated because it triggered a fatal error”: This error message usually includes details about what went wrong. Common causes include PHP version incompatibility or missing server requirements. Check the plugin’s documentation for minimum requirements and verify your server meets them.
How Many Plugins Should You Install?
There’s a persistent myth in the WordPress community that you should limit yourself to a specific number of plugins—I’ve heard people say “never install more than 10 plugins” or similar arbitrary rules. The truth is more nuanced than that.
The number of plugins doesn’t matter nearly as much as the quality of those plugins. Ten lightweight, well-coded plugins will have minimal impact on your site’s performance, while a single bloated, poorly optimized plugin can slow your site to a crawl.
| Site Type | Typical Plugin Range | Common Plugin Categories |
|---|---|---|
| Simple Blog | 8-15 plugins | SEO, security, contact form, social sharing |
| Business Website | 15-25 plugins | Above plus booking, forms, page builder |
| E-commerce Store | 25-40 plugins | Above plus payment gateways, shipping, inventory |
| Membership Site | 20-35 plugins | Above plus membership, content restriction, forums |
Focus on these priorities instead of counting plugins:
Eliminate redundancy. Don’t install five different plugins that optimize images—pick one good one. Don’t run three backup plugins simultaneously—one reliable option is enough.
Audit regularly. Every few months, review your installed plugins and ask yourself: “Am I actually using this?” If you activated something six months ago for a specific project that’s now complete, deactivate and delete it.
Measure performance impact. Use tools like GTmetrix or Query Monitor to identify plugins that are slowing your site down. Sometimes you’ll be surprised which plugins consume the most resources.
Consider built-in functionality. Before installing a plugin, check if your theme already includes similar functionality. Many modern themes have built-in social sharing buttons, related posts features, and portfolio layouts that don’t require separate plugins.
Frequently Asked Questions
How do I know if a WordPress plugin is safe to install?
Check the plugin’s rating, number of active installations, and last update date in the WordPress directory. Plugins with millions of active installs, regular updates within the past few months, and ratings above 4 stars are generally safe. Always read recent reviews for any reported security issues or conflicts. Avoid plugins that haven’t been updated in over two years.
Can I install a plugin without affecting my live website?
Yes, you can test plugins on a staging site before deploying them to your live website. Many hosting providers offer one-click staging environments that clone your live site. Install and test the plugin on staging first, and if everything works correctly, then install it on your live site. This approach prevents visitors from experiencing any issues caused by plugin conflicts or errors.
What should I do if a plugin breaks my WordPress site?
Access your site via FTP or your hosting control panel’s file manager. Navigate to wp-content/plugins and rename the problematic plugin’s folder—adding “-disabled” to the folder name works well. This immediately deactivates the plugin without accessing your WordPress dashboard. Your site should then become accessible again, and you can delete the plugin or contact the developer for support.
How often should I update my WordPress plugins?
Update plugins at least monthly, but ideally within a week of new updates being released. Plugin updates often include critical security patches that protect your site from vulnerabilities. Before updating, create a backup of your site. If you’re running a high-traffic business site, schedule updates during low-traffic periods and test functionality immediately after updating.
Can I install plugins if I’m using WordPress.com?
Plugin installation is only available on WordPress.com Business and eCommerce plans. The free, Personal, and Premium WordPress.com plans do not allow plugin installation due to security and maintenance considerations. If you need plugin functionality on a budget, consider switching to self-hosted WordPress.org, which allows unlimited plugin installations on any hosting plan.
What’s the difference between activating and installing a plugin?
Installing a plugin downloads the plugin files to your WordPress site but doesn’t make it functional yet. It’s like downloading an app to your phone but not opening it. Activating the plugin actually turns it on and enables its functionality on your website. You must both install and activate a plugin for it to work—installation alone won’t provide any features.
Should I install free or premium WordPress plugins?
Start with free plugins from the WordPress directory for most common needs—many are professionally developed and perfectly adequate. Consider premium plugins when you need advanced features, dedicated support, or specialized functionality. Premium doesn’t always mean better; evaluate based on your specific requirements, budget, and the quality indicators like reviews and update frequency rather than price alone.
How do I find the right plugin for my specific needs?
Use the WordPress plugin directory search with specific keywords describing your need, then filter results by popularity and ratings. Read the plugin descriptions thoroughly to ensure they match your requirements. Check the screenshots and reviews to see if the interface and functionality align with your expectations. Consider testing multiple similar plugins on a staging site to find the best fit.
Can installing too many plugins slow down my website?
Yes, but the number matters less than plugin quality. Each plugin adds code that must execute when pages load, but well-optimized plugins have minimal performance impact. Poorly coded plugins can significantly slow your site even if you only have a few installed. Use performance monitoring tools to identify resource-heavy plugins and replace them with more efficient alternatives when possible.
What happens to plugin data if I deactivate or delete a plugin?
Deactivating a plugin turns it off but keeps all settings and data intact—you can reactivate it later with everything preserved. Deleting a plugin removes the plugin files and typically removes all associated data, including settings and database entries. Some plugins ask if you want to keep or delete data during removal. Always backup your site before deleting plugins that store important content.
Taking Your WordPress Site to the Next Level
Installing plugins is more than just clicking buttons—it’s about strategically enhancing your website’s functionality while maintaining performance, security, and user experience. The installation process itself takes seconds, but choosing the right plugins and managing them properly is an ongoing skill that separates struggling WordPress sites from thriving ones.
Start with the basics: install only what you truly need, prioritize quality over quantity, and always verify a plugin’s reputation before installation. As you become more comfortable, you’ll develop an instinct for spotting well-maintained plugins and avoiding problematic ones.
- Audit your current plugins and remove any you’re not actively using
- Check for available updates and install them (after backing up)
- Identify one area where your site needs improvement and research the top 3 plugins that address it
- Create a staging environment for testing new plugins before going live
Remember that WordPress is constantly evolving, and the plugin ecosystem evolves with it. What works today might need replacement tomorrow as better solutions emerge. Stay curious, keep learning, and don’t be afraid to experiment on a staging site. Your WordPress site is a reflection of the effort you put into maintaining it, and proper plugin management is a cornerstone of that maintenance.
Now that you understand how to install plugins safely and effectively, you’re equipped to transform your basic WordPress site into exactly what you envision—whether that’s an online store, a membership community, a booking system, or something entirely unique. The possibilities are genuinely limitless, and they’re just a few clicks away.
Was this article helpful?