How to Install a Directory Theme in WordPress: 5 Simple Steps

Generating summary...
You’ve just purchased a sleek directory theme for your WordPress site—congratulations! Now comes the moment of truth: actually getting it installed and running without breaking a sweat (or your website). If you’ve ever felt that pang of anxiety before uploading a theme, wondering whether you’ll see a beautiful directory or a white screen of death, you’re not alone. Here’s what most installation guides won’t tell you upfront: the real secret to a smooth directory theme installation isn’t just following steps—it’s understanding why each step matters and preparing for the inevitable hiccups before they happen.
Directory themes are uniquely powerful tools in the WordPress ecosystem, transforming a basic blog platform into a sophisticated listing engine for local businesses, professional services, or niche communities. With WordPress powering roughly 43% of all websites and dominating the CMS landscape, the directory theme market has exploded with options—but that abundance also means more complexity during setup. Unlike standard themes, directory themes often require specific plugins, server configurations, and data structures to work properly. Skip one prerequisite check, and you might spend hours troubleshooting.
TL;DR – Quick Takeaways
- Preparation is everything – verify PHP version, WordPress version, and backup your site before touching anything
- Multiple installation methods exist – dashboard upload works for most users, but FTP remains crucial for troubleshooting
- Directory themes need complementary plugins – listing management, maps, and payment processors aren’t optional extras
- Demo content accelerates setup – importing sample listings gives you a functional template to customize
- Post-install testing prevents disasters – check mobile responsiveness, search functionality, and form submissions immediately
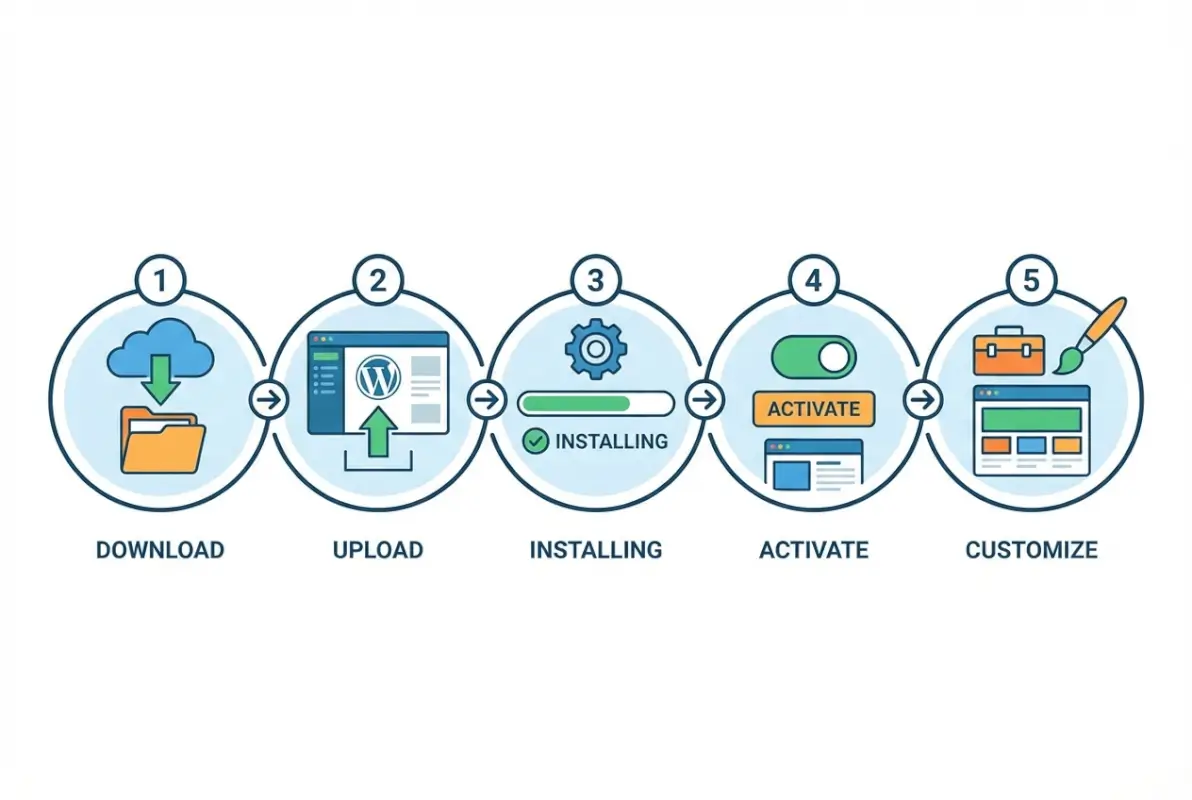
Step-by-Step Guide Overview
Before diving into the actual installation, let’s establish what you need and why preparation separates successful deployments from frustrating debugging sessions. Directory themes are fundamentally different from portfolio or blog themes because they manage complex data relationships—listings with categories, locations, reviews, and often payment systems. This means your hosting environment needs to meet higher technical requirements than a simple brochure site.
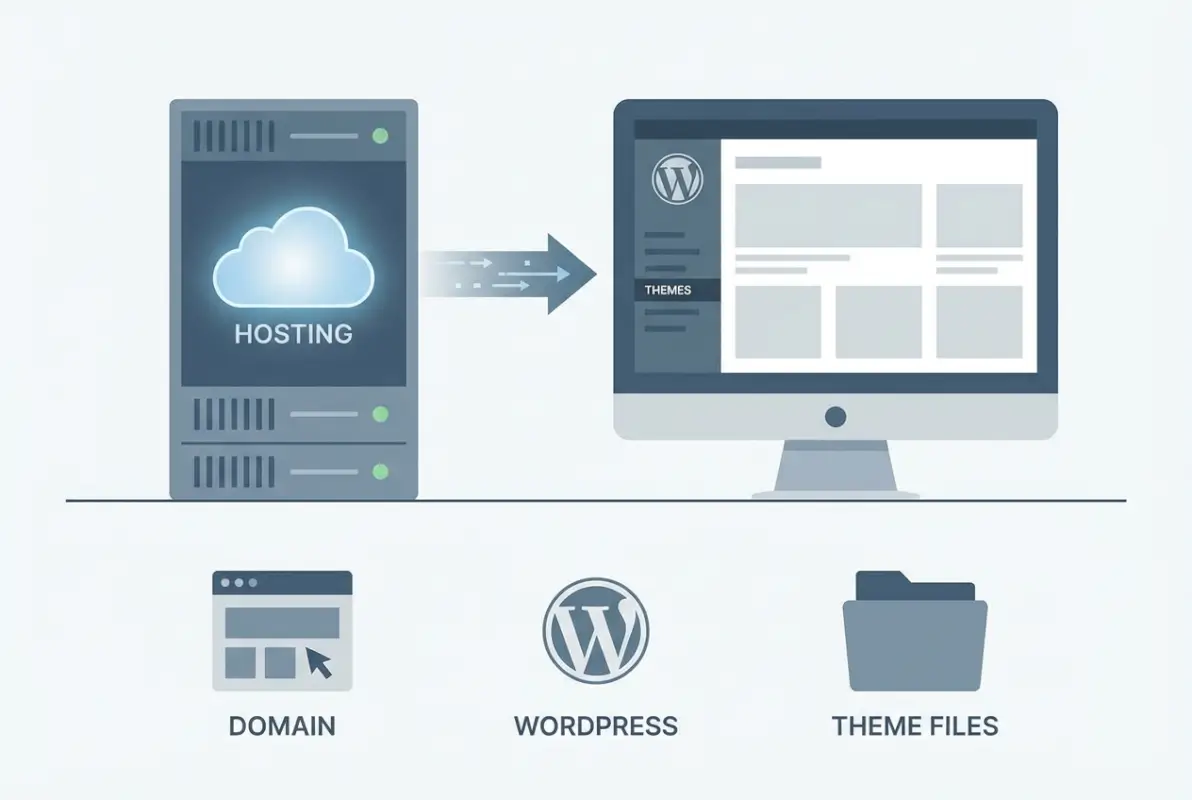
First, ensure you have an active WordPress installation running on a hosting plan with adequate resources. Shared hosting can work for smaller directories, but if you’re planning to scale beyond 500 listings, consider managed WordPress hosting or VPS options. Your theme package should be downloaded from a legitimate marketplace or directly from the developer—never use nulled or pirated themes, as they often contain malware or backdoors that compromise your entire site.
What You’ll Need
Gather these essentials before starting the installation process. Having everything ready prevents interruptions mid-installation, which can sometimes corrupt theme files or create half-configured states that are difficult to diagnose:
- Active WordPress installation (version 6.0 or newer recommended)
- Directory theme package (ZIP file from vendor)
- Admin access to WordPress dashboard and hosting control panel
- FTP/SFTP credentials (as backup installation method)
- Recent backup of your site and database
- Theme documentation (usually PDF or online knowledge base)
- License key (for premium themes requiring activation)
Quick Prerequisites and Compatibility Checks
Directory themes typically require PHP 7.4 or higher, with PHP 8.0+ becoming the new standard. Check your hosting control panel or use a plugin like Display PHP Version to confirm. Many directory themes also depend on specific PHP extensions like GD Library for image processing, cURL for API connections, and sufficient memory limits (256MB minimum, 512MB recommended).
WordPress version compatibility matters more than most people realize. While WordPress maintains excellent backward compatibility, directory themes often leverage newer features like the REST API or block editor integration. Running WordPress 5.8 or older might cause theme features to malfunction even if the theme technically installs. Update WordPress core before proceeding unless your hosting environment prevents updates.
Step 1 – Acquire and Prepare Your Directory Theme
The source of your directory theme directly impacts security, support quality, and long-term viability. Premium marketplaces like ThemeForest, TemplateMonster, and specialized directory theme shops offer buyer protection and verified code quality. Free themes from the official WordPress.org repository undergo code review, making them safer than random download sites. I’ve seen too many directory projects stall because someone grabbed a “free” premium theme from a shady forum, only to discover critical features didn’t work or worse, the theme injected spam links.
Once you’ve downloaded your theme, don’t unzip it yet if you’re planning to use the WordPress dashboard upload method—WordPress needs the intact ZIP file. However, do verify the download completed successfully by checking the file size matches what the vendor specified. Corrupted downloads are surprisingly common on slower connections and cause cryptic installation errors.
Where to Obtain a Directory Theme
Reputable sources for directory themes include:
- ThemeForest/Envato Market – largest premium marketplace with buyer reviews and support guarantees
- WordPress.org Theme Directory – free themes vetted by WordPress security team
- Developer direct sales – StudioPress, Elegant Themes, and specialized directory theme companies
- Niche marketplaces – TemplateMonster, MyThemeShop for specific design styles
Always purchase through official channels even if third-party resellers offer lower prices. The support and updates included with legitimate purchases far outweigh any upfront savings. Most quality directory themes cost $60-$200 for a regular license, which seems expensive until you consider the hundreds of development hours embedded in that code.
Verify Theme Requirements
Every professional directory theme includes a requirements specification in its documentation. This isn’t optional reading—it’s the roadmap to successful installation. Look for minimum PHP version (usually 7.4+), required WordPress version (typically 5.9+), necessary PHP extensions, and recommended server configurations. Some directory themes also specify minimum MySQL or MariaDB versions because they use advanced query features for filtering listings.
Backup Strategies Before Install
Never—and I mean never—install a new theme without a complete backup, even on a fresh WordPress installation. Themes can conflict with existing content in unexpected ways, and having a restore point gives you confidence to experiment. Use a plugin like UpdraftPlus, BackupBuddy, or your hosting provider’s backup tool to create a full site snapshot including database, uploads folder, and WordPress core files.
Store the backup somewhere other than your web server—cloud storage or local download. If the installation goes sideways and crashes your site, you can’t access a backup stored on that same broken server. This might sound paranoid, but I’ve personally rescued three directory projects this year where site owners skipped backups and faced complete data loss when installations failed catastrophically.
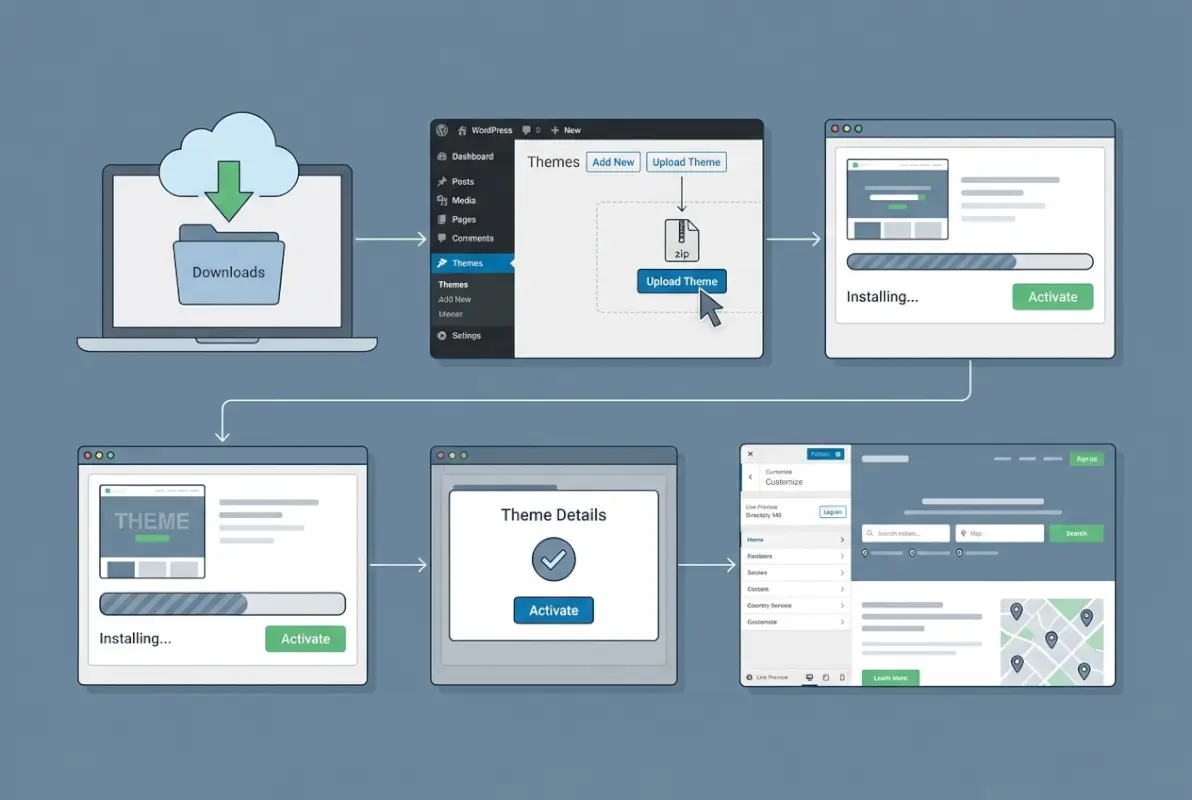
Step 2 – Install the Directory Theme (Manual ZIP Upload or FTP)
Now we arrive at the actual installation process. WordPress offers two primary methods for installing themes: the convenient dashboard upload and the more technical FTP approach. Most users should start with dashboard upload because it’s faster and handles file permissions automatically. However, understanding FTP installation is crucial for troubleshooting when upload limits or server restrictions block the dashboard method.
The dashboard method works wonderfully until you encounter a theme ZIP file larger than your hosting’s upload limit (typically 2MB-64MB depending on host). Directory themes are often hefty because they bundle sample content, multiple design demos, and extensive documentation within the package. If your theme weighs in at 80MB and your host caps uploads at 32MB, you’ll need FTP access regardless of your comfort level with file managers.
Install via WordPress Dashboard
This method is straightforward but requires your theme ZIP file be under your server’s upload limit. Navigate to Appearance → Themes in your WordPress dashboard, then click “Add New” at the top. You’ll see an “Upload Theme” button—click it and select your ZIP file. WordPress will extract the theme, verify the files, and add it to your available themes list automatically.
The process typically takes 30-90 seconds depending on theme size and server speed. Don’t navigate away or close the browser during upload, as this can corrupt the installation. If you see a success message, great! If you encounter an error about upload size, missing files, or broken archive, proceed to the FTP method instead of repeatedly attempting dashboard upload.
| Installation Method | Best For | Limitations |
|---|---|---|
| Dashboard Upload | Beginners, themes under server upload limit | File size restrictions, requires admin access |
| FTP/SFTP Method | Large themes, troubleshooting, manual control | Requires FTP client, must manually set permissions |
| Web Host File Manager | Users without FTP client, medium-sized themes | Slower than FTP, interface varies by host |
Alternative: FTP/SFTP Method to /wp-content/themes
For FTP installation, first unzip your theme package on your local computer. Inside you should find a folder named after your theme (for example, “directory-pro”). Using an FTP client like FileZilla, Cyberduck, or WinSCP, connect to your hosting server using credentials from your host. Navigate to the /wp-content/themes/ directory in the remote server pane.
Upload the unzipped theme folder into the themes directory. This bypasses WordPress entirely and places the theme files directly where they need to be. Once the upload completes (watch for zero remaining files in your FTP client’s queue), the theme will appear in your WordPress dashboard under Appearance → Themes without any additional steps. This method also works for fixing corrupted installations by replacing specific theme files.
Common Issues and Quick Fixes
If the dashboard upload fails with “The uploaded file exceeds the upload_max_filesize directive in php.ini,” you need to either use FTP or ask your host to increase the limit. Some hosts allow you to create a custom php.ini file in your WordPress root directory to override this, while others require a support ticket. For managed WordPress hosting, upload limits are usually generous (100MB+) so this is rarely an issue.
File permission errors during FTP upload usually mean your theme folder landed in /wp-content/themes/ with incorrect permissions (often 600 or 644 when it needs 755). Set the theme folder and all subdirectories to 755, and files to 644. Most FTP clients let you right-click the folder and change permissions recursively, saving you from manually updating hundreds of files.
Step 3 – Activate and Basic Configuration
With your directory theme successfully uploaded, it’s time to activate it and verify basic functionality before diving into advanced customization. This step seems simple—just click “Activate”—but there’s actually quite a bit happening behind the scenes. Directory themes often run activation hooks that create custom post types, register taxonomies, set default options, and sometimes even download additional required files from the theme developer’s server.

Before clicking that activate button, take one more look at your current site if it has existing content. Switching themes always changes your site’s appearance, but directory themes make more dramatic structural changes because they introduce listing post types, location taxonomies, and custom search functionality. Users visiting during the transition might see a broken layout for a few minutes while you complete initial configuration.
Activate the Theme in Appearance → Themes
Navigate to Appearance → Themes in your WordPress dashboard where you’ll see your newly installed directory theme as an option. Hover over the theme thumbnail and click “Activate.” WordPress will immediately switch your site to the new theme, running any activation scripts the theme developer included. This process usually completes in 2-5 seconds, though some themes take longer if they’re downloading demo content or configuring default settings.
After activation, you’ll likely see a welcome screen or setup wizard provided by the theme developer. Don’t ignore this—it often contains critical steps like installing required plugins, importing demo content, and setting recommended permalinks. Modern directory themes use setup wizards to streamline configuration, asking you questions about your directory type (business, restaurant, real estate) to customize initial settings appropriately.
Confirm Responsive Preview and Basic Site Identity
Immediately after activation, visit your site’s frontend in a new browser tab. Check that the theme loaded without PHP errors (white screen or error messages indicate problems). Navigate through existing pages to verify the layout looks reasonable even before customization. Directory themes should be responsive by default—test this by resizing your browser window or using your browser’s device emulation tools.
Next, confirm your site identity settings survived the theme switch. Go to Settings → General and verify your site title, tagline, and WordPress URL are correct. Some themes modify these during activation, though they shouldn’t. This is also the time to review Settings → Reading to ensure your homepage displays what you want—directory themes often work best with a static front page rather than latest posts.
Basic Setup: Header/Footer, Menus, and Home Page Settings
Directory themes typically include customizable header and footer areas where you’ll add your logo, contact information, and navigation menus. Access these through Appearance → Customize, which launches WordPress’s live customization interface. The exact options vary by theme, but look for sections labeled Site Identity, Header Builder, or Layout Options.
Creating navigation menus is crucial for directory sites because users need intuitive ways to browse categories, locations, and listing types. Go to Appearance → Menus to create your primary navigation. Directory themes often support multiple menu locations (main navigation, footer menu, mobile menu, listing actions menu) so consult the theme documentation to understand where each menu appears.
Step 4 – Install Recommended Plugins for Directory Functionality
Here’s where directory themes diverge significantly from standard WordPress themes: they’re fundamentally incomplete without their plugin ecosystem. Unlike a blog theme that works fine with just WordPress core, directory themes depend on specialized plugins for listing submission forms, advanced search filters, map integration, payment processing, and review systems. Some themes bundle these plugins and prompt you to install them via setup wizards, while others require manual installation from the WordPress plugin directory.

The plugin dependency model exists because WordPress plugin guidelines prohibit themes from including certain functionality directly in theme code. Features like payment processing, user-generated content management, and complex data manipulation must live in plugins so they persist when users change themes. This separation protects your directory data—when you eventually switch themes or update your current one, your listings and user data remain intact in the plugin layer.
Directory-Specific Plugins
Your directory theme documentation will specify required and recommended plugins. Common requirements include listing management plugins (often the theme developer’s own plugin), payment gateways (Stripe, PayPal, WooCommerce integration), mapping services (Google Maps, Mapbox, Leaflet), and advanced search functionality. Install required plugins first—your theme likely won’t function properly without them.
For business directories, you’ll typically need plugins that handle business listing submissions, category management, location-based filtering, and contact forms. Restaurant directories require reservation systems and menu builders. Real estate directories need property listing tools with bedroom/bathroom filters. The theme you chose should align with your directory type and include compatible plugins.
- Listing Management – core plugin for creating, editing, and displaying directory entries
- Advanced Search & Filters – enables users to narrow results by category, location, price, ratings
- Google Maps Integration – displays listings on interactive maps with markers and info windows
- Payment Gateways – processes featured listing fees, subscriptions, or claim fees
- Review & Rating System – allows users to rate and review listings
- User Dashboard – gives listing owners a frontend interface to manage their entries
Essential Security and Performance Plugins
Beyond directory-specific functionality, every WordPress site needs security hardening and performance optimization. Directory sites face unique challenges because they accept user-generated content (spam risk) and serve database-intensive queries (performance bottleneck). Install a security plugin like Wordfence or Sucuri to monitor file changes, block malicious login attempts, and scan for vulnerabilities.
Performance plugins become critical as your directory grows beyond 100 listings. Caching plugins like WP Rocket, W3 Total Cache, or LiteSpeed Cache dramatically improve page load times by serving static HTML instead of querying the database for every page view. Directory sites benefit enormously from object caching (Redis or Memcached) which stores listing data in memory for instant retrieval.
Image optimization is another must-have for directories because listing photos consume massive bandwidth. Plugins like ShortPixel, Imagify, or Smush automatically compress uploaded images without visible quality loss. Some also convert images to next-gen formats like WebP, which can reduce file sizes by 30-50% compared to JPEG. When you’re serving thousands of listing images monthly, this optimization directly impacts hosting costs and user experience.
Plugins Provided by the Theme Author
Premium directory themes usually include proprietary plugins that extend theme functionality beyond what’s possible in the theme files themselves. These bundled plugins aren’t available in the WordPress.org directory, so you’ll install them via your theme’s dashboard interface or by uploading ZIP files. Common examples include demo content importers, layout builders specific to the theme, and licensing management plugins.
Activate bundled plugins immediately after theme activation because the theme likely expects them to be present. Some themes gracefully degrade if bundled plugins are missing, while others display error messages or broken layouts. The theme documentation should clearly identify which plugins are absolutely required versus nice-to-have enhancements. When in doubt, install everything the theme developer recommends—you can always deactivate optional plugins later if they don’t fit your use case.
Step 5 – Customize, Import Data, and Test
With your directory theme active and essential plugins installed, you now have a functional skeleton that needs customization to match your brand and directory goals. This final step separates amateur-looking directories from professional platforms that users trust with their business information. The customization phase includes visual styling, importing demo content to understand the theme’s capabilities, and rigorous testing to catch issues before real users encounter them.
Many directory site owners rush through this step, eager to start accepting listings. That’s a mistake because first impressions matter immensely in the directory space. Users evaluate your directory’s credibility within seconds of landing on your homepage. If they see default placeholder text, stock photos, or broken features, they’ll assume the directory is abandoned or unprofessional. Spend time getting the foundation right before promoting your directory or accepting paid listings.
Theme Customization via WordPress Customizer or Theme Options Panel
Access the WordPress Customizer through Appearance → Customize to modify colors, fonts, layouts, and widget areas while seeing changes in real-time. Directory themes often extend the Customizer with directory-specific panels for search settings, listing card layouts, map configurations, and filter displays. Modern themes also integrate with page builders like Elementor, Beaver Builder, or their own proprietary builders for drag-and-drop customization.
Start with the basics: upload your logo, choose brand colors, and select typography that matches your industry. Professional service directories benefit from conservative serif fonts and blue/gray color schemes that convey trust. Restaurant directories can use warmer colors and more casual fonts. Your homepage hero section is prime real estate—use a high-quality banner image and compelling headline that immediately communicates your directory’s value proposition.
Some directory themes include separate options panels outside the WordPress Customizer, often labeled “Theme Settings” or “Directory Options” in the admin menu. These panels typically control more technical settings like API keys for Google Maps, payment gateway credentials, email notification templates, and listing submission workflows. Keep your theme documentation open while configuring these options because incorrect settings can break core functionality.
Import Sample Data If Included
Demo content importers are among the most valuable features premium directory themes offer. They populate your site with sample listings, categories, locations, and pages that demonstrate how the theme is meant to look and function. Importing demo content gives you a working template to customize rather than building everything from scratch, saving dozens of hours of setup time.
Before importing, understand that demo content usually includes placeholder images, lorem ipsum text, and fake business information. You’ll need to replace all of this with real content eventually, but having the structure in place helps you visualize the final product. Some themes offer multiple demo variants (business directory, restaurant directory, medical directory) so choose the one closest to your use case.
Accessibility, Performance Checks, and Mobile Responsiveness
Accessibility matters both for ethical reasons and SEO impact. Test your directory with keyboard navigation (Tab key should move through all interactive elements), verify sufficient color contrast between text and backgrounds, and ensure form labels are properly associated with inputs. Screen reader users represent a significant portion of local service searchers, especially for medical and legal directories. The WebAIM WAVE tool provides free accessibility analysis of any public webpage.
Performance directly impacts user satisfaction and search rankings. Use Google PageSpeed Insights, GTmetrix, or WebPageTest to analyze your directory’s load times. Directory sites should achieve Largest Contentful Paint under 2.5 seconds and Time to Interactive under 3.5 seconds on mobile connections. If your scores are poor, common culprits include unoptimized images, missing caching, excessive plugin overhead, or cheap shared hosting insufficient for database-heavy directory queries.
Mobile responsiveness testing requires checking actual devices, not just browser emulation tools. Borrow phones running iOS and Android to verify your search filters collapse into usable mobile interfaces, listing cards remain readable at small screen sizes, and map interactions work with touch gestures. About 65-70% of local directory searches happen on mobile devices, so a broken mobile experience will tank your user engagement regardless of how beautiful your desktop site looks.
Final Testing Checklist
Before declaring your directory installation complete, systematically test every core feature users will interact with. This checklist prevents embarrassing failures when you announce your launch or start driving traffic:
- Listing submission forms – submit a test listing from the frontend, verify all fields save correctly
- Search and filters – search by keyword, category, location, and combined filters
- Map functionality – confirm listings appear as markers with accurate coordinates
- User registration – create a test user account and verify email confirmations arrive
- Payment processing – run a test transaction if you’re charging for featured listings
- Review submissions – leave a test review and verify moderation workflow
- Contact forms – submit inquiries through listing contact forms, check email delivery
- Mobile navigation – browse the directory on smartphone to verify all features work
- Page load speed – test with PageSpeed Insights, aim for scores above 70/100
Post-Install Best Practices
The installation is complete, but your work isn’t finished—it’s just beginning. The difference between directories that thrive and those that languish often comes down to post-install optimization and maintenance. These practices ensure your directory performs well technically, ranks in search engines, and provides reliable service as you add more listings and attract more users. Think of this phase as the foundation maintenance that prevents future catastrophes.
SEO Basics for Directory Sites
Directory sites have unique SEO advantages because they naturally create hundreds or thousands of location-specific, keyword-rich pages. However, you need to optimize the technical foundation to capitalize on this content advantage. Install an SEO plugin like Yoast SEO, Rank Math, or All in One SEO to manage meta descriptions, title tags, and XML sitemaps. Directory themes should automatically generate proper heading structures, but verify your listing pages use H1 tags for business names and H2/H3 tags for section headings.
Schema markup is crucial for directory sites because it helps search engines understand your listing data and potentially display it in rich snippets. Implement LocalBusiness schema for local directories, Product schema for marketplace directories, or specialized schemas for restaurants, medical practices, or legal services. Many directory themes include schema markup by default, but verify implementation using Google’s Rich Results Test tool. Proper schema can result in your listings appearing with star ratings, addresses, and phone numbers directly in search results.
Speaking of directory SEO impact, internal linking between listings, categories, and location pages signals to search engines how your content relates. Configure your theme to automatically link listings to their categories and locations. Create location landing pages (like “Dallas Restaurants” or “Seattle Plumbers”) that aggregate listings and provide unique content about that geographic area. This location-focused content strategy is how directories compete with national brands for local search traffic.
Security Hardening and Backups
Directory sites accepting user registrations and submissions face elevated security risks. Implement these hardening measures immediately after installation: change the default “admin” username, enforce strong passwords for all user roles, limit login attempts to block brute force attacks, and enable two-factor authentication for administrator accounts. Security plugins automate most of these configurations and provide ongoing monitoring for suspicious activity.
Schedule automated backups to run daily if your directory accepts new listings frequently, or weekly for slower-growing directories. Store backups in off-site locations like cloud storage (Dropbox, Google Drive, Amazon S3) separate from your web server. Test your backup restoration process at least once—I can’t stress this enough because backup plugins sometimes fail silently, and you only discover the backups are corrupted when you desperately need them after a hack or server failure.
| Security Measure | Priority | Implementation |
|---|---|---|
| SSL Certificate | Critical | Free via Let’s Encrypt, enable in hosting control panel |
| Two-Factor Authentication | Critical | Plugin-based (Wordfence, iThemes Security) |
| Automated Backups | Critical | Daily via UpdraftPlus or hosting backup tool |
| Firewall Rules | High | Security plugin or CloudFlare |
| Malware Scanning | High | Weekly automated scans via security plugin |
Ongoing Optimization Tips
As your directory grows, performance optimization becomes increasingly important. Enable object caching (Redis or Memcached) once you exceed 500 listings to reduce database load. Implement lazy loading for images so listing photos only load when users scroll down, reducing initial page weight by 40-60%. Consider a content delivery network (CDN) like Cloudflare or BunnyCDN to serve static assets from servers geographically closer to your users, dramatically improving international load times.
Monitor your directory’s technical health monthly using tools like Google Search Console (crawl errors, indexing status), GTmetrix (performance trends), and your hosting control panel (resource usage). These monitoring routines catch problems early, like a plugin consuming excessive CPU, a sudden spike in 404 errors indicating broken links, or declining search visibility signaling SEO issues. Proactive monitoring prevents small issues from becoming catastrophic failures that take your directory offline or tank your search rankings.
Documentation and Support Channels
Bookmark your theme developer’s documentation and support forum immediately after installation. When you encounter issues weeks or months later, you’ll struggle to remember where to find help. Premium themes typically include 6-12 months of support covering installation help, bug fixes, and usage guidance. Take advantage of this while it’s active—submit support tickets for anything confusing or broken, and save the responses for future reference.
Join WordPress communities specific to directory sites, such as forums on business directory platforms or Facebook groups for directory entrepreneurs. These communities provide invaluable real-world advice on monetization strategies, marketing tactics, and technical solutions that general WordPress forums can’t match. Learning from others who’ve already scaled directories saves you from repeating common mistakes and accelerates your growth trajectory.
Troubleshooting Common Scenarios
Even with perfect preparation and careful execution, directory theme installations sometimes go sideways. Understanding common failure modes and their solutions helps you quickly recover rather than panicking or abandoning the project. These troubleshooting scenarios come from real support tickets and forum posts—they’re the issues users actually encounter in the field, not hypothetical edge cases.
Theme Not Appearing or Activation Error
If your newly uploaded theme doesn’t appear in Appearance → Themes, the theme folder structure is likely incorrect. WordPress expects a style.css file with proper theme headers in the root of the theme folder. If you unzipped a “package” that contains documentation folders and the actual theme folder, you may have uploaded the wrong folder. Extract the ZIP locally and look for the folder containing style.css, functions.php, and template files—that’s the folder you need to upload.
Activation errors displaying PHP warnings or fatal errors usually indicate compatibility problems with your PHP version or missing server extensions. Copy the exact error message and search for it in the theme’s support forum—chances are others have encountered it. If the error mentions a specific PHP function or class, check with your host whether that PHP extension is enabled. Directory themes commonly require GD Library, cURL, and ZIP extensions which aren’t always enabled by default on budget hosting.
White Screen or Blank Listing Pages
The dreaded white screen of death typically results from PHP fatal errors that halt page execution. Enable WordPress debug mode by adding these lines to your wp-config.php file: define(‘WP_DEBUG’, true); define(‘WP_DEBUG_LOG’, true); define(‘WP_DEBUG_DISPLAY’, false);. This writes errors to /wp-content/debug.log without displaying them to site visitors. Review the log for specific error messages pointing to the problematic file or plugin.
Blank listing pages specifically often indicate permalink issues. Directory themes create custom post types for listings, and WordPress needs to regenerate rewrite rules for those custom post types to work. Go to Settings → Permalinks and click “Save Changes” without changing anything—this flushes rewrite rules. If listing pages still show 404 errors or blank screens, verify the listings custom post type is actually registered by checking for “Listings” in your WordPress admin menu.
Plugin Conflicts with Directory Features
Plugin conflicts are the most common cause of broken directory functionality after installation. Security plugins sometimes block listing submission forms thinking they’re malicious. Cache plugins occasionally serve stale pages showing old listing data. SEO plugins can conflict with theme-generated schema markup creating duplicate structured data. Systematically identify conflicts by deactivating all plugins except required directory plugins, verify functionality works, then reactivate plugins one at a time until the problem returns.
When you identify the conflicting plugin, check both plugins’ settings for compatibility options. Many security plugins let you whitelist specific form actions. Cache plugins offer exclusion rules to prevent caching dynamic listing pages. If settings adjustments don’t resolve the conflict, contact support for both plugins—developers often release compatibility patches once they’re aware of conflicts with popular themes.
Missing Styling or Layout Issues
If your directory theme appears with no styling—just plain text and unformatted content—CSS files aren’t loading properly. This typically happens when WordPress site URLs are misconfigured or when server file permissions prevent reading stylesheet files. Verify your WordPress URL and Site URL match in Settings → General (both should be identical and include https:// if you have SSL). Check file permissions on your theme folder and all subdirectories—folders should be 755, files should be 644.
Layout issues where sidebars appear below content or listing cards stack incorrectly usually trace to JavaScript errors preventing layout scripts from executing. Open your browser’s developer console (F12) and check for JavaScript errors in red. Common causes include jQuery conflicts from plugins loading multiple jQuery versions, or required JavaScript libraries not loading due to path issues. Clear all caches (browser, WordPress plugin, server-level) and hard refresh (Ctrl+F5) to rule out caching as the cause.
Frequently Asked Questions
Do I need a child theme for a directory theme?
Yes, using a child theme is strongly recommended if you plan to customize template files or functions.php. Child themes preserve your customizations when the parent theme updates. However, if you only customize through the WordPress Customizer or theme options panel without editing code, a child theme isn’t necessary since those settings survive theme updates.
Can I install a directory theme on a shared hosting plan?
Shared hosting works for smaller directories up to 1,000-2,000 listings, provided you choose a reputable host with adequate resources. Look for plans offering at least 2GB RAM, SSD storage, and PHP 8.0+ support. As your directory grows and attracts more concurrent users, you’ll eventually need to upgrade to managed WordPress hosting or VPS for better performance and reliability.
What are the essential plugins for a WordPress directory site?
Essential plugins include the theme developer’s listing management plugin, an advanced search and filtering plugin, Google Maps integration, a payment gateway for monetization, review and rating functionality, spam protection for user submissions, performance caching, and security hardening. Most directory themes specify required plugins in their documentation during installation.
How do I migrate a directory site to a new host?
Use a migration plugin like Duplicator, All-in-One WP Migration, or your host’s migration tool to create a complete site package including database, uploads, and theme files. Download the package, upload to your new host, and run the installer script. Update DNS records to point to the new host. Test thoroughly before canceling old hosting to ensure listings, maps, and payment processing all function correctly.
How can I optimize the directory’s SEO with schema and structured data?
Implement LocalBusiness schema for each listing including name, address, phone, hours, and coordinates. Use AggregateRating schema to display star ratings in search results. Create location-specific landing pages with unique content targeting “city + service” keywords. Generate XML sitemaps for listings and submit to Google Search Console. Many directory themes include built-in schema markup, but verify implementation with Google’s Rich Results Test tool.
What if the directory theme updates; will my data remain intact?
Listing data stored in custom post types and custom fields persists through theme updates because it lives in the WordPress database, not theme files. However, theme updates can break custom code modifications you’ve made directly to theme files. This is why using a child theme for customizations is critical—child themes remain untouched during parent theme updates, preserving your changes.
How do I test site performance after installation?
Use Google PageSpeed Insights to test both mobile and desktop performance, aiming for scores above 70. Run GTmetrix tests to analyze specific performance bottlenecks like large images or render-blocking resources. Test with WebPageTest using different geographic locations to verify international users receive acceptable load times. Check real user experience by browsing your directory on mobile devices with 4G connections.
Should I import demo content on my live site or staging site first?
Always import demo content on a staging site or fresh WordPress installation first. Demo imports add dozens of sample listings, pages, and settings that are difficult to completely remove. Once you’ve verified the demo content shows you how to structure your directory, you can either customize it in place or use it as a reference while building your live site from scratch with real content.
Why do my directory listings show 404 errors after activation?
This happens when WordPress hasn’t regenerated permalink rewrite rules for the new custom post types your directory theme registered. Go to Settings → Permalinks in WordPress admin and click “Save Changes” without modifying anything. This flushes and regenerates rewrite rules, which should resolve 404 errors on listing pages. If the problem persists, the theme may not have properly registered its custom post types.
Can I switch from one directory theme to another without losing listings?
It depends on how each theme stores listing data. If both themes use the same underlying listing plugin or compatible data structures, listings may transfer seamlessly. However, custom fields, taxonomies, and features specific to the old theme often don’t translate to the new theme. Before switching, export your listings as a backup, then test the new theme on a staging site to verify data compatibility before committing to the change on your live directory.
Ready to Launch Your Directory?
You’ve successfully installed your directory theme, configured essential settings, and tested core functionality. Now comes the exciting part—populating your directory with real listings and driving traffic. Remember that directory sites grow incrementally, your first 50 listings are the hardest to acquire because users want to see an established directory before contributing. Focus on manually adding high-quality seed listings in your target niche, then use those as social proof to attract organic submissions. Monitor your analytics weekly to understand which listing categories attract the most traffic, and double down on those areas. With the technical foundation solidly in place, you can now shift your energy to content strategy, SEO, and community building—the elements that transform a functional directory into an indispensable local resource.
Was this article helpful?