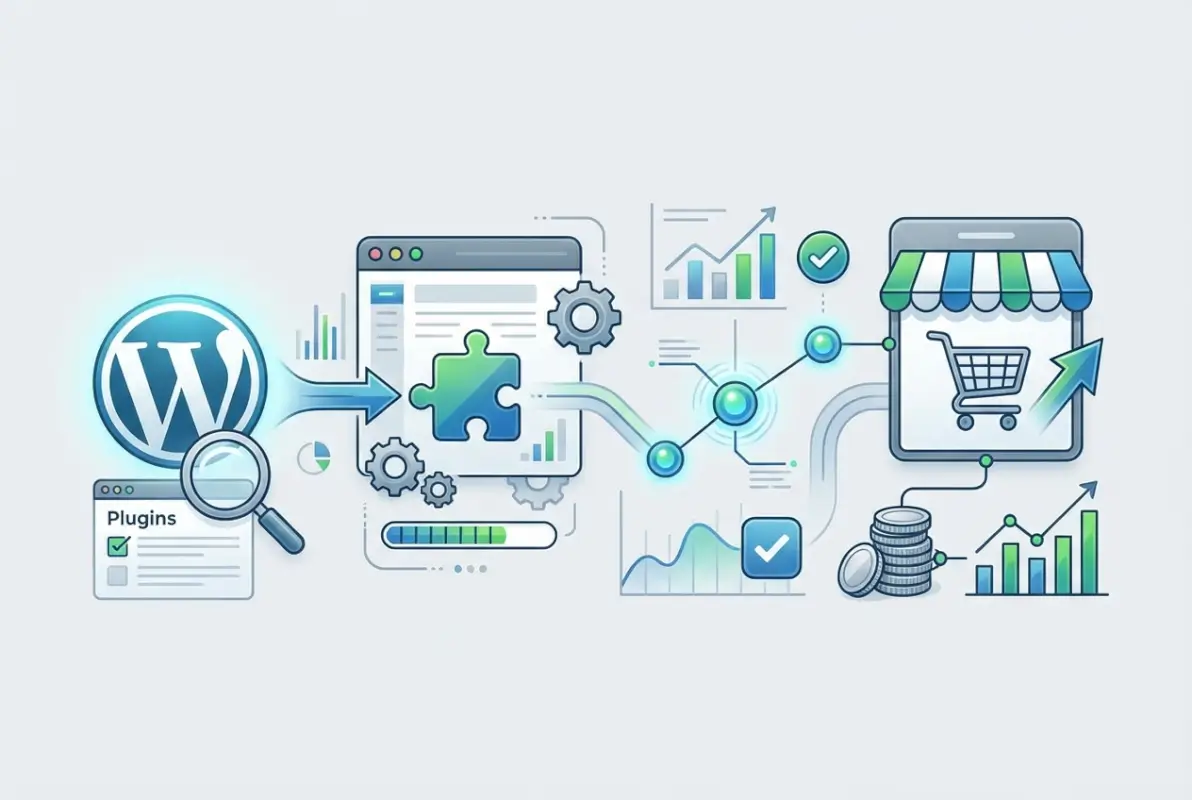
How to Install WooCommerce Plugin in WordPress: A Step-by-Step Guide
Generating summary...
TL;DR – Quick Takeaways
- Install WooCommerce in minutes – Use WordPress Admin’s automatic installation (Plugins → Add New → Search → Install → Activate)
- Setup wizard guides you – The onboarding wizard configures store basics, payments, and shipping automatically after activation
- Market leader for a reason – WooCommerce powers 33-40% of all e-commerce platforms globally with millions of active stores
- Prerequisites matter – Ensure PHP 7.4+, MySQL compatibility, and WordPress 6.8+ before installing
- Manual installation available – Download the ZIP file and upload if automatic installation isn’t feasible
Setting up an online store doesn’t have to feel overwhelming. If you’re reading this, you’ve probably already made the smart decision to build your e-commerce presence on WordPress, and now you’re ready to install WooCommerce—the plugin that’ll transform your site into a fully-functional shop. Here’s what most guides won’t tell you upfront: the installation process itself takes about five minutes, but understanding what happens next (and preparing properly) makes the difference between a smooth launch and weeks of frustration.
I remember my first WooCommerce installation back when the plugin was still relatively new. I clicked “Install,” watched the progress bar, hit “Activate,” and then… stared blankly at my dashboard wondering what to do next. The plugin was installed, sure, but I had no idea about the setup wizard, the importance of permalink settings, or why my product pages looked terrible (theme compatibility, as it turned out). That’s exactly what we’re going to avoid here.
WooCommerce isn’t just another plugin—it’s the backbone of millions of online stores worldwide. Current estimates place its market share somewhere between 33-40% of all global e-commerce platforms, with countless stores processing transactions every second. The WordPress ecosystem has evolved dramatically, and WooCommerce has evolved with it, offering AI-powered tools, streamlined payment integrations, and an onboarding experience that actually makes sense. Whether you’re building a profitable home-based business directory with e-commerce functionality or launching a full-scale online shop, this guide will walk you through every step.
Why WooCommerce Installation via WordPress Admin Is Your Best Path Forward
Let’s address the elephant in the room: there are multiple ways to install WooCommerce, but not all methods are created equal. You could download files manually, connect via FTP, upload to your server, and configure everything by hand. Or you could let WordPress do the heavy lifting through its built-in plugin installer. The latter isn’t just easier—it’s actively recommended by WooCommerce’s official documentation because it handles dependencies, version compatibility, and updates automatically.
The WordPress admin installation method connects directly to the WordPress.org plugin repository, verifies the plugin’s authenticity, checks for conflicts with your current setup, and installs the latest stable version in seconds. When you install WooCommerce this way, you’re also setting yourself up for automatic update notifications (which you’ll want, given the ongoing security considerations in the WordPress ecosystem).
What Happens After You Click “Activate”?
Here’s where things get interesting. The moment you activate WooCommerce, several things happen simultaneously in the background. The plugin creates new database tables to store product information, orders, and customer data. It generates essential pages (Shop, Cart, Checkout, and My Account) that your store needs to function. It adds new menu items to your WordPress dashboard (Products, Orders, Coupons, etc.). And most importantly, it triggers the Setup Wizard—a guided walkthrough that handles the complex configuration steps.
The new menus aren’t just cosmetic additions. They represent an entire e-commerce infrastructure layered onto your WordPress site. You’ll see WooCommerce → Settings with tabs for Products, Shipping, Payments, Accounts, Emails, and Advanced configurations. This is where the real customization happens, but thankfully, the wizard handles the basics first.
Sample Data and Initial Preview Options
One feature that often goes unnoticed is WooCommerce’s option to import sample products during setup. This isn’t just placeholder content—it’s a functional preview that lets you see how products display with your theme, test the checkout flow, and understand the relationship between product categories, tags, and attributes before you add real inventory. I’ve seen store owners spend hours troubleshooting layout issues that would’ve been immediately obvious with sample data loaded.
Step-by-Step Installation: From Zero to Activated in Minutes
Now let’s walk through the actual installation process, step by step, with all the details that matter. Before you begin, verify that your hosting environment meets WooCommerce’s requirements. You’ll need PHP version 7.4 or higher (8.0+ is recommended for performance), a MySQL or MariaDB database, and WordPress version 6.8 or later. Most modern hosting providers meet these requirements automatically, but it’s worth checking—especially if you’re on an older shared hosting plan.
Preparing Your WordPress Environment
Log into your WordPress dashboard (typically yoursite.com/wp-admin) and navigate to the Plugins section in the left sidebar. Before clicking anything, take a moment to verify that your WordPress installation is up to date. An outdated WordPress core can cause compatibility issues with WooCommerce’s latest features. Check Dashboard → Updates and apply any available WordPress updates first.
Next, check your current theme. While WooCommerce is designed to work with virtually any WordPress theme, some themes offer deeper integration with pre-built product page layouts, cart widgets, and checkout styling. If you’re using a general-purpose theme, that’s fine—WooCommerce will use its default templates—but knowing this upfront helps set expectations for the design work you might need later.
Automatic Installation: The Recommended Method
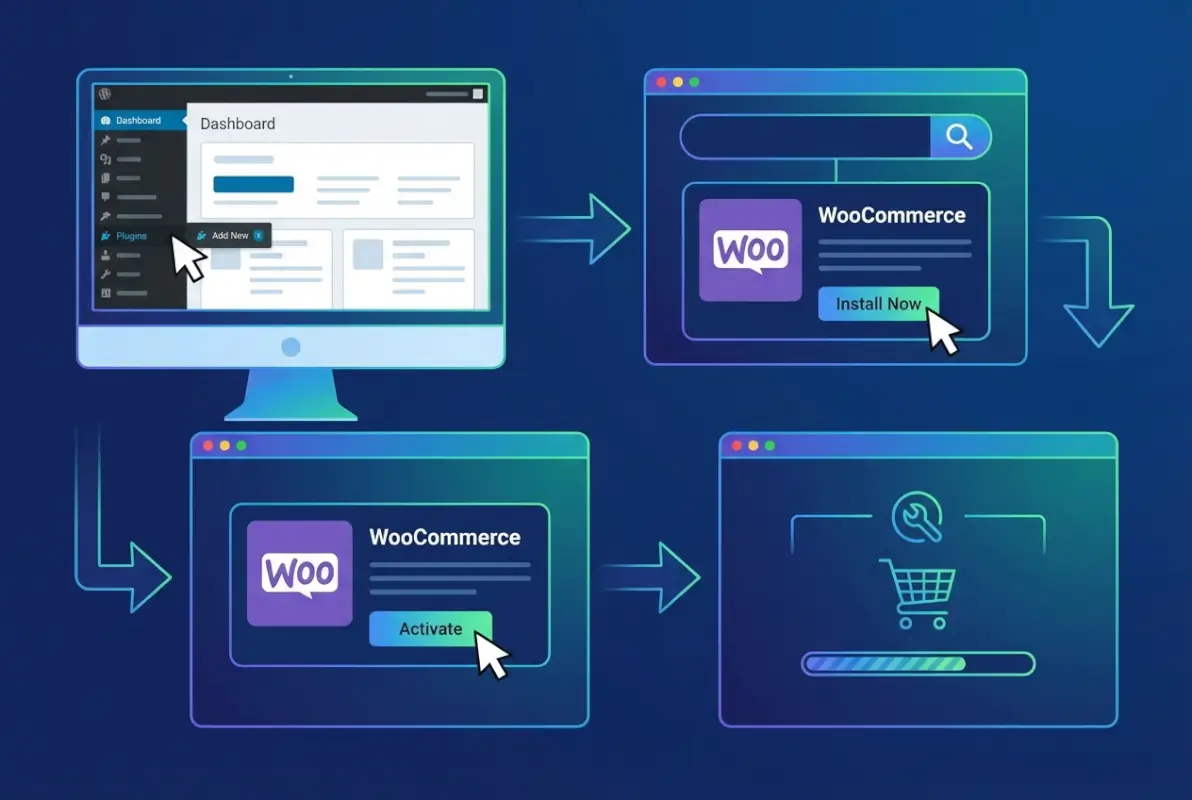
From your WordPress dashboard, click Plugins → Add New. You’ll see a search box in the upper right corner of the screen. Type “WooCommerce” and hit enter. The official WooCommerce plugin (by Automattic) should appear as the first result, complete with its recognizable purple icon and millions of active installations.
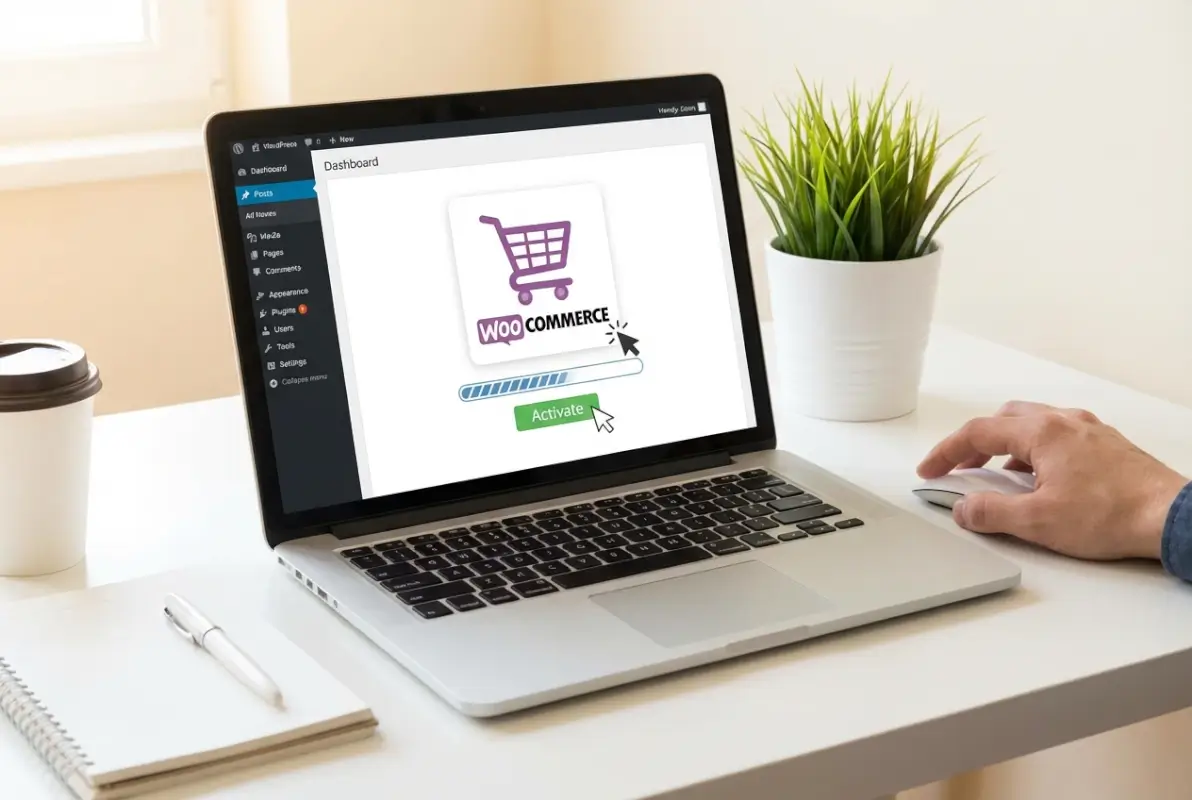
Click the “Install Now” button. WordPress will download the plugin files from the WordPress.org repository, unpack them into your wp-content/plugins directory, and verify the installation. This usually takes 10-15 seconds depending on your server speed and connection. Once the installation completes, the button changes to “Activate.”
Click “Activate.” This is the moment where WooCommerce integrates with your WordPress installation. You’ll see a brief loading screen, and then—if everything goes smoothly—you’ll be redirected to the WooCommerce Setup Wizard welcome screen. If you’re not redirected automatically, look for a WooCommerce menu item in your dashboard sidebar and click WooCommerce → Home to access the wizard manually.
Manual Installation: When Automatic Isn’t an Option
Sometimes automatic installation isn’t feasible. Maybe your hosting provider has disabled the WordPress.org connection for security reasons, or perhaps you’re working in a development environment without internet access. In these cases, manual installation is straightforward.
Visit WordPress.org’s WooCommerce plugin page and click the “Download” button to grab the latest ZIP file. Save it to your computer (don’t unzip it). Back in your WordPress dashboard, navigate to Plugins → Add New → Upload Plugin. Click “Choose File,” select the WooCommerce ZIP you just downloaded, and click “Install Now.”
WordPress will upload the file to your server, unpack it, and install the plugin exactly as it would with the automatic method. Once the upload completes, click “Activate Plugin” to enable WooCommerce. You’ll be redirected to the Setup Wizard just as you would with automatic installation.
| Installation Method | Best For | Time Required | Technical Level |
|---|---|---|---|
| Automatic (via WordPress Admin) | Most users, standard hosting | 2-3 minutes | Beginner |
| Manual Upload (ZIP file) | Restricted hosting, offline dev | 5-7 minutes | Beginner-Intermediate |
| FTP Installation | Advanced users, custom setups | 10-15 minutes | Advanced |
Post-Installation Checklist: Verify Everything Works
After activation, take a moment to confirm that WooCommerce has set up correctly. Navigate to Pages → All Pages and verify that four new pages exist: Shop, Cart, Checkout, and My Account. These are generated automatically and use WooCommerce shortcodes to display the appropriate functionality. Don’t delete these pages (even if the names don’t match your branding—you can rename them later).
Next, check your permalink structure. Go to Settings → Permalinks and click “Save Changes” without making any modifications. This flushes WordPress’s permalink cache and ensures that WooCommerce’s product URLs work correctly. It seems like a minor step, but skipping it can lead to 404 errors on product pages that are frustrating to troubleshoot.
Mastering the WooCommerce Setup Wizard
The Setup Wizard is where WooCommerce transitions from “installed” to “configured.” Think of it as a guided interview where WooCommerce asks about your business and builds your store settings based on your answers. The wizard typically appears automatically after activation, but if you dismissed it or want to run it again, you can access it from WooCommerce → Home → Setup wizard.
Store Details and Profile Questions
The wizard starts with basic questions: Where is your business located? What industry are you in? What types of products will you sell? These aren’t just for WooCommerce’s internal analytics—your answers directly influence which features get enabled and which payment gateways are suggested.
For example, if you indicate that you’re selling physical products and you’re based in the United States, the wizard will suggest USPS shipping integration and WooCommerce Payments (powered by Stripe). If you’re in Europe selling digital products, you’ll see different payment options and tax settings appropriate for EU VAT regulations.
Payment Gateway Configuration
One of the wizard’s most valuable sections is payment setup. WooCommerce supports dozens of payment gateways, but the wizard surfaces the most relevant options based on your location. You’ll typically see options like WooCommerce Payments, PayPal, Stripe, and sometimes regional gateways like Klarna or Mercado Pago.
You don’t need to configure payments immediately during the wizard—you can click “Set up later” and come back to it. However, if you have your payment provider credentials ready, setting up now means you can test the checkout process immediately. For what it’s worth, I always recommend setting up at least one payment method during the wizard, even if it’s just PayPal in sandbox mode, so you can process test orders and verify everything works.
Shipping, Taxes, and Core Settings
The wizard walks through shipping zones (geographical areas where you’ll ship products and the rates you’ll charge), tax settings (whether to calculate taxes automatically or manually), and business details like your store address. If you’re selling digital products exclusively, you can skip shipping entirely. If you’re selling physical goods, take time to set up at least one shipping zone properly.
Tax configuration can get complex depending on your jurisdiction. WooCommerce offers automated tax calculation through services like TaxJar or Avalara for U.S. sellers, or WooCommerce Tax for other regions. For small stores with straightforward tax requirements, manual tax rates work fine, but if you’re selling across multiple states or countries, automated services are worth the investment (they’re not free, but they’re cheaper than a tax audit).
Recommended Features and Extensions
Toward the end of the wizard, WooCommerce suggests optional features like Jetpack (for security and performance), WooCommerce Shipping (discounted shipping labels), and marketing extensions. Some of these are genuinely useful, while others add bloat if you’re not using them. My rule of thumb: stick with the basics during initial setup and add extensions later as specific needs arise.
The wizard also offers to install a compatible theme if your current theme doesn’t have WooCommerce integration. Unless you’re already committed to a specific theme, it’s worth considering the suggested options—they’re designed to work seamlessly with product pages, shop layouts, and checkout flows without additional CSS work.
What Comes After Installation: Essential Next Steps
You’ve installed WooCommerce, completed the wizard, and now you’re staring at your WordPress dashboard with a brand-new WooCommerce menu. What’s next? The answer depends on your specific goals, but there are a few universal tasks that every store owner should tackle immediately after installation.
Adding Your First Products
Navigate to Products → Add New to create your first product listing. WooCommerce’s product editor is similar to WordPress’s post editor, but with additional fields for pricing, inventory, shipping details, and product attributes. If you’re selling physical goods, you’ll set a regular price, sale price (optional), SKU (stock keeping unit), and inventory quantity. For digital products, you’ll upload downloadable files and set download limits or expiration times.
Product categories and tags work exactly like WordPress post categories—they help organize your catalog and enable filtering on your shop page. If you’re running something like an Instagram local business directory with integrated product sales, well-structured categories become critical for user navigation.
Configuring Shipping and Tax Details
Even if you configured shipping in the Setup Wizard, it’s worth revisiting WooCommerce → Settings → Shipping to refine your zones and rates. Shipping zones are geographic regions where you offer specific shipping methods. For example, you might have one zone for the contiguous United States with flat-rate shipping, another for Alaska and Hawaii with calculated rates, and a third for international orders with different carrier options.
Tax settings (under WooCommerce → Settings → Tax) deserve careful attention, especially if you’re operating in jurisdictions with complex sales tax rules. Enable tax calculation, set your base location, and decide whether prices include tax or get calculated at checkout. For U.S.-based stores selling across state lines, this gets complicated fast—nexus laws vary by state, and getting it wrong creates compliance headaches.
Security Hardening and Backup Strategy
WooCommerce stores handle sensitive customer data, payment information, and order history. Security isn’t optional. Start with the basics: ensure your WordPress installation uses HTTPS (SSL certificate), keep WordPress core and all plugins updated, use strong passwords, and enable two-factor authentication on administrator accounts.
Automated backups are non-negotiable. Whether you use your hosting provider’s backup system, a plugin like UpdraftPlus, or a third-party service, schedule daily backups that include both your database and files. Store backups off-site (not just on your hosting server) so you can recover if the server itself fails. I’ve seen too many store owners lose weeks of order data because they assumed their host was backing everything up automatically (spoiler: many hosts don’t back up databases by default).
The WordPress ecosystem has faced increased security scrutiny, with vulnerabilities in plugins and themes being actively exploited. Regular updates, security monitoring, and limiting the number of installed plugins (each one is a potential attack vector) significantly reduce your risk profile.
Industry Context: Why WooCommerce Dominates WordPress E-commerce
Understanding why WooCommerce has become the default choice for WordPress-based e-commerce helps appreciate the ecosystem you’re entering. WooCommerce wasn’t the first WordPress shopping cart plugin, but it succeeded where others faltered by staying free (the core plugin costs nothing), remaining open-source (you can customize anything), and building an extension marketplace that addresses every conceivable e-commerce need.
Market Share and Adoption Numbers
Current estimates place WooCommerce’s global market share between 33% and 40% of all e-commerce platforms. That’s not just WordPress stores—that’s all e-commerce platforms including Shopify, Magento, BigCommerce, and proprietary systems. Within the WordPress ecosystem, WooCommerce’s dominance is even more pronounced, powering the vast majority of stores built on WordPress.
The plugin itself has over 6.9 million active installations according to WordPress.org repository data, though that number significantly undercounts total usage because it only tracks installations that connect to WordPress.org for updates. Many large enterprises and custom builds don’t show up in that count. Independent analyses suggest the actual number of live WooCommerce stores could be closer to 5-7 million.
The Extension Ecosystem Advantage
Part of WooCommerce’s staying power comes from its extension marketplace. Need subscription billing? There’s an extension. Want to integrate with Amazon or eBay? Extensions exist. Looking to add appointment booking, product bundles, or complex shipping rules? All available through official and third-party extensions.
This extensibility means WooCommerce scales from a simple shop selling a handful of products to enterprise stores managing thousands of SKUs, multiple warehouses, and complex tax jurisdictions. The learning curve can be steep (some advanced features require combining multiple extensions), but the flexibility is unmatched among WordPress e-commerce solutions.
Payments Innovation and AI Integration
WooCommerce Payments (launched as a Stripe-powered payment solution integrated directly into WooCommerce) has grown rapidly, now processing billions in annual volume. The advantage for store owners is simplified setup—you don’t need a separate payment processor account, and deposits go directly to your bank with transparent pricing.
Recent developments include AI-powered product description generators, automated marketing tools that suggest promotions based on sales patterns, and inventory forecasting features that predict when you’ll need to reorder stock. These aren’t gimmicks—they’re practical tools that save time for store owners managing catalogs solo. If you’re also managing SEO plugins for WordPress essential extensions, the integrated approach reduces plugin conflicts.
Troubleshooting Installation Issues and Common Pitfalls
Most WooCommerce installations proceed smoothly, but when things go wrong, they tend to go very wrong. Here are the issues I’ve encountered repeatedly (both in my own stores and helping others) and how to resolve them quickly.
Plugin Conflicts and White Screens
If you activate WooCommerce and immediately see a white screen or fatal error message, you’re likely experiencing a plugin conflict. This happens when WooCommerce’s code conflicts with another installed plugin—usually an outdated plugin or one that modifies WordPress core functions in non-standard ways.
The quickest fix is to deactivate all other plugins, then reactivate WooCommerce. If the site works, reactivate your other plugins one by one until you identify the culprit. Once you’ve found the conflicting plugin, check for updates (the issue may be fixed in a newer version) or look for an alternative plugin that provides similar functionality without conflicts.
Theme Compatibility Problems
Some themes simply don’t play nice with WooCommerce, resulting in broken product layouts, misaligned images, or checkout pages that won’t display properly. Before you panic and start editing theme files, check if your theme has a specific WooCommerce integration mode that needs to be enabled in the theme settings.
Many premium themes include a “WooCommerce Mode” toggle that loads WooCommerce-specific styling and templates. If your theme doesn’t have this option and product pages look broken, you have three choices: switch to a WooCommerce-compatible theme (WooCommerce maintains a list of compatible themes), use WooCommerce’s built-in template overrides to customize layouts within your existing theme, or hire a developer to create custom templates.
Performance and Page Speed Considerations
WooCommerce adds database queries, JavaScript files, and CSS stylesheets that can slow down your site if not optimized properly. After installation, run a speed test using tools like Google PageSpeed Insights or GTmetrix to establish a baseline performance metric.
Common performance bottlenecks include unoptimized images (product photos that are unnecessarily large), lack of caching (WooCommerce generates pages dynamically unless you implement caching), and external scripts (payment gateways and analytics tools that load on every page). Address these by installing an image optimization plugin, enabling object caching if your host supports it, and using a content delivery network (CDN) for static assets.
Payment Gateway Configuration Errors
Payment gateways are where many new WooCommerce users stumble. You’ve configured everything perfectly, but test orders fail with cryptic error messages. Most payment issues stem from one of three causes: incorrect API credentials (you’re using sandbox keys in production mode or vice versa), currency mismatches (your gateway account is set to EUR but WooCommerce is set to USD), or SSL certificate problems (payment gateways require HTTPS, and your certificate may have configuration issues).
Always test payment gateways in sandbox/test mode first. Most providers offer a test environment where you can process fake transactions using test credit card numbers to verify the integration works before going live. Document your test results—knowing that the gateway worked in test mode helps narrow down issues if production payments fail.
Frequently Asked Questions
How do I install WooCommerce on WordPress?
Log into your WordPress dashboard, navigate to Plugins → Add New, search for “WooCommerce,” click Install Now, then Activate. After activation, follow the Setup Wizard to configure your store basics including location, products, payments, and shipping settings.
Can I install WooCommerce manually without using the WordPress plugin installer?
Yes, download the WooCommerce ZIP file from WordPress.org, then in your dashboard go to Plugins → Add New → Upload Plugin. Select the ZIP file, click Install Now, and activate the plugin. Manual installation works identically to automatic installation once complete.
What should I do immediately after installing WooCommerce?
Complete the Setup Wizard to configure store location, payment methods, shipping zones, and tax settings. Then verify that the Shop, Cart, Checkout, and My Account pages were created. Add your first product and process a test order in payment gateway sandbox mode to ensure everything works.
Is WooCommerce compatible with all WordPress themes?
WooCommerce works with most WordPress themes, though some themes offer deeper integration with pre-styled product pages and shop layouts. If your theme lacks WooCommerce support, the plugin uses default templates that are functional but may require custom CSS for optimal appearance.
What are the minimum server requirements for WooCommerce?
WooCommerce requires PHP 7.4 or higher (8.0+ recommended), MySQL 5.6 or MariaDB 10.3 or higher, WordPress version 6.8 or later, and HTTPS support for secure checkout. Most modern hosting providers meet these requirements, but verify with your host before installation.
Do I need a special hosting plan for WooCommerce?
While WooCommerce runs on standard WordPress hosting, e-commerce stores benefit from hosting optimized for performance, security, and uptime. Look for hosts offering solid PHP performance, adequate memory limits (256MB minimum, 512MB recommended), and reliable customer support for troubleshooting.
How long does WooCommerce installation take?
The actual plugin installation takes 2-5 minutes via automatic installation, or 5-10 minutes with manual upload. Completing the Setup Wizard adds another 10-15 minutes depending on your business complexity. Full store configuration with products, policies, and customization can take several hours to days.
Can I install WooCommerce on a WordPress.com site?
Only on WordPress.com Business or Commerce plans, not on free or Personal plans. WordPress.com has restrictions on plugin installation for lower-tier plans. Self-hosted WordPress.org installations don’t have these limitations and can install WooCommerce on any hosting plan.
What happens if I uninstall WooCommerce after setting up my store?
Uninstalling WooCommerce removes the plugin files but by default preserves your database tables with products, orders, and customer data. If you need to completely remove all WooCommerce data, there’s an option in WooCommerce → Settings → Advanced → Uninstall that deletes everything when you uninstall.
Do I need technical knowledge to install and run WooCommerce?
Basic WordPress familiarity is sufficient for standard WooCommerce installation and setup. The Setup Wizard guides you through essential configurations without requiring coding knowledge. Advanced customizations may require HTML/CSS skills or developer assistance, but core functionality works out-of-the-box for non-technical users.
You’re now equipped with everything you need to install WooCommerce confidently and start building your online store. The path from installation to first sale involves additional steps—product creation, design refinement, installing SEO plugins and WordPress essential extensions, marketing setup—but you’ve cleared the first critical hurdle. WooCommerce’s ecosystem offers resources, extensions, and community support to help you tackle each challenge as it arises.
Whether you’re launching a side project or building a full-scale business, the infrastructure you’ve just installed powers millions of successful stores worldwide. Start small, test thoroughly, and scale gradually. And remember—every major e-commerce brand started with exactly what you have now: a fresh WooCommerce installation and a vision for what comes next.
Was this article helpful?