How to Install WordPress Plugins: A Beginner’s Guide
Let’s be honest—WordPress plugins are both the best and worst thing about building a website. On one hand, they transform a basic WordPress install into a powerhouse capable of almost anything: e-commerce, membership sites, forums, booking systems, you name it. On the other, poorly chosen or neglected plugins can turn your site into a security nightmare, a sluggish mess, or worse—a digital graveyard after one bad update. If you’ve ever stared at the “Add Plugins” screen feeling paralyzed by thousands of options, or watched your site crash after installing something promising, you’re not alone.

Here’s the thing most beginner guides won’t tell you upfront: plugins are not set-and-forget tools. They’re living parts of your site that need care, vetting, and occasional pruning. Think of them less like apps on your phone and more like tenants in your building—you want trustworthy ones who pay rent on time (stay updated), don’t cause trouble (no conflicts), and leave when asked (clean uninstalls). This guide will walk you through the entire lifecycle of WordPress plugins, from planning and selection to installation, maintenance, and troubleshooting, with a focus on keeping your site fast, secure, and manageable in the long run.
TL;DR – Quick Takeaways
- Quality over quantity – A lean, well-maintained plugin set beats dozens of “nice-to-have” tools every time
- Security starts at selection – Vet plugins before installing by checking update frequency, ratings, and publisher credibility
- Always backup first – One bad plugin update can break your site; backups are your safety net
- Test in staging – Major updates and new plugins should be tested in a staging environment before going live
- Monitor and prune regularly – Audit your active plugins quarterly to remove unused or outdated tools
Understanding WordPress Plugins (What They Are and How They Work)
At its core, a WordPress plugin is a piece of software that extends or modifies the functionality of your WordPress site without touching the core codebase. Think of WordPress itself as a house’s foundation and framing—solid, standardized, predictable. Plugins are the custom features you add: the smart thermostat, security system, solar panels, or entertainment room. They hook into WordPress’s built-in architecture using actions and filters, allowing developers to add features ranging from simple (a contact form) to complex (a full e-commerce platform).
What a plugin does for your site
Plugins solve problems. Need a way for visitors to contact you? Install a form plugin. Want to improve your Google rankings? Add an SEO plugin. Worried about hackers? Security plugins can harden your site. The beauty of the plugin ecosystem is specialization—instead of WordPress trying to be everything to everyone, it provides a stable platform and lets third-party developers create focused solutions. This modularity is powerful, but it also means you need to think carefully about what you install because every plugin adds code, dependencies, and potential points of failure.
How plugins interact with WordPress core, themes, and other plugins
Plugins don’t operate in isolation. They interact with WordPress core (the underlying software that powers every WordPress site), your theme (which controls design and layout), and each other. Sometimes these interactions are harmonious—a caching plugin works quietly behind the scenes to speed up page loads. Other times, they clash—two security plugins trying to manage the same settings can cause conflicts, or a poorly coded plugin can override theme styles in unexpected ways. Understanding this interconnectedness is crucial because it shapes how you approach troubleshooting and maintenance.
Plugins vs. themes: what to install first and why
When setting up a new WordPress site, install your theme first, then plugins. Why? Because your theme sets the baseline design and structure, and many plugins need to know the theme’s context to function properly. For example, page builders and form plugins often need to inherit theme styles. Installing plugins before a theme can lead to configuration headaches. That said, critical infrastructure plugins (backups, security hardening) should go in early—ideally right after your theme—so they’re active from day one.
Common plugin categories for beginners
Not all plugins are created equal in terms of priority. Here’s a quick breakdown of the categories most beginners need to consider:
- Security: Plugins that harden login pages, scan for malware, and manage firewall rules
- Performance: Caching, image optimization, and code minification tools
- SEO: Tools to manage meta tags, sitemaps, and on-page optimization
- Backups: Automated backup solutions that save your site data regularly
- Forms: Contact forms, surveys, and lead capture tools
- Analytics: Plugins that track visitor behavior and site performance
Focus on these categories first, and resist the temptation to install 20 plugins in your first week. A lean, purposeful plugin set is easier to maintain and less likely to cause conflicts. For more on structuring your site’s foundation, check out this guide on must-have elements for a business directory homepage.
Planning Your Plugin Toolkit (How to Choose Quality and Safe Plugins)
Before you install a single plugin, take a step back and think strategically. What does your site actually need to do? Are you building a blog, a portfolio, an online store, or a membership community? Different goals demand different tools. A photography portfolio might need a solid gallery plugin and image optimization, while an online course platform needs membership management and payment processing. Writing down your site’s core functions before browsing plugins will save you from feature creep and bloat.
Define your site goals and required features
Create a simple checklist of must-have features. For example: “I need a contact form, email signups, basic SEO, automated backups, and site speed optimization.” Then prioritize. Which features are critical for launch, and which can wait? This exercise prevents impulse installations and keeps your plugin count lean. It also helps you identify where multiple features might be bundled into one quality plugin instead of installing five separate tools.
How to evaluate plugin quality (ratings, active installs, last update, compatibility)
When browsing the WordPress plugin repository or third-party marketplaces, look for these quality signals:
| Quality Signal | What to Look For | Red Flags |
|---|---|---|
| Active Installs | 50,000+ for niche tools, 500,000+ for popular categories | Under 1,000 installs (unless brand new or highly specialized) |
| Last Updated | Within 3-6 months | Over 1 year ago (likely abandoned) |
| User Rating | 4.0+ stars with 50+ reviews | Below 3.5 stars or only a handful of reviews |
| WordPress Compatibility | Tested with your WordPress version | Not tested with recent versions |
| Support Forum Activity | Developer responds to support threads within days | Unanswered support threads or developer silence |
These signals aren’t foolproof—popular doesn’t always mean secure, and new plugins can be excellent—but they’re a solid starting point. Cross-reference with independent reviews and check if security researchers have flagged the plugin for vulnerabilities.
Security-conscious selection: vetting publishers, reading reviews, and avoiding risky sources
Security isn’t just about installing a security plugin, it starts with choosing trustworthy code in the first place. Vet the plugin author: Do they maintain other well-regarded plugins? Do they have a track record of timely updates and vulnerability patches? Read both positive and negative reviews—negative reviews often reveal deal-breakers like poor support or compatibility issues. And critically, never install plugins from unofficial sources or shady marketplaces. Pirated premium plugins often contain malware or backdoors. Stick to the official WordPress repository or reputable premium marketplaces like CodeCanyon (with caution) or direct from established vendors. For deeper security insights, see the WordPress official security best practices.
Prioritizing plugins you truly need vs. “nice-to-haves”
I learned this the hard way years ago when I built my first membership site. I installed every shiny plugin I found: social sharing, related posts, advanced typography, animated sliders, you name it. The result? A slow, conflict-prone mess that took hours to troubleshoot. The lesson: every plugin adds overhead—code to load, settings to manage, potential conflicts to debug. Be ruthless about necessity. If a feature isn’t directly supporting your site’s goals or user experience, skip it.
Maintaining a lean plugin set to minimize risk and performance impact
Aim for the minimum effective dose. If you can achieve the same result with theme functionality or a single versatile plugin instead of three specialized ones, do that. For example, many modern themes include basic SEO settings, so you might not need a heavy SEO plugin right away. Similarly, some hosting providers offer server-level caching, eliminating the need for caching plugins. Regularly audit your active plugins and deactivate or delete anything you’re not using—inactive plugins still pose security risks if they’re not removed.
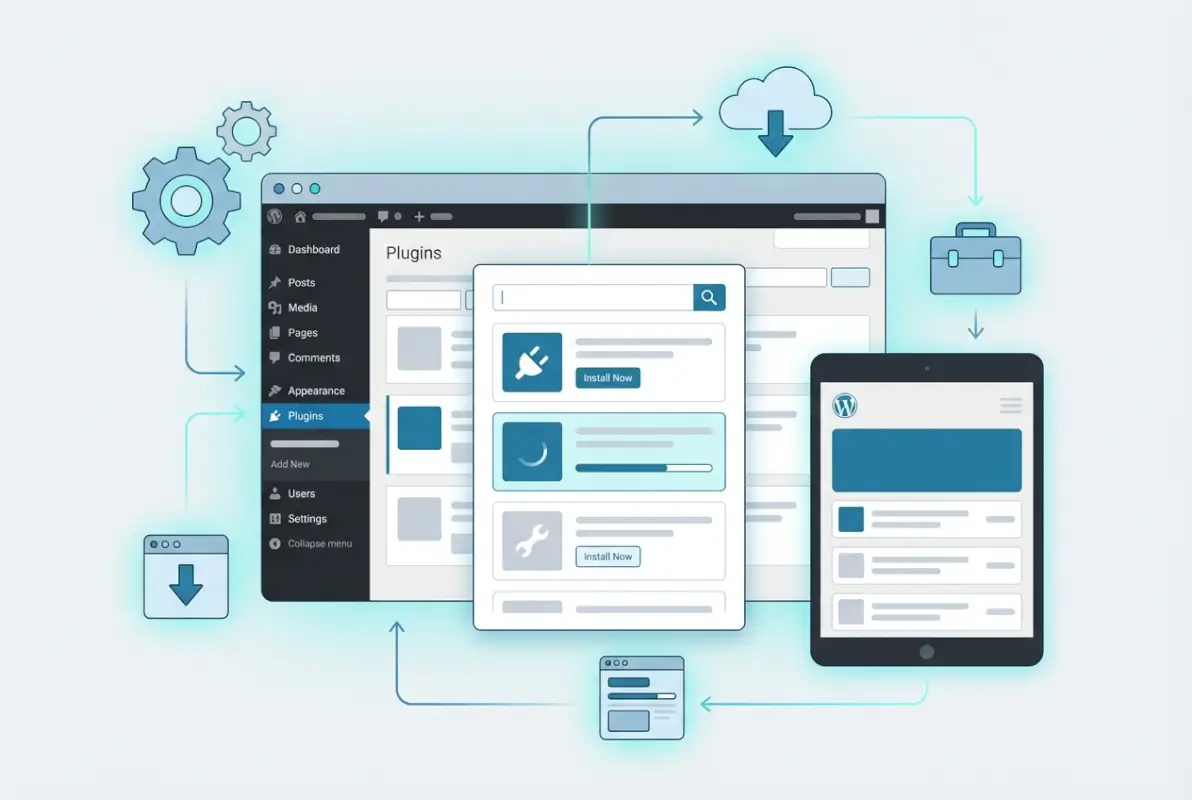
Installing Plugins (Methods and Best Practices)
Once you’ve selected quality plugins, it’s time to install them. WordPress offers multiple installation methods, each with trade-offs. The most common—and beginner-friendly—approach is installing directly from the WordPress admin dashboard. This method leverages the official plugin repository, automatically handles updates, and minimizes user error. But there are scenarios where manual installation makes sense, especially for premium plugins or when working offline.
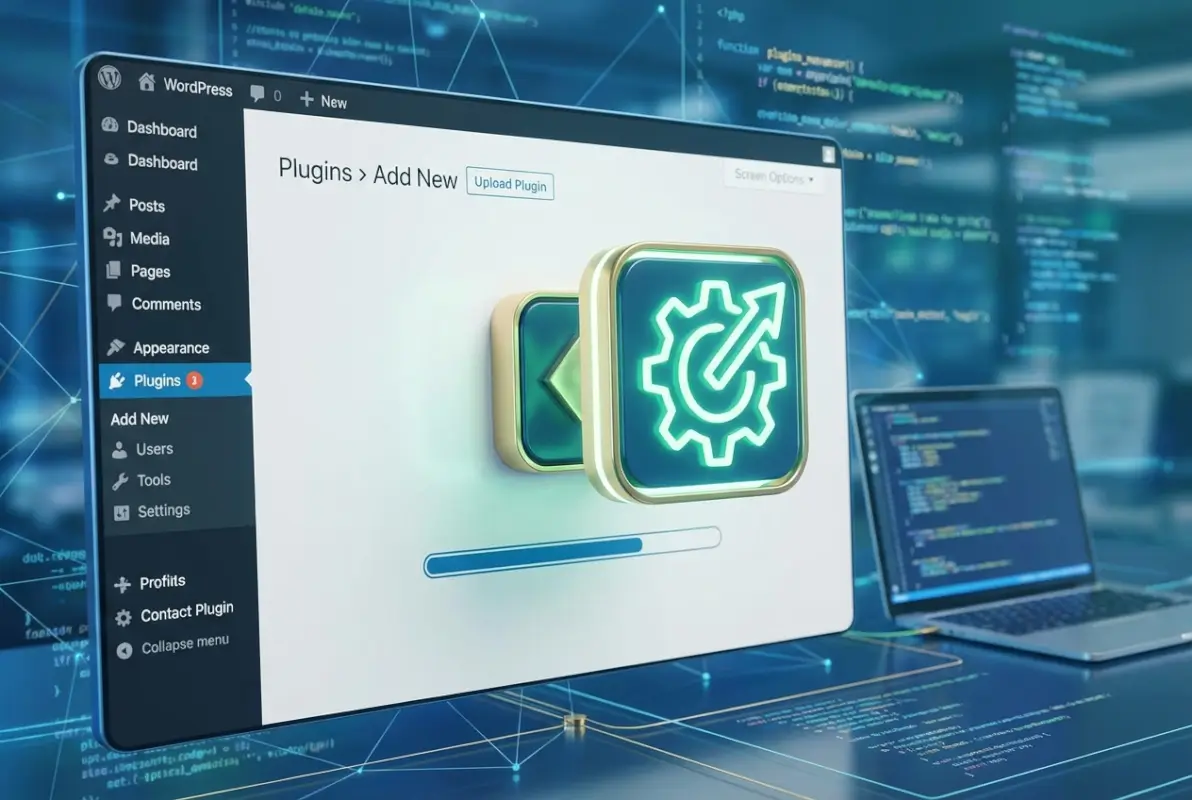
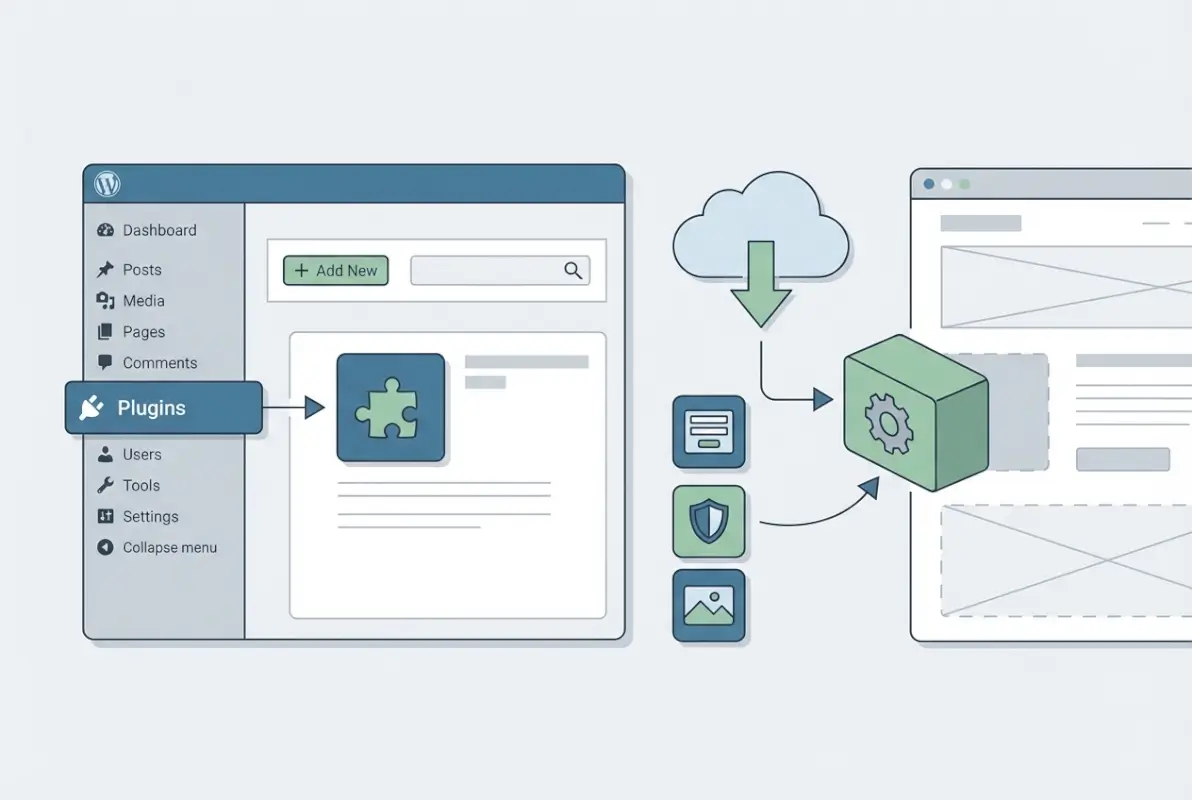
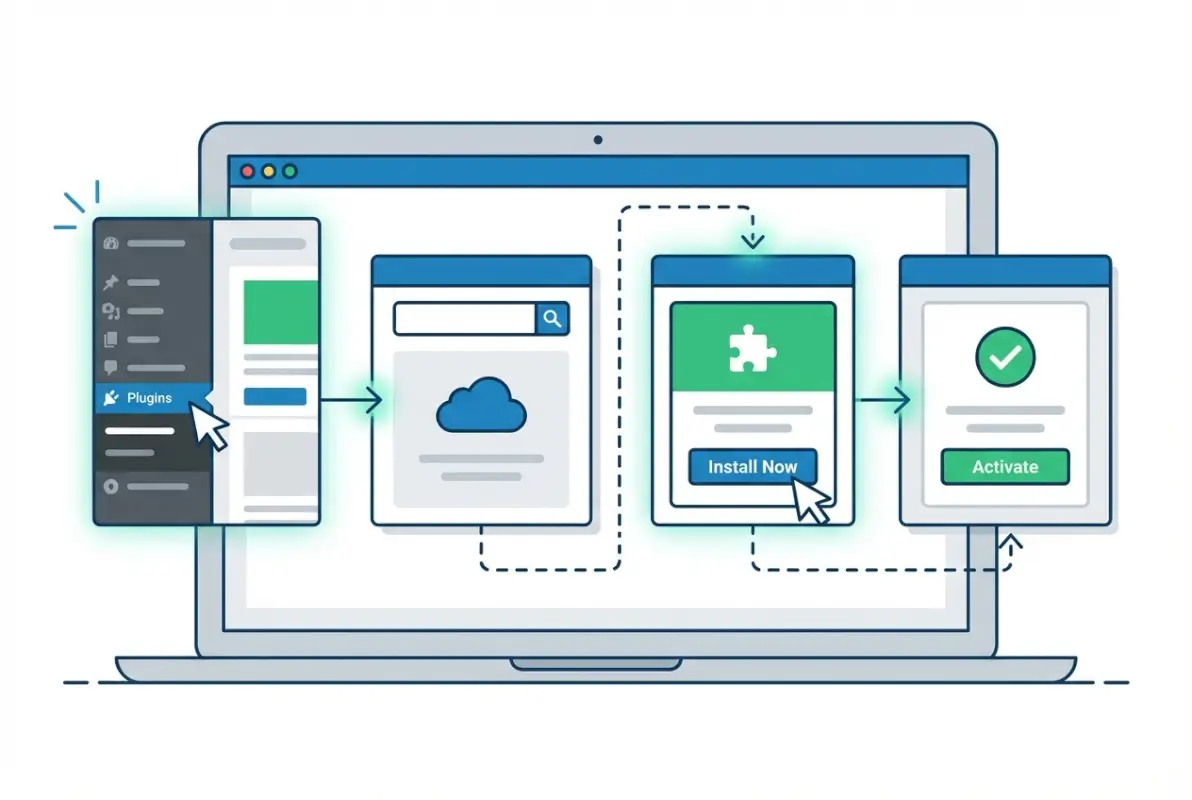
Installing from the WordPress admin dashboard (Plugins → Add New)
This is your primary installation method for most free plugins. Log into your WordPress admin, navigate to Plugins → Add New, and use the search bar to find your desired plugin by name or keyword. Once you’ve found it, click Install Now, wait a few seconds for the download, then click Activate. That’s it—the plugin is now live on your site. Before activating, take a moment to read the plugin description and changelog for any special configuration requirements or known issues with your WordPress version. If you’re looking for a specific installation method, here’s a detailed walkthrough on how to install a WordPress plugin from a ZIP file.
Manual installation (zip upload) vs. automatic updates
For premium plugins, beta versions, or plugins not in the official repository, you’ll need to install manually. Download the plugin as a .zip file from the vendor, then go to Plugins → Add New → Upload Plugin, choose your .zip file, and click Install Now. After installation, activate the plugin. Manual installations require more attention to updates—you won’t get automatic update notifications like repository plugins, so bookmark the plugin vendor’s site or sign up for update alerts. Some premium plugins include built-in update mechanisms, but always verify this.
Understanding plugin licenses, updates, and compatibility notes
Free plugins in the WordPress repository are licensed under GPL, meaning they’re open-source and free to use, modify, and redistribute. Premium plugins often have commercial licenses restricting use to a certain number of sites or domains—read the terms carefully. Updates are critical for security and compatibility. Repository plugins update automatically if you’ve enabled auto-updates (recommended for most plugins), while premium plugins may require license key activation to receive updates. Always check compatibility notes before updating—if a plugin hasn’t been tested with your WordPress version yet, hold off until the developer confirms compatibility or test in staging first.
When to avoid a plugin (compatibility conflicts, deprecated code, lack of updates)
Skip plugins that show these warning signs: outdated code (PHP warnings in error logs), compatibility conflicts with your theme or other plugins (check support forums for complaints), or abandonment (no updates in over a year). Also avoid plugins that bundle too many unrelated features—these “kitchen sink” plugins often introduce bloat and increase attack surface. If a plugin requires extensive custom code or workarounds to function properly, it’s probably not the right tool for your needs.
Quick-start checklist (backup before install, test in staging, review permissions)
Before installing any plugin, especially on a live site, follow this checklist:
- Backup your site: Full database and files backup via your hosting panel or a backup plugin
- Check compatibility: Verify the plugin works with your WordPress version, PHP version, and theme
- Review permissions: Check what data the plugin accesses (some plugins require admin privileges or external API connections)
- Test in staging: If you have a staging environment, install and test there first
- Read documentation: Skim the plugin’s setup guide to avoid rookie configuration mistakes
This might seem tedious, but I’ve seen too many sites go down because someone skipped the backup step before installing a plugin that conflicted with their theme. Five minutes of preparation beats hours of recovery work.
Managing Plugins for Longevity and Security
Installing plugins is the easy part. Maintaining them over months and years is where most site owners drop the ball. Neglected plugins become security liabilities, performance drags, and compatibility nightmares. A disciplined maintenance routine—regular updates, compatibility checks, security audits—is what separates thriving websites from abandoned ones. Think of plugin management like car maintenance: you can skip oil changes for a while, but eventually the engine seizes up.

Keeping plugins updated (core, themes, plugins) and testing updates
Updates fall into three categories: major updates (new features, breaking changes), minor updates (bug fixes, small improvements), and security patches (urgent fixes for vulnerabilities). Security patches should be applied immediately, ideally within 24 hours of release. For major updates, test in staging first to catch conflicts. WordPress core, themes, and plugins all need regular updates—neglecting any one component creates vulnerabilities. Enable automatic updates for minor releases on trusted plugins, but manually review major updates. If you’re managing multiple sites, consider using a management tool like ManageWP or MainWP to streamline bulk updates.
Compatibility checks before updating or deactivating plugins
Before updating a plugin, check the changelog for breaking changes or new requirements (e.g., minimum PHP version bumps). If the update introduces major changes, test it in staging first. Before deactivating a plugin, especially if it’s been active for a while, check if other plugins or theme features depend on it. Some plugins hook into each other—deactivating a page builder might break custom layouts, or removing a security plugin might expose settings you forgot existed. Document your plugin dependencies so you know which tools are mission-critical and which are optional.
Security hygiene: using reputable plugins, limiting how many are active, and monitoring for vulnerabilities
Security-conscious plugin management means staying informed about vulnerabilities. Subscribe to security newsletters (like WPScan or Wordfence Intelligence) that report newly discovered plugin vulnerabilities. When a vulnerability is disclosed, check if you’re running the affected plugin and update immediately. Limit active plugins to reduce attack surface—every plugin is a potential entry point for attackers. Use security-focused hosting or a security plugin that scans for malware and suspicious code changes. And critically, never ignore security warnings or skip updates because “the site is working fine.” That’s how breaches happen. For platform-specific security guidance, review WordPress.com’s security guidelines.
Performance considerations (impact on load time, caching, and resource usage)
Not all plugins are created equal when it comes to performance. Heavy page builders, poorly coded sliders, and outdated analytics plugins can add seconds to your page load time. Use performance testing tools (like GTmetrix or Query Monitor) to identify plugins that slow down your site. Common culprits include:
- Plugins that load external scripts on every page (social sharing widgets, chat tools)
- Database-heavy plugins that run complex queries on every load (related posts, live search)
- Plugins with inefficient code or memory leaks
When evaluating a new plugin, check reviews for performance complaints and test load times before and after activation. If a plugin is causing slowdowns, look for a lighter alternative or optimize its settings (many plugins let you disable features you don’t use, reducing overhead).
Backups and rollback procedures in case an update breaks site functionality
Even with careful testing, updates sometimes break things. That’s why automated daily backups are non-negotiable. Use a backup plugin or hosting-level backups that store copies off-site (not just on your web server). Test your backup restoration process at least once—knowing how to restore a backup in theory doesn’t help if you’ve never done it under pressure. Many managed hosts offer one-click rollback features that revert your site to a previous state in seconds. If an update breaks your site, deactivate the problem plugin via FTP or your hosting file manager (navigate to /wp-content/plugins/ and rename the plugin folder), then restore from backup or troubleshoot the conflict.
Security and Performance Best Practices (Plug-in Hygiene)
Security and performance aren’t one-time tasks, they’re habits. The best WordPress sites aren’t necessarily the ones with the most advanced security plugins or the fastest hosting—they’re the ones with disciplined owners who follow consistent best practices. Let’s break down the daily, weekly, and monthly routines that keep your plugins (and your site) healthy and secure.

Use security-focused plugins wisely, and only when necessary
Security plugins can be double-edged swords. A quality firewall or malware scanner adds valuable protection, but installing three or four overlapping security plugins often causes more problems than it solves (conflicting rules, performance hits, false positives). Choose one comprehensive security plugin that covers hardening, monitoring, and scanning, and configure it properly. Popular options include Wordfence, Sucuri, or iThemes Security. Avoid “security suites” that bundle unrelated features—you want focused, well-maintained tools. And remember, no plugin can substitute for good fundamentals: strong passwords, limited user privileges, and regular updates.
Enable monitoring, backups, and a staging environment for testing
Set up uptime monitoring (services like UptimeRobot or Pingdom) to alert you if your site goes down. Configure automated backups to run daily, with off-site storage (cloud backup services or hosting-level backups). If your host doesn’t offer staging environments, use a plugin like WP Staging to create a clone of your live site for testing. This three-layer safety net—monitoring, backups, staging—gives you the confidence to update plugins without fear of catastrophic failures.
Regularly audit active plugins for necessity and updated status
Schedule a quarterly plugin audit. Review every active plugin and ask: “Are we still using this? Is there a better alternative? Is it still being maintained?” Delete anything that’s no longer needed. Replace outdated plugins with modern alternatives. I remember auditing a client’s site and finding seven inactive plugins (including two deprecated SEO plugins from 2015) still sitting in the installation. Each one was a potential security hole. Quarterly cleanups prevent this kind of digital clutter from accumulating.
Hosting and server-level protections complement plugin-based security
Don’t rely solely on plugins for security. Many quality hosts offer server-level firewalls, DDoS protection, automatic malware scanning, and hardened PHP configurations. These server-side protections often outperform plugin-based solutions because they intercept threats before they reach WordPress. If you’re on shared hosting, consider upgrading to managed WordPress hosting (WP Engine, Kinsta, Flywheel) where security is baked into the infrastructure. This layered approach—server-level + plugin-level + good habits—is far more effective than any single solution.
For businesses managing directories or niche sites, keeping overhead low is especially crucial. Sites targeting specific markets, like veteran-owned business directories by state, benefit from lean, focused plugin sets that prioritize performance and security over feature bloat.
Troubleshooting, Maintenance, and Common Gotchas
Even with the best planning and discipline, things go wrong. Plugins conflict, updates break features, sites slow to a crawl. Knowing how to debug plugin issues quickly is the difference between minor inconvenience and extended downtime. Here’s your troubleshooting playbook for the most common plugin-related problems.
Debugging plugin conflicts (safe mode/deactivate others, error logs)
When your site breaks after installing or updating a plugin, the first step is isolating the culprit. The fastest method: deactivate all plugins (if you can access the admin dashboard) or rename the /wp-content/plugins/ folder via FTP (this disables all plugins at once). If your site returns to normal, reactivate plugins one by one until the issue reappears—that’s your problem plugin. Check error logs (usually in your hosting control panel or /wp-content/debug.log if WP_DEBUG is enabled) for specific PHP errors that point to the conflict. Common conflict triggers include JavaScript library clashes (two plugins loading different jQuery versions) and CSS conflicts (one plugin’s styles overriding another’s).
Dealing with performance issues caused by plugins
If your site suddenly slows down, a plugin is often the culprit. Use Query Monitor or P3 (Plugin Performance Profiler) to identify which plugins are consuming the most resources. Once you’ve pinpointed the offender, check its settings—many performance-heavy plugins have options to reduce overhead (e.g., limiting related posts, disabling unused features). If settings tweaks don’t help, look for a lighter alternative. I once replaced a bloated social sharing plugin with a simple code snippet and shaved 1.2 seconds off page load time. Sometimes the best solution is less plugin, more theme or manual code.
Handling premium vs free plugins (support, updates, licensing)
Premium plugins come with trade-offs. Pros: dedicated support, regular updates, advanced features. Cons: ongoing costs, license restrictions, occasional vendor lock-in. If you buy a premium plugin, keep your license active—many vendors require an active license for updates and support. Read license terms carefully: some limit use to a single domain, others allow unlimited sites. Free plugins offer no guaranteed support, but active community forums can be surprisingly helpful. When choosing between free and premium, weigh your support needs and budget. For mission-critical functionality (e.g., e-commerce, membership), premium plugins with guaranteed support are usually worth the investment.
When to seek professional help or use staging environments
Not every problem has a DIY solution. If you’re dealing with complex conflicts, custom code issues, or persistent performance problems, hiring a WordPress developer can save hours of frustration. Similarly, if you lack a staging environment and your host doesn’t provide one, invest in staging plugin or upgrade your hosting—testing updates in production is asking for trouble. Know your limits, and don’t be afraid to call in an expert when you’re out of your depth.
Best Practices for Beginners (A Quick Start Plan)
Let’s bring everything together into a practical, repeatable workflow. If you’re setting up a new WordPress site or overhauling an existing one, follow this step-by-step plan to build a lean, secure, high-performance plugin toolkit.
Step-by-step beginner-friendly workflow (plan → install → test → monitor)
- Plan: List your site’s core functions and must-have features. Research 2-3 plugin options for each function.
- Vet: Check ratings, update frequency, compatibility, and reviews for each candidate plugin.
- Backup: Create a full site backup before installing anything new.
- Install: Install and activate plugins one at a time, testing functionality after each.
- Configure: Adjust plugin settings to match your site’s needs and disable unused features.
- Test: Check site speed, mobile responsiveness, and core functionality after all plugins are active.
- Document: Create a simple spreadsheet listing each active plugin, its purpose, and version number.
- Monitor: Set up uptime monitoring, enable automatic backups, and schedule quarterly plugin audits.
A starter plugin set for most new WordPress sites
Here’s a minimal, versatile plugin set suitable for blogs, portfolios, and small business sites:
- Security: Wordfence or Sucuri (firewall, malware scanning, hardening)
- Backups: UpdraftPlus or BackupBuddy (automated backups with cloud storage)
- Performance: WP Super Cache or W3 Total Cache (page caching)
- SEO: Yoast SEO or Rank Math (meta tags, sitemaps, on-page optimization)
- Forms: WPForms or Gravity Forms (contact forms, lead capture)
- Image Optimization: Smush or ShortPixel (compress images, lazy loading)
This six-plugin set covers the fundamentals without bloat. As your site grows, add specialized tools (e.g., e-commerce via WooCommerce, email marketing via Mailchimp integration), but start with this core and expand deliberately. For sites with specific community needs, such as essential items for a community business directory, tailor your plugin choices to support local engagement and user-generated content.
How to document your plugin choices for future maintenance
Create a simple “Plugin Inventory” document (Google Sheet or Notion page) with columns for: Plugin Name, Purpose, Version, Last Updated, License Key (if premium), and Notes. Update this document whenever you add, remove, or update a plugin. This inventory is invaluable for troubleshooting, onboarding new team members, or migrating to a new host. I’ve seen too many site owners forget which plugins they installed or why, leading to redundant tools and unnecessary complexity. Good documentation prevents this.
Quick reference: common signals of quality
- Recent updates: Updated within the last 3 months
- Active support: Developer responds to support threads within 48 hours
- Good ratings: 4+ stars with 50+ reviews
- Clear documentation: Comprehensive setup guides and FAQs
- Established author: Developer maintains multiple well-regarded plugins
- Transparent changelog: Detailed release notes for each update
Use this checklist as a gut-check before installing any plugin—if it fails multiple criteria, keep looking.
Alternatives and Special Scenarios
Not every WordPress site needs the same plugin approach. Depending on your hosting platform, site type, or technical constraints, you might follow a different path. Let’s explore some common edge cases and how to handle them.
If you’re on WordPress.com (Jetpack and built-in protections)
WordPress.com (the hosted platform) differs significantly from self-hosted WordPress.org installs. Free and lower-tier plans don’t allow plugin installation at all—you’re limited to Jetpack features and built-in tools. Business and eCommerce plans allow plugins, but many traditional plugins (like security and caching tools) are redundant because WordPress.com handles security and performance at the platform level. If you’re on WordPress.com, focus on functionality plugins (forms, SEO, galleries) and skip infrastructure plugins.
When you might not need plugins (or use built-in features)
Modern WordPress and many themes include features that once required plugins: custom menus, widget areas, basic SEO fields, image galleries, and responsive design. Before installing a plugin, check if your theme or WordPress core already offers the feature. For example, WordPress’s built-in block editor (Gutenberg) includes layout tools that reduce the need for page builders. Similarly, many hosts offer server-level caching, eliminating the need for caching plugins. Always exhaust native options before adding plugins.
Plugins for non-profit, e-commerce, or membership sites (consider scope and risk)
Specialized site types demand specialized plugins—and careful vetting. E-commerce sites (WooCommerce) need payment gateways, inventory management, and shipping plugins, each adding complexity and risk. Membership sites need access control, subscription management, and content restriction plugins. Non-profits often need donation forms and volunteer management tools. For these use cases, prioritize premium plugins with dedicated support and active development. The stakes are higher (payment data, user accounts, donor information), so security and reliability are non-negotiable. For budget-conscious organizations, explore low-cost business directory options for startups that offer solid functionality without premium price tags.
How to handle deprecations and plugin removals gracefully
Plugins get abandoned, deprecated, or removed from the repository. When this happens, you need a migration plan. First, export any data stored by the plugin (settings, user data, content). Next, find a replacement plugin with similar functionality and import your data if possible. Test thoroughly in staging before deactivating the old plugin on your live site. If no direct replacement exists, you might need custom development to replicate critical features. The key is monitoring plugin health proactively so you’re not caught off-guard by a sudden shutdown.
Documentation, Resources, and Where to Learn More
WordPress plugin management isn’t a one-and-done skill, it’s an evolving discipline. The plugin ecosystem changes constantly—new tools emerge, old ones fade, security threats evolve. Staying current requires ongoing education and access to credible resources. Here’s where to turn for authoritative guidance and community support.
Official WordPress resources (WordPress.org, developer docs)
The WordPress.org plugin repository is your primary source for free plugins, complete with user reviews, changelogs, and support forums. The WordPress Developer Resources offer deep dives into plugin development, security best practices, and advanced administration. For security-specific guidance, the WordPress Security Team publishes advisories and hardening guides. These official resources are free, authoritative, and regularly updated.
Industry guides and credible outlets for ongoing education
Beyond official documentation, several industry publications and guides offer valuable insights. WP Engine’s Ultimate Guide to WordPress Plugins provides an in-depth overview of the plugin ecosystem and best practices. DreamHost’s plugin roundups highlight quality tools across categories. For security news, TechRadar and similar outlets report on newly discovered vulnerabilities and exploits.
How to stay current with plugin security news and vulnerability disclosures
Subscribe to WordPress security newsletters: Wordfence Intelligence, WPScan, and Sucuri’s blog all publish regular vulnerability reports. Follow WordPress security researchers on Twitter or RSS feeds. Many managed hosting providers (WP Engine, Kinsta) send proactive security alerts to customers when critical vulnerabilities are disclosed. Set up Google Alerts for “[plugin name] vulnerability” for any mission-critical plugins you rely on. The goal is early warning—if you hear about a vulnerability the day it’s disclosed, you can patch immediately instead of days later after attackers have already exploited it.
Quick-start bibliography and recommended readings
- WordPress Security Guide – WordPress.org official hardening documentation
- Ultimate Guide to WordPress Plugins – WP Engine comprehensive ebook
- Plugin Security Best Practices – OWASP WordPress Security Guidelines
- Performance Optimization for WordPress – Google’s PageSpeed Insights guidance
Bookmark these resources and revisit them quarterly to stay current with evolving best practices.
Frequently Asked Questions
Do I really need plugins for my WordPress site?
Most WordPress sites benefit from a focused set of plugins covering security, backups, performance, and essential functionality. However, avoid overloading your site—start with core necessities and add specialized plugins only when truly needed. Modern themes and WordPress core include many features that once required plugins, so always check built-in options first before installing third-party tools.
How do I choose safe, well-supported plugins?
Look for plugins with recent updates (within 3-6 months), 50,000+ active installations, ratings above 4.0 stars with 50+ reviews, responsive support forums, and compatibility with your WordPress version. Vet the publisher’s track record and read both positive and negative reviews. Always install from the official WordPress repository or reputable vendors, and test new plugins in a staging environment before deploying to your live site.
What’s the best order to install plugins when starting a new site?
Install your theme first, then add plugins in this order: backups, security hardening, caching/performance optimization, SEO tools, forms and analytics. This sequence ensures critical infrastructure (backups, security) is active from day one, followed by performance foundations, then user-facing functionality. Always create a full backup before installing each new plugin and test functionality after activation.
How often should I update plugins, and what about compatibility?
Apply security patches immediately upon release, ideally within 24 hours. For major updates introducing new features or breaking changes, test in a staging environment first to verify compatibility with your WordPress version, theme, and other plugins. Enable automatic updates for minor bug fixes on trusted plugins, but manually review changelogs for major releases before updating production sites.
What should I do if a plugin breaks my site?
Immediately deactivate the problematic plugin via your WordPress dashboard, or rename its folder in /wp-content/plugins/ using FTP if you can’t access the admin panel. Clear all caches, check error logs for specific issues, and test for conflicts by reactivating other plugins one by one. If the problem persists, restore from your most recent backup, seek alternative plugins with similar functionality, or consult the plugin’s support forum for known issues and fixes.
Are security plugins necessary for WordPress.com vs self-hosted WordPress?
WordPress.com sites include built-in security protections (Jetpack, platform-level firewalls, automatic updates) and typically don’t require separate security plugins. Self-hosted WordPress sites benefit from comprehensive security strategies including hardening plugins, regular updates, strong passwords, and server-level protections. Choose one quality security plugin for self-hosted sites rather than stacking multiple overlapping security tools.
How many plugins is too many for a WordPress site?
There’s no magic number—site complexity varies. However, most well-maintained sites run 10-20 carefully chosen plugins. Focus on necessity over quantity. A lean, high-quality plugin set outperforms dozens of “nice-to-have” tools. Each active plugin adds overhead, potential conflicts, and maintenance burden. Regularly audit your plugins quarterly and remove anything unused or redundant.
Can I install plugins if I’m on a free WordPress.com plan?
Free and Personal WordPress.com plans do not allow custom plugin installation. You’re limited to Jetpack features and built-in tools. To install third-party plugins, you need the Business plan or higher, or switch to self-hosted WordPress.org. WordPress.com’s platform-level features often reduce the need for traditional plugins like caching or security tools.
Where can I learn more about plugin security and best practices?
Consult the official WordPress Security Guide, subscribe to security newsletters from Wordfence or WPScan, follow credible industry publications like TechRadar for vulnerability reports, and review vendor documentation for your hosting provider. Join WordPress community forums and attend local meetups for peer knowledge sharing. Staying informed requires ongoing education as threats and best practices evolve continuously.
Should I use premium plugins or stick with free options?
Premium plugins offer dedicated support, regular updates, and advanced features—valuable for mission-critical functionality like e-commerce, memberships, or complex forms. Free plugins work well for basic needs but offer no guaranteed support. Evaluate based on your site’s requirements, budget, and risk tolerance. For critical functionality, premium plugins with active support are often worth the investment, while free plugins suffice for non-essential features.
Final Thoughts: Building a Sustainable Plugin Strategy
WordPress plugins are powerful tools, but they demand respect and discipline. The difference between a thriving WordPress site and a security nightmare often comes down to plugin hygiene—thoughtful selection, diligent maintenance, and proactive monitoring. Start with clear goals, choose quality over quantity, test rigorously, and never stop learning. The plugin ecosystem will continue evolving, new vulnerabilities will emerge, and best practices will shift, but the fundamentals remain constant: backup religiously, update promptly, audit regularly, and always prioritize security and performance over flashy features.
Your WordPress site is an investment—of time, money, and reputation. Treat your plugins like the critical infrastructure components they are, not disposable add-ons. Build a staging workflow, document your decisions, and cultivate relationships with trusted plugin developers and hosting providers. When done right, a lean, well-maintained plugin toolkit will serve your site (and your sanity) for years to come.
Now it’s your turn. Take inventory of your current plugins, identify any that haven’t been updated in six months, and schedule a backup before your next update. Small, consistent actions build resilient websites. Your future self will thank you.