How to Install SEO Plugins in WordPress: 6 Essential Extensions

Most WordPress site owners install an SEO plugin, flip a few switches, and call it done. But here’s the thing—effective WordPress SEO isn’t about installing a single plugin and hoping for the best. It’s about assembling a lean, powerful toolkit that works together like a well-oiled machine. I remember when I first started managing WordPress sites, I thought Yoast SEO alone would magically boost my rankings. Spoiler: it didn’t. What actually moved the needle was understanding how different plugins complement each other to handle analytics, redirects, schema markup, and performance optimization.

The WordPress plugin ecosystem is vast—thousands of options compete for your attention—but only a handful truly matter for sustainable SEO growth. In this guide, you’ll learn exactly which six essential SEO plugins to install, how to configure them properly, and how to avoid the common pitfalls that sabotage most WordPress SEO efforts. We’re focusing on practical, actionable steps that deliver measurable results, not theory or fluff.
TL;DR – Quick Takeaways
- Six essential plugins cover all SEO bases: Core SEO (Yoast/Rank Math), analytics, redirects, schema, sitemaps, and performance optimization
- Don’t over-install: Too many plugins create conflicts, slow your site, and complicate maintenance
- Configuration matters more than installation: A properly configured free plugin beats a poorly set-up premium one every time
- Performance impacts SEO: Fast-loading pages rank better, so caching and optimization plugins aren’t optional
- Regular audits prevent drift: SEO settings need quarterly reviews to stay effective as your site evolves
Choose Your 6 Essential SEO Plugins
Let’s cut through the noise. WordPress has over 60,000 plugins in its directory, but you don’t need dozens of SEO tools cluttering your dashboard. What you need is a strategic stack that covers six critical areas without creating conflicts or slowing your site to a crawl.

The key is understanding what each plugin does and why it matters. Many site owners make the mistake of installing overlapping tools—running three different schema plugins, for example, which creates duplicate structured data and confuses search engines. Or they install a heavyweight “all-in-one” solution when they only need specific functionality. This approach inevitably leads to bloat, conflicts, and a frustrating troubleshooting cycle.
Core SEO Plugin (Yoast SEO or Rank Math)
Your foundation starts here. A core SEO plugin handles on-page analysis, meta tags, XML sitemaps, breadcrumbs, and schema markup. Yoast SEO has been the dominant player for years, with millions of active installations and a mature feature set. It’s reliable, well-documented, and has a massive support community. Rank Math has surged in popularity recently by offering more features in its free version and a cleaner interface.
Both plugins do essentially the same job, but with different philosophies. Yoast takes a more guided, beginner-friendly approach with traffic light indicators and readability checks. Rank Math gives you more granular control out of the box and includes features like built-in 404 monitoring and redirection that Yoast reserves for premium users. According to comparisons from industry analysis sites, Rank Math has grown its market share significantly by appealing to users who want more control without paying for premium features.
SEO Analytics & Auditing Extension
You can’t improve what you don’t measure. An analytics plugin connects your WordPress site to Google Search Console and Google Analytics, giving you direct dashboard access to performance data. Tools like MonsterInsights or Site Kit by Google eliminate the need to constantly switch between your site and Google’s tools.
These plugins show you which pages rank for what keywords, where your traffic comes from, and which content performs best. More importantly, they surface technical issues—crawl errors, mobile usability problems, security warnings—before they tank your rankings. Site Kit is free and official from Google, making it a solid choice if you’re budget-conscious.
Redirection and Site Structure Tool
Broken links and improper redirects are ranking killers. When you change URLs, move content, or restructure your site, you need a robust way to manage 301 and 302 redirects. The Redirection plugin is purpose-built for this, offering detailed logging and easy management of redirect rules.
It also tracks 404 errors so you can fix or redirect them before they hurt user experience. I’ve seen sites lose 30% of their organic traffic simply because they changed their permalink structure without setting up proper redirects. This plugin prevents that disaster, and if you’re looking to understand essential steps to set up a business directory website, managing redirects becomes even more critical as your content scales.
Schema Markup & Rich Results Helper
Schema markup is the secret sauce that helps your content appear in rich results—those enhanced search listings with star ratings, FAQ dropdowns, and recipe cards. While Yoast and Rank Math include basic schema functionality, a dedicated plugin like Schema Pro or WP SEO Structured Data Schema gives you fine-tuned control over multiple schema types.
These plugins let you implement Article, Product, FAQ, How-To, Local Business, and dozens of other schema types without touching code. They’re particularly valuable if you run an e-commerce site or publish diverse content types that benefit from different structured data formats.
XML Sitemap & Indexation Manager
Modern SEO plugins like Yoast and Rank Math generate XML sitemaps automatically, but if you need advanced sitemap control—splitting large sites into multiple sitemaps, excluding specific content types, or managing image and video sitemaps—consider a dedicated tool like XML Sitemap Generator for Google.
This becomes essential for larger sites (500+ pages) where you need to control exactly what search engines crawl and prioritize. The plugin automatically notifies search engines when you publish new content and helps you exclude thin or duplicate content from indexation.
Core Web Vitals/Performance-Focused Plugin
Page speed is a confirmed ranking factor, and Core Web Vitals—Largest Contentful Paint (LCP), First Input Delay (FID), and Cumulative Layout Shift (CLS)—directly impact your search visibility. A caching and optimization plugin like WP Rocket, W3 Total Cache, or LiteSpeed Cache is non-negotiable.
These plugins handle caching, minification, lazy loading, and database optimization. WP Rocket is the premium option with the easiest setup, while W3 Total Cache and LiteSpeed Cache offer powerful free versions if you’re willing to navigate more complex settings. The SEO benefit is straightforward: faster pages rank better and keep visitors engaged longer, which signals quality to search engines.
| Plugin Category | Primary Purpose | Top Recommendation |
|---|---|---|
| Core SEO | On-page optimization, meta, sitemaps | Yoast SEO or Rank Math |
| Analytics | Track performance, crawl issues | Site Kit by Google |
| Redirects | Manage URL changes, fix 404s | Redirection |
| Schema | Structured data for rich results | Schema Pro |
| Sitemaps | Advanced sitemap control | Built into core SEO plugin |
| Performance | Caching, speed, Core Web Vitals | WP Rocket or LiteSpeed Cache |
Install and Activate Your Plugins
Once you’ve identified your six essential plugins, the installation process is straightforward but requires attention to detail. A rushed installation can lead to conflicts, broken functionality, or worse—a completely inaccessible site. Let’s walk through the proper way to add plugins to your WordPress installation.
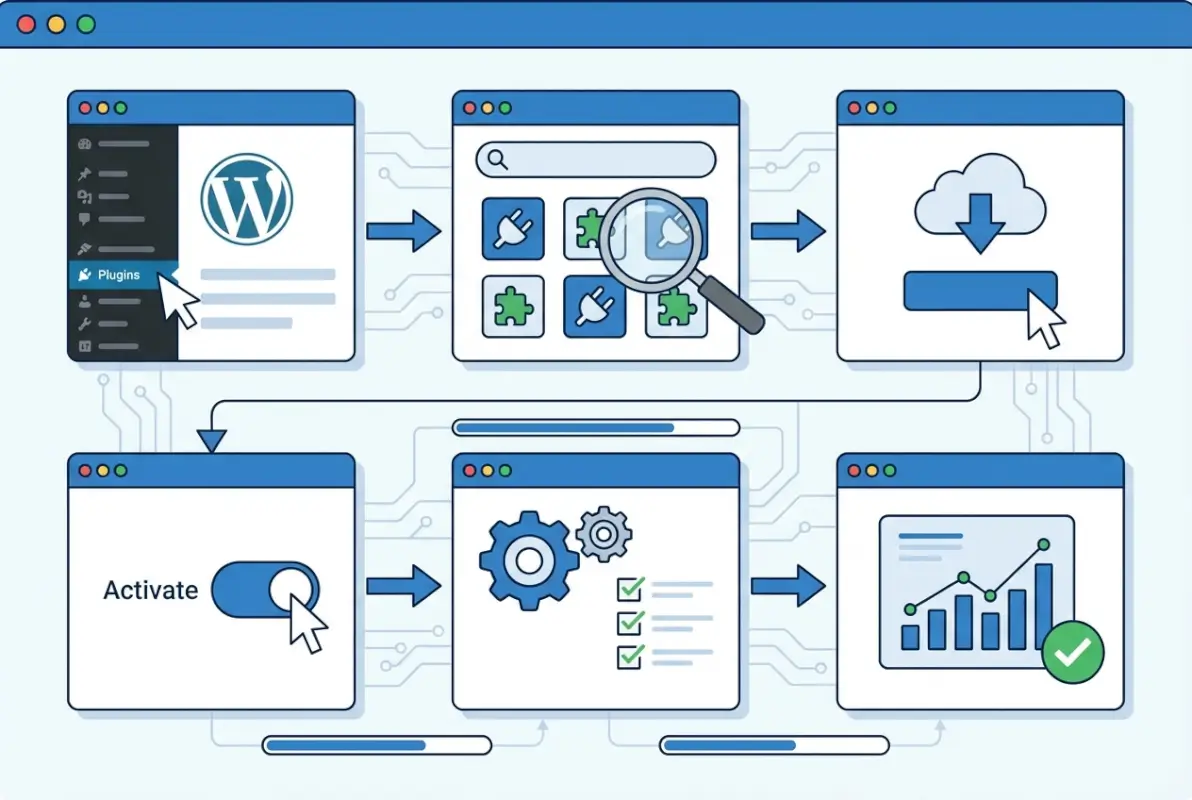
Step-by-Step Install
Log into your WordPress admin dashboard and navigate to Plugins → Add New. You’ll see a search bar in the top right. Type the exact name of the plugin you want—for example, “Yoast SEO”—and press enter. WordPress will display results from the official repository. Look for the correct plugin (check the developer name and install count to verify authenticity), then click the blue Install Now button.
After installation completes (usually 5-10 seconds), the button changes to Activate. Click it. The plugin is now live on your site. Repeat this process for each of your six chosen plugins. For premium plugins like WP Rocket, you’ll upload the .zip file you received after purchase by clicking Upload Plugin at the top of the Add New page.
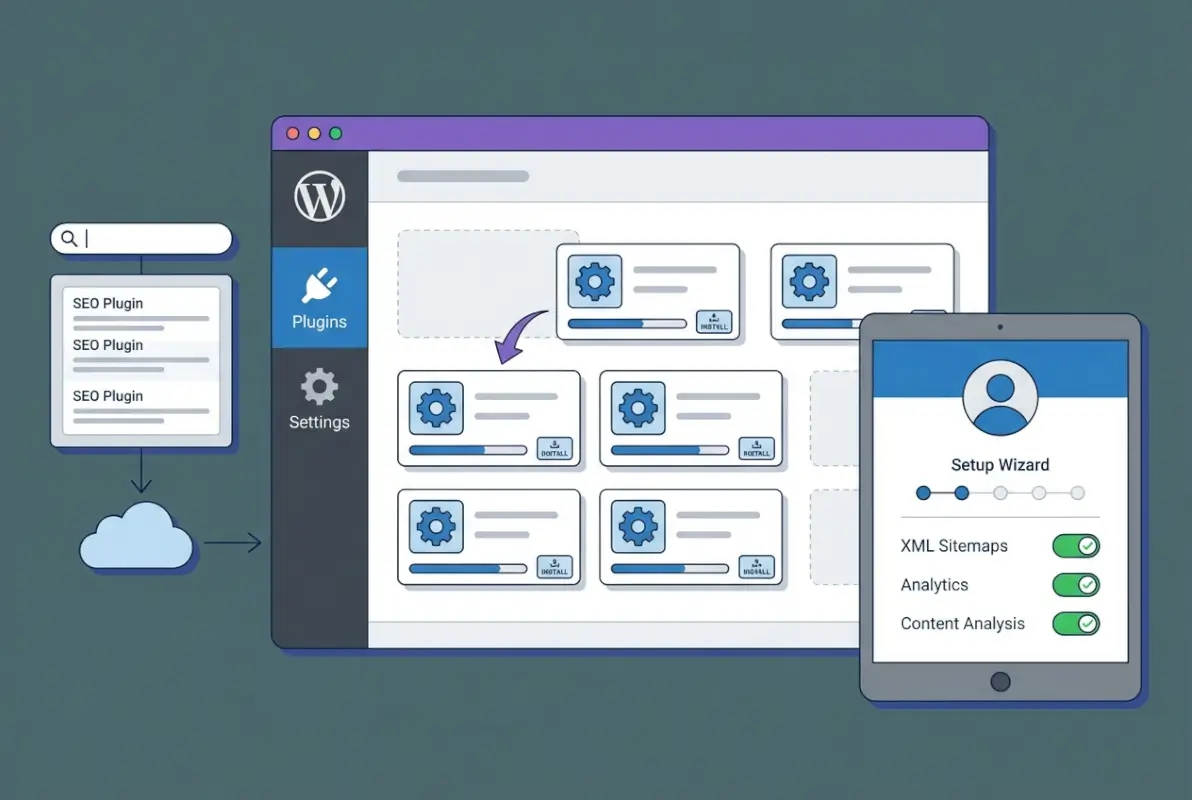
Basic Configuration Prerequisites
Most modern SEO plugins include an onboarding wizard that launches immediately after activation. Don’t skip this step—these wizards configure essential settings based on your site type, content focus, and experience level. For example, Yoast asks whether your site is a blog, online store, or business site, then optimizes its default settings accordingly.
Rank Math’s wizard is particularly thorough, walking you through Google Search Console connection, sitemap settings, and schema configuration in one go. Take your time with these wizards; the five minutes you invest here will save you hours of manual configuration later. If you want to understand how to properly install a purchased WordPress plugin, many of these principles apply universally across different plugin types.
Compatibility Checks
Not all plugins play nicely together, and some themes have built-in features that conflict with SEO plugins. Before you activate everything at once, check your theme documentation to see if it includes schema markup or sitemap generation. If it does, you’ll need to disable those features to avoid duplication.
PHP version matters too. Most modern SEO plugins require PHP 7.4 or higher. Check your current version in Tools → Site Health. If you’re running an older version, contact your hosting provider to upgrade. Outdated PHP versions create security vulnerabilities and prevent newer plugins from functioning properly.
Caching layers can also cause issues. If you’re using a server-level cache (like Varnish) or a CDN (like Cloudflare), you may need to configure cache exceptions for your admin area and certain dynamic pages. WP Rocket and similar plugins usually handle this automatically, but it’s worth verifying.
Migration Tips
Switching from one SEO plugin to another—say, from Yoast to Rank Math—requires careful data migration to preserve your metadata, redirects, and settings. Fortunately, Rank Math includes a built-in migration tool that imports your Yoast configuration automatically. Navigate to Rank Math → Status & Tools → Import & Export and select Yoast SEO from the list.
The migration takes a few minutes and transfers your post metadata, titles, descriptions, and schema settings. However, some advanced configurations (like custom redirects in Yoast Premium) may not transfer perfectly, so review your settings after migration and test critical pages to ensure everything works as expected.
Configure Core SEO Plugin (Yoast or Rank Math)
Installing your core SEO plugin is just the beginning—proper configuration is where the real SEO work happens. Both Yoast and Rank Math offer extensive settings, but you don’t need to tweak every option to see results. Focus on the high-impact areas first, then refine as you grow more comfortable with the tool.
Site-Wide Settings
Start with general settings that affect your entire site. In Yoast, navigate to SEO → General and work through each tab. The Features tab lets you enable or disable major functionality like XML sitemaps, breadcrumbs, and admin bar menu. For most sites, you’ll want sitemaps enabled and breadcrumbs activated if your theme supports them.
In Rank Math, go to Rank Math → General Settings. The interface is more compact but covers similar ground. Key decisions here include whether to noindex certain post types (like attachment pages, which create thin content issues) and whether to enable link counter and 404 monitor features.
Under Search Appearance (Yoast) or Titles & Meta (Rank Math), you’ll define default templates for meta titles and descriptions across your site. These templates use variables like %title%, %sitename%, and %sep% to dynamically generate metadata. A common setup for blog posts is: %title% %sep% %sitename%
Content Analysis and Focus Keywords
The content analysis feature in both plugins evaluates your posts and pages against SEO best practices. You specify a focus keyword for each piece of content, and the plugin checks whether you’ve used it in your title, headings, URL, first paragraph, and throughout the body copy.
Here’s where many users go wrong: they over-optimize, stuffing keywords unnaturally to hit every green light. Don’t do that. The traffic light system (red, orange, green) is a guide, not a mandate. Sometimes a perfectly optimized piece of content performs poorly because it reads like robot-written spam. Prioritize natural, helpful writing over mechanical keyword insertion.
Yoast also includes readability analysis, checking factors like sentence length, paragraph length, and use of subheadings. These metrics aim to improve user experience, which indirectly supports SEO by reducing bounce rates and increasing engagement. Rank Math offers similar readability checks in its content analyzer.
Schema and Structured Data Setup
Schema markup tells search engines what type of content you’re publishing—article, product, recipe, event, etc. Both Yoast and Rank Math generate basic schema automatically, but you should verify and customize it for your content types.
In Yoast, go to SEO → Search Appearance → Content Types and set schema type for each post type. For blog posts, select “Article.” For product pages (if you use WooCommerce), select “Product.” Yoast’s free version offers limited schema options; the premium version adds FAQ, How-To, and more.
Rank Math’s free version is more generous with schema types. Navigate to Rank Math → Titles & Meta → [Content Type] and scroll to the Schema section. You can select from Article, BlogPosting, NewsArticle, Recipe, Product, and more. Rank Math also lets you add custom schema via JSON-LD in the Schema Generator tool.
After configuring schema, test it with Google’s Rich Results Test. Paste your page URL and verify that the structured data is valid and eligible for rich results. Fix any errors or warnings before moving on.
XML Sitemaps and Indexing Preferences
XML sitemaps help search engines discover and crawl your content efficiently. Both Yoast and Rank Math generate sitemaps automatically, but you should customize what’s included. In Yoast, go to SEO → General → Features and ensure XML sitemaps are enabled, then click the gear icon to access sitemap settings.
Exclude post types and taxonomies that don’t add SEO value—media attachments, archives for rarely-used tags, author archives if you’re a single-author blog. Less is more here; a lean sitemap focuses search engines on your best content.
In Rank Math, sitemap settings are under Rank Math → Sitemap Settings. You’ll see options for each post type and taxonomy, plus advanced settings like excluding specific posts by ID or limiting the number of entries per sitemap (useful for very large sites).
Integrations (Google Search Console, Analytics)
Connecting your SEO plugin to Google Search Console surfaces indexing issues, crawl errors, and keyword data directly in your WordPress dashboard. In Yoast, you’ll need the premium version for this feature. Navigate to SEO → General → Integrations and authenticate with your Google account.
Rank Math offers Search Console integration for free. Go to Rank Math → General Settings → Webmaster Tools and click “Connect Search Console.” You’ll authenticate with Google, select your property, and grant permissions. Once connected, Rank Math displays Search Console data in its dashboard, showing top keywords, impressions, and clicks.
For Google Analytics, consider using Site Kit by Google instead of relying on your SEO plugin. Site Kit provides comprehensive analytics without adding extra code to your theme files or risking conflicts with other plugins. It integrates seamlessly with WordPress and shows real-time traffic data on your dashboard.
Implement SEO Analytics & Auditing
Raw data without context is noise. Analytics and auditing tools transform that noise into actionable insights—showing you what’s working, what’s broken, and where to focus your optimization efforts. This is where you move from “guessing” to “knowing” what impacts your search performance.
Connect Analytics Accounts and Set Up Goals
If you’re using Site Kit by Google, navigate to Site Kit → Settings → Connect More Services and add Google Analytics and Google Search Console if you haven’t already. The setup wizard walks you through authentication and property selection. For most sites, Universal Analytics has been replaced by Google Analytics 4 (GA4), which requires different setup steps but offers more robust reporting.
Once connected, define conversion goals in GA4—newsletter signups, contact form submissions, product purchases, or whatever action matters for your business. These goals help you understand which content and traffic sources deliver real value, not just vanity metrics like page views.
MonsterInsights simplifies this process if you prefer a plugin-based approach. After activating MonsterInsights, run the setup wizard, connect your Google account, and select your GA4 property. The plugin automatically tracks common events like outbound link clicks, file downloads, and form submissions without requiring custom code.
Use Site Crawl Reports and Index Coverage
Google Search Console’s Index Coverage report shows which pages are indexed, which are excluded, and which have errors. Access this through Site Kit’s dashboard or directly in Search Console. Look for patterns—if dozens of pages are excluded due to “Duplicate content without canonical,” you have a canonicalization issue to address.
Common indexing problems include:
- Crawled but not indexed: Usually means thin or low-quality content that Google chose not to include
- Discovered but not crawled: Google found the URL but hasn’t prioritized crawling it, often due to low internal linking or slow server response
- Blocked by robots.txt: Check your robots.txt file (yoursite.com/robots.txt) and ensure you’re not accidentally blocking important pages
- 404 errors: Broken links that need redirects or content restoration
Address these issues methodically. For instance, if you’re learning how to register a company in a business directory, ensuring those directory pages are properly indexed is critical for visibility.
Identify and Fix Crawl Issues
Redirect chains—where one redirect points to another, which points to another—waste crawl budget and slow page load times. Use the Redirection plugin’s log feature to identify chains, then consolidate them into single-step redirects.
Orphan pages (pages with no internal links pointing to them) are invisible to crawlers and users. Find them by comparing your sitemap URLs to your Google Analytics page list. Any page in your sitemap but with zero organic traffic over 90 days might be orphaned. Add internal links from relevant content to bring these pages back into your site architecture.
404 errors should either redirect to relevant content or return a helpful 404 page with links to popular content. The Redirection plugin tracks 404 hits automatically. Review the log weekly and create 301 redirects for legitimate URLs (typos in links, old URLs you forgot to redirect) or leave as 404 if they’re spam or probe attempts.
Set Up Redirects and Internal Linking
Redirect management is unsexy but crucial. Every time you change a URL—whether renaming a post, restructuring your permalink format, or deleting outdated content—you create potential for broken links and lost traffic. The Redirection plugin gives you precise control over this process without touching .htaccess files or server configs.

Create and Manage 301/302 Redirects
After activating Redirection, go to Tools → Redirection. Click Add New at the top of the page. Enter the source URL (the old path, like /old-blog-post) and the target URL (where you want it to redirect, like /new-blog-post). Select 301 Permanent as the type for most redirects, since you’re permanently moving content.
Use 302 Temporary redirects only for short-term situations—seasonal promotions, A/B testing, or temporary content moves. Search engines treat 301s as permanent signals to transfer ranking authority to the new URL, while 302s don’t pass authority because they indicate the original URL will return.
The plugin logs every redirect hit, showing you which old URLs still receive traffic and from where. This data is gold for identifying outdated backlinks you might want to reach out about updating, or popular old URLs that deserve better content than a simple redirect.
Use Internal Linking Suggestions to Optimize Topic Clusters
Internal links distribute authority throughout your site and help users discover related content. Rank Math includes an internal linking suggestion feature that analyzes your content and recommends relevant pages to link to based on keyword similarity.
When editing a post in the block editor, open the Rank Math sidebar and scroll to the Link Suggestions section. The plugin displays a list of your existing posts that share topical relevance with the current post. Click any suggestion to automatically insert a contextual link in your content.
This feature shines when you’re building topic clusters—comprehensive coverage of a subject across multiple interlinked posts. For example, if you’re creating content about how to showcase a business directory on your homepage, you’d want internal links to related posts about directory setup, customization, and monetization.
Audit for Broken Links and Fix
Broken links frustrate users and signal poor maintenance to search engines. The Broken Link Checker plugin scans your entire site for broken internal and external links, missing images, and redirect issues. After activation, it runs in the background and emails you when it finds problems.
Access the dashboard at Tools → Broken Links. You’ll see a list of all detected issues with options to edit the link directly, unlink it, or mark it as “not broken” if it’s a false positive. For high-traffic sites, this plugin can be resource-intensive; consider running it weekly rather than continuously, or use an external service like Screaming Frog for periodic audits.
Implement Schema and Rich Results
Schema markup is your direct line to enhanced search listings. When implemented correctly, it can earn you featured snippets, knowledge panels, and rich results that dramatically boost click-through rates—even if your ranking doesn’t change.
Enable/Adjust FAQ, How-To, Article, Product Schemas
Different content types benefit from different schema. Blog posts typically use Article or BlogPosting schema, which Yoast and Rank Math apply automatically. But if you publish FAQs, tutorials, recipes, or product reviews, you’ll want specialized schema.
Rank Math’s free version includes FAQ and How-To blocks for the Gutenberg editor. Add a new block, search for “FAQ” or “How-To,” and structure your content within these blocks. Rank Math automatically generates the corresponding schema markup in the background.
For WooCommerce stores, Product schema is essential. Both Yoast (premium) and Rank Math handle this automatically, adding price, availability, ratings, and review count to your product pages’ structured data. Verify that your theme doesn’t already include Product schema to avoid duplication.
If you’re running a profitable home-based business directory, Local Business schema helps your listings appear in map results and local packs. Use Schema Pro or Rank Math’s schema generator to add business name, address, phone, hours, and service area information.
Validate Structured Data
After implementing schema, always validate it before considering the job done. Google’s Rich Results Test (search.google.com/test/rich-results) shows whether your page is eligible for specific rich result types.
Paste your page URL into the test tool and click “Test URL.” The tool fetches your page and displays detected schema types along with any errors or warnings. Errors (red) must be fixed—they prevent rich results entirely. Warnings (yellow) are less critical but worth addressing if they’re easy fixes.
The Schema Markup Validator (validator.schema.org) provides more detailed technical feedback. Use this if you’re troubleshooting complex schema issues or implementing custom schema types not fully supported by your plugin.
Monitor for Schema Errors and Fix
Schema isn’t set-and-forget. As you update content, change themes, or install new plugins, schema markup can break. Monitor the Enhancements section in Google Search Console monthly. This report shows which pages have valid rich results and which have errors preventing them.
Common schema errors include missing required properties (like “author” for Article schema), invalid date formats, or duplicate schema from multiple sources (your theme, your plugin, and maybe a third plugin all generating Article schema). Fix these by disabling redundant schema sources and ensuring all required fields are populated.
XML Sitemaps, Indexation, and Performance
Your sitemap is your site’s index card for search engines—a structured list of pages you want crawled and indexed. Combined with solid performance optimization, it ensures search engines can efficiently access and process your content.
Ensure Sitemap is Registered and Submitted
Both Yoast and Rank Math generate XML sitemaps automatically at yoursite.com/sitemap_index.xml (or similar). Verify your sitemap loads by visiting that URL. You should see a list of sub-sitemaps (posts, pages, categories, etc.) with entry counts and last modification dates.
Submit your sitemap to Google Search Console by going to Sitemaps in the left menu and entering your sitemap URL. Google will fetch it and report how many URLs were discovered. Do the same for Bing Webmaster Tools if you want coverage beyond Google.
Most SEO plugins ping search engines automatically when you publish new content, but manual submission ensures they know your sitemap exists, especially for new sites or after URL structure changes.
Exclude Non-Indexable Content
Not everything on your site deserves to be indexed. Thin content—short author bios, tags with only one post, archive pages, attachment pages—dilutes your site’s overall quality signal. Use your SEO plugin to noindex these content types.
In Yoast, navigate to SEO → Search Appearance and review each content type and taxonomy. Toggle “Show [content type] in search results?” to No for anything that shouldn’t be indexed. Common candidates: Media (attachments), Format archives, Author archives (for single-author sites), and sparsely-used tags.
Rank Math has similar settings under Rank Math → Titles & Meta. For each content type, you’ll see a “Robots Meta” section where you can set noindex. This tells search engines not to include these pages in their index, focusing their crawl budget on your valuable content instead.
Cache, Minification, and Image Optimization
Performance optimization directly impacts SEO through Core Web Vitals and user experience metrics. WP Rocket is the gold standard for caching—activate it, run through the setup wizard, and you’re 80% of the way to optimal performance. The plugin handles page caching, browser caching, GZIP compression, minification, and lazy loading out of the box.
For free alternatives, LiteSpeed Cache (if your host supports LiteSpeed servers) or W3 Total Cache offer powerful features but require more configuration. Focus on these core optimizations:
- Page caching: Stores static HTML versions of your pages to reduce server processing time
- Minification: Removes unnecessary characters from CSS/JS files to reduce file size
- Lazy loading: Delays loading images until they’re about to enter the viewport
- Database optimization: Cleans up revisions, spam comments, and transients that bloat your database
Image optimization is a separate concern. Plugins like ShortPixel or Smush automatically compress images on upload, reducing file sizes by 50-70% without visible quality loss. Smaller images mean faster page loads and better Core Web Vitals scores.
Page Speed Considerations Tied to SEO Health
Core Web Vitals—LCP, FID/INP, and CLS—are confirmed ranking factors. Measure yours with PageSpeed Insights or the Core Web Vitals report in Google Search Console. Target these benchmarks:
- LCP (Largest Contentful Paint): Under 2.5 seconds—the time it takes for your main content to load
- FID/INP (First Input Delay / Interaction to Next Paint): Under 200ms—how quickly your site responds to user interactions
- CLS (Cumulative Layout Shift): Under 0.1—how much your page layout shifts during loading
Poor scores in any category hurt your rankings and user experience. Address LCP by optimizing images and using a CDN. Fix FID/INP by minimizing JavaScript execution and using efficient code. Reduce CLS by specifying image dimensions and avoiding ads that push content around as they load.
Security, Backups, and Maintenance
The best SEO in the world means nothing if your site gets hacked or goes down. Security and maintenance aren’t glamorous, but they protect all the optimization work you’ve done.
Schedule Regular Plugin Updates and Vulnerability Checks
Outdated plugins are the #1 attack vector for WordPress hacks. Enable automatic updates for minor versions and security patches, but manually test major updates on a staging site first. WordPress makes this easy—go to Dashboard → Updates and click “Enable automatic updates” for each plugin.
Subscribe to security bulletins from WPScan or use a security plugin like Wordfence or Sucuri Security that alerts you to known vulnerabilities in your installed plugins. These tools scan your site daily and notify you of any security issues that need immediate attention.
Backups Before Major Changes
Before installing a new plugin, updating your theme, or making significant configuration changes, create a complete backup. UpdraftPlus is free and reliable, backing up your database and files to cloud storage (Dropbox, Google Drive, Amazon S3). Schedule automatic daily or weekly backups so you always have a recent restore point.
Test your backups periodically by restoring them to a staging environment. A backup you can’t restore is worthless, and you don’t want to discover issues when you’re trying to recover from a crisis.
Periodic SEO Health Audits
Schedule a comprehensive SEO audit quarterly. Review these areas:
- Index coverage in Search Console—any new errors or exclusions?
- Core Web Vitals—has performance degraded?
- Broken links and 404 errors—anything new to fix?
- Schema validation—still working correctly?
- Redirect audit—any chains or outdated redirects to clean up?
- Content freshness—which top pages need updating?
Document findings in a spreadsheet and prioritize fixes by impact. This proactive approach catches small issues before they become ranking problems.
5 Common Pitfalls and How to Avoid Them
Even experienced WordPress users make predictable mistakes that undermine their SEO efforts. Here are the big ones and how to sidestep them.
Plugin Conflicts and Load Order
Two plugins trying to do the same job—like two schema plugins or two sitemap generators—create conflicts that break functionality or duplicate output. The fix is simple: choose one plugin per function and deactivate competitors. If you suspect a conflict, use the Health Check & Troubleshooting plugin to isolate which plugin is causing the issue.
Over-Optimizing with Focus Keywords
Keyword stuffing to hit every green light in your SEO plugin makes content unreadable. Search engines are sophisticated enough to understand natural language and semantic variations. Write for humans first, optimize for search engines second. If a sentence feels forced to include your focus keyword one more time, don’t include it.
Neglecting Mobile Performance
Google uses mobile-first indexing—it primarily crawls and ranks your site based on its mobile version. Test your site on actual mobile devices (not just browser dev tools) and check PageSpeed Insights for mobile-specific scores. Common mobile performance killers include uncompressed images, render-blocking JavaScript, and excessive ads above the fold.
Inconsistent Redirects or Broken Canonicalization
Redirecting /page-a to /page-b while your canonical tag on /page-b points back to /page-a confuses search engines. Ensure your redirects and canonicalization strategy align—both should point to the same authoritative version of each page. Use the Redirection plugin’s logs and Search Console’s Index Coverage report to identify mismatches.
Overlooking Data Privacy/Compliance
If you serve users in the EU, GDPR compliance requires cookie consent before loading analytics scripts. Plugins like Complianz or CookieYes handle this automatically, blocking scripts until users consent. Non-compliance risks fines and damages user trust, and indirectly impacts SEO if users bounce due to intrusive, non-compliant cookie banners.
Measuring Impact and Ongoing Optimization
SEO isn’t a one-time project—it’s a continuous process of measurement, testing, and refinement. The plugins and configurations you’ve implemented create the foundation; ongoing optimization drives sustained growth.
Key Metrics to Monitor
Focus on these metrics in Google Analytics and Search Console:
- Organic traffic: Total visitors from search engines (the ultimate success metric)
- Click-through rate (CTR): Percentage of impressions that result in clicks (low CTR indicates poor meta descriptions or title tags)
- Average position: Where your pages rank on average for tracked queries
- Impressions: How often your pages appear in search results (indicates visibility)
- Bounce rate and time on page: Engagement metrics that signal content quality
- Conversions: Whatever action matters for your business goals
Track these monthly and look for trends. A sudden drop in organic traffic warrants immediate investigation—check for manual penalties, algorithmic changes, or technical issues. Steady growth confirms your strategy is working.
A/B Testing Content Changes and Schema Tweaks
Small changes can have outsized impacts. Test variations of your meta descriptions to see which drives higher CTR. Experiment with different schema types to see if How-To schema outperforms standard Article schema for tutorial content.
WordPress doesn’t have built-in A/B testing, but you can run controlled experiments by changing one variable at a time and monitoring results over 2-4 weeks. For example, update meta descriptions on 10 similar posts and compare their CTR to 10 control posts that kept original descriptions.
Routine Content Audits and Updating Stale Content
Content decays over time—information becomes outdated, screenshots show old interfaces, statistics lose relevance. Identify your top 20 traffic-generating posts and update them annually. Add current data, refresh examples, expand thin sections, and update meta descriptions to reflect new angles.
Google rewards freshness for time-sensitive topics. Adding a paragraph of new information and updating the publish date can trigger a rankings boost for competitive keywords. Use this strategy selectively for high-value content, not as a bulk tactic across your entire site.
Practical 30-Minute Setup Checklist
If you’re starting from scratch or auditing an existing site, this checklist gets you 80% of the way to solid SEO in under 30 minutes.
Quick-Start Steps for Immediate SEO Improvements
- Install and activate your core SEO plugin (Yoast or Rank Math)
- Run the onboarding wizard and connect Google Search Console
- Set up XML sitemaps and submit to Search Console and Bing
- Configure default title and meta description templates
- Enable schema markup for your primary content type
- Install a caching plugin (WP Rocket or LiteSpeed Cache) and activate it
- Install Redirection plugin and import any existing redirects from .htaccess
- Set up Google Analytics via Site Kit or MonsterInses
- Run PageSpeed Insights on your homepage and top 3 posts
- Fix critical issues identified in PageSpeed (usually image optimization and caching)
Post-Setup Validation Tasks
After initial setup, verify everything works:
- Visit
yoursite.com/sitemap_index.xmland confirm your sitemap loads - Check Search Console to see if Google has fetched your sitemap
- Use Google’s Rich Results Test on 2-3 representative posts to validate schema
- Verify Google Analytics is tracking page views (visit a page and check Real-Time report)
- Create a test redirect and confirm it works
- Run a mobile-friendly test on your homepage
Frequently Asked Questions
What is the best SEO plugin for WordPress?
There’s no single “best” plugin—it depends on your needs. Yoast SEO offers beginner-friendly guidance and has the largest user base, while Rank Math provides more features for free and appeals to users who want advanced control. Both are excellent choices for most sites.
Should I use Yoast or Rank Math for my site?
Choose Yoast if you prefer structured guidance and don’t mind paying for premium features. Choose Rank Math if you want more functionality in the free version and are comfortable with a slightly steeper learning curve. Never run both simultaneously—they’ll conflict.
Do I need a separate analytics plugin if I use an SEO plugin?
Most SEO plugins don’t include comprehensive analytics, so yes, you should add Google Analytics via Site Kit or MonsterInsights. Some premium SEO plugins include basic analytics dashboards, but they’re not substitutes for full GA4 implementation.
How do I set up XML sitemaps in WordPress?
Both Yoast and Rank Math generate XML sitemaps automatically when activated. Just enable the sitemap feature in plugin settings, then submit the sitemap URL to Google Search Console and Bing Webmaster Tools. Your sitemap is usually at yoursite.com/sitemap_index.xml.
How often should I review and update SEO settings?
Review SEO settings quarterly for most sites, monthly for high-traffic or rapidly changing sites. Update individual post settings whenever you refresh content or target new keywords. Major site-wide changes (like schema adjustments) should follow any significant theme or plugin updates.
Can I optimize for SEO without heavy plugins?
Technically yes—you can manually add meta tags, generate sitemaps via code, and implement schema through custom fields. But this requires development skills and ongoing maintenance. For most users, a well-configured SEO plugin is more efficient and less error-prone.
How can I verify that my schema markup is working properly?
Use Google’s Rich Results Test (search.google.com/test/rich-results) and Schema Markup Validator (validator.schema.org). Paste your page URL into these tools to see detected schema, check for errors, and confirm eligibility for rich results. Monitor the Enhancements section in Search Console for ongoing validation.
How many SEO plugins should I run on WordPress?
Aim for 5-7 specialized plugins covering core SEO, analytics, redirects, caching, and security. More plugins increase conflict risk and slow your site. Avoid overlapping functionality—one sitemap plugin, one schema plugin, one caching plugin.
Do Yoast and Rank Math slow down my site, and how to mitigate it?
Both plugins add minimal overhead if configured properly. The slowdown usually comes from excessive features you don’t use or conflicts with other plugins. Disable unnecessary features in settings, use a quality caching plugin, and choose either Yoast or Rank Math—not both.
Which plugin is best for beginners vs. advanced users?
Yoast SEO is more beginner-friendly with guided workflows and traffic light indicators. Rank Math suits advanced users who want granular control and aren’t intimidated by more options. Both have learning curves, but Yoast holds your hand more.
How do I fix broken redirects and 404s efficiently?
Install the Redirection plugin and enable 404 logging. Review the 404 log weekly, create 301 redirects for legitimate old URLs, and ignore spam/probe attempts. For broken redirects, check the Redirection log for redirect chains and consolidate them into direct redirects.
Final Thoughts
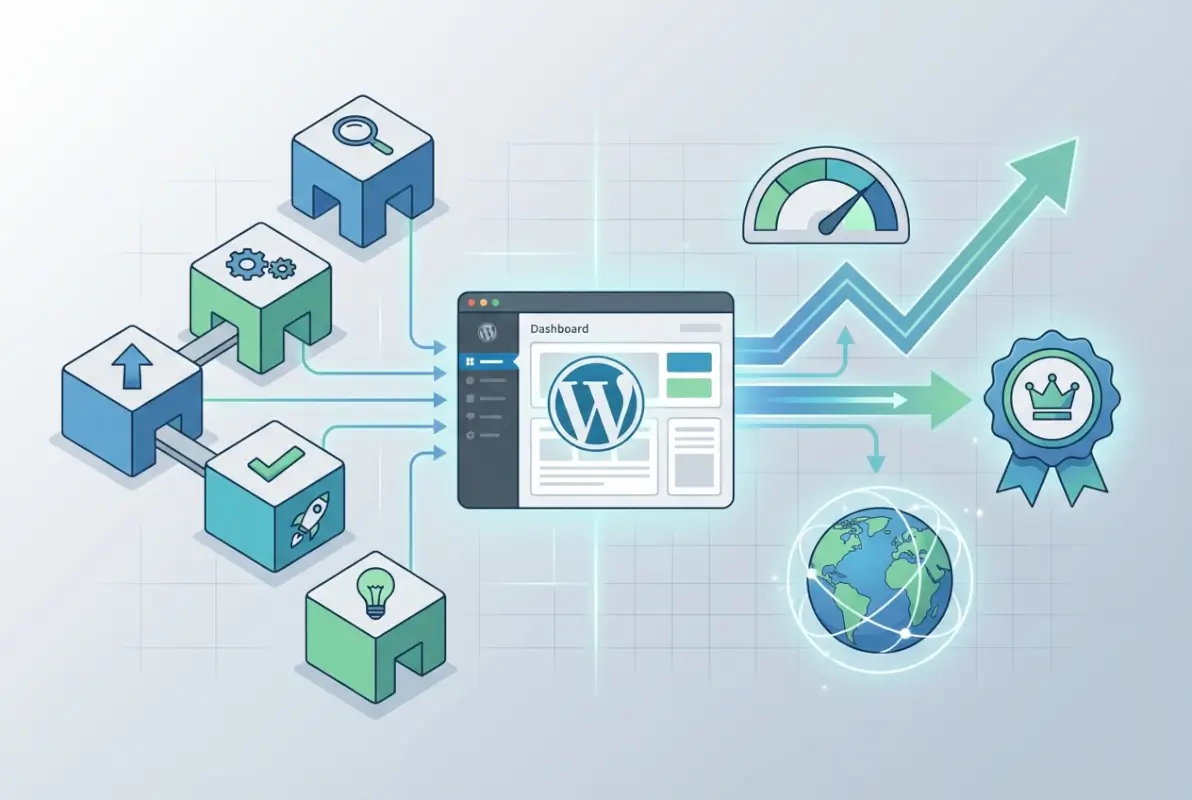
Installing SEO plugins is straightforward—configuring them intelligently separates amateurs from professionals. The six essential plugins we’ve covered (core SEO, analytics, redirects, schema, sitemaps, and performance) form a comprehensive toolkit that handles every major aspect of WordPress SEO without bloat or redundancy.
Your next steps are clear: implement the 30-minute setup checklist to get your foundation in place, then schedule quarterly audits to maintain and refine your configuration. SEO isn’t about achieving perfection once; it’s about establishing systems that keep your site healthy, fast, and search-friendly as it grows.
The difference between sites that rank and sites that languish often comes down to consistent attention to these fundamentals. You now have the roadmap—all that’s left is execution. Start with one plugin today, work through the configuration methodically, and build from there. Your future organic traffic will thank you.