How to Install a WordPress Directory Theme: A Step-by-Step Guide

TL;DR – Quick Takeaways
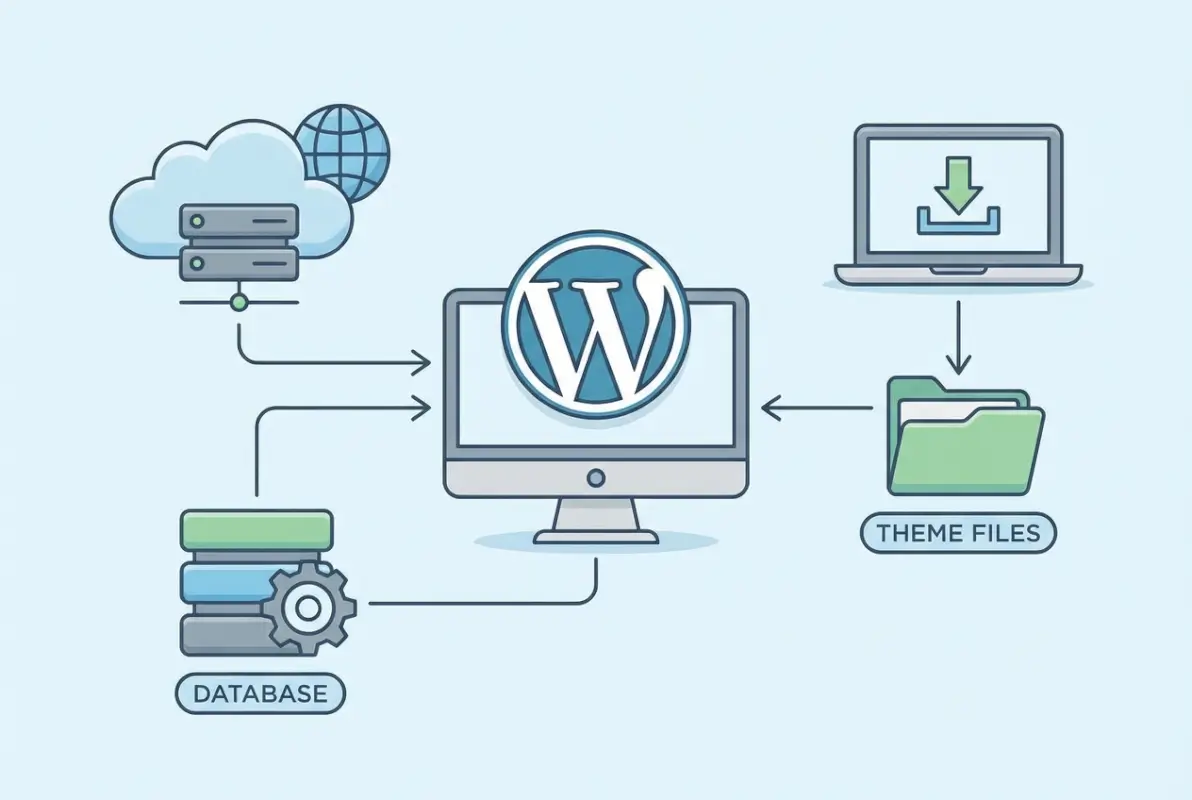
- Directory themes require both a theme AND a plugin – The theme provides the design, while plugins like Directorist power the directory functionality
- One-click demo imports save days of work – Import complete demos with listings, pages, and settings in minutes
- Proper hosting matters – Directory sites need at least PHP 7.4, 256MB memory, and MySQL 5.6 to function smoothly
- Testing before launch is critical – Verify forms, payments, maps, and mobile responsiveness to avoid user frustration
- Ongoing maintenance isn’t optional – Regular updates protect against security vulnerabilities and keep features working
Installing a WordPress directory theme feels intimidating at first, especially if you’re used to simpler blog setups. I remember my first attempt at building a local business directory—I spent three hours wrestling with plugin conflicts before I realized I’d skipped a critical compatibility check. The truth is, directory sites are fundamentally different from standard WordPress installations. They’re not just about publishing content; they’re about creating a functional database of listings with search, filtering, maps, user submissions, and often monetization features.

What makes directory themes unique is their symbiotic relationship with specialized plugins. Unlike a standard blog theme that works fine on its own, directory themes need powerful plugins to handle listing submissions, custom fields, search algorithms, and payment gateways. This guide walks you through the entire process—from choosing the right theme and plugin combination to configuring your first listing template and launching a fully functional directory site.
The WordPress directory ecosystem has matured significantly in recent years. Themes now come with sophisticated builders, pre-designed templates for different niches (real estate, events, restaurants, services), and integration with payment processors and map services right out of the box. Whether you’re building a hyper-local business directory, a real estate portal, or a service marketplace, the installation process follows a similar pattern—but the details matter enormously.
Planning Your Directory Website
Before you download a single file or purchase a theme, you need clarity on what you’re building. Directory sites fail most often because of unclear goals, not technical problems. Are you creating a local business directory for your city? A vertical directory for a specific industry like plumbers or wedding vendors? Or maybe a real estate listing site with advanced search filters? Each niche demands different features and monetization strategies.
Your feature list should emerge directly from your niche. A restaurant directory needs reservation integration and menu uploads. A real estate directory requires advanced search with price ranges, property types, and location radius filters. A service marketplace might need booking calendars and video consultations. Write down your must-have features before evaluating themes—this list becomes your shopping criteria.
Choose a Niche and Define Your Goals
Successful directories solve a specific problem for a specific audience. “All businesses in all locations” is too broad to compete with established players. Instead, consider geographic niches (businesses in your county), vertical niches (only HVAC contractors), or hybrid approaches (eco-friendly businesses in Pacific Northwest). Your niche determines everything from your hosting requirements to your marketing strategy.
Think about your end goals beyond just launching. Will you monetize through premium listings, featured placements, or advertising? Do you plan to handle payments and memberships, or start with a free directory and add monetization later? These decisions affect which plugins and theme features you’ll need from day one. Starting with a free directory and adding a paywall six months later is technically possible but creates user experience headaches.
Budgeting and Hosting Considerations
Directory sites demand more from hosting than typical blogs. You’re running database queries every time someone searches or filters listings, serving map tiles, and potentially processing payments. Shared hosting with 64MB memory limits will buckle under moderate traffic. At minimum, you need PHP 7.4 or higher, MySQL 5.6+, and at least 256MB of PHP memory (512MB is better).
Budget for both one-time and recurring costs. Premium directory themes typically cost between $60-120, with annual renewals for support and updates around $30-60. Essential plugins might add another $50-200 annually depending on your feature needs. Quality managed WordPress hosting runs $20-50/month for directory-level resources. Add domain registration, SSL certificates (often free with hosting), and optional paid extensions like advanced map features or booking systems.
Compliance and Accessibility Basics
Directory sites collect user data—business information, contact details, sometimes payment information. This triggers data protection obligations like GDPR in Europe or CCPA in California. Your theme should include privacy policy and terms of service page templates, cookie consent mechanisms, and data export/deletion tools for users. Don’t treat compliance as an afterthought; it’s easier to build it in from the start than retrofit later.
Accessibility matters both legally and practically. A directory that’s difficult to navigate with screen readers or keyboard-only inputs excludes potential users and listings. Look for themes that follow WCAG accessibility guidelines—proper heading hierarchy, sufficient color contrast, keyboard navigation support, and meaningful link text. Most premium directory themes now include accessibility considerations, but verify before purchasing.
Choosing a Directory Theme
The theme market for directories has consolidated around a few established ecosystems. Unlike generic WordPress themes where you have thousands of options, directory themes work best when paired with a specific directory plugin. The two most mature ecosystems are Directorist themes and GeoDirectory themes, each with their own plugin architecture and theme families.

When evaluating themes, ignore the flashy demos for a moment and check the technical details. Does the theme require a specific version of its companion plugin? What’s the minimum PHP version? How recent was the last update? A theme that hasn’t been updated in 18 months is a red flag—it likely has compatibility issues with current WordPress versions and security vulnerabilities.
What to Look for in a Directory Theme
Compatibility with your chosen directory plugin is non-negotiable. A theme built for Directorist won’t work properly with GeoDirectory, and vice versa. Within compatible themes, look for these essentials: demo content import (saves enormous time), page builder integration (Elementor, WPBakery, or Gutenberg blocks), responsive design verified on actual mobile devices, and documentation quality. Poor documentation turns simple customizations into hours of frustration.
Demo content quality varies wildly. The best themes provide multiple demo variations for different niches—one for restaurants, another for real estate, one for services. This gives you a head start with appropriate category structures, listing fields, and page templates. Lower-quality themes offer one generic demo that requires extensive reconfiguration regardless of your niche.
| Feature | Premium Theme | Free Theme |
|---|---|---|
| Demo Import | One-click, multiple niche options | Manual or basic single demo |
| Page Builder | Elementor/custom builder included | Basic Gutenberg only |
| Support | Dedicated ticket system, 6-12 month coverage | Community forums only |
| Updates | Regular compatibility and feature updates | Infrequent or abandoned |
| Customization | Extensive theme options panel | Limited settings, requires coding |
Evaluating Support and Documentation
Support quality matters more for directory themes than typical WordPress themes because they’re more complex. Check the theme’s documentation before purchasing—is it comprehensive with screenshots and video tutorials? Are there setup guides for common tasks like configuring payment gateways or custom listing fields? Browse the support forum or ticket system to see how quickly the developers respond and whether they actually solve problems or give generic brush-offs.
Look for themes that have been around for at least two years with consistent updates. New themes might look appealing with modern designs, but they haven’t been battle-tested across different hosting environments, WordPress versions, and plugin combinations. Established themes have worked out the compatibility kinks and edge cases that will frustrate you three months after launch.
Preparing WordPress and the Directory Plugin
A clean WordPress installation is your foundation. Most hosting providers offer one-click WordPress installers, but verify you’re getting a current version (WordPress updates frequently). If you’re migrating from an existing site, back everything up first—directory plugin installations can conflict with existing content structures in unexpected ways.
Your hosting environment needs proper configuration before installing directory plugins. Log into your hosting control panel and verify the PHP version, memory limit, and max execution time. Directory imports and listing submissions can timeout with default PHP settings. Increase max_execution_time to 300 seconds and post_max_size to at least 64MB if you plan to allow listing owners to upload multiple images or videos.
Install the Core Directory Plugin
The directory plugin must be installed before the theme. This order matters because the theme’s installation wizard checks for required plugins and won’t activate certain features without them. For Directorist installations, navigate to Plugins > Add New in your WordPress dashboard, search for “Directorist,” and click Install Now followed by Activate. The free version provides core functionality; premium extensions add payments, advanced search, and monetization features.
Required versus recommended plugins is an important distinction. Required plugins are essential—the theme won’t function without them. Recommended plugins add convenience or extended features but aren’t mandatory. During theme installation, you’ll see a list of both. Install all required plugins immediately, then evaluate recommended plugins based on your specific feature needs. Installing everything “just in case” bloats your site and creates unnecessary security and performance overhead.
Review Official Guidelines and Best Practices
If you plan to distribute your theme or heavily customize it, familiarize yourself with WordPress theme review guidelines. Even if you’re not submitting to the theme directory, these guidelines represent best practices for security, performance, and compatibility. They’ll help you avoid common pitfalls when customizing your theme later.
The official WordPress theme getting started guide covers installation basics, but directory themes have additional considerations. Note the permalink structure requirements (most directory plugins work best with “Post name” permalinks), and plan your category hierarchy before importing demo content. Restructuring categories after you have dozens of listings becomes tedious.
Installing and Activating Your Directory Theme
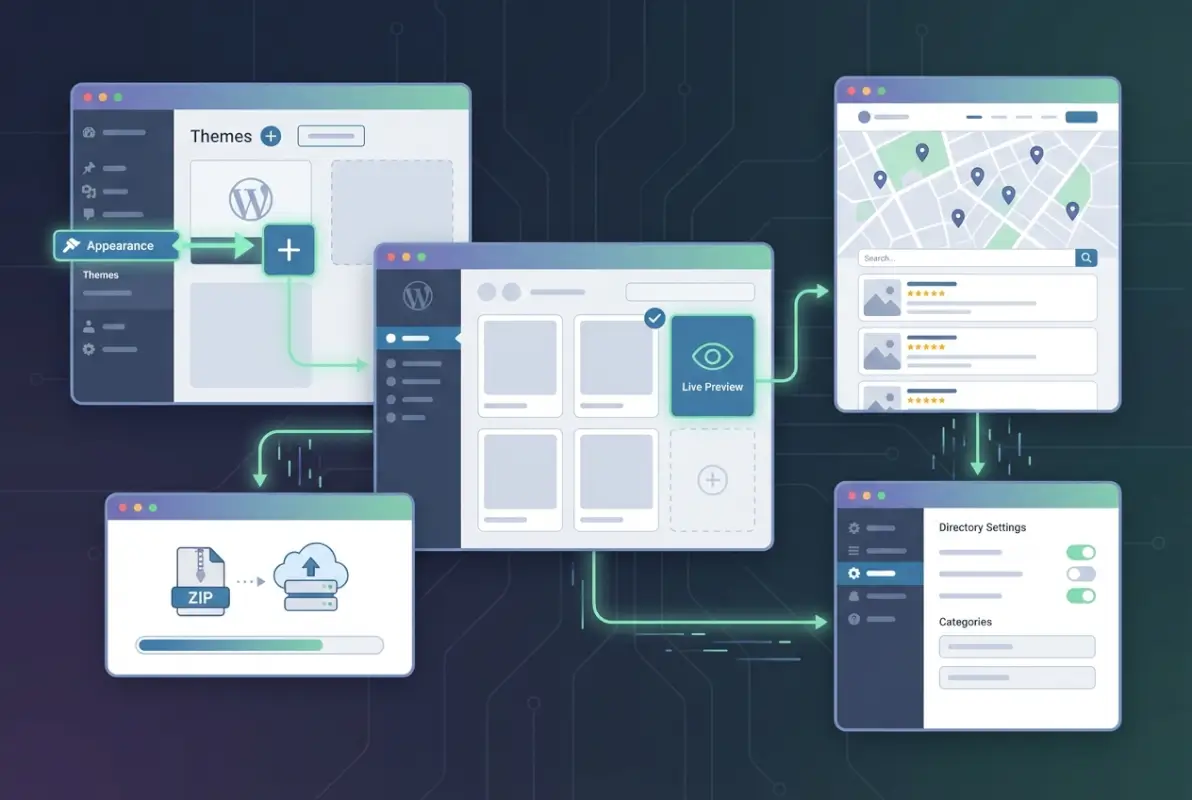
With WordPress and your directory plugin ready, you’re set to install the theme. Download your theme package from wherever you purchased it—you’ll receive a ZIP file. Don’t unzip it yet; WordPress accepts the compressed file directly. Navigate to Appearance > Themes > Add New > Upload Theme in your dashboard. Click “Choose File,” select your theme ZIP, and click “Install Now.”
The upload might take 30-60 seconds depending on theme size and your connection speed. Once complete, click “Activate” to make the theme live. At this point, your site will look quite different—possibly broken if required plugins aren’t installed yet. Don’t panic. Most premium themes display a notification about missing plugins and provide a one-click installer for required dependencies.
Initial Plugin Prompts and Required Plugins
After activation, you’ll typically see a dashboard notification or welcome screen listing required and recommended plugins. The interface varies by theme, but most use the TGMPA (TGM Plugin Activation) system. Click “Begin installing plugins” and select all required items. The batch installer downloads and activates them automatically. This process can take several minutes—don’t close the browser tab or you’ll have to start over.
Some premium themes bundle proprietary plugins in the theme ZIP rather than pulling them from WordPress.org. These won’t receive automatic updates through the standard WordPress update system. Instead, they update when you update the theme itself. This is normal for premium features like advanced page builders or custom directory modules, but verify your theme developer provides regular updates.
Demo Content Import and Configuration
Demo import is where directory themes shine. Instead of manually creating listing templates, category pages, and example listings, one-click import populates your site with a complete working demo. Navigate to the theme’s welcome screen or dashboard (usually under Appearance > [Theme Name]). Look for “Import Demo” or “Quick Start” options. You’ll typically see several demo variations if the theme offers them—choose the one closest to your niche.
The import process takes 5-15 minutes depending on demo complexity. You’ll see progress notifications as it creates pages, posts, sample listings, menus, and widgets. When complete, visit your site’s frontend. You should see a fully functional directory with example listings, working search functionality, and professional styling. This becomes your template—now you customize it with your branding and real listings.
After import, flush your permalinks immediately. Go to Settings > Permalinks and click “Save Changes” without changing anything. This regenerates the rewrite rules WordPress uses for directory URLs. Skipping this step causes 404 errors on listing pages even though they exist in your database. It’s a simple fix, but I’ve seen people spend hours troubleshooting before remembering this step.
Configuring Directory Builder and Core Settings
Your imported demo gives you a working structure, but real customization happens in the directory builder. This is typically accessed through a menu item like “Directorist” or “Directory” in your WordPress dashboard. The builder controls how listing submission forms look, what fields appear on listing pages, search filter configurations, and the overall directory structure.

Start with the Add Listing form. This determines what information listing owners provide when submitting their business or property. The demo includes generic fields like name, description, address, phone, and images. Add custom fields specific to your niche—opening hours for restaurants, property size for real estate, service areas for contractors. Each field type (text, dropdown, checkbox, date picker) has configuration options for whether it’s required, searchable, or displayed on listing cards.
Setting Up Templates and Custom Fields
Directory templates control the layout of three critical pages: the Add Listing form (submission), Listing Archives (search results and category pages), and Single Listing (individual listing detail pages). Most modern themes use drag-and-drop builders for these templates. You can rearrange field positions, add or remove sections, and customize the information hierarchy.
Custom fields deserve careful planning. Once you have live listings using a field structure, changing it creates data inconsistencies. If you’re building a restaurant directory, you might need fields for cuisine type, price range, delivery options, and menu PDF upload. For real estate, you need bedrooms, bathrooms, square footage, property type, and listing price. Map these out on paper before configuring them in the builder.
Menu Navigation and Search Forms
Create a logical menu structure that helps users find listings quickly. Primary navigation should include links to your main listing category pages, the Add Listing page (for listing owners), and key informational pages like pricing or how-it-works. Many directory themes include mega menu support, allowing you to display category hierarchies directly in navigation dropdowns.
Search functionality is the heart of any directory. Configure search forms to include the filters most valuable for your niche. A restaurant directory needs cuisine type and location filters. Real estate needs price range, bedrooms, and property type. Services need category and service radius. The directory plugin’s settings include search configuration—enable relevant filters and disable irrelevant ones to avoid overwhelming users with options.
Payments and Monetization Setup
If you’re monetizing through paid listings or featured placements, configure payment gateways now. Most directory plugins support PayPal, Stripe, and bank transfer options. Navigate to the plugin’s payment settings and enter your API credentials. For Stripe, you’ll need your publishable and secret keys from your Stripe dashboard. For PayPal, you’ll enter your PayPal email or API credentials depending on whether you’re using standard or Express Checkout.
Create pricing packages that make sense for your market. A typical structure includes a free basic listing with limited features, a premium listing with more photos and priority placement, and a featured listing that appears at the top of search results. Set appropriate durations—monthly for high-volume markets, annual for stable business directories. Include a trial period or money-back guarantee to lower the barrier for first-time buyers.
Design, Branding, and UX Enhancements
With functionality configured, shift focus to visual branding and user experience. The demo design is polished but generic—your directory needs distinct branding to build trust and recognition. Start with the Customizer (Appearance > Customize), where you’ll find options for logo upload, color schemes, typography, and header/footer layouts.
Upload your logo in both standard and retina sizes for crisp display on high-resolution screens. Choose a color palette that reflects your niche—professional blues and grays for B2B directories, vibrant colors for entertainment or food directories. Most themes allow you to set primary, secondary, and accent colors that automatically apply across buttons, links, and UI elements throughout the site.
Homepage and Listing Card Design
Your homepage is sales real estate. It needs to immediately communicate what your directory offers and help users start searching. Common effective layouts include a hero section with large search bar, featured categories with icons, recently added or popular listings, and trust indicators like testimonial snippets or listing counts. If your demo homepage doesn’t match this structure, use your page builder to reconfigure it.
Listing cards (the small listing previews shown in search results) need careful design. Users scan dozens of cards looking for relevant results. Include only essential information: listing title, primary category, location, key feature icons (verified, featured, open now), and thumbnail image. Too much information clutters the card; too little makes listings indistinguishable. Test different card layouts with real listing data, not the polished demo photos.
Performance and Security Optimization
Directory sites can become slow if not optimized properly, they’re database-intensive with complex queries running on every search. Install a caching plugin like WP Rocket or W3 Total Cache to serve pre-generated HTML instead of querying the database for every page load. Configure object caching if your host supports it—this dramatically speeds up directory searches and filtering.
Image optimization matters more for directories than typical sites because listing owners upload images in various sizes and quality levels. Install an image optimization plugin like ShortPixel or Imagify to automatically compress uploaded images without visible quality loss. This reduces bandwidth costs and improves load times, especially on mobile connections.
Security hardening should happen before launch, not after an incident. Install a security plugin like Wordfence or Sucuri to monitor for malware, brute force attacks, and suspicious activity. Enable two-factor authentication for all admin accounts. If you’re processing payments, ensure your SSL certificate is properly configured—browsers display scary warnings for payment forms on non-HTTPS pages, killing conversion rates.
Testing, SEO, and Launch
Pre-launch testing prevents embarrassing issues and lost transactions. Create a testing checklist and methodically verify each item. Start with listing submission—go through the entire flow as a new user would, creating an account, submitting a listing, uploading images, and selecting categories. Does the form validate properly? Do error messages make sense? Does the thank-you page display correctly?
Test payment flows with sandbox/test mode credentials before processing real transactions. Most payment gateways provide test card numbers that simulate successful payments, declined transactions, and other scenarios. Submit a test paid listing, verify the payment processes correctly, and confirm the listing receives appropriate status (published, featured, etc.) based on the package purchased.
Cross-Browser and Mobile Testing
Your directory needs to work across devices and browsers. Open your site in Chrome, Firefox, Safari, and Edge. Check the listing submission form, search functionality, and listing detail pages in each. Mobile testing is critical—mobile devices generate over 50% of web traffic. The search interface, listing cards, and submission forms must be fully functional on small screens.
Use actual devices for mobile testing, not just browser resize tools. Touch interactions differ from mouse clicks, and real-world network speeds reveal performance issues desktop testing misses. Have a friend or colleague test on their device—fresh eyes catch issues you’ve become blind to after hours of development.
SEO Configuration for Directory Sites
Directory SEO requires attention to structure and metadata. Set your permalink structure to “Post name” in Settings > Permalinks if you haven’t already. This creates clean URLs like yoursite.com/listings/joes-plumbing instead of cryptic parameter strings. Install an SEO plugin like Yoast or Rank Math to manage meta titles, descriptions, and schema markup.
Schema markup helps search engines understand your directory structure and can earn rich snippets in search results. Configure LocalBusiness schema for business directories, Product schema for marketplace directories, or Real Estate schema for property listings. Most directory plugins include schema generators, but verify the output is valid using Google’s Structured Data Testing Tool.
Create XML sitemaps for both pages and listings. Most SEO plugins generate these automatically, but directory listings might require additional configuration to be included. Submit your sitemaps to Google Search Console and Bing Webmaster Tools to ensure search engines discover and index your listings. For local directories, claim and optimize your own Google Business Profile to build authority.
Analytics and Launch Monitoring
Install Google Analytics and Google Search Console before launch so you capture data from day one. Configure event tracking for key actions—listing submissions, search queries, category clicks, and payment completions. This data reveals how users interact with your directory and where friction points exist in the submission or search flows.
Set up uptime monitoring with a service like UptimeRobot or Pingdom. These tools alert you immediately if your site goes down, allowing quick response before you lose traffic or revenue. Configure performance monitoring to track page load times and identify slow queries or resource bottlenecks as your listing database grows.
Launch with a soft opening to a limited audience if possible. Promote to a small group, gather feedback on usability and functionality, then iterate before the big public announcement. This approach catches issues while stakes are low and gives you testimonials and initial listings to feature in your broader launch marketing.
Ongoing Maintenance and Scaling
Launching is just the beginning; successful directories require consistent maintenance and evolution. Schedule regular update checks—at least monthly for WordPress core, themes, and plugins. Updates patch security vulnerabilities, fix bugs, and add features. Use a staging environment to test updates before applying them to your live site. Breaking a live directory with a bad update destroys user trust quickly.
Implement automated daily backups with off-site storage. Your hosting might include backups, but don’t rely solely on that—you want redundancy. Backup plugins like UpdraftPlus or BackupBuddy can automatically send backups to cloud storage like Dropbox or Google Drive. Test backup restoration at least quarterly to verify they actually work when needed.
Extending Functionality Over Time
As your directory grows, you’ll identify feature gaps and expansion opportunities. Maybe users request appointment booking integration, or listing owners want to manage multiple locations under one account. Most directory ecosystems offer extensions and add-ons for common needs—reviews and ratings, advanced maps with radius search, event calendars, or multi-vendor marketplaces.
Prioritize extensions based on user feedback and analytics data. If your analytics show users rarely filter by a particular field, don’t invest in a premium extension to enhance it. If support tickets constantly request a specific feature, that’s your roadmap telling you what matters. Talk to your listing owners—they’re your customers and often have valuable insights on features that would drive more business for them (and make your directory more valuable).
Monitor database performance as your listing count grows. Directory sites with thousands of listings and complex search queries can slow down if database indexes aren’t optimized. If search performance degrades, consider dedicated search solutions like ElasticSearch or Algolia that handle complex queries more efficiently than WordPress’s native database searches.
Building a Community Around Your Directory
The most successful directories become communities, not just listing databases. Encourage reviews and ratings to build social proof and engagement. Consider adding a blog with useful content for your niche—local business tips for a city directory, home buying guides for real estate directories. This content attracts organic search traffic and positions your directory as an authoritative resource.
Email marketing keeps your directory top-of-mind. Capture emails during listing submission and site registration, then send regular updates—new listings in followed categories, featured businesses, seasonal tips. Just get explicit consent and follow regulations like CAN-SPAM and GDPR to avoid legal issues.
Frequently Asked Questions
What is a WordPress directory theme and how does it differ from a standard theme?
A WordPress directory theme is specifically designed to display organized listings of businesses, properties, services, or events with search and filtering functionality. Unlike standard blog or business themes that focus on content pages, directory themes integrate with specialized plugins to handle database-driven listings, custom fields, search algorithms, map integrations, and often payment systems for monetization. They include templates for listing submissions, search results, and detailed listing pages that standard themes lack.
Do I need a plugin to run a directory site or can the theme handle it alone?
You absolutely need a specialized directory plugin—themes provide the design and layout, but plugins power the core functionality. The plugin manages the listing database structure, submission forms, search queries, custom fields, and user permissions. Themes are essentially templates that display the plugin’s data in an attractive, organized way. Popular directory plugins include Directorist, GeoDirectory, and Business Directory Plugin, each with compatible theme ecosystems.
How long does it take to install and launch a directory site?
With a premium theme and one-click demo import, you can have a functional directory site running in 2-4 hours. This includes WordPress installation, theme and plugin setup, demo import, and basic branding customization. However, full launch-ready configuration with custom fields, payment gateway setup, legal pages, and content migration typically takes 2-3 days of focused work. Plan additional time for testing and gathering initial listings before public launch.
What are best practices for demo import and initial content?
Always import demo content on a fresh WordPress installation to avoid conflicts with existing pages or settings. Before importing, note which demo variation best matches your niche. After import, immediately flush permalinks by visiting Settings > Permalinks and clicking Save Changes. Replace demo text and images progressively rather than all at once—this helps you understand the theme structure. Keep a few demo listings as templates while adding real content, then delete them before going live.
How do I monetize listings with pricing plans and commissions?
Most directory plugins include built-in monetization through pricing packages—free basic listings, paid premium listings with more features, and top-tier featured placements. Configure these in your plugin’s payment settings, then integrate Stripe or PayPal for transaction processing. Alternatively, charge commissions on transactions if your directory facilitates bookings or sales. Some directories monetize through banner advertising or affiliate partnerships rather than charging listing owners directly.
How can I optimize my directory site for search engines and local SEO?
Start with clean permalink structures using post names, not default parameters. Implement schema markup for your listing type (LocalBusiness, Product, RealEstateListing) so search engines understand your content structure. For local directories, optimize listing pages for “category + city” keywords and encourage listing owners to complete all fields including addresses and hours. Create unique meta descriptions for category pages. Submit XML sitemaps to Google Search Console and build local citations by listing your directory in relevant local business indexes.
Are there security risks with directory themes and how can I mitigate them?
Directory sites face elevated security risks because they accept user-submitted content and often process payments. Mitigate risks by keeping WordPress core, themes, and plugins updated immediately when new versions release. Install a security plugin like Wordfence to monitor for malware and suspicious login attempts. Use strong passwords and two-factor authentication on all accounts. Ensure your SSL certificate is properly configured, especially on payment and login pages. Regular automated backups provide recovery options if security incidents occur despite preventive measures.
What are common troubleshooting steps if a theme won’t install or demo import fails?
Theme installation failures usually stem from insufficient PHP memory limits or max upload file size restrictions. Contact your host to increase PHP memory_limit to 256MB and upload_max_filesize to 64MB. Demo import failures often occur when required plugins aren’t installed—verify all required plugins are active before attempting import. If import partially completes then fails, check for server timeout issues by increasing max_execution_time to 300 seconds. Some hosts block large imports; contact support to temporarily lift restrictions during installation.
Where can I find official guidance and documentation for WordPress directory themes?
Start with official WordPress theme documentation at wordpress.org/themes/getting-started for general installation and customization guidance. For directory-specific guidance, consult your plugin’s documentation—Directorist maintains comprehensive docs at directorist.com/docs covering installation, configuration, and troubleshooting. Theme developers typically provide documentation specific to their theme’s features and settings, usually accessible from your WordPress dashboard under a theme-specific menu item. Community forums on WordPress.org and developer support channels provide additional help for specific issues.
Take the Next Step
Installing a WordPress directory theme transforms from overwhelming to manageable when you follow a structured process. You’ve now got the roadmap: plan your niche and features, choose compatible theme and plugin combinations, install and configure methodically, test thoroughly, and launch with confidence. The directory ecosystem has matured to the point where you don’t need to code anything—modern themes and plugins handle the heavy lifting through intuitive interfaces.
Your directory’s success depends less on technical perfection and more on understanding your audience and providing genuine value. Focus on solving a specific problem for a specific group of people. Build relationships with your early listing owners—they become advocates who spread word-of-mouth growth. Monitor user behavior through analytics and let data guide your feature additions and improvements.
Remember that ongoing maintenance isn’t optional overhead—it’s the price of running a professional platform. Schedule regular update checks, monitor site performance, and stay engaged with your listing owners and site visitors. The directories that fail are usually abandoned technically, not conceptually. The directories that thrive evolve continuously based on user needs and market changes.