Elementor Pro Download: 5 Steps to Get Started in 2025

Generating summary...
After building over 200 client websites with various WordPress page builders, I’ve found that Elementor Pro consistently delivers the best balance of power and usability. The difference between wrestling with theme limitations and having complete design freedom is night-changing for anyone serious about WordPress development. If you’re considering Elementor Pro, you’re likely tired of compromising your vision or patching together multiple plugins to achieve basic functionality.
Elementor Pro isn’t just an upgrade—it’s a complete shift in how you approach WordPress design. With the Theme Builder, you control every template on your site. The Form Builder replaces clunky contact form plugins. The Popup Builder handles conversions without third-party tools. You get dynamic content capabilities that turn static designs into database-driven experiences, all through a visual interface that shows you exactly what visitors will see.
This guide walks you through the complete process: from understanding what Elementor Pro actually is and checking your server prerequisites, to downloading, installing, activating your license, and leveraging the features that matter most. I’ll share the exact steps I follow for every client site, plus the performance optimizations and troubleshooting tactics that aren’t obvious from official documentation.
TL;DR – Quick Takeaways
- Prerequisites matter: WordPress 5.2+, PHP 7.3+, and the free Elementor plugin must be installed first
- License access: Download Pro from your Elementor account dashboard after purchase, not from external sources
- Installation is simple: Upload the ZIP via Plugins > Add New > Upload Plugin, then activate with your license key
- Start with templates: The 300+ pre-built templates accelerate learning and reveal design patterns you can adapt
- Performance requires attention: Use global styles, limit widgets per page, and enable Elementor’s built-in performance features
- Pricing scales: Essential (1 site), Advanced (3 sites), or Expert (25 sites) plans with annual renewal for updates
Elementor Pro: What It Is, Prerequisites, and How It Compares to the Free Version
Elementor Pro is the premium extension of the free Elementor page builder, transforming it from a solid page editor into a complete site design platform. Where the free version gives you 40+ widgets and basic page editing, Pro adds the Theme Builder for custom headers and footers, the Form Builder with CRM integrations, the Popup Builder for targeted campaigns, over 50 additional widgets, and dynamic content capabilities that pull data directly from your WordPress database.
The licensing model is straightforward: you purchase an annual plan covering a specific number of sites (1, 3, or 25 depending on your tier), and your license grants you plugin updates, premium template access, and official support. The license must remain active to receive updates, though the plugin continues functioning if you let it lapse—you just won’t get new features or security patches. According to Elementor’s official installation guidance, you must have the free version installed before adding Pro, as Pro functions as an extension rather than a standalone plugin.

One aspect that surprised me when I first upgraded was how much Pro reduces plugin bloat. Before Pro, I was running separate plugins for forms (Contact Form 7 or WPForms), popups (OptinMonster or similar), custom headers (through theme options or additional plugins), and dynamic content (custom fields plugins). Pro consolidates all of this into a single, well-integrated system. The reduction in plugin conflicts alone justified the cost within the first month.
Core Capabilities and Licensing Model
The Theme Builder is probably the most transformative feature. You design templates for your entire site—headers that appear on every page, footers with your contact information and social links, single post templates that control how blog posts display, archive layouts for categories and tags, and even WooCommerce product pages if you’re running an online store. These templates use Elementor’s visual editor, so you see exactly how they’ll look while designing them.
Dynamic content takes this further by connecting your designs to WordPress data. You can display the current post title, featured image, custom fields, author bio, or any other database content within your templates. This means you design the layout once, and it automatically populates with the correct information for every post or page. For client sites where they need to update content regularly, this is invaluable—they can add new posts through WordPress’s standard editor, and those posts automatically inherit your custom design.
The Form Builder includes advanced features like multi-step forms, conditional logic (showing or hiding fields based on previous answers), integrations with email marketing services (Mailchimp, ActiveCampaign, ConvertKit, and others), webhook support for connecting to virtually any service, and spam protection through reCAPTCHA or honeypot methods. Forms can redirect users after submission, display custom success messages, or trigger popups.
License management happens through your Elementor account dashboard at elementor.com. Each license key activates on the number of sites specified by your plan. You can deactivate a site to free up a license slot for a new project, which is useful when you’re migrating or retiring old sites. The dashboard also shows your renewal date, download links, and support ticket history.
System Requirements, Compatibility, and Who Should Upgrade
Before downloading, verify your hosting environment meets these requirements: WordPress 5.2 or higher (though staying on the latest version is always recommended), PHP 7.3 or higher (PHP 8.0+ is ideal for performance and security), MySQL 5.6+ or MariaDB 10.0+, and a WordPress memory limit of at least 128MB (256MB or higher is better for complex sites). Most reputable hosting providers meet these specs, but budget shared hosting sometimes runs outdated PHP versions.
To check your current setup, navigate to Tools > Site Health in your WordPress dashboard. The “Info” tab shows your PHP version, database version, and memory limit. If you’re on PHP 7.2 or earlier, contact your host to upgrade—outdated PHP versions create security vulnerabilities and slow down your site regardless of which page builder you use.
Compatibility with themes is generally excellent because Elementor Pro includes a “Full Width” template option that removes theme headers, footers, and sidebars entirely. This means you can use Elementor’s Theme Builder to design everything, making your theme choice almost irrelevant. That said, some theme features (like custom post type support or specific widget areas) can enhance Pro’s capabilities. The official WooCommerce integration guide shows how Pro works alongside eCommerce plugins for product page design.
Who should upgrade? If you’re building sites for clients, Pro pays for itself in time savings on the first project. If you run a business site and need custom forms, popups, or unique layouts, Pro eliminates the need for multiple premium plugins (which often cost $50-$100 each annually). If you’re a blogger wanting more design control without hiring a developer, Pro’s learning curve is steep but manageable. However, if you only need a simple blog with a standard theme, the free version might suffice—don’t upgrade just because you feel you should.
How to Download, Install, and Activate Elementor Pro (Step-by-Step)
The download and installation process is straightforward once you know where to look and which steps matter. I’ve seen people waste hours downloading from unofficial sources or struggling with license activation, so I’ll walk through the exact process that works every time.
First, purchase your license directly from the official Elementor website—never use nulled versions or third-party marketplaces. Nulled plugins often contain malware, lack updates, and leave your site vulnerable to attacks. Beyond security risks, using unlicensed software violates Elementor’s terms and can result in your site being blacklisted from their services. The official site occasionally runs promotions (especially around Black Friday and Cyber Monday), so if you’re not in a rush, waiting for a sale can save 20-40%.
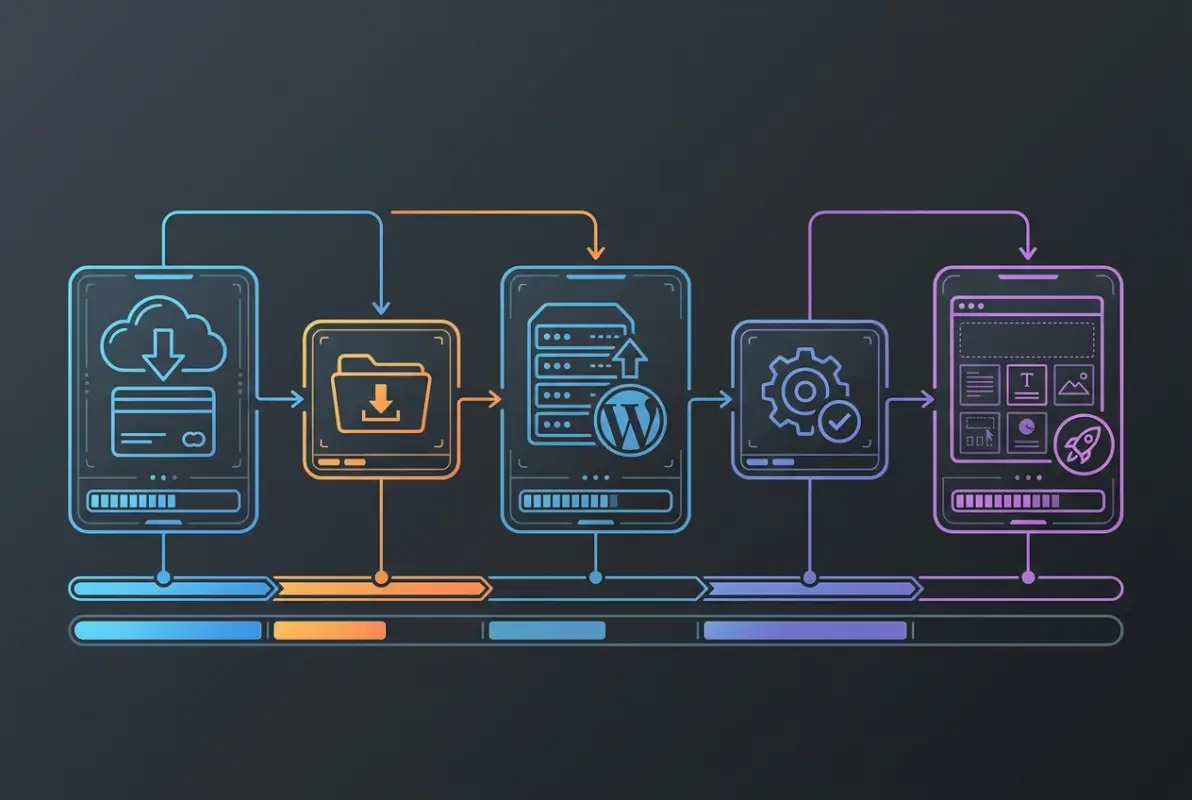
After purchase, you’ll receive an email with your account credentials and a link to log into your Elementor account dashboard. This dashboard is your central hub for everything Pro-related: downloads, license keys, renewal management, and support tickets.
Accessing Your License and Obtaining the Pro Download
Log into your account at elementor.com using the credentials from your purchase email. If you created an account during checkout, use those credentials. Once logged in, navigate to “My Account” in the top right corner, then click “Subscriptions” or “Downloads” (the interface has changed slightly over time, but you’re looking for the section that lists your active licenses).
You’ll see your active subscription with details about which plan you purchased, how many sites it covers, and when it renews. Click the “Download” button next to Elementor Pro to download the plugin ZIP file to your computer. This file is typically named something like “elementor-pro.zip” and is usually 5-8MB in size. Don’t extract this ZIP file—WordPress needs it in ZIP format for installation.
On the same page, you’ll also see your license key, which looks something like “a1b2c3d4e5f6g7h8i9j0k1l2m3n4o5p6.” Copy this key to a text file or note-taking app, as you’ll need it in a few minutes for activation. This key is unique to your account and shouldn’t be shared publicly (though if you accidentally expose it, you can deactivate and regenerate it from your account dashboard).
Installing on WordPress and Activating the License
Before installing Elementor Pro, ensure the free version of Elementor is already installed and activated on your WordPress site. Pro won’t work without the free version because it functions as an extension, not a replacement. If you haven’t installed the free version yet, go to Plugins > Add New in your WordPress dashboard, search for “Elementor,” and install and activate the free plugin (it’s the one by Elementor.com with millions of active installations).
With the free version active, navigate to Plugins > Add New again. This time, click the “Upload Plugin” button at the top of the page. Click “Choose File” and select the elementor-pro.zip file you downloaded from your account. Click “Install Now” and wait for the upload and installation to complete—this usually takes 10-30 seconds depending on your server speed.
After installation completes, click the “Activate Plugin” button. WordPress will reload, and you’ll see a notification at the top of your dashboard prompting you to activate your Elementor Pro license. Click “Connect & Activate” in that notification (or navigate to Elementor > License in your WordPress menu if the notification disappears).
On the license page, paste your license key into the input field and click “Activate.” Elementor will connect to their servers to verify your key. If activation succeeds, you’ll see a green checkmark and a message confirming that your license is active. The page will also display which plan you’re on and how many sites you have remaining (if your plan covers multiple sites).
Common activation issues include server configurations that block external API connections. If you get an error like “Could not connect to the license server,” contact your hosting provider and ask them to ensure your server can make outbound HTTPS connections to api.elementor.com. Most hosts can whitelist this domain within minutes. Another issue is entering the license key with extra spaces at the beginning or end—always copy and paste carefully, then visually inspect the key to confirm it’s clean.
Once activated, Elementor Pro will automatically check for updates and notify you in your WordPress dashboard when new versions are available. You can update from the Updates section in WordPress like any other plugin, or enable auto-updates if you prefer hands-off maintenance (though I recommend testing updates on a staging site first for client projects).
Essential Features and Widgets You’ll Use First
Elementor Pro unlocks dozens of features, but focusing on the core capabilities first prevents overwhelm and builds your skillset systematically. The Theme Builder, template library, and form system are where most users see immediate value, followed by popups and dynamic content as you gain confidence.
When I train clients on Elementor Pro, I always start with importing a pre-built template and customizing it. This approach teaches the interface mechanics while producing a functional page within an hour. Trying to build from a blank canvas on day one usually leads to frustration—you don’t yet know which widgets exist, how to structure sections efficiently, or what’s possible with styling options.

Theme Builder, Dynamic Content, and Template Library
The Theme Builder lives under Elementor > Theme Builder in your WordPress menu. Here you create templates that control site-wide elements rather than individual pages. The most common starting point is a custom header. Click “Header” in the Theme Builder, then “Add New” to launch the visual editor with header-specific widgets (site logo, navigation menu, search icon, etc.).
Design your header using columns to arrange elements—a typical pattern is three columns with logo on the left, navigation menu in the center, and a call-to-action button on the right. Elementor’s responsive controls let you adjust the layout for tablets and mobile devices (like stacking the navigation into a hamburger menu). When you publish the header template, you’ll set display conditions determining where it appears—usually “Entire Site” for a universal header, though you can create different headers for different sections.
The template library contains over 300 professionally designed templates spanning various industries: landing pages for SaaS products, service pages for agencies, about pages for consultants, blog post layouts for publishers, and more. Access it by clicking the folder icon at the bottom of the Elementor editor sidebar (or through Templates > Saved Templates in your WordPress menu). You can preview templates before importing, and importing is one-click—Elementor downloads the design and any required assets automatically.
Dynamic content is where Elementor Pro becomes truly powerful for sites with lots of posts or products. When designing a single post template, you use dynamic widgets like “Post Title,” “Featured Image,” “Post Content,” and “Author Box.” These widgets don’t contain static text—instead, they pull data from the current post being viewed. Design the layout once with these dynamic elements, and every blog post automatically inherits that design while displaying its own unique content.
For advanced users, custom fields integration lets you display WordPress custom fields or Advanced Custom Fields (ACF) data within your designs. If you run a directory site where each listing has fields like phone number, address, and hours of operation, you can design a template that displays those fields beautifully without manually updating each listing’s layout.
Forms, Popup Builder, and Design Performance
The Form Builder widget appears in the Elementor panel under “Pro” widgets. Drag it onto your page, and you’ll see a default contact form with name, email, and message fields. You customize forms by adding, removing, or rearranging fields through an intuitive interface—click any field to edit its label, placeholder text, required status, and validation rules.
Advanced form features include multi-step forms (useful for surveys or complex applications where you break fields across multiple screens), conditional logic (showing a “Company Name” field only if someone selects “Business” from a dropdown), and integrations with email marketing services. The integrations work through “Actions After Submit”—you can send the form data to Mailchimp, trigger a webhook to Zapier, store submissions in your WordPress database, and send email notifications all from one form submission.
For spam protection, enable reCAPTCHA (which requires a free Google API key) or use the honeypot method (a hidden field that bots fill out but humans don’t see). I typically use honeypot for lower-traffic sites and reCAPTCHA when dealing with high-visibility forms that attract spam.
The Popup Builder follows the same visual editing approach as pages. Navigate to Templates > Popups > Add New to launch the popup editor. You design the popup content using standard Elementor widgets, then set triggers determining when it appears: after X seconds, after scrolling X% down the page, on exit intent (when the user moves their cursor toward closing the tab), on click of a specific button or link, or after X page views.
Display conditions let you show popups only on certain pages, to logged-in or logged-out users, to visitors from specific referral sources, or based on dozens of other criteria. Advanced triggers like showing a popup to users who viewed 3+ pages but didn’t convert are perfect for retargeting visitors without using intrusive advertising.
Performance becomes critical as you add more widgets and complexity to your pages. Elementor Pro includes built-in optimization features under Elementor > Settings > Features. Enable “Optimized DOM Output” to reduce HTML markup size, use “Lazy Load” to defer loading images until they’re about to enter the viewport, and activate “Improved CSS Loading” to inline critical CSS for faster rendering.
Beyond Elementor’s settings, follow these performance practices: limit yourself to 40-50 widgets per page (more than that starts impacting load times), use global styles for colors and fonts rather than custom styling on individual widgets (reduces CSS bloat), optimize images before uploading (I use tools like TinyPNG or ShortPixel), and implement a caching plugin like WP Rocket or W3 Total Cache. According to research on WordPress performance optimization, proper caching and image optimization typically improve load times more than widget choices.
Best Practices, Performance, and Troubleshooting
Getting Elementor Pro installed is one thing, running it efficiently and troubleshooting issues when they arise is another. Performance optimization directly impacts both user experience and SEO rankings, while knowing how to diagnose common problems saves hours of frustration.
The biggest performance mistake I see is treating Elementor like a blank canvas with unlimited creative freedom. While technically you can nest sections within sections and use hundreds of custom-styled widgets, that approach creates bloated HTML, massive CSS files, and slow page loads. Structure matters for performance just as much as it matters for responsive design.

Performance Optimization and Core Web Vitals Considerations
Core Web Vitals—Google’s metrics for page experience—include Largest Contentful Paint (LCP), First Input Delay (FID), and Cumulative Layout Shift (CLS). Elementor sites can excel or fail at these metrics depending on how you build them. LCP measures how quickly the main content loads, FID measures interactivity responsiveness, and CLS measures visual stability as elements load.
To optimize LCP, ensure your largest above-the-fold element (usually a hero image or video) loads quickly. Use next-gen image formats like WebP, enable lazy loading for below-the-fold images but not for hero images (since lazy loading delays them), and minimize render-blocking resources. Elementor’s “Optimized DOM Output” feature helps by reducing HTML complexity, making it faster for browsers to parse and render your page.
CLS issues often come from images or ads that don’t have defined dimensions, causing the page to shift as they load. Always specify width and height attributes for images, reserve space for ads or embeds, and avoid injecting content above existing content after page load (like popups that push content down instead of overlaying it).
Global styles are your performance friend. Define your brand colors, typography, and button styles under Elementor > Site Settings > Global Colors and Global Fonts. When you use these global values throughout your site, Elementor generates efficient CSS that reuses classes rather than creating unique styles for every widget. Changing a global color updates it everywhere, and the CSS file stays lean.
Limit third-party integrations within Elementor where possible. Every Google Maps embed, social media feed, or external script adds requests and slows loading. If you must include them, use facade techniques (loading a static image that loads the real embed only when clicked) or lazy load them far down the page. For directory sites with map listings, consider using a lightweight mapping solution or loading maps only on individual listing pages rather than on archive pages showing dozens of listings.
According to Google’s Web Vitals documentation, mobile performance is weighted more heavily than desktop for search rankings. Always test your Elementor designs on actual mobile devices, not just the responsive preview in the editor. The preview is useful for layout, but real devices reveal performance issues that desktop emulation misses.
Common Issues, Updates, and Reliable Troubleshooting Steps
The most frequent issue I encounter is the Elementor editor not loading—you click “Edit with Elementor” and get a blank screen or infinite loading spinner. This usually indicates a JavaScript conflict with another plugin or theme. Troubleshoot by temporarily switching to a default WordPress theme (like Twenty Twenty-Three) and deactivating all plugins except Elementor and Elementor Pro. If the editor loads, reactivate plugins one by one to identify the culprit.
Another common problem is license activation failures. Beyond the connection issues mentioned earlier, this sometimes happens when you’ve transferred a site from one domain to another. Elementor ties licenses to specific domains, so moving from a development domain to a production domain requires deactivating the license on the old domain and reactivating on the new one. If you can’t access the old domain, you can manage active installations from your Elementor account dashboard.
Template import issues occasionally occur when your server has low resource limits. If templates fail to import or partially import (missing images or sections), increase your PHP memory limit, max execution time, and upload file size limits. Most hosts allow you to adjust these through cPanel or by contacting support. The recommended values are: memory_limit 256MB, max_execution_time 300 seconds, post_max_size 64MB, and upload_max_filesize 64MB.
Widget rendering problems (where a widget displays incorrectly or not at all on the front end but looks fine in the editor) usually stem from CSS conflicts with your theme. Elementor loads its own CSS, but themes sometimes apply overly specific styles that override Elementor’s styling. Use your browser’s developer tools to inspect the element and identify conflicting styles, then add custom CSS to Elementor (under Site Settings > Custom CSS) to override the theme’s styles.
Updating Elementor Pro follows WordPress plugin standards, but I recommend caution with major version updates (like going from version 3.x to 4.x). These updates sometimes change how widgets render or introduce new features that require PHP version updates. Always backup your site before updating, and if you manage client sites, test updates on a staging environment first. Minor version updates (like 3.5.1 to 3.5.2) are usually safe to apply directly since they focus on bug fixes.
For persistent issues that basic troubleshooting doesn’t resolve, Elementor’s support team is responsive for Pro license holders. Submit a ticket through your account dashboard with details about your issue, including your WordPress and PHP versions, active plugins and theme, and steps to reproduce the problem. Support typically responds within 24 hours and can access your site (with your permission) to diagnose complex conflicts.
Pricing, Plans, ROI, and Alternatives
Elementor Pro’s pricing structure is clear, but understanding which plan fits your needs and calculating whether it’s worth the investment requires looking at your specific use case. I’ll break down the current pricing, what you get at each tier, and when alternatives might make more sense.
As of the latest pricing update, Elementor offers three Pro plans: Essential for $59/year covering 1 site, Advanced for $99/year covering 3 sites (previously called Plus), and Expert for $199/year covering 25 sites (previously called Expert or Agency). All plans include the same features—the difference is only the number of sites you can activate. There’s no “lifetime” license; all plans are annual subscriptions that must be renewed to continue receiving updates and support.

The renewal discount is worth noting: if you let your license expire, you lose access to updates, support, and new template downloads (though your existing sites continue functioning with the last version you had installed). Reactivating an expired license typically costs the same as a new purchase, so if you plan to use Elementor Pro long-term, maintaining continuous renewal is more economical than letting it lapse and repurchasing later.
Elementor Pro Pricing Overview, License Limits, and Where to Buy
The Essential plan ($59/year for 1 site) works for individual site owners or developers working on one client project at a time. You can deactivate your license from one site and move it to another, so “1 site” really means “1 active site at any given time.” This is perfect if you build sites for clients, hand them off, and then move onto the next project—just deactivate the license from the completed site before starting the new one.
The Advanced plan ($99/year for 3 sites) is the sweet spot for freelancers managing a few client sites or businesses running multiple WordPress installations (like a main site, a blog subdomain, and a landing page site). The per-site cost drops to $33/year, making it significantly more economical than buying three Essential licenses. If you’re building directory sites with TurnKey Directories or similar WordPress directory plugins across multiple locations or niches, this plan covers your needs without breaking the bank.
The Expert plan ($199/year for 25 sites) targets agencies, freelancers with large client rosters, or developers who build and maintain numerous sites. At $7.96 per site per year, it’s incredibly economical at scale. Even if you only actively maintain 10-15 client sites, the flexibility to test designs on development sites, run personal projects, or take on new clients without worrying about license limits makes this plan worthwhile for professionals.
Always purchase directly from elementor.com. Third-party marketplaces occasionally sell Elementor Pro licenses, but these are often unauthorized resales that violate Elementor’s terms and may not include proper support or updates. I’ve seen cases where “discounted” licenses from unofficial sources were revoked after Elementor detected the violation, leaving users without access to updates or support.
Elementor occasionally runs promotions (typically 20-40% off) during major shopping holidays like Black Friday, Cyber Monday, and their anniversary in June. If your timeline allows, waiting for these sales can save substantial money, especially on the higher-tier plans. Sign up for their newsletter to get notified of promotions, or check their pricing page periodically if you’re planning a purchase in the coming months.
When to Consider Alternatives or Complementary Tools
Elementor Pro excels at visual page building and site-wide design control, but it’s not always the right solution for every project. Lightweight sites focused primarily on content (like simple blogs or news sites) might perform better with block-based builders like GenerateBlocks or the native WordPress block editor (Gutenberg), which create leaner HTML and CSS compared to Elementor’s comprehensive design system.
For eCommerce-heavy sites, Elementor Pro works well with WooCommerce, but specialized solutions like Kadence Blocks or theme builders native to WooCommerce-focused themes sometimes offer more eCommerce-specific features with better performance. That said, Elementor’s WooCommerce builder widgets are robust for most stores, and the visual design flexibility often outweighs the slight performance trade-off.
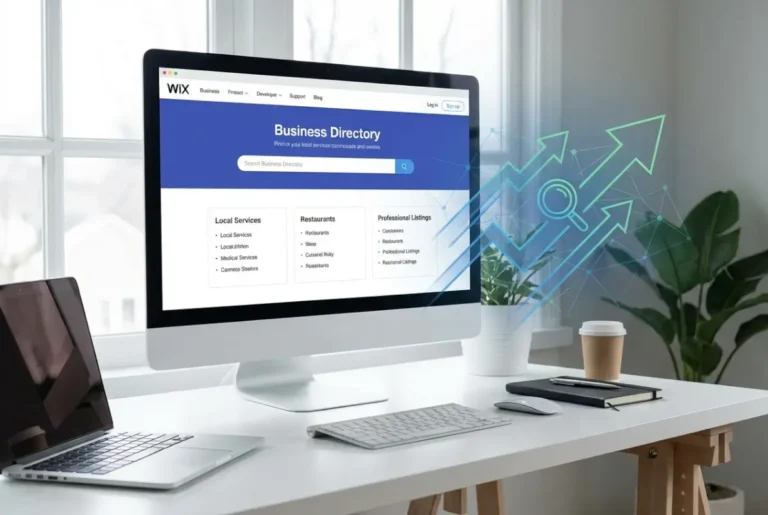
If you’re building business directories or membership sites, Elementor Pro pairs excellently with directory-specific solutions. TurnKey Directories provides a ready-made directory framework optimized for local business listings, while Elementor Pro handles the design customization. This combination gives you the best of both worlds: structured directory functionality with complete visual design control. Similarly, membership plugins like MemberPress or Restrict Content Pro work well with Elementor for creating members-only page designs.
Alternative page builders worth considering include Beaver Builder (known for its clean code and performance), Bricks Builder (relatively new but growing in popularity among performance-focused developers), and Oxygen Builder (powerful but with a steeper learning curve). According to various WordPress performance analyses, Bricks and Oxygen typically generate lighter code than Elementor, while Beaver Builder offers a middle ground between simplicity and features.
| Page Builder | Price (Annual) | Best For | Performance |
|---|---|---|---|
| Elementor Pro | $59-$199 | Visual design flexibility, theme building | Good (with optimization) |
| Bricks Builder | $149 | Performance-focused developers | Excellent |
| Beaver Builder | $99 | Clean code, professional sites | Very Good |
| Oxygen Builder | $129 | Advanced users, custom workflows | Excellent |
| GenerateBlocks (Pro) | $49 | Lightweight content sites | Excellent |
The ROI calculation for Elementor Pro depends on how you use it. For agencies billing $1,000+ per website, the $59 license cost is negligible—you’ll likely save that much time on the first project compared to coding custom templates. For hobbyists or small business owners, calculate the cost of alternative solutions: a premium theme ($60), a form plugin ($50/year), a popup plugin ($30/year), and a header/footer customizer ($40) quickly exceeds Elementor Pro’s cost while providing less flexibility.
I ran the numbers for my own agency work, and Elementor Pro saves me an average of 8-12 hours per client website compared to my previous workflow (using a premium theme with limited customization and multiple plugins for forms, popups, and custom post layouts). At my hourly rate, that time savings paid for a year of the Expert plan within two projects.
Is Elementor Pro worth it in 2025?
Elementor Pro is worth the investment if you build client sites, need complete design control without coding, or want to consolidate multiple premium plugins (forms, popups, theme customization) into one system. The Theme Builder alone justifies the cost for most users by eliminating dependence on theme limitations. However, simple blogs with minimal customization needs may not benefit enough to justify the annual fee.
How do I update or renew my Elementor Pro license?
Updates install automatically through WordPress (Plugins > Updates) when your license is active. To renew an expiring license, log into your Elementor account dashboard where you’ll see your subscription status and renewal options. You can enable auto-renewal to avoid service interruption, or manually renew before expiration. If your license expires, your sites continue functioning but won’t receive updates or support until renewed.
Does Elementor Pro work with my WordPress theme and plugins?
Elementor Pro works with virtually any WordPress theme thanks to its Full Width template option that bypasses theme headers, footers, and sidebars entirely. For best results, use a lightweight theme like Hello Theme (Elementor’s free minimal theme), GeneratePress, or Astra. It integrates seamlessly with WooCommerce for eCommerce sites and major plugins like Yoast SEO, contact forms, and membership systems.
Can I use Elementor Pro on multiple sites?
Your license determines how many sites you can use simultaneously: Essential covers 1 site, Advanced covers 3 sites, and Expert covers 25 sites. You can deactivate a license from one site and move it to another at any time through your Elementor account dashboard, making it flexible for developers who build sites and hand them off to clients.
What are the system requirements for Elementor Pro?
Elementor Pro requires WordPress 5.2 or higher, PHP 7.3 or higher (7.4+ or 8.0+ recommended), MySQL 5.6+ or MariaDB 10.0+, and a WordPress memory limit of at least 128MB (256MB recommended). The free Elementor plugin must be installed before adding Pro. Check your current setup under WordPress > Tools > Site Health to verify compatibility before purchasing.
How do I download Elementor Pro after purchasing?
Log into your Elementor account at elementor.com, navigate to Subscriptions or Downloads, and click the Download button next to Elementor Pro to get the ZIP file. Also copy your license key from the same page. Then in WordPress, go to Plugins > Add New > Upload Plugin, select the ZIP, install, activate, and enter your license key under Elementor > License to complete setup.
What features make Elementor Pro different from the free version?
Elementor Pro adds the Theme Builder for custom headers, footers, and post templates; Form Builder with CRM integrations; Popup Builder with advanced triggers; 50+ additional widgets including dynamic content widgets; 300+ premium templates; global widgets; and WooCommerce builder. The free version provides basic page building with 40+ widgets but lacks these site-wide design and conversion tools.
Can I get a refund if Elementor Pro doesn’t meet my needs?
Elementor offers a 30-day money-back guarantee allowing you to request a full refund within 30 days of purchase if you’re unsatisfied with the product. This gives you time to thoroughly test all features on your actual projects before fully committing to the annual subscription. Contact their support team through your account dashboard to initiate a refund request.
Your Elementor Pro Journey Starts Now
You’ve got the complete roadmap: system requirements verified, download and installation process mastered, core features understood, performance optimization strategies in hand, and pricing clarity to make an informed decision. The next step is taking action on one specific aspect rather than trying to learn everything at once.
Here’s your immediate action plan: Start by importing one template from the library that’s close to your vision, customize it with your branding using global colors and fonts, and publish that single page. This builds confidence and teaches you Elementor’s interface through practical application. Then tackle the Theme Builder to create a custom header. By the end of week one, you’ll have a custom-designed page and site-wide header that would have taken days to code manually. That’s when Elementor Pro’s value becomes undeniable.
The difference between someone who buys Elementor Pro and never uses it effectively versus someone who leverages it to build stunning sites comes down to focused practice. Don’t aim for perfection on day one. Import templates, break them apart to understand how they work, rebuild sections from scratch, and gradually expand your skill set. The 30-day money-back guarantee gives you a risk-free window to determine if Elementor Pro fits your workflow—use that time to build a real project, not just watch tutorials.
If you’re building directory sites, pairing Elementor Pro with specialized directory solutions like TurnKey Directories gives you structured listing functionality alongside complete visual design freedom. If you’re running an agency, the time savings on client projects will pay for the Expert plan within your first two builds. If you’re a business owner taking control of your own site design, the ability to update layouts, create forms, and launch popups without hiring developers changes what’s possible for your marketing.
What’s the one feature you’re most excited to try first—the Theme Builder for custom templates, the Form Builder for lead capture, or the Popup Builder for conversions? Start there, master it, then expand to the next feature. Elementor Pro rewards focused learning over scattered experimentation.
Was this article helpful?