How to Upgrade to Business Plan to Install Pro Plugins on WordPress: Complete Guide
Generating summary...
Installing premium plugins on WordPress requires more than just clicking a button—it demands strategic planning, proper environment setup, and often a hosting plan upgrade. Most WordPress.com users discover this reality when they encounter the message: “upgrade to the business plan to install plugins.” This isn’t a limitation designed to frustrate you; it’s a gateway to professional-grade functionality that can transform your website from basic to exceptional. Understanding the upgrade path, installation process, and optimization strategies separates successful WordPress sites from those that struggle with functionality and performance issues.
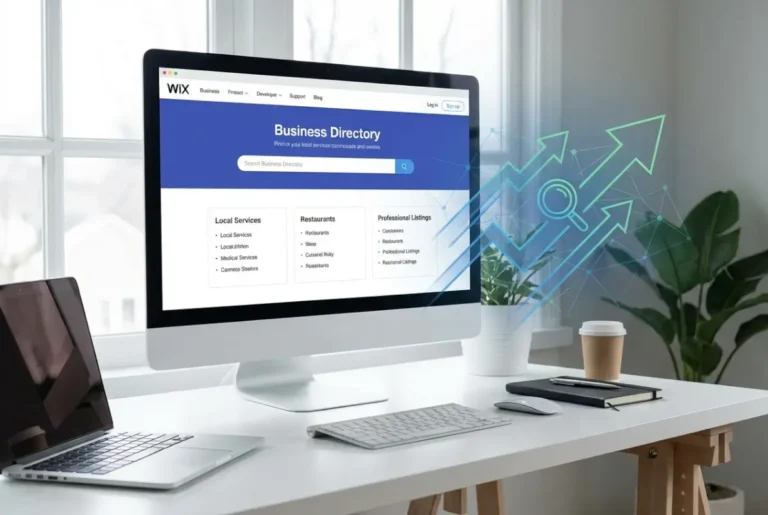
The journey from a free or personal WordPress plan to installing premium plugins involves several critical decisions: choosing the right hosting environment, selecting quality plugins, and configuring them for optimal performance. Whether you’re building a business directory, an e-commerce store, or a membership site, premium plugins unlock capabilities that free alternatives simply cannot match—but only if you navigate the upgrade and installation process correctly.
Quick Navigation: What You’ll Learn
- WordPress.com vs Self-Hosted: Why plan limitations exist and which option suits your needs
- Business Plan Requirements: What the upgrade includes and whether it’s worth the investment
- Installation Methods: Dashboard upload and FTP techniques for different plugin sizes
- License Management: Activating and maintaining premium plugin access
- Performance Optimization: Ensuring plugins don’t slow down your site
- Troubleshooting Solutions: Fixing common installation and activation errors
Understanding WordPress.com Plan Limitations
WordPress.com operates on a tiered pricing model that restricts plugin installation to Business and higher plans. This fundamental limitation catches many beginners by surprise when they attempt to install their first premium plugin. The free and personal plans provide basic website functionality, but they run on WordPress.com’s managed infrastructure with strict limitations designed to maintain security and performance across millions of sites.
The plugin restriction exists because WordPress.com must carefully control what code runs on their servers. Unrestricted plugin access could introduce security vulnerabilities, performance issues, or conflicts that affect server stability. When you upgrade to the business plan to install plugins, you’re essentially gaining access to a more flexible hosting environment that allows custom code execution.
WordPress.com Plan Comparison
| Plan Type | Plugin Access | Custom Themes | Storage | Annual Cost |
|---|---|---|---|---|
| Free | ❌ No | ❌ No | 3GB | $0 |
| Personal | ❌ No | ❌ No | 6GB | $48 |
| Premium | ❌ No | ✅ Yes | 13GB | $96 |
| Business | ✅ Yes | ✅ Yes | 200GB | $300 |
Self-Hosted WordPress: The Alternative Path
Many WordPress users don’t realize they have an alternative that doesn’t require upgrading to expensive WordPress.com plans. Self-hosted WordPress (WordPress.org software) allows unlimited plugin installation from day one, regardless of your hosting provider’s pricing tier. This approach requires purchasing separate hosting from providers like Bluehost, SiteGround, or specialized solutions, but it delivers complete control over your site’s functionality.
The cost comparison often favors self-hosting for users who need extensive customization. Quality shared hosting starts around $5-10 monthly, providing plugin installation capabilities that would cost $25/month on WordPress.com Business plan. I switched from WordPress.com to self-hosted WordPress three years ago specifically for this reason—the flexibility to install any plugin immediately transformed my site’s capabilities without the premium price tag.
For users building directory websites, how to add plugins to wordpress simple steps becomes straightforward with self-hosted installations, avoiding the upgrade requirement entirely.
What the Business Plan Upgrade Includes
The WordPress.com Business plan represents a significant investment, but it delivers far more than just plugin installation access. The upgrade transforms your WordPress.com site into a nearly-full-featured platform comparable to self-hosted installations. Understanding what you’re actually paying for helps determine whether the upgrade makes financial and functional sense for your specific needs.
Beyond plugin installation, the Business plan includes SFTP access, Git integration, and database access—technical capabilities that developers need for advanced customization. You also gain the ability to upload custom themes, access detailed site analytics, and remove WordPress.com branding completely. The plan includes premium support with faster response times, automatic daily backups, and priority restoration services.
The 200GB storage allocation proves essential for sites using media-heavy plugins or membership systems that generate substantial database content. Standard SEO plugins, for instance, store cached data and optimization information that accumulates over time. E-commerce plugins maintain product images, transaction records, and customer data that quickly consume storage on lower-tier plans.
For those wondering if wordpress upgrade to business plan to install plugins represents good value, consider your long-term needs. If you require 3-5 premium plugins for essential functionality (SEO, security, performance, forms, backups), the Business plan provides integrated management. However, if you need extensive customization or plan to scale significantly, self-hosted WordPress often delivers better long-term value and flexibility.
Pre-Installation Preparation Checklist
Before installing any premium plugin—whether on WordPress.com Business plan or self-hosted—proper preparation prevents disasters that could crash your site or corrupt your database. I learned this lesson the hard way when a poorly-timed plugin installation during peak traffic hours created database conflicts that took three hours to resolve. Following a systematic pre-installation checklist eliminates these risks and ensures smooth deployment.
Start with a complete site backup that captures both your database and all uploaded files. WordPress.com Business plans include automatic backups, but creating a manual backup immediately before plugin installation provides an additional safety net. Self-hosted users should use backup plugins like UpdraftPlus or rely on their hosting provider’s backup tools to create a restore point.
Essential Pre-Installation Steps
- Create Full Backup: Database, themes, plugins, uploads, and WordPress core files
- Check PHP Version: Navigate to Tools → Site Health to verify compatibility
- Review Plugin Requirements: Confirm your WordPress version meets minimum requirements
- Verify Available Storage: Ensure adequate space for plugin files and generated data
- Test in Staging Environment: Use WordPress.com staging or create local test site
- Document Current Settings: Screenshot important configurations for reference
- Schedule Off-Peak Installation: Avoid high-traffic periods for major changes
- Disable Caching Temporarily: Prevent cached conflicts during initial setup
Staging environment testing becomes particularly important for premium plugins that modify database structure or integrate with external services. WordPress.com Business plans include staging environments accessible through your dashboard, allowing you to test plugin compatibility without affecting your live site. This feature alone justifies the upgrade for many professional users who can’t afford downtime.
Following WordPress security best practices during plugin installation prevents vulnerabilities that hackers commonly exploit. Never install plugins from unofficial sources, always verify developer credentials, and check recent update history before committing to any premium plugin purchase.
Finding and Purchasing Quality Premium Plugins
The premium plugin marketplace extends far beyond simple price comparisons—quality, support reliability, and long-term viability separate plugins that enhance your site from those that create ongoing problems. After years of testing dozens of premium plugins, I’ve developed a systematic evaluation process that identifies trustworthy developers and avoids problematic purchases that ultimately waste time and money.
Reputable premium plugins typically come from three sources: established companies with proven track records (Gravity Forms, WPForms, Elegant Themes), well-reviewed marketplace platforms like CodeCanyon, or specialized developers who focus on specific functionality. Each source offers different advantages—established companies provide comprehensive support and regular updates, while specialized developers often deliver more focused, efficient code for specific use cases.
Premium Plugin Evaluation Criteria
| Evaluation Factor | What to Look For | Red Flags |
|---|---|---|
| Update Frequency | Updates within last 30-60 days | No updates for 6+ months |
| Support Response | Replies within 24-48 hours | Unanswered forum questions |
| Documentation Quality | Comprehensive guides with screenshots | Minimal or outdated instructions |
| Pricing Structure | $50-200+ annually for quality plugins | Suspiciously low prices vs. competitors |
| User Reviews | Recent positive feedback, active users | Multiple complaints about same issues |
| WordPress Compatibility | Tested with latest WordPress version | Compatibility warnings or limitations |
Avoiding Premium Plugin Scams and Poor Purchases
The “nulled plugin” marketplace represents one of the most dangerous pitfalls for budget-conscious site owners. These illegally distributed premium plugins often contain malware, backdoors, or deliberately sabotaged code that compromises site security. Beyond security risks, nulled plugins don’t receive updates, leaving your site vulnerable to exploits that developers patch in legitimate versions.
Suspiciously low pricing compared to established competitors often indicates either outdated code or developers who lack resources for proper support and updates. Premium plugins require ongoing development to maintain WordPress compatibility, fix bugs, and add features—developers pricing far below market rates typically can’t sustain these essential activities long-term.
For directory websites specifically, understanding how to add plugin wordpress site step by step guide helps evaluate whether premium plugins integrate smoothly with your existing setup before purchasing.
Installing Premium Plugins Step-by-Step
Premium plugin installation on WordPress requires a different approach than free plugins from the official repository. Instead of searching and installing directly from your WordPress dashboard, premium plugins come as ZIP files that you’ll upload manually. This process applies identically whether you’ve upgraded to WordPress.com Business plan or use self-hosted WordPress—the underlying installation mechanism remains the same.
The installation method you choose depends primarily on plugin file size and your hosting environment’s upload limits. Most hosting providers restrict dashboard uploads to 2-64MB, while FTP installations handle unlimited file sizes. Premium plugins with extensive functionality or bundled assets (page builders, theme packages) often exceed dashboard upload limits, requiring FTP as the only viable option.
Method 1: WordPress Dashboard Upload
Navigate to your WordPress admin dashboard, then select Plugins → Add New → Upload Plugin. The upload interface appears with a “Choose File” button—click it and select your downloaded premium plugin ZIP file. Critically, do not extract the ZIP file before uploading; WordPress expects the compressed format and will fail if you attempt to upload extracted folders.
After selecting the file, click “Install Now” and monitor the progress bar. Upload times vary from 30 seconds to several minutes depending on file size and internet connection speed. Once completed, you’ll see either a success message with an “Activate Plugin” button, or an error message indicating what went wrong (typically file size limits, permission issues, or PHP memory constraints).
Common dashboard upload failures include “The uploaded file exceeds the upload_max_filesize directive in php.ini” or “The link you followed has expired.” Both indicate server configuration limits that require either hosting provider adjustment or switching to FTP installation. Contact your hosting support to increase these limits if dashboard upload represents your preferred method.
Method 2: Manual FTP/SFTP Installation
FTP installation provides a reliable alternative when dashboard uploads fail or when working with particularly large premium plugins. First, extract your plugin ZIP file locally to reveal the plugin folder (usually named after the plugin itself). Connect to your server using an FTP client like FileZilla, WinSCP, or Cyberduck with credentials provided by your hosting provider.
Navigate to the /wp-content/plugins/ directory on your server, then upload the entire extracted plugin folder—not individual files from within it. The upload process may take several minutes for large plugins, and interruptions can corrupt the installation. After uploading completes, return to your WordPress dashboard and navigate to Plugins → Installed Plugins, where your new plugin should appear with an “Activate” link.
File permissions occasionally cause FTP installation failures, particularly on security-hardened servers. Directories should typically have 755 permissions, while files need 644 permissions. If your newly uploaded plugin doesn’t appear in the WordPress dashboard, verify these permission settings through your FTP client or hosting control panel.
For developers managing multiple environments, understanding how to add plugin to server methods explained 2 provides additional context for server-level plugin management across different hosting configurations.
License Activation and Initial Configuration
Premium plugin functionality remains severely limited until you activate your license key—this isn’t an optional step but a mandatory requirement to unlock the features you paid for. The license system connects your installation to the developer’s servers, enabling automatic updates, premium support access, and activation of advanced features blocked in unlicensed installations.
Your license key typically appears in three locations: the purchase confirmation email, your account dashboard on the developer’s website, or a separate automated email sent after payment processing. Some developers send license keys immediately, while others delay delivery by several minutes as their system processes payment. Save this key securely in a password manager, as you’ll need it for future updates, site migrations, and renewal management.
License Activation Process
- Locate License Settings: Navigate to the plugin’s dedicated menu item (often labeled “License,” “Settings,” or the plugin name)
- Enter License Key: Paste the complete key without spaces or extra characters—copy-paste errors are the most common activation failure
- Activate License: Click “Activate License” or similar button to connect with developer’s servers
- Verify Activation: Confirm success message appears and license status shows as “Active” or “Valid”
- Complete Setup Wizard: Follow any initial configuration prompts to optimize plugin settings
- Test Core Features: Verify essential functionality works before proceeding with detailed configuration
Troubleshooting License Activation Failures
License rejection occurs for several predictable reasons that you can systematically diagnose and resolve. The most common cause—copy-paste errors—happens when invisible characters from email clients contaminate the pasted key. Manually typing the license key, though tedious, eliminates this issue entirely. Also verify you’re entering the key in the correct field, as some plugins separate license keys from API keys or registration codes.
Multi-site license violations trigger rejection when you’ve installed the plugin on more domains than your license allows. Single-site licenses restrict activation to one domain, while developer and agency licenses permit multiple installations. Check your license terms in your purchase confirmation or account dashboard to verify how many sites your license supports. Most developers offer upgrade paths to higher-tier licenses if you need additional activations.
Server connectivity problems prevent license verification when hosting firewalls block outbound connections to license servers. This issue particularly affects high-security hosting environments that whitelist allowed external connections. Contact your hosting provider to whitelist the plugin developer’s domain, or check the plugin’s documentation for specific IP addresses requiring firewall exceptions.
I encountered a fascinating license activation failure last year where the plugin couldn’t verify licenses for WordPress installations using non-standard port numbers. The solution involved contacting the developer’s support team, who provided a manual activation method bypassing automatic verification—an edge case but one that demonstrates why choosing plugins with responsive support matters.
Compatibility Testing and Performance Optimization
Installing a premium plugin represents just the beginning of the integration process—thorough compatibility testing prevents conflicts that could break layouts, disable features, or create security vulnerabilities. Theme conflicts rank among the most common post-installation issues, particularly when plugins modify frontend output or inject custom CSS that overrides theme styles.
The systematic testing approach involves checking all major page templates individually: homepage, blog posts, pages, archives, search results, and any custom post types your site uses. Premium plugins often add functionality to specific page types, and conflicts may only manifest in certain contexts. Test both desktop and mobile views, as responsive behavior can vary significantly and some theme-plugin conflicts only appear at specific screen widths.
Plugin Conflict Resolution Strategy
Plugin conflicts typically stem from three sources: duplicate functionality (two SEO plugins competing for the same hooks), JavaScript library version mismatches, or plugins that modify identical database tables. Identifying the specific conflict source requires systematic deactivation testing—disable all other plugins except the newly installed premium plugin, verify it works correctly, then reactivate other plugins one by one until the conflict reappears.
The Health Check & Troubleshooting plugin (available free from WordPress.org) provides “troubleshooting mode” that creates an isolated testing environment. This mode temporarily switches to a default WordPress theme and disables other plugins—but only for your logged-in session, so visitors see your normal site while you test. This approach eliminates the risk of exposing a broken site during conflict diagnosis.
WordPress error logs provide specific details about plugin conflicts when they occur. Most hosting providers enable error logging by default, with logs accessible through cPanel’s File Manager or via FTP at /wp-content/debug.log. The log entries show exactly which function failed and which plugins were involved, allowing targeted troubleshooting rather than random deactivation testing.
Performance monitoring becomes essential after adding premium plugins, as their additional functionality inevitably impacts load times. Use tools like Google PageSpeed Insights, GTmetrix, or Pingdom to measure performance before and after plugin installation. Quality premium plugins typically add less than 200ms to load times when properly configured, while poorly coded plugins can add several seconds.
Common Installation Problems and Solutions
Despite careful preparation, premium plugin installations occasionally trigger errors that require systematic troubleshooting to resolve. Understanding the most common failure modes and their solutions reduces downtime and prevents panic when installations don’t proceed as expected. Most installation issues fall into predictable categories with well-established resolution paths.
White Screen of Death (WSOD) After Activation
The white screen of death—a completely blank page with no error messages—indicates a PHP fatal error that prevents page rendering. This typically occurs when plugins require more memory than your hosting environment provides, or when fatal code conflicts prevent PHP execution. Enable WordPress debug mode by adding define('WP_DEBUG', true); to your wp-config.php file, then check the error log for specific function names and line numbers causing the failure.
Recovery from WSOD requires accessing your site via FTP to rename the problematic plugin folder, which forces WordPress to deactivate it. Navigate to /wp-content/plugins/ and rename the newly installed plugin’s folder (for example, change “premium-plugin” to “premium-plugin-disabled”). Your site should immediately recover, allowing you to investigate the underlying cause before attempting reactivation.
PHP Memory Limit Exhausted Errors
Modern premium plugins—particularly page builders, SEO suites, and e-commerce systems—require substantial PHP memory to function properly. The default PHP memory limit on many shared hosting accounts (128MB) proves insufficient for these resource-intensive plugins. Increase the memory limit by adding define('WP_MEMORY_LIMIT', '256M'); to your wp-config.php file, or contact your hosting provider to raise the server-wide limit.
Some premium plugins provide memory requirement information in their documentation, but many don’t specify exact needs until installation failures occur. As a general rule, allocate 256MB minimum for standard premium plugins, 384MB for page builders or membership systems, and 512MB for complex e-commerce installations with multiple integrations.
⚠️ Critical: Database Backup Before Troubleshooting
Before attempting any troubleshooting steps that modify database settings or plugin files, create a fresh backup. Some troubleshooting actions—particularly those involving database table modifications or plugin file edits—can cause irreversible damage if executed incorrectly. The few minutes spent creating a backup potentially save hours of recovery work if troubleshooting goes wrong.
License Verification Connection Failures
License activation failures sometimes stem from server configuration issues rather than incorrect keys. Servers configured with overly restrictive firewall rules may block outbound HTTPS connections to license verification servers. Test basic connectivity by installing the “HTTP Headers” plugin and attempting to fetch headers from the plugin developer’s website—connection failures indicate firewall restrictions requiring hosting provider intervention.
SSL certificate validation problems occasionally prevent license verification on older hosting environments. Some shared hosting providers use outdated certificate bundles that fail to validate modern SSL certificates. The error logs typically show “SSL certificate problem: unable to get local issuer certificate” or similar messages. Contact your hosting provider to update their SSL certificate bundle, or ask the plugin developer if they offer alternative activation methods.
For complex troubleshooting scenarios involving multiple potential causes, resources like how to add plugin to intellij easy steps demonstrate systematic diagnostic approaches applicable across different plugin installation contexts.
Updating and Maintaining Premium Plugins
Premium plugin maintenance requires more active management than free plugins due to license-dependent update systems. Unlike free plugins that update automatically through WordPress, premium plugins only receive updates when licenses remain active and properly configured. This dependency makes license management a critical ongoing responsibility rather than a one-time setup task.
WordPress displays update notifications for premium plugins in Dashboard → Updates, but only when your license activation successfully connects to the developer’s update servers. Deactivated licenses, expired subscriptions, or server connectivity issues prevent update notifications from appearing—leaving your site running outdated, potentially vulnerable plugin versions without obvious warning signs.
Update Best Practices for Premium Plugins
Schedule premium plugin updates during off-peak traffic hours to minimize disruption if updates trigger unexpected issues. WordPress.com Business plan users benefit from integrated staging environments where updates can be tested before applying to production sites. Self-hosted users should implement similar staging workflows using subdomain installations or local development environments.
Read changelog entries before applying updates to understand what changes the new version introduces. Major updates (version 1.x to 2.x) sometimes include breaking changes that require configuration adjustments or theme compatibility updates. Minor updates (version 2.1 to 2.2) typically contain bug fixes and incremental improvements with lower risk of compatibility issues.
Some premium plugins offer rollback functionality that reverts to previous versions if updates cause problems. This safety feature proves invaluable when updates introduce bugs or compatibility issues that weren’t apparent during staging tests. Not all plugins include rollback capabilities, making pre-update backups your primary protection against problematic updates.
License Renewal Management
Premium plugin licenses typically operate on annual subscriptions that continue providing updates and support only while active. After expiration, plugins continue functioning but stop receiving updates—leaving security vulnerabilities unpatched and compatibility issues unresolved as WordPress itself updates. Set calendar reminders 30-45 days before renewal dates to evaluate whether continued subscription makes sense for your site’s needs.
Many developers offer early renewal discounts or loyalty pricing for existing customers. These discounts—typically 20-40% off standard renewal rates—often require action before your license expires. Missing these discount windows costs significantly over multiple years, particularly for premium plugins with higher annual fees.
Consider whether you still actively use all premium plugin features before renewing licenses. Sites evolve over time, and functionality that seemed essential initially may become redundant as your needs change. Conducting annual plugin audits identifies opportunities to reduce costs by switching to alternative solutions or eliminating unused functionality entirely.
Alternative Approaches to Business Plan Requirement
The WordPress.com Business plan upgrade isn’t the only path to premium plugin installation—several alternative approaches deliver similar capabilities at potentially lower cost or with different trade-offs. Understanding these alternatives helps you make informed decisions based on your specific needs, technical comfort level, and budget constraints.
🚀 Self-Hosted WordPress: Complete Freedom
Migrating from WordPress.com to self-hosted WordPress eliminates all plugin restrictions immediately. Quality shared hosting starts at $5-10 monthly, providing unlimited plugin installation capabilities without premium plan requirements. This approach requires managing your own hosting but delivers maximum flexibility and control.
Best for: Users needing extensive customization, multiple premium plugins, or long-term cost optimization
Managed WordPress Hosting Solutions
Specialized managed WordPress hosts like WP Engine, Kinsta, or Flywheel provide hosting optimized specifically for WordPress with premium features including automatic backups, staging environments, and security hardening. These services typically cost $25-50+ monthly—comparable to WordPress.com Business plan—but include technical support and performance optimization that standard shared hosting lacks.
Managed hosting makes particular sense for business-critical sites where downtime costs exceed hosting expenses. The specialized support teams understand WordPress deeply and can troubleshoot plugin conflicts or performance issues more effectively than general hosting support. Many managed hosts also include premium security features and CDN integration that would require separate plugin purchases on standard hosting.
For directory-focused websites, solutions like TurnKey Directories provide pre-configured WordPress installations with essential plugins already installed and optimized, eliminating much of the complexity involved in manual premium plugin setup and configuration.
Cost Comparison Over Time
The break-even point between WordPress.com Business plan and self-hosted alternatives typically occurs within 12-24 months depending on your specific needs. WordPress.com Business at $300 annually compares to quality shared hosting at $60-120 annually plus domain costs. However, self-hosted sites may incur additional costs for premium themes, security plugins, and backup solutions that WordPress.com includes.
Calculate total cost of ownership by including all expenses: hosting fees, premium plugin licenses, security services, backup storage, and your time investment for management and updates. WordPress.com simplifies management significantly but restricts customization, while self-hosting maximizes flexibility at the cost of increased technical responsibility.
Frequently Asked Questions
Why can’t I install plugins on WordPress.com without upgrading?
WordPress.com restricts plugin installation to Business and higher plans to maintain security, performance, and stability across their shared infrastructure. Free and Personal plans run on tightly controlled servers where unrestricted plugin access could introduce vulnerabilities or conflicts affecting other users. The upgrade requirement ensures only users committed to advanced functionality can execute custom code on WordPress.com’s servers.
How much does WordPress.com Business plan cost to install plugins?
WordPress.com Business plan costs $300 annually (or $25 monthly if paid month-to-month), which includes unlimited plugin installation, 200GB storage, custom theme uploads, SFTP access, and priority support. This represents the minimum investment required to install premium plugins on WordPress.com’s platform. Self-hosted alternatives starting around $60-120 annually provide similar plugin capabilities without upgrade requirements.
Can I install free plugins on WordPress.com without Business plan?
No, WordPress.com restricts all plugin installation—both free and premium—to Business plan and above. Even free plugins from the official WordPress.org repository require Business plan to install. This policy applies uniformly regardless of plugin source, type, or intended functionality. The only way to install any plugins on WordPress.com is upgrading to Business plan or migrating to self-hosted WordPress.
What’s the difference between WordPress.com and self-hosted WordPress for plugins?
WordPress.com hosts your site on their servers with plan-based restrictions including plugin limitations until Business plan. Self-hosted WordPress (WordPress.org software) installed on your own hosting allows unlimited plugin installation from day one regardless of hosting cost. Self-hosted requires managing your own hosting, updates, and security, while WordPress.com handles technical management but restricts customization options.
How do I activate my premium plugin license after installation?
Navigate to the plugin’s settings page in your WordPress admin dashboard, typically labeled “License,” “Settings,” or the plugin name. Locate the license key field, paste your key exactly as provided (no extra spaces), and click “Activate License” or similar button. Verify activation success message appears confirming connection to the developer’s license server. Save your license key securely for future reference.
What should I do if my premium plugin causes my site to crash?
Access your site via FTP or hosting file manager, navigate to /wp-content/plugins/, and rename the problematic plugin’s folder (add “-disabled” to the name). This forces WordPress to deactivate it immediately, restoring site functionality. Once recovered, enable WordPress debug mode, check error logs for specific error messages, then contact the plugin developer’s support with detailed information about the crash circumstances.
Can I use the same premium plugin license on multiple sites?
License terms vary by developer—single-site licenses restrict activation to one domain, while developer or agency licenses permit multiple installations. Check your purchase confirmation or license dashboard to verify how many sites your specific license supports. Attempting to activate single-site licenses on multiple domains triggers rejection errors. Most developers offer license upgrades if you need additional site activations.
How often should I update my premium plugins?
Apply security updates immediately when released, as they patch vulnerabilities that hackers actively exploit. For feature updates and minor releases, test in staging environments before applying to production sites. Most premium plugins release updates monthly or quarterly depending on development pace and WordPress core update schedules. Delays beyond 60-90 days risk compatibility issues and security vulnerabilities.
Will premium plugins slow down my WordPress site?
Quality premium plugins typically add less than 200-300ms to page load times when properly configured. Poorly coded plugins or those with extensive functionality can add several seconds. Monitor performance using Google PageSpeed Insights or GTmetrix before and after installation. Enable caching, optimize plugin settings, and disable unused features to minimize performance impact while maintaining necessary functionality.
What happens to my premium plugin if my license expires?
The plugin continues functioning normally after license expiration, but you lose access to updates, new features, and premium support. Without updates, security vulnerabilities remain unpatched and compatibility with newer WordPress versions isn’t guaranteed. Most developers allow grace periods of 30-90 days for renewal before completely blocking access to update servers. Renew licenses promptly to maintain security and functionality.
Take Control of Your WordPress Site’s Potential
Successfully installing premium plugins transforms WordPress from a basic publishing platform into a powerful business tool capable of complex functionality. Whether you choose WordPress.com Business plan upgrade or self-hosted WordPress, the key lies in systematic preparation, careful plugin selection, and thorough testing before going live.
The investment in premium plugins pays dividends when you choose quality solutions from reputable developers, maintain active licenses for critical updates, and optimize configurations for performance. Don’t let plan limitations or technical uncertainties prevent you from accessing the functionality your site needs to succeed.
Ready to upgrade your WordPress capabilities? Evaluate your specific needs, compare hosting options, and invest in premium plugins that deliver measurable value for your business or project.
Was this article helpful?