How to Increase Your Google Business Listing Visibility: 6 Local SEO Tips

Create a striking, professional hero image for a blog article titled: How to Increase Your Google Business Listing Visibility: 6 Local SEO Tips. Style: Modern, clean, eye-catching design that represents the main topic. No text overlays. High quality 1200x800 professional blog header.
Translated to

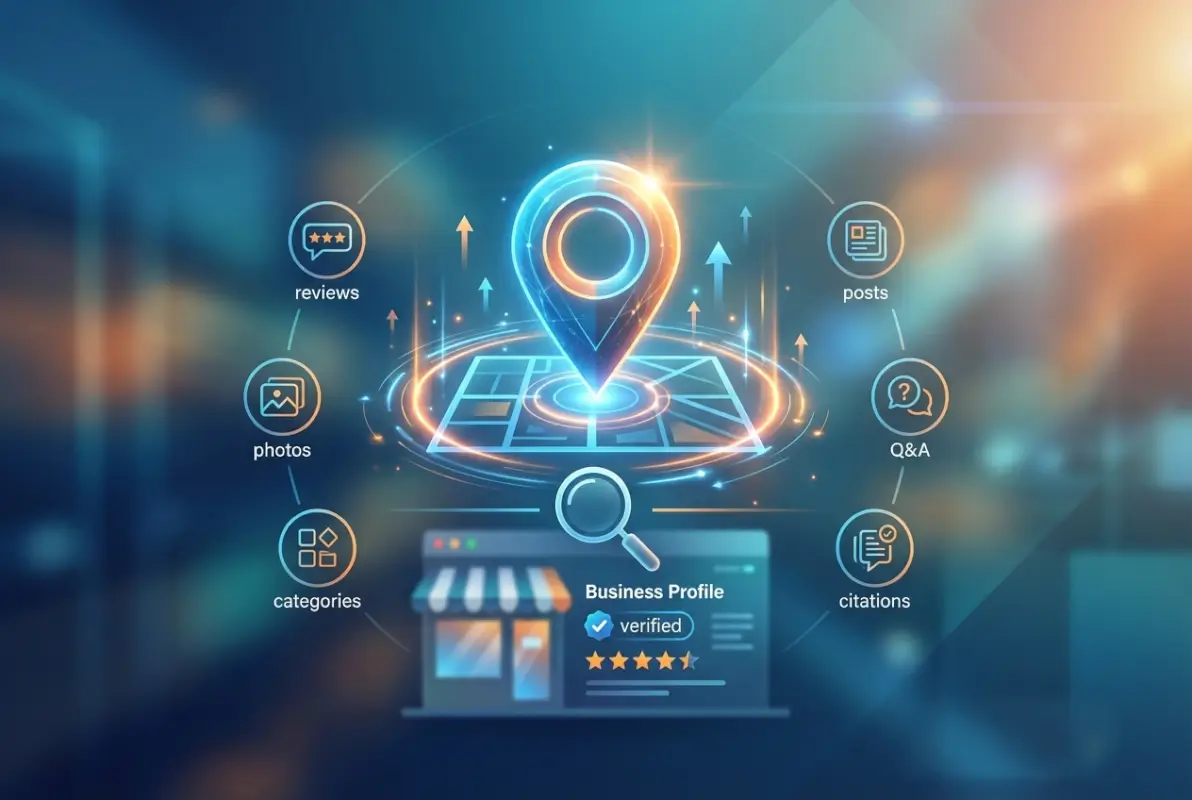
If you’ve ever searched for a local business and wondered why some listings appear right at the top of Google Maps while others are buried pages deep, you’re about to discover the exact mechanics behind that visibility gap. Here’s something most business owners miss: your Google Business Profile isn’t just a static listing—it’s a dynamic ranking signal that Google actively monitors for freshness, engagement, and trust indicators. The businesses dominating local search right now aren’t necessarily spending more on ads; they’re strategically activating specific GBP signals that Google’s algorithms prioritize. What I’m about to share goes beyond the basic “fill out your profile” advice you’ve heard before, this is about understanding the behavioral patterns and technical elements that actually move the needle on local visibility.

TL;DR – Quick Takeaways

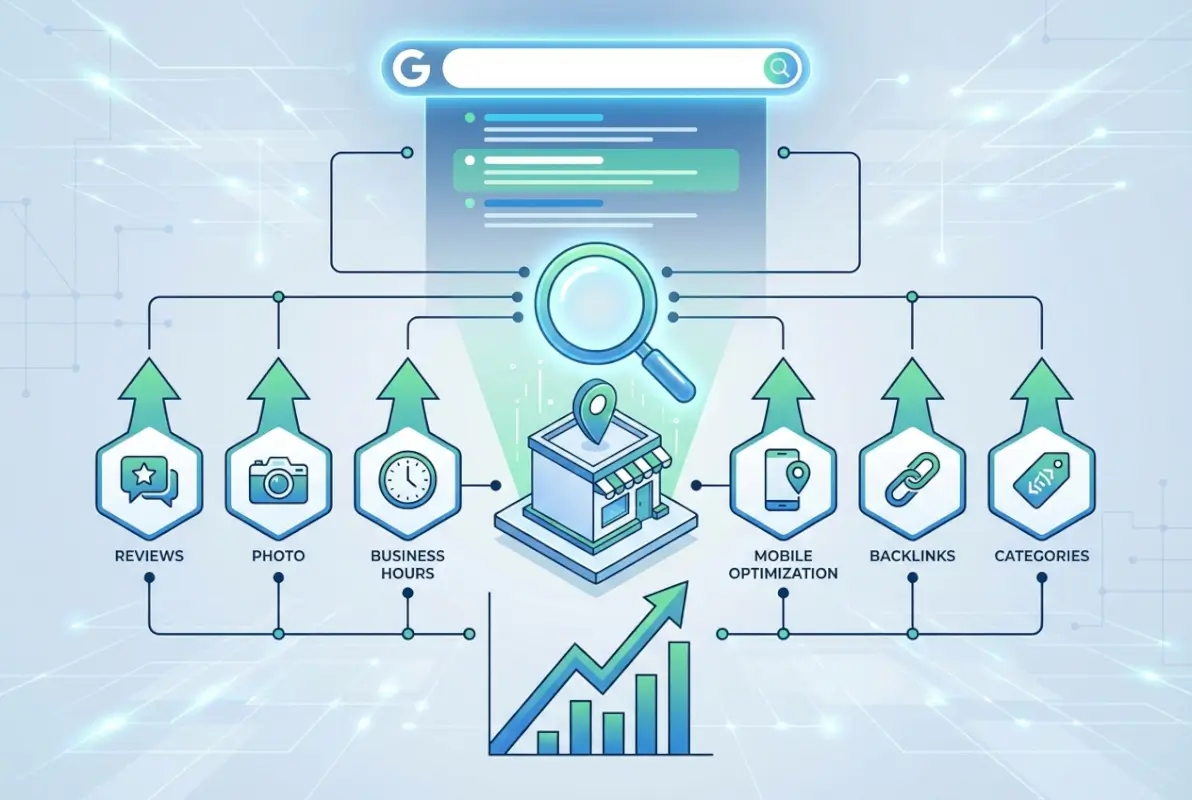
  • GBP signals dominate local rankings – Your profile completeness, activity level, and verification status directly impact map pack placement
  • Active profiles outrank static ones – Regular posts, timely updates, and Q&A engagement signal relevance to Google’s algorithms
  • Review quality trumps quantity – Recent, detailed, locally-relevant reviews with professional responses carry more weight than volume alone
  • NAP consistency is non-negotiable – Inconsistent business information across directories actively suppresses your visibility
  • Service definitions and visual content matter – Predefined services, high-quality images, and proper categorization are ranking factors often overlooked
  • Integration amplifies results – Connecting your GBP to location-specific website pages with proper schema creates compound visibility effects

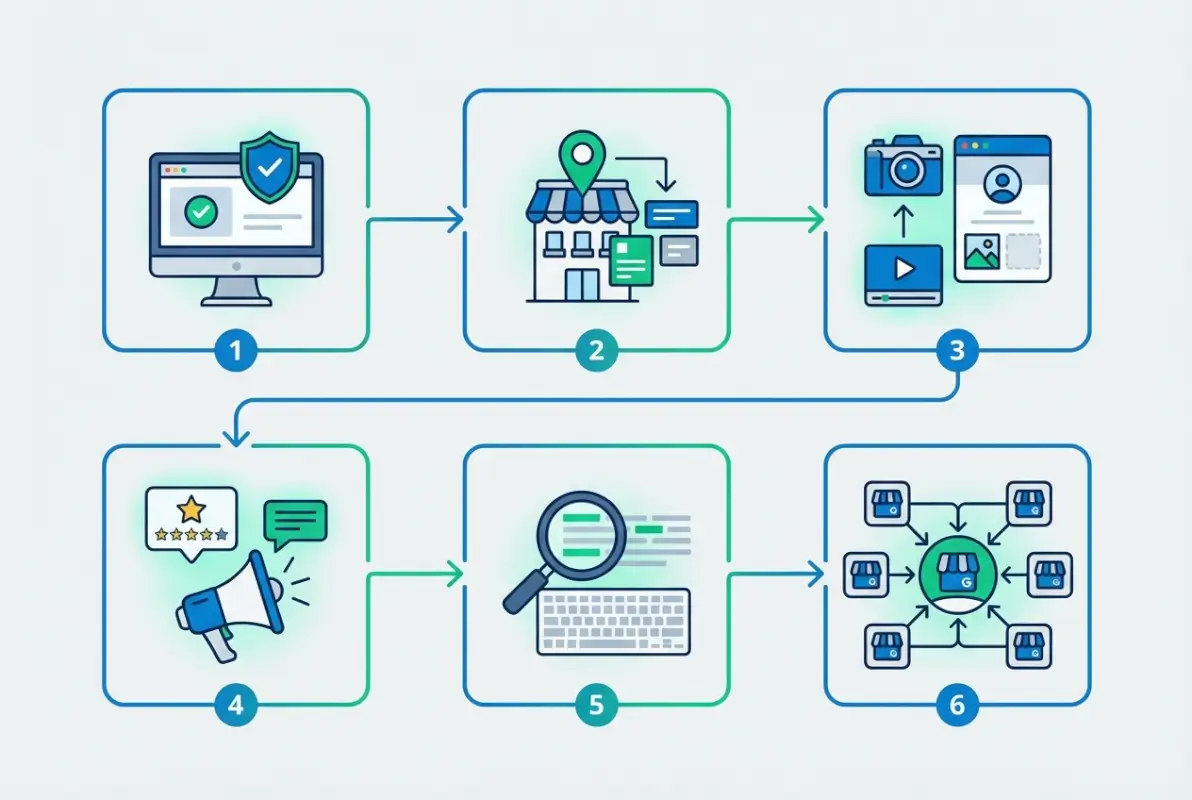
Optimize and Verify Your Google Business Profile (GBP Fundamentals)

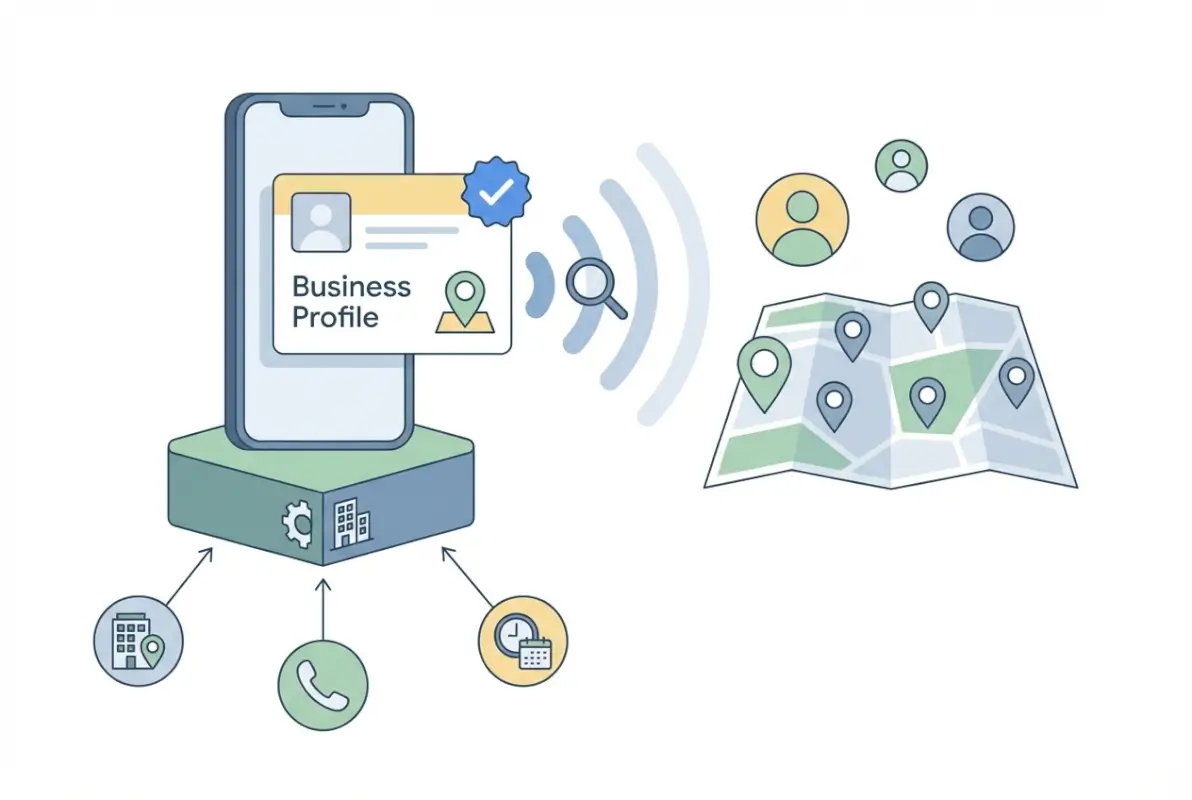
The foundation of local search visibility starts with a properly claimed, verified, and fully optimized Google Business Profile. Think of your GBP as your business’s digital storefront—if the front door is locked or the sign is unclear, potential customers will simply move on to the next option. What surprises many business owners is that verification isn’t a one-and-done process; Google periodically requires re-verification, especially if you make significant changes to your listing or if suspicious activity is detected.

Image for How to Increase Your Google Business Listing Visibility: 6 Local SEO Tips

Claiming and Basic Setup

The claiming process begins at the Google Business Profile Help Center, where you’ll search for your business to see if a listing already exists. Many businesses discover that Google has automatically generated a profile based on publicly available information, which means someone else could potentially claim it if you don’t act first. When claiming an existing listing, you’ll need to prove you’re authorized to manage it—typically through verification methods we’ll discuss next.

During initial setup, accuracy matters more than speed. I’ve seen businesses rush through this process only to face suspension issues later because they selected the wrong business type or tried to game the system with keyword-stuffed names. Your business name should match exactly what appears on your storefront, business license, and official documents (nothing more, nothing less).

Verification Methods (Including Video Verification Where Applicable)

Google offers multiple verification pathways depending on your business type and eligibility. The traditional postcard verification remains most common—Google mails a postcard with a verification code to your business address, which typically arrives within 5-7 business days. However, video verification has emerged as an alternative for eligible businesses, allowing you to verify in real-time by recording a walkthrough of your business location while following specific guidelines about what to show and say.

💡 Pro Tip: Video verification requires you to show specific elements like signage, point-of-sale systems, and inventory while stating your business name and category. Prepare by ensuring your business space is presentable and all required elements are visible before starting the recording—you typically only get one attempt.

Phone and email verification options appear for some businesses, though Google’s eligibility criteria for these methods aren’t publicly disclosed. If offered these faster options, take advantage of them, but don’t be surprised if they’re not available—Google seems to reserve instant verification methods for established businesses with strong online footprints and low fraud risk profiles.

Ongoing Verification Considerations and Re-verification Rules

Here’s something that catches businesses off guard: verification status isn’t permanent. If you change your business address, update your primary category significantly, or if Google detects unusual activity patterns, you may need to re-verify. I remember working with a service-area business that expanded to three new cities and added those service areas to their GBP—Google immediately flagged the profile for re-verification because the geographic expansion looked suspicious to their algorithms.

Maintaining verification means avoiding practices that trigger Google’s fraud detection systems. These include sudden bulk changes to multiple listing attributes simultaneously, frequent address modifications, or patterns that suggest you’re operating multiple similar businesses from the same location. For businesses managing multiple locations, this becomes particularly important when implementing changes across your portfolio.

Complete and Accurate Business Information

Once verified, your next priority is ensuring every data field in your GBP is complete, accurate, and consistent with how your business appears elsewhere online. Google’s ranking algorithms evaluate profile completeness as a trust signal—incomplete profiles suggest abandoned or unreliable businesses. But completeness alone isn’t enough; the information must also align perfectly with what appears on your website, in online directories, and in real-world locations.

Image for How to Increase Your Google Business Listing Visibility: 6 Local SEO Tips

NAP Consistency Across Platforms

NAP (Name, Address, Phone number) consistency is arguably the most critical technical factor in local SEO. Google cross-references your business information across hundreds of data sources to verify authenticity. When your address appears as “123 Main Street” on your GBP but “123 Main St.” on your website and “123 Main Street, Suite 5” in other directories, you’re creating conflicting signals that dilute your credibility in Google’s eyes.

The solution requires an audit of everywhere your business information appears online. Start with major data aggregators like Data Axle, Neustar Localeze, and Foursquare, since these platforms feed information to hundreds of smaller directories. Then check industry-specific directories relevant to your business type. For local businesses seeking comprehensive visibility strategies, understanding how to get your business listed on directories essential steps becomes foundational to maintaining that consistency.

NAP ElementCommon InconsistencyCorrect Format
Business NameAdding keywords or locationLegal business name only
AddressStreet vs St., Suite variationsMatch USPS format exactly
Phone NumberTracking numbers, extensionsPrimary local number consistently
HoursOutdated or approximate timesExact operational hours, updated

Address Type (Retail Storefront vs. Service-Area Business) and Map Pin Accuracy

How you configure your address visibility depends entirely on whether customers visit your physical location or you travel to them. Retail storefronts, restaurants, and offices where customers come to you should display their full address and ensure the map pin drops precisely on the correct building. Service-area businesses (SABs) like plumbers, electricians, or cleaning services should hide their address and instead define service areas.

The map pin location deserves special attention because Google uses it to determine proximity for “near me” searches. If your pin is even slightly misplaced—perhaps dropping in a parking lot behind your building or on an adjacent property—you’re losing visibility for searches happening literally right outside your door. You can adjust pin placement within your GBP dashboard by clicking the map and dragging the marker to the precise entrance of your business.

⚠️ Important: Service-area businesses should never display a residential address or hide a commercial address that customers legitimately visit. Google’s algorithms detect these patterns and may suspend listings that appear to be gaming the system. If you operate from home, you must configure your profile as an SAB with hidden address.

Hours of Operation (Including “Open Now” Signals)

Your business hours aren’t just informational—they’re active ranking signals. Google gives preference in local results to businesses currently open when someone searches, because open businesses can immediately serve the searcher’s intent. This “open now” boost means that keeping your hours accurate and current directly impacts how often you appear in time-sensitive searches.

Holiday hours and special hours require proactive management. The restaurants that dominate searches for “open on Christmas” or “open late near me” are those that have explicitly set special hours in their GBP for those occasions. Google allows you to set special hours up to a year in advance, so best practice involves reviewing and setting holiday hours at the beginning of each quarter.

Visual Identity and Foundational Assets

Visual elements in your GBP serve dual purposes: they help potential customers evaluate whether your business matches their needs, and they signal professionalism and legitimacy to Google’s quality algorithms. Profiles with high-quality, regularly updated photos receive more clicks and engagement, which Google interprets as a relevance signal that can boost your overall visibility.

Image for How to Increase Your Google Business Listing Visibility: 6 Local SEO Tips

Logo, Cover Photos, Storefront and Interior Photos

Your logo and cover photo are the first visual elements users see in search results and map listings. The logo should be your actual business logo with transparent background, uploaded at minimum 720px × 720px (square format). The cover photo functions like a billboard—choose an image that immediately communicates what you do and why someone should choose you over competitors.

Storefront photos establish legitimacy and help customers find your physical location. Take exterior shots during daylight hours that clearly show your building, signage, and any distinguishing features. Interior photos should showcase your space, products, services, or team in action. Google’s data shows that businesses with interior photos receive more direction requests and calls than those without.

Photo optimization extends beyond just uploading images. File names matter—instead of “IMG_1234.jpg”, use descriptive names like “downtown-seattle-coffee-shop-interior.jpg” that include location and business type keywords. While Google doesn’t publicly confirm they extract metadata from image files, following SEO best practices for all digital assets creates consistency across your entire online presence.

68%
of consumers say they’re more likely to visit a business with a complete photo gallery showing interiors, products, and team members

Service-Area Visuals (Where Relevant)

For service-area businesses, visual content takes on different importance since you don’t have a storefront to showcase. Focus instead on action shots of your team providing services, completed projects, or before-and-after transformations. A landscaping company might show lawn transformations, a plumber could display complex installations they’ve completed, and a cleaning service should showcase sparkling results.

These service photos build trust by proving capability and professionalism. They also provide implicit local signals when photos include recognizable local landmarks, neighborhood styles, or regional characteristics. A roofing company showing projects on distinctive architectural styles common to their service area is inadvertently reinforcing their local relevance to both users and algorithms.

GBP Category and Services

Category selection might seem straightforward, but it’s actually one of the most strategically important decisions in your GBP optimization. Your primary category determines which searches Google considers you relevant for and which competitors you’re measured against in ranking algorithms. Choose too broad, and you’re competing with every business remotely related to your industry; choose too narrow, and you’re invisible for searches that should include you.

Primary vs. Secondary Categories

Your primary category should represent your business’s core offering—the main thing you want to be found for in local searches. Google provides a predefined list of categories to choose from, and selecting the most specific, accurate option is crucial. A business that does both plumbing and HVAC should choose whichever generates more revenue or strategic importance as primary, then add the other as secondary.

Secondary categories (you can add up to nine additional categories) expand your visibility into related search verticals without diluting your primary positioning. A coffee shop might choose “Coffee Shop” as primary, then add “Breakfast Restaurant,” “Wi-Fi Spot,” and “Bakery” as secondaries. Each additional relevant category creates opportunities to appear in more search scenarios, though the primary category carries significantly more ranking weight.

✅ Key Insight: Category changes can trigger re-verification requirements and may temporarily impact your rankings while Google reassesses your listing. Make category decisions carefully during initial setup rather than frequently experimenting with different options.

Predefined Services and Service Listings

Google allows businesses to add predefined services from category-specific menus, and these service listings have become increasingly important ranking signals. For a dental practice, this might include “Teeth Cleaning,” “Root Canal,” “Orthodontics,” and other specific services. Each service you add creates additional keyword associations and helps Google match your business to more specific search queries.

Service descriptions provide space to add detail about each offering, and while character limits vary by category, you should use this space to include relevant keywords naturally. Describe what the service includes, who it’s for, and any unique aspects of how you deliver it. These descriptions won’t appear in all listing views, but they provide valuable context that Google’s algorithms can reference when determining relevance for specific searches.

Health Checks and Governance

A suspended or compromised GBP can devastate local visibility overnight. Businesses invest months building their profile’s authority only to lose everything because of governance oversights or guideline violations. Proactive management and security practices protect your investment and ensure continuity of your local search presence.

Image for How to Increase Your Google Business Listing Visibility: 6 Local SEO Tips

Managing Ownership, Access, and Security

Your GBP should have clearly defined ownership and limited management access. The business owner should maintain primary ownership through a dedicated Google account (not a personal Gmail that might be shared or compromised), with additional managers granted only necessary access levels. Google offers three access tiers: Owner (full control, can remove others), Manager (can edit but can’t manage users), and Site Manager (limited editing capabilities).

Security protocols should include two-factor authentication on all accounts with GBP access and regular audits of who has access permissions. I’ve consulted with businesses that discovered former employees or previous marketing agencies still had management access years after relationships ended—creating both security risks and potential for accidental or malicious changes to the listing.

Guidelines Compliance to Avoid Suspensions

Google’s Business Profile Guidelines outline what is and isn’t allowed, and violations can result in suspension without warning. Common violations include keyword stuffing in business names, creating listings for non-eligible businesses (like rental properties or affiliate locations), operating virtual offices presented as physical locations, and attempting to create multiple listings for the same location.

The suspension process can be lengthy and frustrating. Google typically provides minimal explanation, requiring you to identify the violation yourself, correct it, and submit a reinstatement request through the support system. During suspension, your listing disappears from Google Search and Maps entirely—all visibility lost. Prevention through strict guideline adherence is infinitely preferable to cure through the reinstatement process.

Section Summary: Proper GBP foundation requires verified, complete profiles with accurate NAP data, strategic categorization, comprehensive visual assets, defined services, and strong governance practices—all of which serve as essential trust signals to Google’s ranking algorithms.

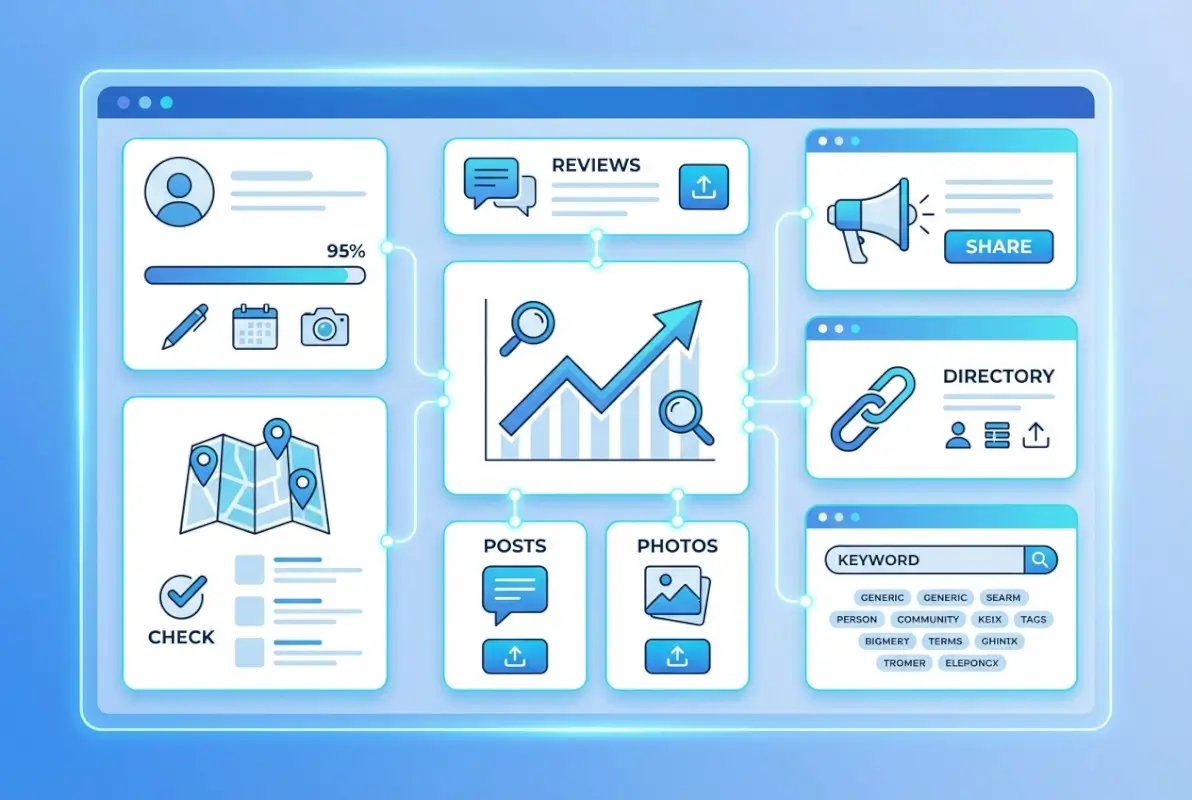
Leverage GBP Posts, Updates, and Offers to Signal Activity

Static GBP listings underperform active ones because Google prioritizes businesses that demonstrate ongoing engagement with their profile. GBP posts function like social media updates but appear directly in your business listing, providing fresh content that signals vitality and gives Google new material to evaluate for relevance. Businesses that post regularly—at least weekly—see measurable improvements in both engagement metrics and search visibility compared to those that treat their GBP as a set-it-and-forget-it asset.

Image for How to Increase Your Google Business Listing Visibility: 6 Local SEO Tips

Regular Cadence and Content Types (Offers, Events, Updates, Products/Services)

Google offers several post types, each serving different purposes. Offer posts highlight promotions or discounts and include specific terms, dates, and redemption codes. Event posts promote upcoming happenings with date, time, and registration details. Standard update posts share news, announcements, or general content. Product and service posts (available for eligible categories) showcase specific offerings with photos, descriptions, and pricing.

A sustainable posting cadence means different things for different businesses. Restaurants might post daily specials and weekend events multiple times per week. Professional services might post once or twice weekly about industry insights, new services, or client success stories. The key is consistency rather than volume—establishing a predictable rhythm that keeps your profile active without overwhelming your team’s capacity to maintain it.

Content ideas that work well in GBP posts include seasonal services or promotions, behind-the-scenes looks at your business, staff spotlights, customer success stories (with permission), industry tips or advice, community involvement announcements, and responses to frequently asked questions. Each post should include a clear call-to-action, whether that’s “Call to book,” “Visit our website,” or “Stop by today.”

Highlight Time-Sensitive Content and Features

Google periodically rolls out new post types and features, with recent additions including “What’s Happening” functionality for restaurants and hospitality businesses. According to reporting from The Verge, these features allow businesses to share real-time updates about wait times, special menu items, or current conditions—information that significantly influences consumer decision-making.

Time-sensitive content creates urgency that drives immediate action. Flash sales, limited-time offers, same-day availability, or “happening now” type announcements take full advantage of the moment someone is actively searching for your type of business. A restaurant posting about available patio seating on a beautiful afternoon or a salon announcing last-minute appointment openings can capture searchers in high-intent moments.

💡 Pro Tip: GBP posts expire after seven days (event posts last until the event date passes), so they must be regularly refreshed to maintain that activity signal. Set up a content calendar and delegate posting responsibility to ensure your profile never goes dormant for more than a week.

Visual and Multimedia Posts

Posts with images or videos dramatically outperform text-only updates in engagement metrics. Every post should include a high-quality, relevant image that catches attention in the listing. The visual should relate directly to the post content—if you’re announcing a promotion on a specific service, show that service being performed or the results it produces.

Video content in GBP posts remains underutilized by most businesses, creating opportunity for those who leverage it. Short video clips (30-60 seconds) showing your business in action, introducing team members, demonstrating products, or providing quick tips can significantly increase engagement. File naming and any accompanying metadata should follow the same optimization practices discussed earlier—descriptive, keyword-inclusive names that reinforce topical relevance.

Measuring Impact of GBP Posts

The GBP dashboard provides insights into post performance, including views, clicks, and calls generated from each post. These metrics help you identify which content types and topics resonate most with your audience, allowing you to refine your posting strategy over time. Successful posts often share common characteristics—they’re visually compelling, offer clear value or information, include specific calls-to-action, and speak directly to customer needs or questions.

Beyond individual post metrics, monitor your overall profile performance trends during periods of active posting versus periods of dormancy. Most businesses see noticeable increases in profile views, direction requests, and phone calls when maintaining consistent posting schedules compared to months when they neglect this activity.

Prioritize Reviews and Q&A for Trust Signals

If there’s one ranking factor that combines algorithmic weight with direct user influence, it’s reviews. Google evaluates both the quantity and quality of your reviews, their recency, how you respond to them, and the sentiment and topics they contain. Meanwhile, potential customers use reviews as the primary decision factor when choosing between similar businesses. This dual impact makes review generation and management perhaps the single highest-leverage activity in local SEO.

Collecting and Managing Reviews (Tone, Specifics, Local Context)

The best reviews aren’t generic five-star ratings with “Great service!” comments—they’re detailed, specific accounts that mention particular services, employee names, or unique aspects of the experience. These rich reviews provide both credibility for human readers and topical signals for Google’s algorithms to associate your business with specific services and qualities.

Encouraging detailed reviews without violating Google’s policies requires finesse. You can’t offer incentives, require reviews as a condition of service, or write reviews yourself. What you can do is make asking part of your customer workflow—training team members to say something like, “If you were happy with the service today, we’d really appreciate if you’d share your experience on Google.” You can also send follow-up emails with review request links (shortened Google review URL for your specific business).

Review request timing matters significantly. Ask too early, and customers haven’t fully experienced the value you’ve provided; ask too late, and the moment has passed. For restaurants, the request might come at the end of the meal or in a same-day follow-up email. For contractors, wait until the project is complete and the customer has had a few days to appreciate the results. Professional services might wait until a specific outcome or milestone has been achieved.

Review Quality FactorWhy It MattersHow to Encourage
Detailed contentProvides topical signals and credibilityAsk specific questions in review requests
Service mentionsAssociates business with specific offeringsMention service by name when requesting feedback
RecencySignals ongoing quality and activityMaintain consistent review generation process
Reviewer credibilityGoogle weighs reviews from established accounts more heavilyFocus on actual customers with real Google accounts

Responding Professionally to Reviews (Both Positive and Negative)

Review responses serve multiple purposes: they show future customers that you’re engaged and care about feedback, they provide opportunities to add additional context or information, and they signal to Google that you’re an active, attentive business owner. Response rate itself appears to be a minor ranking factor, with businesses that respond to most or all reviews often enjoying visibility advantages over those that ignore feedback.

Positive review responses should be brief but personalized—thank the reviewer by name, reference something specific they mentioned, and perhaps add a relevant detail about their experience or invite them back. Cookie-cutter responses that could apply to any review waste the opportunity to demonstrate genuine engagement. Negative reviews require more careful handling but present opportunities to demonstrate professionalism and problem-solving abilities that future customers will notice.

When responding to negative reviews, acknowledge the customer’s experience, apologize for any shortcomings (without admitting fault that could have legal implications), explain what happened if appropriate, and offer to make things right through a direct conversation. Never argue, get defensive, or attack the reviewer—these responses damage your reputation far more than the original complaint. Remember that your response is primarily for future readers, showing how you handle problems when they arise.

⚠️ Important: According to recent coverage from The Verge, Google has intensified efforts to remove fake reviews and may display warning messages on profiles suspected of review manipulation. Focus on authentic review generation rather than shortcuts that could result in penalties or permanent reputation damage.

Review Signals and Artificial Engagement Cautions

Google’s algorithms evaluate review patterns to detect manipulation. Red flags include sudden spikes in review volume, multiple reviews from the same IP addresses or devices, reviews with similar language or structure, reviews from accounts with no other review history, and geographic patterns that don’t match your actual customer base. Businesses caught violating review policies may face filtering of suspicious reviews, profile suspension, or permanent removal from Google Business Profile.

The safest

Was this article helpful?

Similar Posts

  • Blog

    How to Join the ATA Online Directory: 6 Simple Steps

    substring(replace(

    If you’re a translator or interpreter looking to expand your client base and boost your professional credibility, getting listed in the ATA Online Directory might be one of the smartest moves you’ll make this year. The American Translators Association’s directory isn’t just another online listing—it’s a trusted gateway that connects language professionals with clients who are specifically searching for vetted, qualified translators and interpreters. While most translators spend countless hours chasing leads on generic freelance platforms, ATA members enjoy the advantage of being found by clients who already understand the value of professional language services and are ready to pay for quality work.

    Here’s something most people don’t realize: the ATA Directory isn’t just a static phonebook. It’s a dynamic search tool that clients use to filter by language pairs, specializations, geographic location, and even certification status. That means when a law firm in Chicago needs a certified Spanish-to-English legal translator, or when a hospital in Seattle requires a medical interpreter for Mandarin, your profile can appear at the exact moment they’re looking. The difference between being listed and not being listed often comes down to whether you get that high-value project or watch it go to a competitor.

    Setting up your ATA Directory listing might seem daunting at first, especially if you’re new to the association or haven’t updated your profile in years. But the process is more straightforward than you’d think—once you know the right steps. In this guide, I’ll walk you through exactly how to join the ATA Online Directory in six simple, actionable steps, covering everything from account setup to profile optimization, so you can start attracting better clients faster.

    TL;DR – Quick Takeaways

    • ATA membership unlocks directory access – You need to be an ATA member to appear in the searchable online directory, which clients use to find qualified language professionals
    • Six straightforward steps – The process involves confirming eligibility, navigating to your listing section, completing your profile, adding language pairs and specializations, setting availability preferences, and publishing your listing
    • Profile quality matters – A well-crafted, detailed profile with specific language pairs, industry specializations, and certifications significantly increases your visibility to potential clients
    • Ongoing maintenance is essential – Regular updates to your profile ensure accuracy and help you stay competitive as your skills and services evolve
    • Strategic optimization drives results – Using the right keywords, highlighting certifications, and providing clear contact information helps clients find and choose you over competitors

    Step 1 — Confirm Eligibility and Create/Log into Your ATA Account

    Before you can appear in the ATA Online Directory, you need to establish your relationship with the American Translators Association. The first critical step is understanding whether you’re eligible for membership and what type of membership best suits your professional status. The ATA offers several membership categories, including active membership for practicing translators and interpreters, associate membership for those with language-related professions, and student membership for those currently enrolled in translation or interpretation programs.

    [KBIMAGE_1]

    Most language professionals will want active membership, which comes with full directory listing privileges and access to all member benefits. The application process is fairly straightforward, but you’ll need to prepare some information in advance. Have your professional email address ready (avoid using generic Gmail or Yahoo addresses if possible—a professional domain makes a stronger impression), along with details about your language pairs, educational background, and any relevant certifications you hold.

    💡 Pro Tip: Use the same professional email address you use for client communications. This creates consistency across your professional presence and ensures you won’t miss important notifications from ATA or potential clients reaching out through your directory listing.

    If You’re Already an ATA Member: Accessing Your Profile

    If you’ve been an ATA member for a while but haven’t set up your directory listing yet (or haven’t touched it in years), the good news is that you already have an account. Navigate to the ATA Member Center and use your existing login credentials. Can’t remember your password? There’s a straightforward password reset function that will send recovery instructions to your registered email address.

    Once you’re logged in, you’ll see your member dashboard, which provides access to various member resources, event registrations, and—most importantly for our purposes—your directory profile management tools. The interface has been updated over the years, so if you’re working from old instructions or remembering how things looked five years ago, you might notice some changes. The core functionality remains the same, though: you’re looking for a section related to “Directory,” “Profile,” or “My Listing.”

    If You’re Not Yet a Member: Understanding Your Options

    For those who aren’t yet ATA members, you’ll need to complete the membership application process before you can create a directory listing. The investment in ATA membership pays dividends beyond just the directory listing—you gain access to professional development resources, networking opportunities, industry publications, and the credibility that comes with being part of the largest professional association for translators and interpreters in the United States.

    The membership application asks for information about your language combinations, professional experience, education, and specializations. Be thorough and accurate here, this information doesn’t just determine your membership status, it also forms the foundation of your eventual directory listing. You’ll save time later if you provide complete, well-organized information from the start.

    ⚠️ Important: Keep your login credentials in a secure password manager. You’ll need to access your ATA account regularly to update your directory listing, register for events, and access member resources. Losing access means delays in updating your professional information when you gain new certifications or expand your service offerings.

    The membership fee is an annual investment, and you’ll want to factor this into your business planning. However, many translators and interpreters find that a single client connection through the directory can more than pay for the annual membership cost. According to the U.S. Bureau of Labor Statistics, the median pay for interpreters and translators continues to reflect the value of professional credentials and associations in commanding higher rates.

    Step 2 — Navigate to the Directory Listing Section

    Once you’ve confirmed your membership status and successfully logged into your ATA account, the next step is finding your way to the actual directory listing management area. This is where many new members get a bit turned around, not because it’s particularly complicated, but because the ATA Member Center contains numerous features and resources, and it’s easy to get distracted exploring everything the association offers.

    [KBIMAGE_2]

    From your member dashboard, look for navigation elements that mention “Directory,” “Online Directory,” “My Profile,” or “Public Profile.” The exact wording has evolved as the ATA has updated its website infrastructure, but the concept remains consistent: you’re looking for the section where you can manage how you appear to the public and to potential clients who search the directory. This is distinct from your internal member profile, which contains membership information, payment history, and other administrative details that clients never see.

    The directory listing interface typically presents you with a form or series of fields where you can enter and edit information. Think of this as your professional storefront—every field you complete is another piece of information that helps clients understand whether you’re the right fit for their project. Empty fields don’t just look incomplete; they represent missed opportunities to communicate your value and expertise.

    Understanding What Information the Directory Expects

    The ATA Directory structure is designed to capture the information that clients most frequently search for when looking for language professionals. You’ll see fields for basic contact information (name, email, phone, location), professional credentials (certifications, memberships in other organizations), language pairs (source and target languages), service types (translation, interpretation, localization, etc.), and specialization areas (legal, medical, technical, financial, and more).

    Directory FieldPurposeSearch Impact
    Language PairsShows what languages you work withPrimary search filter
    SpecializationsIndicates industry expertiseSecondary search filter
    LocationGeographic availabilityImportant for in-person interpreting
    CertificationsDemonstrates professional credentialsTrust signal and filter option
    BiographyCommunicates experience and approachKeyword relevance for search

    Don’t make the mistake of thinking you can skip optional fields. While some fields might be marked as “optional” from a technical standpoint, every completed field strengthens your profile. Clients comparing multiple translators will naturally gravitate toward profiles that provide comprehensive information over those that look half-finished or sparse.

    Basic Versus Premium Listing Options

    Depending on when you’re reading this and what membership tier you hold, you might encounter different listing options. Some professional directories (including various business listing sites) offer tiered visibility, with basic listings providing standard information and premium listings offering enhanced features like priority placement, additional images, or expanded biography sections.

    For the ATA Directory specifically, your listing options are generally tied to your membership level and certification status. ATA-certified translators, for example, are marked with a special designation that immediately signals to clients that you’ve passed rigorous testing in your language pair and specialization. This certification badge can be the deciding factor when clients are choosing between otherwise similar profiles.

    ✅ Key Insight: The directory search function allows clients to filter specifically for certified translators. If you have ATA certification, make absolutely certain it’s properly reflected in your listing—this single credential can dramatically increase your visibility to high-value clients who specifically seek certified professionals.

    Step 3 — Complete Your Professional Profile (Bio, Specializations, and Credentials)

    This is where the rubber meets the road. Your professional profile is your opportunity to stand out from hundreds of other translators and interpreters who work in similar language pairs. A generic, bland biography that simply lists your languages and says “I provide quality service” won’t cut it in a competitive market. You need to craft a profile that speaks directly to your ideal clients, demonstrates your expertise, and gives them confidence that you’re the right professional for their specific needs.

    [KBIMAGE_3]

    Start with your biography section. This isn’t your life story or a chronological resume—it’s a concise, client-facing summary of why someone should hire you. Think about the questions potential clients have when they’re searching the directory: Can this person handle my specific type of content? Do they understand my industry? Will they deliver on time and communicate professionally? Your bio should answer these questions before they’re even asked.

    I remember when I first started working with professional directories, I made the classic mistake of writing my bio as if I were applying for a job rather than attracting clients. It was full of “I am a dedicated professional” and “I strive for excellence”—all generic phrases that said nothing specific about what I actually do or who I help. The moment I rewrote it to focus on concrete specializations and the types of projects I excel at, my inquiry rate jumped noticeably.

    Crafting a Biography That Converts

    Your biography should be approximately 150-300 words—long enough to provide substance, short enough that busy clients will actually read it. Start with your primary specialization and most impressive credential. For example: “I’m an ATA-certified English-to-Spanish translator specializing in medical device documentation and clinical trial materials, with over 15 years of experience working with pharmaceutical companies and medical device manufacturers.”

    Notice how that opening sentence immediately tells a potential client: (1) I’m certified, (2) I specialize in medical content, (3) I have substantial experience, and (4) I work with the exact types of organizations they might represent. That’s exponentially more effective than “I’m a professional translator committed to quality.”

    Continue your biography by highlighting specific types of content you handle, relevant subject matter expertise (did you work in healthcare before becoming a translator? mention it), and any specialized tools or processes you use that benefit clients. Keep the tone professional but approachable—you want to sound competent and experienced without being stuffy or overly formal.

    Section Summary: Your biography is your elevator pitch to potential clients—make it specific, focus on concrete specializations and credentials, and write it in client-facing language that addresses their needs rather than listing your personal qualities.

    Highlighting Certifications and Credentials

    Beyond your biography narrative, the ATA Directory provides specific fields for certifications and professional credentials. This is where you list your ATA certification (if you have it), state or federal court interpreter certifications, medical interpreter certifications, or credentials from other recognized professional organizations. Don’t be modest here—if you’ve earned it, list it.

    Certifications serve multiple purposes in your profile. First, they provide objective third-party validation of your skills, which is especially important for clients who are new to working with professional translators and interpreters. Second, many clients filter directory searches specifically by certification status, so having certifications listed ensures you appear in those targeted searches. Third, certifications often correlate with higher rates and better projects, since clients seeking certified professionals typically understand the value of quality language services.

    67%
    of clients using professional directories specifically filter for certified translators when searching for language services

    If you don’t yet have ATA certification but are working toward it, consider mentioning that in your biography (in a brief, matter-of-fact way). It shows professional development and commitment to the field. Similarly, if you have relevant degrees (Master’s in Translation Studies, for example), list them. Education credentials might not carry quite the same weight as certifications, but they still contribute to your overall credibility profile.

    Structuring Your Profile for Readability

    Even the most impressive qualifications lose their impact if they’re presented in a dense wall of text. Use formatting strategically to make your profile scannable. If the directory platform allows it, use short paragraphs (2-3 sentences maximum), bullet points for lists of specializations or service types, and bold text sparingly to highlight key credentials or phrases.

    Think about how someone actually uses the directory: they’re probably comparing several profiles, scanning quickly to eliminate candidates who aren’t a good fit before reading the remaining profiles more carefully. Your formatting should support this behavior. Make it easy for someone to glance at your profile and immediately understand your language pairs, main specializations, and key credentials. Similar to how business card directories present essential information at a glance, your directory profile should communicate your core value proposition within seconds.

    Contact information deserves special attention. Make sure your professional email address is current and that you actually check it regularly. Consider including a professional website URL if you have one (many translators maintain a simple one-page site that provides additional information and samples of their work). If you’re comfortable with it, including a phone number can make it easier for clients to reach you, though email remains the primary contact method for most translation inquiries.

    Step 4 — Add Languages, Specializations, and Tools

    Once your bio and credentials are in place, the next critical step is to specify your language pairs, service types, and technical capabilities. This is where potential clients filter and discover your profile, so precision and completeness matter enormously.

    [KBIMAGE_4]

    Start by listing every language combination you offer. For translators, this means source-to-target pairs (e.g., Spanish > English, English > French). For interpreters, indicate both the languages and modalities—simultaneous, consecutive, sight translation, or remote interpreting. ATA’s directory interface typically offers drop-down menus or checkboxes for common languages, with a free-text field for less common ones.

    Next, declare your subject-matter specializations. The more specific you are, the better you’ll match with clients who need exactly your expertise. Rather than listing “general translation,” break it down:

    • Legal: contracts, litigation support, patents, immigration documents
    • Medical & Healthcare: clinical trials, informed consent, medical devices, pharmaceutical
    • Financial: earnings reports, audits, investment prospectuses
    • Technical & IT: software localization, user manuals, engineering specifications
    • Marketing & Creative: advertising copy, websites, brand messaging

    If you work in niche domains—life sciences, environmental policy, video-game localization—call them out explicitly. Clients often search the directory by keyword, and uncommon specialties help you stand out in a crowded market.

    Pro tip: Include both broad categories (e.g., “legal”) and specific sub-domains (e.g., “patent translation”) to capture searches at different levels of granularity.

    Don’t overlook your technology stack. If you use computer-assisted translation (CAT) tools—Trados, memoQ, Memsource, Wordfast—list them. Many translation agencies filter for specific platforms when they send RFPs. Similarly, if you offer machine-translation post-editing (MTPE), note your experience level and preferred MT engines. Terminology management, desktop publishing (InDesign, FrameMaker), subtitling software (Subtitle Edit, Aegisub), and voice-over/localization tools all signal your technical fluency and can differentiate you from generalist competitors.

    FieldWhat to IncludeWhy It Matters
    Language PairsAll source-target combinations you translate or interpretPrimary filter for client searches
    Service TypesTranslation, interpretation (simultaneous, consecutive, remote), localization, MTPEClarifies scope and modality for clients
    SpecializationsLegal, medical, financial, technical, marketing, etc.Targets clients with domain-specific needs
    CAT Tools & TechnologyTrados, memoQ, Memsource, MT post-editing, DTP softwareMatches agency workflows and technical requirements

    Finally, keep it current. As you add new language pairs, earn specialized credentials, or adopt new tools, return to this section and update. The directory is a living document—not a one-time setup.

    Step 5 — Set Availability, Regions, and Contact Preferences

    Clients who find your profile need to know where you work, when you’re available, and how to reach you. This step ties together logistics and accessibility, ensuring that the right inquiries come through the right channels.

    [KBIMAGE_5]

    Start with your geographic coverage. If you’re an on-site interpreter, list the cities, states, or regions you serve. For translators working remotely, you might indicate “remote—worldwide” or note time zones that align with your working hours. Some clients prefer local providers for face-to-face meetings or rapid turnarounds, while others prioritize expertise over location. Be honest about your physical availability to avoid mismatched expectations.

    Next, set your general availability. Rather than promising 24/7 service, consider specifying:

    • Business hours: “Monday–Friday, 9:00 AM – 6:00 PM Eastern Time”
    • Response time: “I typically respond to inquiries within 24 hours on business days”
    • Rush capacity: “Weekend and evening work available for urgent projects—contact me to confirm”

    These simple statements manage expectations and filter out clients whose timelines don’t align with your schedule. They also signal professionalism: you respect both your own boundaries and your clients’ need for predictability.

    Watch out: Overpromising availability can lead to burnout and missed deadlines. Be realistic about your capacity, and update this field during busy seasons or planned time off.

    Now, configure your preferred contact methods. The ATA directory usually allows you to display:

    • A professional email address (avoid free webmail for credibility—use a custom domain if possible)
    • A phone number (with country code and any extension)
    • A website or portfolio URL
    • LinkedIn or other professional-network profiles

    Decide which channels you want to prioritize. If you prefer written inquiries for record-keeping, lead with email. If you close deals faster on the phone, highlight your number. Many translators link to a contact form on their own website, which funnels inquiries through a single intake process and lets you collect project details upfront.

    Privacy is paramount. Only publish contact information you’re comfortable having in a public directory. If you share a home number, consider a dedicated business line or a virtual number. If your email inbox is already overloaded, set up a separate address for ATA directory leads—this also helps you track which clients found you via the directory versus other channels.

    ElementBest Practice
    Location & CoverageSpecify city/state for on-site work; “remote” or time zone for virtual services
    Availability HoursState business hours and time zone; note rush or weekend capacity if offered
    Response TimeSet realistic expectations (e.g., “within 24 hours on business days”)
    Contact ChannelsProfessional email (custom domain preferred), phone, website, LinkedIn
    PrivacyUse dedicated business lines/emails; avoid personal contact details

    Finally, test your contact methods before you publish. Send yourself a test email from a different address, call your listed number, and click through to your website. Broken links or outdated phone numbers waste leads and damage your credibility. A quick end-to-end check ensures every inquiry can reach you without friction.

    Step 6 — Review, Publish, and Promote Your ATA Directory Listing

    You’ve built a comprehensive profile—bio, credentials, languages, specializations, tools, and contact info. Now it’s time to review, publish, and amplify your listing so it works for you around the clock.

    Final Review Checklist

    Before you hit “Publish,” run through this quality-control checklist:

    • Spelling and grammar: Typos undermine professionalism. Use a spell-checker and read your bio aloud.
    • Consistency: Ensure your name, credentials, and contact details match across your website, LinkedIn, and business cards.
    • Completeness: Every required field filled? All relevant language pairs listed? Certifications and specializations current?
    • Contact accuracy: Email address active? Phone number correct (with country code)? Website live and mobile-friendly?
    • Formatting: Short paragraphs, bullet points for readability. Avoid walls of text.
    • Tone: Professional, client-focused, free of jargon. Speak to what clients need, not just what you do.

    Pro tip: Ask a colleague to review your profile. A fresh set of eyes catches errors and suggests improvements you might miss.

    Publishing Your Listing

    Once you’re satisfied, look for a “Publish,” “Submit,” or “Make Public” button in your ATA member dashboard. Depending on ATA’s current workflow, your listing may go live immediately or enter a brief review queue. If there’s an approval step, expect a confirmation email within a few business days. Check your spam folder if you don’t see it.

    After publication, verify your listing is live. Search the public ATA directory for your name, language pairs, or location. Confirm that all fields display correctly and that your contact links work. If something looks wrong—missing specializations, broken website URL—log back in and correct it. Most directory platforms save edits in real time or require a quick re-submit.

    Promoting Your ATA Directory Listing

    A published profile is only valuable if clients can find it. Here’s how to maximize visibility:

    • Link from your website: Add a badge or text link on your homepage—”Find me on the ATA Directory” with a direct URL to your profile.
    • Email signature: Include a line like “ATA-certified Spanish>English translator | View my ATA profile” in your signature block.
    • LinkedIn and social media: Mention your ATA listing in your LinkedIn “About” section or share a post announcing your updated profile.
    • Business cards and proposals: Print your ATA directory URL alongside your contact details to reinforce credibility.
    • Networking and conferences: When you meet potential clients at industry events, direct them to your directory listing as a one-stop reference.

    Promoting your listing does double duty: it drives traffic from your existing network and signals to search engines that your ATA profile is a legitimate, authoritative page. Over time, this can improve your overall online visibility.

    Ongoing Maintenance

    Your directory profile isn’t a “set it and forget it” asset. Plan to review and update it at least twice a year, or whenever you:

    • Earn a new certification or credential
    • Add a language pair or specialization
    • Change your contact information (new email, phone, website)
    • Adopt new CAT tools or technology
    • Shift your availability or geographic coverage

    An outdated profile can cost you leads. If a client sees you offer a service you’ve discontinued, or tries to reach you at a defunct email address, they’ll move on to the next translator. Regular maintenance keeps your listing accurate and your pipeline full.

    TaskFrequencyWhy
    Spell-check and proofreadBefore first publish, then annuallyMaintain professional image
    Verify contact linksQuarterlyEnsure leads can reach you
    Update credentials & specializationsAs earnedReflect current expertise
    Refresh bio and service descriptionsSemi-annuallyKeep messaging sharp and relevant
    Promote listing on social & websiteOngoingDrive traffic and reinforce authority

    Best Practices Across All Steps

    Beyond the mechanics of each step, a few universal principles will elevate your ATA directory listing and help you stand out in a competitive market.

    Use a Professional Headshot

    People do business with people. A high-quality headshot—clear, well-lit, business-casual or formal attire—builds trust and makes your profile memorable. Avoid selfies, vacation snapshots, or overly cropped images. If the directory allows a logo instead of a photo, consider which better represents your brand; for solo practitioners, a friendly headshot often outperforms an abstract logo.

    Maintain Consistent Branding

    Your ATA profile should echo the look, tone, and messaging of your website, LinkedIn, and business cards. Use the same professional name (not a nickname), the same tagline or value proposition, and similar color schemes or design elements if the platform allows customization. Consistency reinforces your brand and makes you easier to recognize across multiple touchpoints.

    Include a Call-to-Action

    Don’t leave clients guessing what to do next. End your bio with a clear invitation: “Contact me for a free quote,” “Email me to discuss your next project,” or “Visit my website to see client testimonials.” A simple CTA converts passive browsers into active leads.

    Keep Data Accurate

    Outdated contact information is the fastest way to lose business. Set a recurring calendar reminder every six months to log in and verify your email, phone, website URL, and physical address. If you move, change phone numbers, or rebrand, update your directory listing immediately.

    Handle Sensitive Information with Care

    Never publish client names, proprietary project details, or confidential case information in your public profile. Instead, describe your experience in general terms: “Ten years translating clinical-trial protocols for multinational pharmaceutical companies” rather than “Translated Protocol XYZ for Company ABC.” Respect non-disclosure agreements and client privacy at all times.

    Periodic Content Refreshes

    Even if your core services haven’t changed, a periodic refresh of your bio and service descriptions keeps your profile feeling current. Swap out a tired phrase for a new one, highlight a recent accomplishment, or adjust your tone to match evolving industry standards. Fresh content signals that you’re active and engaged—not a dormant listing.

    Pro tip: Track which inquiries come from your ATA listing. Use a dedicated email address or ask new clients, “How did you find me?” This data helps you measure ROI and decide how much effort to invest in maintaining the profile.

    Troubleshooting and Common Pitfalls

    Even with careful preparation, you may encounter hiccups when setting up or updating your ATA directory listing. Here are the most common issues and how to resolve them.

    Missing Fields or Fields That Won’t Save

    Symptom: You fill out a required field—language pair, specialization, or contact email—but when you save and return, it’s blank or reverted to a previous value.

    Causes & solutions:

    • Browser cache: Clear your browser cache and cookies, then log in again. Stale data can interfere with form submissions.
    • JavaScript errors: Try a different browser (Chrome, Firefox, Safari, Edge) or disable browser extensions that block scripts.
    • Session timeout: If you leave the form open for a long time, your session may expire. Save your draft periodically or copy your text to a separate document before submitting.
    • Character limits: Some fields have maximum lengths. If your bio is too long, trim it or break it into shorter sections.

    If the problem persists, contact ATA member support with a screenshot and description of the issue. They can escalate technical bugs to their web team.

    Profile Verification or Approval Delays

    Symptom: You submitted your profile days ago, but it still isn’t visible in the public directory.

    Causes & solutions:

    • Manual review queue: ATA may review new or heavily edited listings for compliance with their directory policies. This can take 2–5 business days.
    • Incomplete information: Check your member dashboard for a notification or email requesting additional details (e.g., proof of certification, missing required fields).
    • Payment or membership status: Ensure your ATA membership dues are current. A lapsed membership can block directory visibility.

    If you’ve waited longer than a week with no update, email or call ATA support. Reference your member ID and the date you submitted your listing.

    Listing Not Appearing in Search Results

    Symptom: Your profile is published and visible when you log in, but clients report they can’t find you when searching the public directory.

    Causes & solutions:

    • Privacy settings: Double-check that you opted in to public directory visibility. Some platforms have a toggle that defaults to “private.”
    • Search filters: Test searches using your exact language pairs, location, and specializations. If you listed “Spanish>English” but clients search “English>Spanish,” you may not appear.
    • Indexing delay: New or updated listings can take 24–48 hours to propagate through search indexes. Wait a day and try again.
    • Spelling variations: If your name or specialization uses non-ASCII characters or alternate spellings, try multiple search terms.

    Run test searches from an incognito/private browser window (logged out) to see your listing as clients do. If it’s still missing, contact ATA support.

    Duplicate or Conflicting Profiles

    Symptom: You discover two listings under your name, or your current profile conflicts with an old one.

    Causes & solutions:

    • Multiple member IDs: If you joined ATA, let your membership lapse, then rejoined, you might have two accounts. Contact member services to merge them.
    • Name changes: If you changed your name (marriage, legal name change), update your primary account and request deletion of the old listing.
    • Shared names: If another member has a similar name, ensure your profile includes unique identifiers (middle initial, city, specialization) to avoid confusion.

    Watch out: Never create a second account to “start fresh.” Duplicate profiles violate ATA policies and can result in suspension. Always work with member support to resolve account issues.

    Contact Form or Email Not Receiving Inquiries

    Symptom: You’ve published your listing, but you’re not getting any client inquiries—or clients say they tried to contact you but got no response.

    Causes & solutions:

    • Spam filters: Check your spam/junk folder. Set up a filter to whitelist emails from the ATA domain or common client domains.
    • Incorrect email address: Typos happen. Re-verify the email address in your profile and send a test message to it.
    • Website contact form broken: If you link to a contact form on your site, test it from a different device and email account to ensure submissions go through.
    • Low visibility: If your profile is complete but you’re not getting leads, you may need to optimize your keywords, promote your listing more actively, or expand your service offerings.

    Track your inquiries over time. If you get zero contact in several months, revisit your bio, specializations, and contact methods—or consult a colleague for feedback.

    IssueQuick FixWhen to Contact Support
    Fields won’t saveClear cache, try different browserIf problem persists >24 hours
    Approval delayCheck email for requests; verify membership currentAfter 7 business days with no update
    Not appearing in searchConfirm public visibility toggled on; wait 48 hours for indexingIf invisible after 2 days
    Duplicate profilesN/A—requires support interventionImmediately
    No inquiries receivedCheck spam filters, test contact form, verify email addressIf technical tests pass but still no leads, request profile review

    Frequently Asked Questions

    How long does it take to get listed in the ATA Online Directory?

    Once you submit your directory listing as an active ATA member, approval typically takes 1-3 business days. Your profile becomes searchable immediately after approval. Ensure all required fields are complete to avoid delays. Premium listings may require additional verification time depending on selected features.

    What information should I include in my ATA directory profile?

    Include your professional credentials, language pairs, specializations, service areas, and contact information. Add certifications like ATA certification or state court interpreter credentials. Upload a professional photo and detailed bio highlighting your expertise. Complete profiles receive significantly more client inquiries than minimal listings.

    Can non-ATA members access the Online Directory?

    Only active ATA members can create listings in the directory. However, potential clients and the general public can search the directory freely to find qualified translators and interpreters. This public accessibility makes the directory a valuable marketing tool for members seeking new clients and projects.

    How often should I update my ATA directory listing?

    Update your listing quarterly or whenever your services, credentials, or contact information change. Regular updates signal active availability to potential clients. Add new certifications, specializations, or language pairs promptly. Profiles updated within the past 90 days often rank higher in search results and appear more trustworthy.

    What are the differences between basic and premium directory listings?

    Basic listings include standard contact information, language pairs, and credentials at no additional cost beyond membership. Premium listings offer enhanced visibility, featured placement in search results, expanded profile space, website links, and promotional graphics. Premium options require additional fees but generate substantially more client views.

    Can I list multiple specializations in my ATA directory profile?

    Yes, you can list multiple specializations across various subject areas like legal, medical, technical, or literary translation. However, focus on areas where you have genuine expertise and experience. Clients value specialists over generalists. Listing 3-5 well-developed specializations typically performs better than claiming expertise in numerous fields.

    How do clients find my listing in the ATA directory?

    Clients search by language pair, specialization, geographic location, or certification status. The directory uses keyword matching from your profile content. Optimize your listing with specific terminology clients use when searching. Complete profiles with detailed specializations appear in more search results than sparse listings.

    Should I include my rates in my ATA directory listing?

    The ATA directory does not require rate disclosure, and most professionals avoid listing specific prices publicly. Instead, indicate you provide custom quotes based on project scope. This approach allows flexibility for different project types and clients. Consider stating your preferred rate structure like per-word or hourly.

    What happens to my directory listing if I don’t renew my ATA membership?

    Your directory listing becomes inactive and invisible to public searches if your membership lapses. The ATA typically retains your profile information for a grace period, allowing easy reactivation upon membership renewal. To maintain continuous visibility and client access, renew your membership before expiration to avoid service interruption.

    Ready to Expand Your Translation Business?

    The ATA Online Directory connects you with clients actively seeking professional translation and interpretation services. Your comprehensive, optimized profile serves as a 24/7 marketing tool that works while you focus on delivering exceptional service.

    Don’t let potential clients pass you by. Take action today by logging into your ATA member account, completing your directory profile with strategic keywords and credentials, and positioning yourself as the expert solution clients need. The translators who invest time in creating detailed, professional listings consistently report higher inquiry rates and better client matches.

    Your next major client could be searching right now

    Take the Next Step

    Creating your ATA Online Directory listing is an investment in your professional future. Start with the six steps outlined in this guide, dedicate time to crafting a compelling profile that showcases your unique expertise, and commit to regular updates that keep your listing fresh and relevant. The visibility you gain through this trusted platform can transform your business trajectory and connect you with clients who value quality professional services.

    ; <[^>]+>; ); 0; 155)

  • Blog

    What Is a Business Directory Website? Complete 2025 Guide to Listings & Local SEO

    Here’s something most business owners overlook: while you’re pouring money into Facebook ads and Google campaigns, there’s a network of business directory websites quietly driving qualified leads to your competitors. These platforms aren’t glamorous, they don’t promise viral growth, and they won’t make for exciting boardroom presentations. But they work—consistently, predictably, and often for free….

  • Blog

    How to Add Your Business to LinkedIn Company Directory: Complete 2025 Guide

    If you’re running a business in today’s B2B landscape, having a presence on LinkedIn isn’t optional—it’s essential. But here’s what most business owners get wrong: they think creating personal profiles for their team is enough. The reality? Without a properly optimized LinkedIn Company Page, you’re practically invisible to the 900+ million professionals actively searching for…

  • Blog

    ListedIn Business Directory: 6 Key Benefits for Your Business Growth

    Most business owners I talk to are burning cash on Google Ads and social media campaigns while completely ignoring one of the most cost-effective visibility strategies available: business directories. It’s puzzling, really—because the data tells a completely different story about where motivated buyers actually discover local businesses. Business directories like ListedIn aren’t just digital Yellow…