How to Install a Plugin on Bludit: 5 Simple Steps

Generating summary...
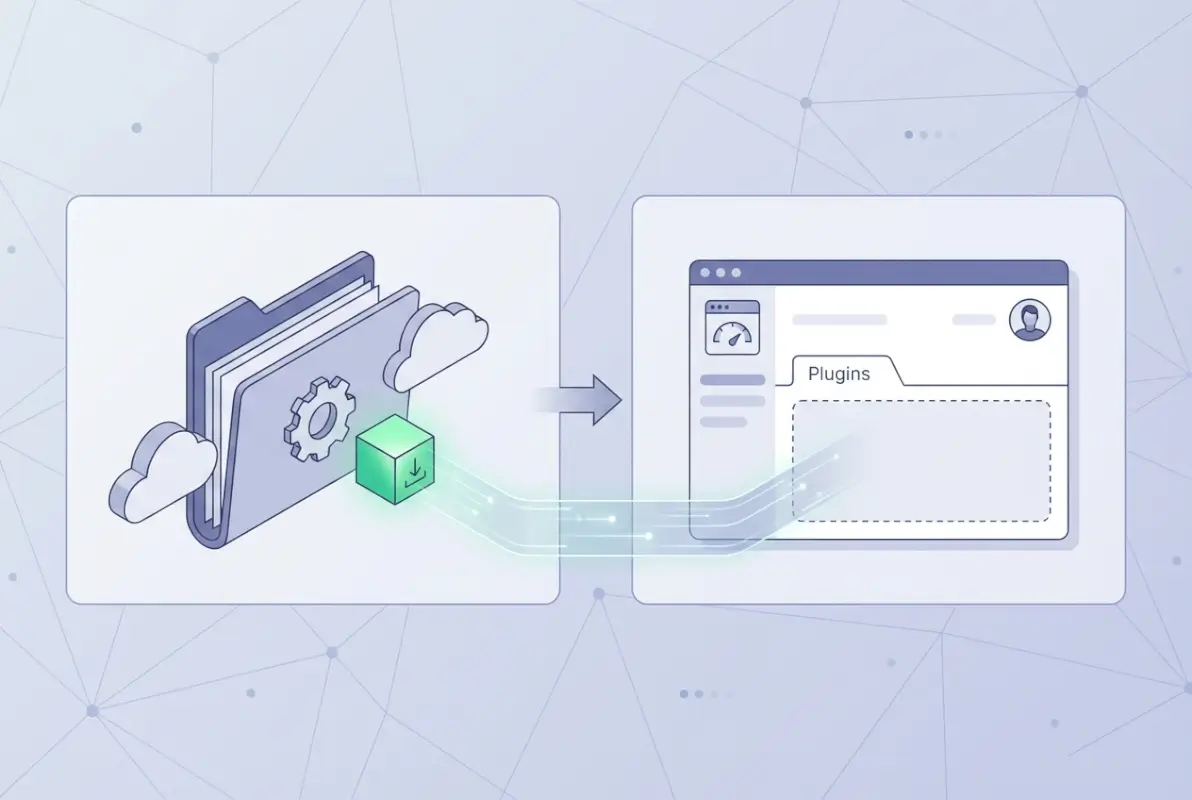
Let’s cut to the chase: installing a plugin on Bludit is dead simple, but the real value lies in knowing how to do it safely, efficiently, and without breaking your site. While platforms like WordPress have massive plugin ecosystems with automated installers, Bludit takes a more streamlined approach—you manually place files in the right directory, activate through the admin panel, and configure as needed. This hands-on method gives you complete control (which I’ve always appreciated) but requires understanding a few critical steps to avoid common pitfalls.
What makes Bludit’s plugin system unique? It’s lightweight by design. Unlike bloated CMS platforms that ship with dozens of pre-installed plugins you’ll never use, Bludit lets you handpick exactly what you need. This keeps your site fast, secure, and maintainable. You’re working with a flat-file CMS that doesn’t rely on databases for everything, meaning plugin installations have minimal overhead—but also zero safety nets if you skip backups or ignore compatibility checks.
Here’s what you’ll master in this guide: the exact 5-step process to download, install, activate, configure, and maintain Bludit plugins like a pro. We’ll also cover troubleshooting tactics for when things go sideways, security best practices (because not all plugins are created equal), and advanced tips for power users who want to automate or optimize their workflow.
TL;DR – Quick Takeaways
- 5-Step Process – Download from official sources, upload to /bl-plugins/, activate in admin, configure settings, maintain with updates
- Always Backup First – One misconfigured plugin can break your site; backups are your insurance policy
- Stick to Official Marketplace – Third-party plugins from unknown sources are security risks waiting to happen
- Test Before Going Live – Use staging environments or test posts to verify plugin behavior before full deployment
- Keep Everything Updated – Outdated plugins create vulnerabilities; regular maintenance prevents 90% of plugin-related issues
Prerequisites and Preparation
Before you touch any files or click any buttons, let’s talk about what you actually need to make this work. The worst plugin installations I’ve witnessed all had one thing in common: people skipped the prep work and dove straight into uploading files. That’s how you end up with broken sites at 2 AM, frantically Googling error messages.
First, you need administrative access to your Bludit installation—both the admin panel and server file system. If you’re running Bludit on shared hosting, that means FTP/SFTP credentials or a file manager through your hosting control panel. For VPS or dedicated servers, you’ll need SSH access with the proper permissions. Your server must have write permissions to the /bl-plugins/ directory; without this, Bludit can’t read the plugin files you upload.
Version compatibility matters more than you’d think. A plugin built for Bludit 3.x might not work correctly (or at all) on Bludit 4.x. Check the plugin’s documentation or marketplace listing for explicit version requirements. The official Bludit plugin documentation includes compatibility notes for most popular plugins, and serious developers always specify which Bludit versions they’ve tested against.
Where do you find legitimate Bludit plugins? The official Bludit Plugins marketplace is your primary source. This repository is maintained by the Bludit team and trusted contributors, so you’re far less likely to encounter malicious code or abandoned projects. You can also find plugins distributed through GitHub repositories, but exercise more caution there—verify the developer’s reputation, read the code if you have the skills, and check when the last commit was made (anything older than a year is probably dead).
Backup considerations extend beyond just files. If your plugin stores configuration data or creates custom content types, you need to understand where that data lives. Some plugins write to JSON files in their own directories, others integrate with Bludit’s core data structures. Read the plugin’s documentation to identify what gets backed up automatically with your standard Bludit backup and what requires manual attention.
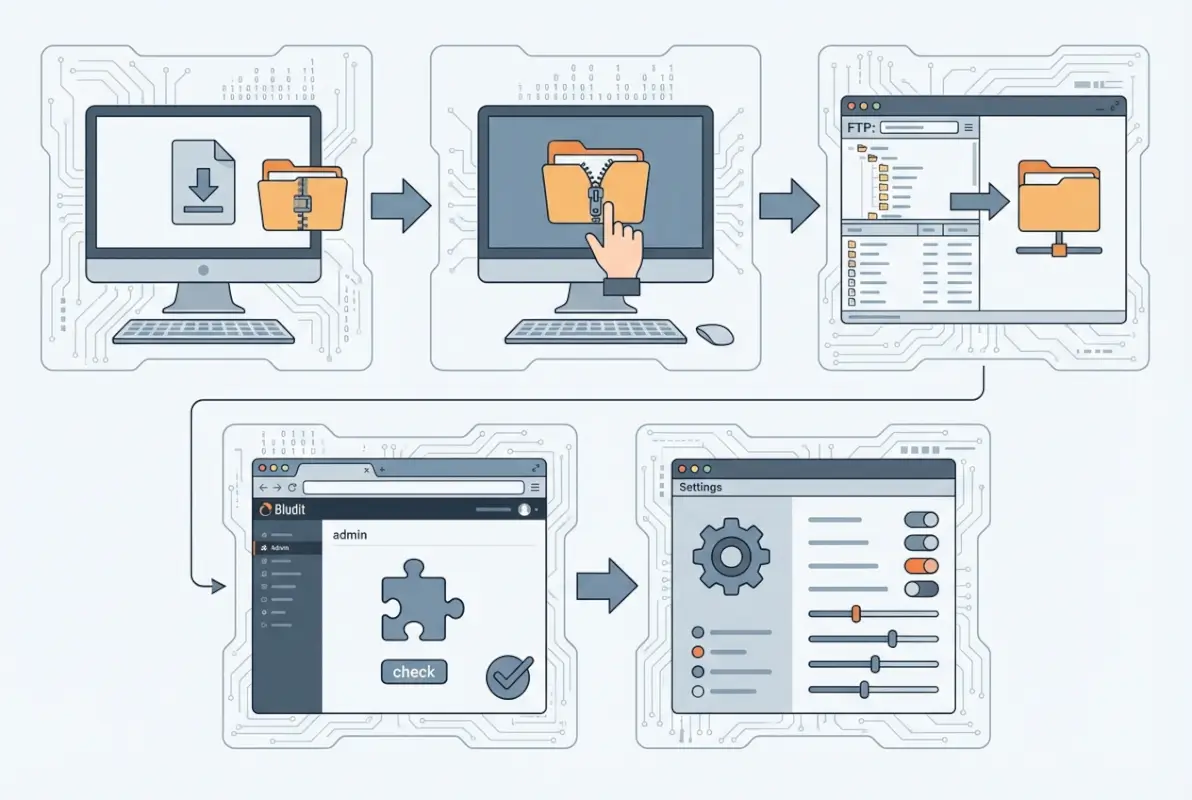
Step 1: Downloading the Plugin
The download process seems straightforward, but there are nuances that can bite you if you’re not paying attention. When you browse the Bludit Plugins marketplace, you’ll see listings with version numbers, compatibility notes, and download links. Don’t just grab the first download button you see—verify you’re getting the correct version for your Bludit installation.
Each plugin page should clearly state which Bludit versions it supports. For example, a plugin might say “Compatible with Bludit 3.14 and above” or list specific tested versions. If you’re running an older Bludit install and the plugin requires a newer version, you have two choices: update Bludit first (which carries its own risks and should also be backed up and tested), or find an older plugin version that works with your current setup.
Download the ZIP file to a location on your local machine where you can easily access it. Some plugins provide checksums (MD5, SHA256 hashes) to verify file integrity. This is especially important if you’re downloading from third-party sources or mirrors. To verify, use your operating system’s built-in tools (like `certutil` on Windows or `shasum` on Mac/Linux) to generate a hash of your downloaded file and compare it against the published checksum. If they don’t match, the file is corrupted or tampered with—don’t use it.
Once downloaded, extract the ZIP file locally before uploading to your server. This lets you inspect the contents and verify the structure matches what Bludit expects: a single folder containing plugin metadata files (typically a JSON file with plugin information) and the PHP/JavaScript/CSS files that make the plugin work. The folder name matters—it must match what the plugin developer specified, as Bludit uses directory names to identify plugins.
Some plugins include readme files or documentation PDFs in the ZIP. Don’t skip these. They often contain critical configuration steps, API key requirements, or compatibility warnings that aren’t mentioned on the marketplace listing. I once spent an hour troubleshooting a gallery plugin that refused to display images, only to discover the readme explained you needed to create a specific subdirectory first.
Step 2: Uploading and Installing the Plugin
Now we get to the actual file manipulation. This is where the rubber meets the road, and also where most mistakes happen. The core concept is simple: copy the plugin folder into Bludit’s plugins directory. The execution requires precision.

Your Bludit installation has a directory structure that looks something like this: /bl-content/, /bl-kernel/, /bl-languages/, /bl-plugins/, and /bl-themes/. The /bl-plugins/ directory is your target. Connect to your server via FTP, SFTP, or use your hosting control panel’s file manager. Navigate to the root of your Bludit installation (where you see all those /bl-* directories), then open /bl-plugins/.
Upload the entire plugin folder (not just the contents—the folder itself) into /bl-plugins/. For example, if you downloaded a contact form plugin that extracts to a folder called “contact-form”, you should end up with /bl-plugins/contact-form/ on your server, containing all the plugin files. Do not rename the folder unless the documentation specifically tells you to; Bludit’s plugin system relies on these names to load plugins correctly.
| Upload Method | Best For | Speed | Learning Curve |
|---|---|---|---|
| FTP (FileZilla, etc.) | Shared hosting, beginners | Moderate | Low |
| SFTP (Cyberduck, WinSCP) | Security-conscious users | Moderate | Low-Medium |
| cPanel File Manager | Quick single uploads | Fast | Very Low |
| SSH/SCP | VPS/dedicated servers, power users | Very Fast | High |
File permissions are critical and often overlooked. Bludit needs to read the plugin files, which typically requires permissions of 644 for files and 755 for directories. Some hosting setups default to more restrictive permissions. If your plugin doesn’t appear in the admin panel after uploading, check permissions first—this solves 80% of “plugin not detected” issues. Most FTP clients let you right-click a folder and modify permissions recursively.
If you’re using SSH, you can upload via SCP and set permissions in one command: `scp -r contact-form user@yourserver:/path/to/bludit/bl-plugins/ && ssh user@yourserver ‘chmod -R 755 /path/to/bludit/bl-plugins/contact-form’`. This is faster for bulk plugin installs and gives you more control over the process.
Some hosting environments have security modules (like ModSecurity) that block certain file types or patterns. PHP files are sometimes flagged if they contain suspicious-looking code. If uploads fail or files disappear after uploading, check your hosting error logs or temporarily disable overzealous security rules. Legitimate plugins shouldn’t trigger these, but false positives happen (I’ve seen it with plugins that use cURL or remote API calls).
Step 3: Activating the Plugin in Bludit
Files are uploaded, permissions are set—now it’s time to tell Bludit to actually use the plugin. This happens through the admin interface, which is one of Bludit’s strengths compared to CMS platforms that require command-line activation or configuration file edits.
Log into your Bludit admin panel (typically at yoursite.com/admin). Navigate to the Settings area, then click on Plugins. You’ll see a list of all detected plugins, divided into two groups: Activated and Deactivated. Your newly uploaded plugin should appear in the Deactivated section. If it doesn’t, go back to Step 2 and verify folder names, permissions, and that all required files are present.
Each plugin listing shows basic metadata: name, version, author, and a brief description. Click the Activate button next to your plugin. Bludit will load the plugin code, run any initialization routines the developer programmed, and add the plugin to the active list. This process is instant for most plugins, though complex ones with database initialization or external API setup might take a few seconds.
After activation, some plugins immediately work with default settings. Others require configuration before they do anything useful. Look for a Settings or Configure link next to the activated plugin. This opens the plugin’s control panel where you can enter API keys, adjust display options, enable or disable features, and customize behavior to match your site’s needs.
The Bludit plugin documentation walks through this exact activation flow with screenshots. If you’re a visual learner or working with a plugin that has unusual activation requirements, that’s your go-to reference. It also explains what happens under the hood when you activate a plugin (spoiler: Bludit loads a metadata file, registers hooks, and makes the plugin’s functions available to the core system).
One gotcha: some plugins depend on other plugins or require specific PHP extensions. A social sharing plugin might need cURL for API calls, or an image optimizer might require GD or ImageMagick. If activation fails with an error message, read it carefully—it usually tells you exactly what’s missing. You can check installed PHP extensions through a phpinfo() file or your hosting control panel’s PHP settings.
Step 4: Configuring and Testing the Plugin
Activation is only half the battle. A plugin sitting there doing nothing because you skipped configuration is worse than no plugin at all—it’s just dead weight on your installation. This step separates casual users from people who actually extract value from their tools.

Open the plugin’s settings page (found in the Plugins section of your admin panel, next to the activated plugin). You’ll typically see a form with various options. Common configuration elements include API keys (for plugins that integrate with external services like Disqus or Mailchimp), display toggles (show this widget on homepage vs. all pages), feature flags (enable comments, require user registration, etc.), and styling options (colors, fonts, layout choices).
Read each option carefully. Many plugins use sensible defaults, but “sensible” is subjective. A contact form plugin might default to sending all submissions to the site admin email, but if you’re running a multi-author blog, you probably want submissions going to a shared inbox instead. A caching plugin might default to aggressive caching that breaks dynamic content—you need to exclude certain pages or post types.
Testing should be systematic, not just “looks good enough.” If you installed a gallery plugin, upload test images in various formats (JPEG, PNG, WebP) and sizes. If it’s a form plugin, submit test data including edge cases—empty fields, special characters, extremely long text. If it’s a caching plugin, clear cache and verify pages load correctly, then check load times to confirm the cache is actually working. For tips on managing plugins across different platforms, check out our guide on installing WordPress plugins which covers similar testing strategies.
Conflicts with themes or other plugins are real and annoying. A newsletter signup plugin might inject JavaScript that clashes with your theme’s slider script. Two SEO plugins might both try to rewrite meta tags, causing duplicate or broken markup. Test systematically: activate the new plugin alone, verify it works, then re-activate other plugins one by one to identify conflicts. If you find a conflict, you usually have three options: disable one plugin, find an alternative that doesn’t conflict, or contact the developers for a fix.
| Issue Type | Common Cause | First Troubleshooting Step |
|---|---|---|
| Plugin not visible after activation | Missing configuration or wrong hook | Check settings; verify plugin hooks match theme regions |
| White screen (WSOD) | PHP fatal error in plugin code | Delete plugin folder via FTP to restore site; check error logs |
| Slow page loads after install | Plugin making external API calls on every load | Check plugin settings for caching options; use browser dev tools to identify bottleneck |
| Features not working | Missing PHP extensions or dependencies | Review plugin documentation for requirements; check phpinfo() |
Enable debugging if things don’t work as expected. Bludit has a debug mode you can activate by editing /bl-kernel/boot/init.php (set DEBUG_MODE to true). This logs errors to /bl-content/databases/debug.log, giving you detailed information about what’s breaking. Just remember to turn debug mode off once you’ve fixed the issue—leaving it on in production exposes sensitive information in error messages.
Cache clearing is often necessary after configuration changes. Some plugins cache their output for performance, and you won’t see your setting changes until you clear that cache. Bludit doesn’t have a built-in cache system like WordPress (since it’s flat-file), but individual plugins might. Check the plugin’s settings for a “Clear Cache” button, or simply deactivate and reactivate the plugin to force a fresh start.
Step 5: Maintenance, Updates, and Security Best Practices
Installation is done, plugin is configured, everything works—but you’re not finished. Plugins require ongoing maintenance to stay secure, compatible, and functional. This is the step most people skip, and it’s why sites get hacked or break after Bludit core updates.
Keep plugins updated whenever new versions are released. Plugin developers issue updates for three main reasons: security patches, bug fixes, and new features. Security patches are non-negotiable; they fix vulnerabilities that attackers actively exploit. Bug fixes improve stability and prevent edge-case failures. New features are nice to have but lower priority. Check the Bludit Plugins marketplace or the developer’s GitHub repository regularly for updates, and read changelogs before updating (sometimes updates break backward compatibility or require configuration changes).
Some plugins support automatic updates through Bludit’s plugin manager, but most require manual replacement: download the new version, upload to /bl-plugins/ (overwriting the old version), and reactivate if needed. Always backup before updating—even well-tested updates can introduce bugs in specific environments. If an update breaks something, you can quickly roll back to the previous version from your backup.
Regularly audit your active plugins. Every few months, review what you have installed and ask: do I still use this? Is it still maintained by the developer? Are there better alternatives now? Unused plugins are security liabilities and performance drags. Deactivate and delete anything you’re not actively using. If you’re building a local business directory, you might need specialized plugins that aren’t useful for a personal blog—periodically reviewing your plugin list keeps your setup lean.
Security goes beyond just updating. Only install plugins from trusted sources—the official Bludit marketplace or verified developers with good reputations. Read reviews and check when the plugin was last updated (anything abandoned for over a year is risky). Inspect permissions: does a contact form plugin really need write access to your entire content directory? Probably not. If a plugin requests unusual permissions or makes changes outside its scope, that’s a red flag.
File integrity monitoring helps catch unauthorized changes. Some hosting providers offer this as a service, or you can use third-party tools to monitor your /bl-plugins/ directory for unexpected modifications. If a file suddenly changes and you didn’t update the plugin, that’s a sign of compromise. Restore from backup immediately and investigate.
Remove plugins cleanly when you’re done with them. Deactivate first (this tells Bludit to unload the plugin’s code), then delete the folder from /bl-plugins/. Some plugins create additional files or directories during installation—check the plugin documentation for removal instructions. Leftover files won’t usually hurt anything, but they clutter your installation and can confuse you months later when you see folders you don’t recognize.
Troubleshooting Common Scenarios
Even following all the steps perfectly, things sometimes go wrong. Plugins are software, and software has bugs, edge cases, and unexpected interactions. Here’s how to diagnose and fix the most common issues.
Plugin not appearing in the admin panel after upload usually means Bludit can’t detect it. Check three things: folder name matches exactly what the plugin expects (case-sensitive on Linux servers), all files are present (especially the metadata JSON file), and permissions allow Bludit to read the directory. Open the plugin folder and verify you see files like metadata.json or plugin.php—if the folder is empty or contains only documentation, you uploaded the wrong thing.
Activation failing or causing site errors typically indicates a compatibility problem. The plugin might require a newer PHP version than your server runs, or depend on an extension that’s not installed. Error messages usually point to the specific issue: “Call to undefined function curl_init” means you need cURL; “syntax error unexpected ‘)'” probably means PHP version mismatch. Update your environment or find an alternative plugin that works with your setup.
White screen of death (WSOD) after activation is scary but fixable. It means the plugin caused a fatal PHP error that crashed the site. Connect via FTP and rename or delete the plugin folder from /bl-plugins/. This immediately removes the problematic code and restores your site. Then check error logs to see what went wrong—you can usually find logs at /bl-content/databases/debug.log if debug mode was enabled, or in your hosting control panel’s error log viewer.
Performance degradation after installing a plugin suggests the plugin is doing something expensive on every page load. Common culprits: making external API calls without caching results, processing large files, or running complex database queries (yes, even on flat-file systems—some plugins use SQLite or external databases). Use browser developer tools (F12) to check the Network tab; look for slow requests to external domains. If you see the plugin making dozens of API calls, check its settings for caching options or rate limiting.
Security concerns after installation require immediate action. If you suspect a plugin is malicious or compromised, deactivate and delete it immediately. Change your admin password and any API keys the plugin had access to. Scan your site files for unauthorized changes—many hosting providers offer malware scanning tools. If you find infections, restore from a clean backup taken before the plugin was installed. For consulting professionals managing multiple sites, understanding how to find and maintain clients includes demonstrating strong security practices.
Conflicts with themes show up as broken layouts, missing widgets, or styling glitches. This happens when plugins inject CSS/JavaScript that overrides theme styles, or when plugins and themes both try to modify the same page elements. Inspect the page source: look for duplicate scripts, conflicting CSS rules, or JavaScript console errors. Try temporarily switching to a default Bludit theme; if the problem disappears, it’s a theme compatibility issue. Contact the plugin or theme developer with specifics—they can often provide workarounds or fixes.
Advanced Tips and Alternatives
Once you’re comfortable with basic plugin installation, there are power-user techniques that streamline workflow and unlock advanced capabilities. These aren’t necessary for everyone, but if you manage multiple Bludit sites or have specific technical requirements, they’re worth exploring.
The Bludit API enables programmatic plugin management for automated deployments. If you’re running Bludit in a containerized environment or managing dozens of sites, you can script plugin installations using the Bludit API. This requires authentication tokens and careful script design, but it eliminates manual FTP uploads. Create a deployment script that pulls plugin ZIPs from a central repository, extracts them to the correct directory, sets permissions, and triggers activation—all without touching the admin panel.
Plugin templates and scaffolding tools help if you’re developing custom plugins. Instead of installing third-party solutions, you can create precisely what you need using Bludit’s plugin API. The documentation includes boilerplate code and hooks for common plugin types (content filters, admin widgets, authentication handlers). This approach requires PHP knowledge but gives you complete control and eliminates dependency on external developers who might abandon their projects.
One-click convenience plugins like “Upload Plugin” simplify installations by adding a ZIP upload interface directly to the admin panel. Instead of using FTP, you upload the ZIP file through a form, and the plugin handles extraction and placement automatically. This is perfect for less technical users or shared hosting environments where FTP access is limited. The tradeoff: you lose visibility into the file system and can’t easily troubleshoot if the automatic extraction fails.
Migration plugins help if you’re moving from another CMS to Bludit. WordPress-to-Bludit converters attempt to import posts, pages, and metadata, though they rarely handle everything perfectly. Expect manual cleanup after migration. These plugins are most useful for content-heavy sites where manually recreating hundreds of posts isn’t feasible. Just verify the migration in a staging environment before touching your production site.
Evaluate whether you actually need a plugin before installing one. Bludit’s core functionality is deliberately minimal, but it’s also easily extensible through themes and custom code. If you need a simple feature—say, adding a copyright notice to your footer—you might be able to accomplish it with a few lines in your theme’s template instead of installing a whole plugin. Plugins add maintenance overhead; if custom code solves your problem in 10 minutes, that’s often the better choice.
Best Practices and Security
Security isn’t just about updates and official sources, it’s a mindset that should inform every decision you make about plugins. The convenience of adding functionality needs to be balanced against the risks of introducing third-party code into your site.
Source plugins exclusively from the Bludit Plugins marketplace or verified developers with established reputations. When evaluating a plugin from GitHub or a personal website, check: How many stars or forks does it have? When was the last commit? Are there open issues reporting security problems or bugs? Does the developer respond to issues and maintain the code? A plugin with 5 stars, last updated three years ago, and dozens of open issues is a hard pass.
Read plugin code if you have the skills. PHP is human-readable, and even basic knowledge lets you spot obvious red flags: eval() calls on user input, file operations without validation, hardcoded credentials, or obfuscated code (often a sign of malicious intent). You don’t need to understand every line, just enough to verify nothing looks sketchy. When building specialized sites like those covered in our guide on locating the perfect business directory, ensuring plugin security is critical since directories often handle user data.
Limit plugin permissions to only what’s necessary. A gallery plugin should access your media directory, not your entire content folder. A form plugin should write to a submissions database, not modify your theme files. Bludit’s file system is relatively open by design (it’s not sandboxed like WordPress with its wp-content structure), so you’re the enforcement mechanism. Review what directories and files a plugin creates or modifies, and verify those align with its stated functionality.
Regular backups remain your ultimate safety net. Automate them if possible—weekly full backups and daily incremental backups of changed files. Store backups off-server (cloud storage, external hard drive, different data center) so server failures or compromises don’t take out both your site and your backups. Test restoration occasionally to verify backups actually work; an untested backup is security theater, not real protection.
Test updates in staging environments before applying them to production. This is standard practice for professional developers but often skipped by casual users who don’t want to maintain two environments. If a staging setup is too complex, at least back up immediately before updating, and schedule updates during low-traffic periods when you can quickly roll back if something breaks.
Monitor your site for unexpected changes. Set up automated monitoring (many hosting providers offer this, or use third-party services) that alerts you when files in critical directories change. If your contact form plugin’s main file suddenly modifies overnight and you didn’t update it, that’s a potential compromise. Immediate investigation and restoration prevents small breaches from becoming major incidents.
Quick Reference Checklist
Here’s a condensed checklist you can reference for every plugin installation. Bookmark this section and run through it each time you add new functionality to your Bludit site.
- Verify Bludit version compatibility with plugin requirements
- Back up entire Bludit directory and any databases
- Confirm server write permissions to /bl-plugins/
- Download plugin ZIP from official marketplace or verified source
- Extract ZIP locally and review folder structure
- Upload plugin folder to /bl-plugins/ via FTP/SFTP/file manager
- Set folder permissions to 755, file permissions to 644
- Verify plugin appears in admin Plugins list (Deactivated section)
- Click Activate in admin panel
- Access plugin Settings and configure required options
- Test functionality on draft post/page before enabling site-wide
- Check for conflicts with theme or other plugins
- Clear caches and verify changes appear on front end
- Document what you configured (API keys, settings, etc.)
- Schedule regular update checks
- Monitor site performance and error logs
- Verify backup system captures plugin files and configuration
This checklist condenses the entire process into a workflow that takes 10-15 minutes per plugin, depending on complexity. Following it consistently prevents 90% of installation problems and establishes good habits for long-term site maintenance.
Optional: Internationalization and Locales
If you’re running a multilingual Bludit site or serving international audiences, plugin language support becomes important. Not all plugins handle multiple languages well, and understanding how to configure locales properly avoids broken translations and user confusion.
Bludit’s core includes a language system that plugins can hook into. Well-designed plugins provide language files (usually JSON files in a /languages/ subdirectory) containing translations for all plugin text. When you activate a plugin, it should automatically load the language file matching your Bludit admin language setting. If you’ve set Bludit to French, and the plugin has a fr.json language file, French text appears throughout the plugin interface.
Configuring locale settings for plugins that support them typically happens in the plugin’s settings page. You might see options like “Display language” or “User locale preference” where you can override the global Bludit language for that specific plugin. This is useful if your admin interface is in English but you want a contact form plugin to display in Spanish for your Spanish-speaking audience.
Translating plugin labels and messages when language files don’t exist requires manual work. Find the plugin’s language directory (usually /bl-plugins/plugin-name/languages/), copy the English language file (en.json), rename it to your target language code (es.json for Spanish, de.json for German), and translate the text strings. This assumes the plugin is properly coded to load language files; poorly designed plugins might have hardcoded English text that can’t be translated without modifying the source code.
Plugin documentation should specify which languages are supported and how to add new ones. If it doesn’t, check the plugin’s GitHub repository or contact the developer. Some plugins use external translation services or crowdsourced translation platforms where you can contribute translations for languages that aren’t yet supported.
Frequently Asked Questions
How do I know which Bludit plugins are safe to install?
Use plugins from the official Bludit Plugins marketplace, which vets submissions for quality and security. Check plugin ratings, reviews, and last update dates—active maintenance is a good indicator of reliability. Verify the developer’s reputation through their other published plugins or open-source contributions. Avoid plugins from unknown sources or those with suspicious permission requests.
Do I need to restart Bludit after activating a plugin?
No server restart is required. Activation happens instantly through the admin interface—Bludit loads the plugin code immediately. Some plugins may require clearing your browser cache or Bludit’s internal cache to display changes, but this is done through the admin panel, not server-level restarts. If changes don’t appear after activation, try clearing your cache or reloading the admin page.
Can I uninstall a plugin if something goes wrong?
Yes, uninstalling is straightforward. First, deactivate the plugin in the admin Plugins section, which tells Bludit to stop loading its code. Then, delete the plugin folder from /bl-plugins/ using FTP or your file manager. Clear any caches, and test your site to ensure the removal didn’t break anything that depended on the plugin.
Are there security risks in installing third-party Bludit plugins?
Yes, third-party plugins from unverified sources can contain malicious code, security vulnerabilities, or poor coding practices that expose your site to attacks. Stick to the official Bludit marketplace where plugins undergo basic security review. For plugins from GitHub or personal sites, review the code yourself or only install from developers with established reputations and active maintenance records.
What should I back up before installing a plugin?
Back up your entire /bl-content/ directory (contains posts, pages, and user data), the /bl-plugins/ directory (existing plugins and configurations), and any custom theme files in /bl-themes/. If you’ve modified core Bludit files (not recommended but some users do), back those up too. Ideally, create a complete site backup including all Bludit files and directories so you can restore to a known-good state if anything breaks.
How do I update a plugin in Bludit?
Download the updated plugin version from the marketplace or developer’s site. Connect via FTP and upload the new plugin folder to /bl-plugins/, overwriting the existing version. Some plugins preserve configuration data automatically; others may require you to reconfigure settings after update. Always back up before updating, and read the plugin’s changelog for any breaking changes or new requirements.
Can I automate plugin installation or updates?
Bludit doesn’t include built-in automation for plugin management like WordPress’s auto-updater, but you can use the Bludit API to script installations and updates. This requires programming knowledge (PHP, bash, or similar) to create deployment scripts. Some plugins offer their own auto-update features through the admin interface, check individual plugin documentation for these capabilities.
Why doesn’t my plugin appear after uploading files?
Check four common issues: the folder name doesn’t match plugin requirements (case-sensitive on Linux), files have incorrect permissions (should be 755 for folders, 644 for files), the metadata file is missing or corrupted, or you uploaded to the wrong directory. Verify you placed the plugin folder directly in /bl-plugins/ and it contains all required files, especially the JSON metadata file.
How many plugins should I install on a Bludit site?
There’s no hard limit, but fewer is better for performance and security. Each plugin adds code that must load on page requests, and more plugins mean more potential conflicts and vulnerabilities. Regularly audit your plugin list and remove anything unused. Most small to medium Bludit sites function well with 5-15 plugins; if you need more than 20, consider whether built-in features or custom code could replace some.
What’s the difference between activating and installing a plugin?
Installation means placing plugin files in the /bl-plugins/ directory where Bludit can detect them. Activation means telling Bludit to load and use the plugin’s code. A plugin can be installed (files present) but inactive (not loaded). You must first install by uploading files, then separately activate through the admin interface for the plugin to actually function.
Installing plugins on Bludit isn’t rocket science, but it does require attention to detail and a methodical approach. The five-step process—download from trusted sources, upload to the correct directory with proper permissions, activate through admin panel, configure settings thoroughly, and maintain with regular updates—gives you a solid foundation for extending your site’s functionality safely and effectively.
What separates successful plugin implementations from disasters is respect for the process. Back up before making changes. Test in controlled environments before going live. Read documentation instead of assuming you know how things work. Monitor for issues after deployment. These aren’t glamorous steps, but they’re what keep your site stable when everyone else is frantically restoring from backups at 3 AM.
The plugin ecosystem around Bludit continues growing as developers recognize the platform’s lightweight architecture and flexibility. Whether you’re adding a simple contact form or building complex functionality, following these guidelines ensures you extract maximum value while minimizing risk. Your future self—the one not dealing with a broken site or security breach—will thank you for doing things right.
Start small if you’re new to this. Install one plugin, master the process, verify everything works correctly. Then move on to the next. Building competence through repetition beats rushing through installations and hoping for the best. And when you inevitably encounter problems (you will, everyone does), you’ll have the troubleshooting skills and systematic approach to solve them quickly instead of panicking.
Was this article helpful?