How to Install a Pro Plugin in WordPress: 5 Simple Steps
Generating summary...
Installing a Pro plugin on your WordPress site can feel like a high-stakes decision—and it should. Unlike free plugins that you can grab and test with minimal commitment, Pro plugins involve money, licensing, and often deeper integration into your site’s core functionality. But here’s what most guides won’t tell you upfront: the installation process itself is actually the easiest part. The real challenge lies in choosing the right plugin, preparing your environment properly, and maintaining it so you don’t wake up one day to a broken site or a security vulnerability.
I remember the first time I installed a premium form builder on a client’s site. Everything seemed fine until we discovered the plugin conflicted with their existing theme, causing checkout pages to break silently. We only found out after three days of lost sales. That experience taught me that Pro plugin installation isn’t just about clicking “Upload” and “Activate”—it’s about understanding the entire ecosystem you’re introducing into your WordPress environment.
In this guide, you’ll learn a systematic approach to installing Pro plugins that minimizes risk while maximizing the value you’re paying for. We’ll cover evaluation criteria that go beyond star ratings, preparation steps that most site owners skip (at their peril), and post-installation maintenance practices that ensure your investment keeps delivering results.
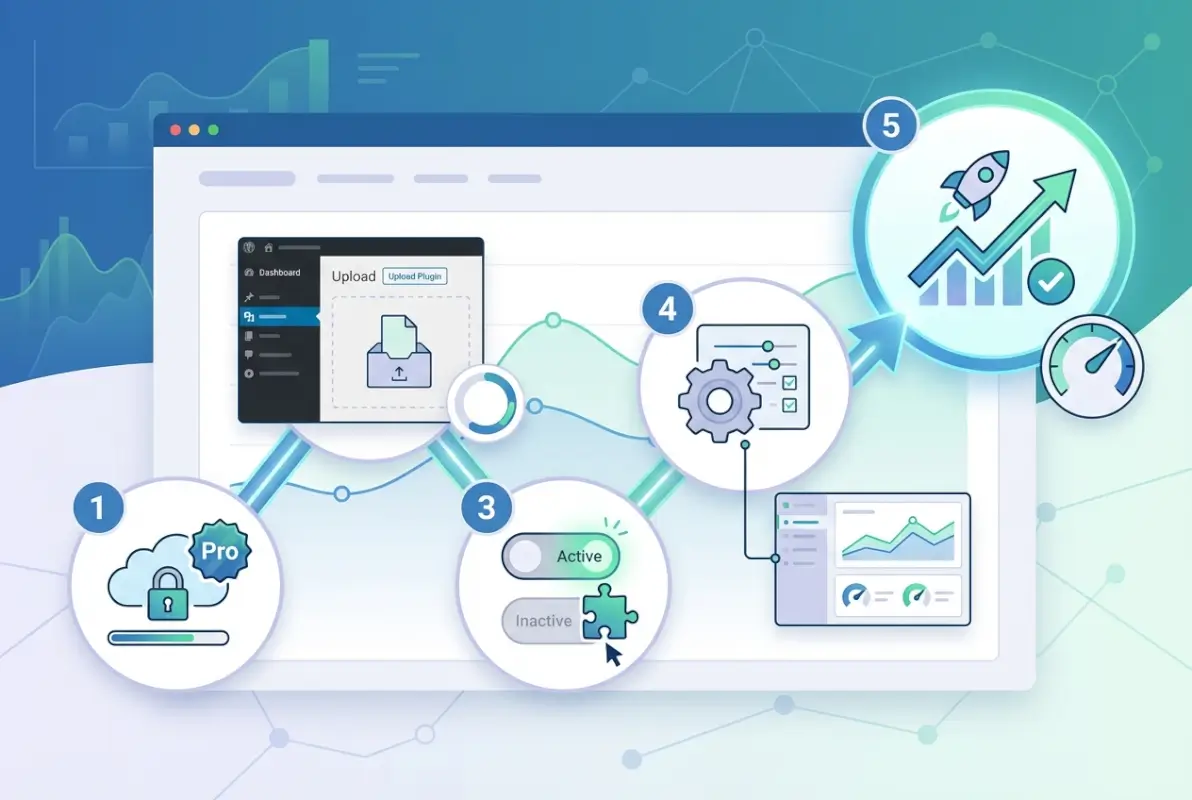
TL;DR – Quick Takeaways
- Evaluation is critical – Check license terms, update frequency, and publisher reputation before purchasing any Pro plugin
- Preparation prevents disasters – Always backup your site and verify PHP/WordPress compatibility before installation
- Licensing unlocks value – Pro plugins require license key activation to access updates and support
- Upload method is standard – Most Pro plugins install via ZIP upload through WordPress admin (Plugins > Add New > Upload)
- Maintenance is ongoing – Regular updates, compatibility checks, and security reviews keep your Pro plugins performing safely
Step 1: Choose the Right Pro Plugin
The plugin selection phase determines everything that follows. This isn’t like browsing Netflix where a bad choice costs you two hours—a poorly chosen Pro plugin can compromise your site’s security, slow down performance, or create technical debt that takes months to resolve.
Start by evaluating the feature set against your actual needs, not your wishlist. Many site owners fall into the trap of buying feature-rich plugins when they only need three or four specific capabilities. That premium SEO suite might look impressive with its 47 modules, but if you’re only using the schema markup and XML sitemap features, you’re paying for bloat that could slow your site.
License terms matter more than most people realize. Some Pro plugins offer lifetime licenses, while others require annual renewals. Neither model is inherently better, but you need to understand what happens when your license expires. Will the plugin stop working entirely? Will you lose access to updates but keep functionality? Will support be cut off immediately? These details should influence your purchasing decision, especially if you’re installing the plugin on multiple client sites.
Verifying Publisher Credibility
Publisher reputation isn’t just about reading reviews, it’s about investigating the company’s track record. How long have they been in the WordPress ecosystem? Do they maintain multiple products, or is this their only offering? A company with a diverse product portfolio and years of history is more likely to provide long-term support than a one-plugin startup (though exceptions exist, some specialized developers focus intensely on a single excellent product).
Check their documentation quality before buying. Solid documentation indicates a professional operation that values user success. If the vendor’s docs are sparse, outdated, or riddled with broken screenshots, expect similar quality in their support channels. I’ve found that documentation quality correlates strongly with overall plugin quality—developers who care about explaining their product usually care about building it well too.
| Evaluation Criteria | What to Check | Red Flags |
|---|---|---|
| Update Frequency | Changelog, version history | No updates in 6+ months |
| WordPress Compatibility | “Tested up to” version number | More than 2 major versions behind |
| Support Quality | Response time, resolution rate | Unanswered forum questions, slow responses |
| License Terms | Renewal policy, multi-site options | Unclear refund policy, hidden fees |
Active installations provide context, but don’t worship this metric blindly. A niche Pro plugin solving a specific problem might have only 1,000 installations but be absolutely perfect for your use case. Conversely, a popular plugin with 50,000 installations might be bloated with features you don’t need. Use installation numbers as one data point among many, not as the deciding factor.
Step 2: Prepare Your Site for Installation
Site preparation is where most installation problems are either prevented or guaranteed. I’ve seen countless WordPress sites break during plugin installation, and in nearly every case, the root cause was skipping preparation steps that seemed “optional” at the time.
Start with WordPress core version compatibility. Your WordPress installation should be running the latest stable version before you introduce any Pro plugin. Plugin developers typically test against current WordPress versions, and running outdated core software creates unnecessary compatibility risks. If you’re several versions behind, update WordPress first, test your existing site functionality, and then proceed with the Pro plugin installation.
Why Backups Are Non-Negotiable
Creating a complete backup before installing a Pro plugin isn’t paranoia, it’s professionalism. Your backup should include both your database and all WordPress files, not just one or the other. Many backup plugins default to database-only backups, which won’t help if the Pro plugin you’re installing modifies theme files or creates conflicts with existing plugin files.
Store your backup off-server, period. A backup stored only on your web server is vulnerable to the same issues that might compromise your site. Use cloud storage, download a local copy, or use a backup service that automatically stores copies remotely. I’ve learned this the hard way when a server migration went sideways and took the backups with it (thankfully, I had a week-old local backup that saved the day, but those seven days of lost content still sting).
Test your backup restoration process at least once before you need it. A backup you can’t restore is just wasted disk space. Many WordPress site owners discover their backups are corrupted or incomplete only when they’re desperately trying to restore a broken site at 2 AM. Don’t be that person.
Server Environment Checks
PHP version compatibility often gets overlooked until it causes problems. Most modern Pro plugins require PHP 7.4 or higher, with many now recommending PHP 8.0+. If your hosting account is running PHP 7.2 or older, you’re asking for trouble. Check your hosting control panel or contact your host to verify your PHP version and upgrade if necessary.
Memory limits can make or break Pro plugin performance. The default PHP memory limit on many shared hosting accounts is 128 MB, which might be sufficient for basic WordPress sites but often proves inadequate when you add resource-intensive Pro plugins (especially page builders, form builders with complex logic, or membership plugins managing thousands of users). Check your memory limit in WordPress under Site Health > Info > Server. If it’s below 256 MB, you may need to request an increase from your host or upgrade your hosting plan.
Don’t forget about plugins and theme conflicts. Deactivate any plugins that might conflict with the Pro plugin you’re about to install, particularly if they serve similar functions. Two SEO plugins running simultaneously, for example, will almost certainly cause problems.
Step 3: Install the Pro Plugin
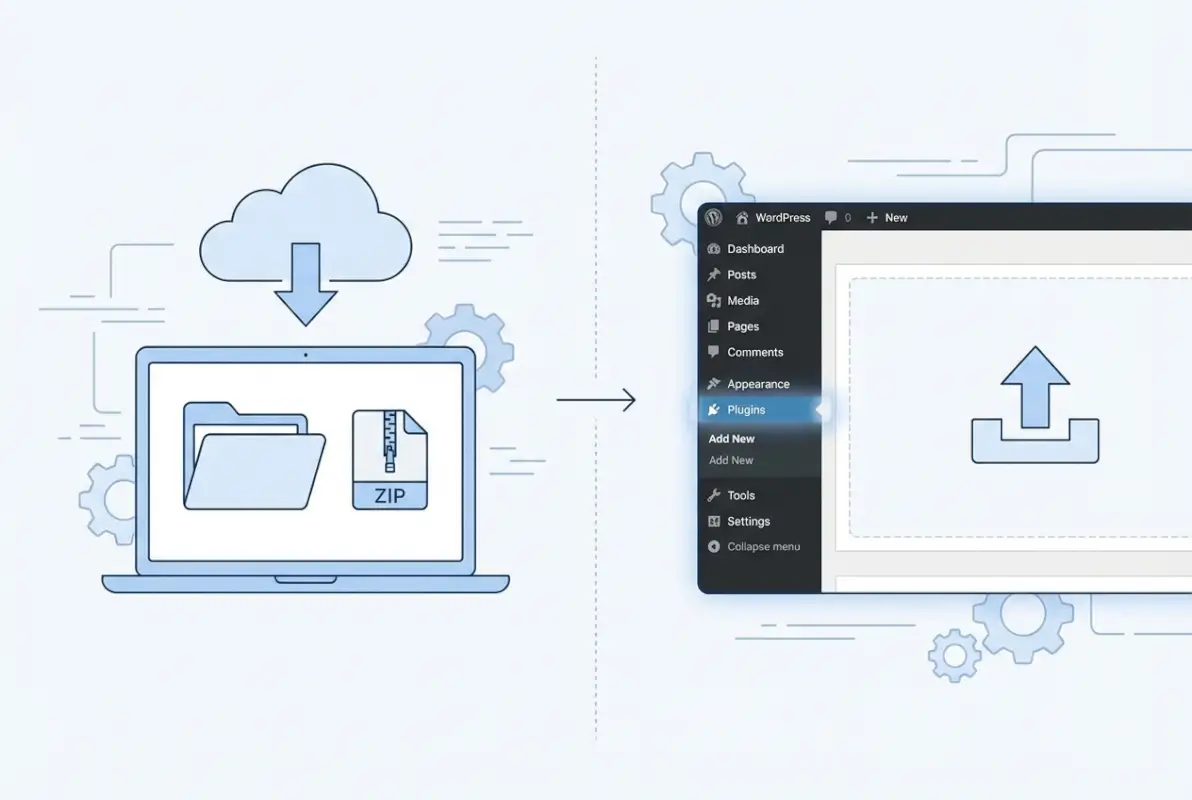
The actual installation process for Pro plugins differs from free plugins in one key way: you’re uploading a ZIP file you received from the vendor rather than installing directly from the WordPress.org repository. This distinction matters because it changes how updates work and requires license activation for ongoing support.
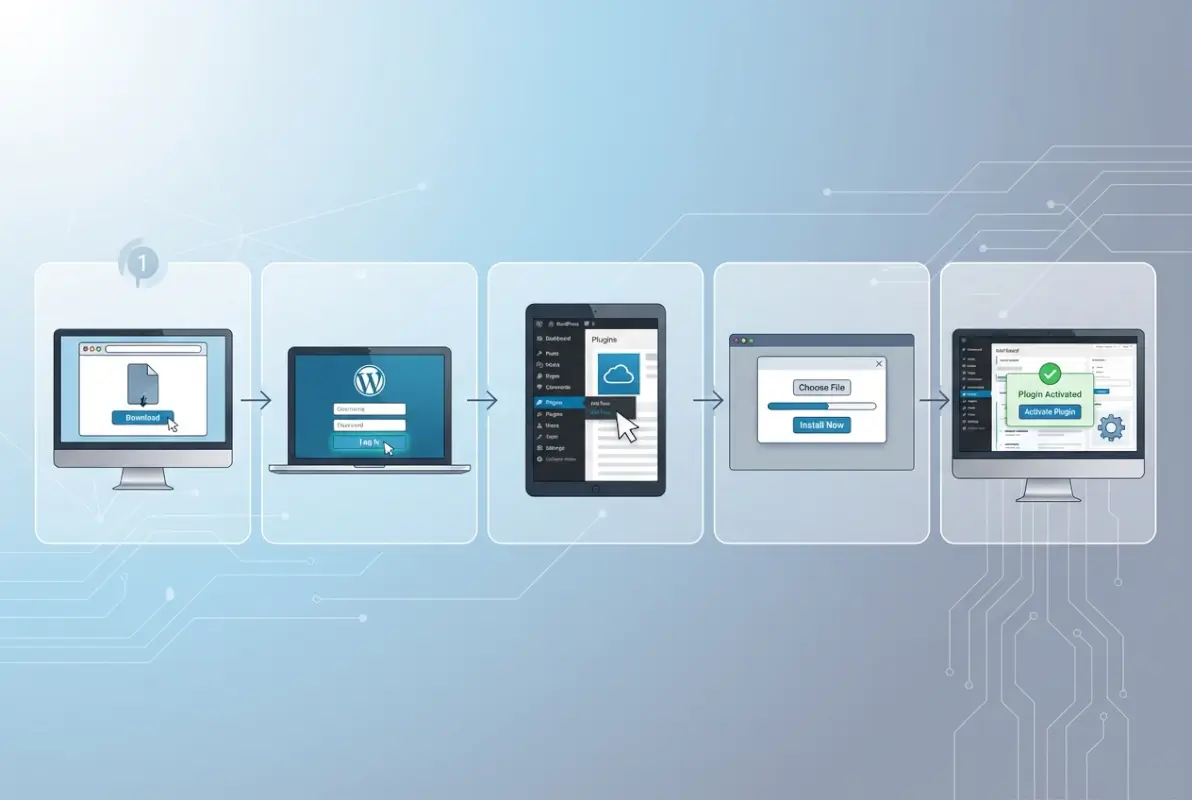
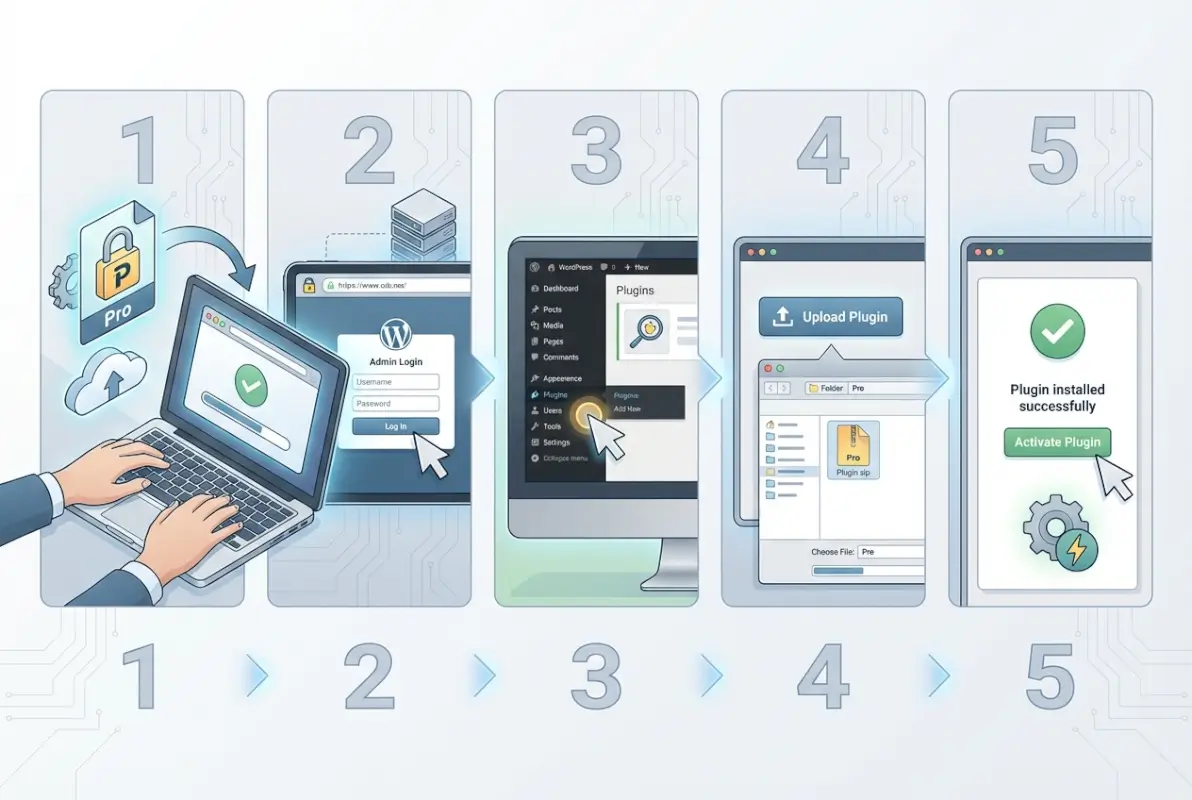
Navigate to your WordPress admin dashboard and locate the Plugins menu in the left sidebar. Click “Add New” and you’ll see a prominent “Upload Plugin” button at the top of the screen. This is your entry point for all Pro plugin installations. Click that button and you’ll get a simple file chooser asking you to select a ZIP file from your computer.
Select the ZIP file you downloaded from the plugin vendor (usually found in your member account area on their site), then click “Install Now.” WordPress will upload the file, extract it to your wp-content/plugins directory, and display a success message with an “Activate Plugin” link. Don’t click that link just yet—I know it’s tempting, but hold on for one more step.
License Activation Process
Here’s where Pro plugins diverge significantly from their free counterparts. After installation but before activation, some Pro plugins require you to enter your license key first. Others let you activate the plugin and then prompt you for the license key through a settings page or welcome wizard.
Your license key should be available in the purchase confirmation email from the vendor or in your account area on their website. Copy it exactly as provided—license keys are case-sensitive and often include special characters that are easy to mistype. Many Pro plugins use a simple license activation interface where you paste the key and click “Activate License.” This process connects your WordPress site to the vendor’s update server, enabling automatic updates and support access.
Some vendors use alternative activation methods. You might need to authenticate through their website, download a license file, or connect via OAuth. Follow the vendor’s specific instructions, as the activation process varies by plugin and company. If you run into issues during license activation, check that your server allows outbound connections to the vendor’s license server (some restrictive hosting environments block these connections).
| Installation Method | When to Use | Considerations |
|---|---|---|
| WordPress Admin Upload | Standard installation for most Pro plugins | Easiest method, handles permissions automatically |
| FTP Upload | When admin access is restricted or upload limits are too low | Requires manual extraction and permission setting |
| Vendor Portal Installation | Some premium themes and plugin suites offer this | Streamlines updates but creates vendor dependency |
Once license activation completes successfully, you can activate the plugin itself. Click the “Activate” link and WordPress will enable the plugin on your site. You should see the plugin appear in your installed plugins list with an “Active” status indicator. Many Pro plugins will immediately redirect you to a welcome screen or setup wizard when activated for the first time.
Understanding how to organize your plugins helps maintain a clean WordPress environment as you add more Pro tools to your site.
Step 4: Configure Pro Plugin Settings
Initial configuration is where Pro plugins often reveal their complexity—and their value. Unlike simple free plugins that might have five settings, Pro plugins frequently offer dozens or hundreds of configuration options across multiple sections. This depth can be overwhelming, but a systematic approach makes it manageable.
Start with the setup wizard if the plugin offers one. Most well-designed Pro plugins include an onboarding wizard that walks you through essential configuration steps in a logical sequence. These wizards typically handle the core settings that must be configured for the plugin to function, leaving advanced options for later exploration. Don’t skip the wizard thinking you’ll save time by jumping straight into advanced settings—you’ll likely miss critical setup steps.
Configure essential features first, then layer in advanced capabilities. For example, if you’re setting up a membership plugin, focus first on basic membership levels, payment gateways, and content protection. Get those core functions working and tested before you add features like drip content, member directories, or complex access rules. This incremental approach makes troubleshooting easier because you can identify exactly which configuration change caused any issues that arise.
Security and Compatibility Considerations
Review permission settings carefully. Many Pro plugins grant extensive capabilities to specific user roles, and the defaults might be more permissive than your security requirements allow. A membership plugin might default to letting Editors modify member accounts, when your security policy requires that only Administrators can make those changes. Audit these permission settings and adjust them to match your site’s security posture.
Test for plugin conflicts immediately after configuration. Activate all your other plugins (if you deactivated any before installation) and browse through various parts of your site looking for broken functionality, visual glitches, or JavaScript errors in your browser console. Plugin conflicts often manifest as subtle issues—a form that no longer validates, a slider that doesn’t advance, or an AJAX feature that fails silently.
Enable auto-updates for the Pro plugin if the option is available and you trust the vendor’s quality control. Automatic updates ensure you receive security patches and bug fixes promptly without manual intervention. However, auto-updates aren’t appropriate for every situation—if the plugin is deeply integrated into custom functionality or you’ve modified it in any way, manual updates with staging site testing are safer. Consider strategies to monetize your site effectively after installing revenue-generating Pro plugins.
Document your configuration choices somewhere accessible. I use a simple Google Doc for each site listing installed Pro plugins, their license keys, important configuration settings, and any customizations made. This documentation becomes invaluable six months later when you need to troubleshoot an issue or migrate the site to a new host.
Integration with External Services
Many Pro plugins connect to external services—email marketing platforms, CRM systems, payment processors, analytics tools, or API-based services. These integrations typically require API keys, webhook URLs, or OAuth authentication. Gather all necessary credentials before starting the integration process to avoid interrupting your workflow.
Test external integrations thoroughly. Send test transactions through payment gateways, verify that email opt-ins actually reach your email marketing platform, and confirm that data flows correctly between your WordPress site and connected services. Integration bugs often hide during initial setup and only surface when real users encounter edge cases your testing didn’t cover.
Step 5: Verify Functionality and Maintain Your Pro Plugin
Installation and configuration get the plugin running, but verification and ongoing maintenance determine whether your Pro plugin investment delivers sustained value or becomes a future liability. This final step separates professional WordPress site owners from amateurs who install plugins and hope for the best.

Start with front-end validation—view your site as an actual visitor would experience it. Test the plugin’s functionality from a logged-out browser session, ideally from a different device or network than you normally use. This approach reveals issues that don’t appear in your admin-focused testing, such as caching conflicts, mobile responsiveness problems, or permissions issues that only affect non-admin users.
Check page load speed before and after plugin activation using tools like GTmetrix or Google PageSpeed Insights. Most Pro plugins add some overhead—scripts to load, styles to render, database queries to execute—but excessive performance impact suggests configuration problems or plugin bloat. If your page load time increases by more than 20%, investigate whether you can optimize the plugin’s settings or consider alternative solutions.
License Management and Update Discipline
Keep your license active and current. An expired license doesn’t usually disable the plugin immediately, but it cuts off access to updates and support. Without updates, you miss security patches, bug fixes, and compatibility improvements that keep the plugin working as WordPress core evolves. Set calendar reminders for license renewal dates, or better yet, enable auto-renewal if your budget allows.
Establish an update schedule and stick to it. I recommend checking for Pro plugin updates monthly at minimum, with critical security updates applied immediately when vendors release emergency patches. Schedule updates during low-traffic periods and always test on staging before applying updates to your production site. This discipline prevents the common scenario where someone clicks “Update All” on a live site during peak traffic and breaks critical functionality.
Documentation and Support Resources
Bookmark the plugin’s official documentation and support channels immediately after installation. You’ll need these resources eventually—whether for troubleshooting an issue, learning an advanced feature, or understanding how an update affects your configuration. Store these bookmarks in a dedicated folder in your browser or a password manager that syncs across devices.
Engage with the plugin’s community if one exists. Many Pro plugins maintain user forums, Slack channels, or Facebook groups where customers share solutions, workflows, and use cases. These communities often provide faster answers than official support tickets for common questions, and they’re excellent sources of implementation ideas you might not have considered. Learning to promote your WordPress site becomes easier when you’ve optimized it with the right Pro plugins.
Monitor plugin changelogs whenever updates are released. Changelogs tell you what changed, what was fixed, and what new features were added. This information helps you understand whether an update is critical (security fix), beneficial (new features you need), or low-priority (minor tweaks). Informed update decisions prevent both the risk of running outdated plugins and the disruption of unnecessary update churn.
Frequently Asked Questions
Do I need a special license for Pro plugins, and how do I activate it?
Yes, Pro plugins require a license key purchased from the vendor. After installing the plugin, you’ll activate the license through a settings page by entering your key and clicking activate. This connects your site to the vendor’s update servers and unlocks support access. Without activation, you may retain basic functionality but lose access to updates and assistance.
Can I install Pro plugins on WordPress.com, or only self-hosted WordPress.org installations?
Pro plugin installation typically requires self-hosted WordPress (WordPress.org). WordPress.com restricts plugin installation to Business and eCommerce plans, and even then, plugin options may be limited. For full control over Pro plugin installation, use a self-hosted WordPress site with a hosting provider of your choice.
What if the Pro plugin isn’t listed in the WordPress plugin directory?
Most Pro plugins aren’t in the WordPress.org directory because they’re commercial products. Install them using the Upload Plugin method in WordPress admin. Navigate to Plugins > Add New > Upload Plugin, select the ZIP file you received from the vendor, and proceed with installation and activation as normal.
How do I ensure Pro plugins don’t break my site?
Test on a staging environment first, verify PHP and WordPress version compatibility, create complete backups before installation, and check for plugin conflicts. After activation, monitor your site for errors, test critical functionality, and review PHP error logs. If issues arise, deactivate the plugin, restore from backup, and contact vendor support.
What’s the recommended method to install a Pro plugin if I have a ZIP file from the vendor?
In WordPress admin, go to Plugins > Add New > Upload Plugin. Click “Choose File” and select your vendor-provided ZIP file, then click “Install Now.” After installation completes, activate the plugin and enter your license key when prompted. This method works for virtually all Pro plugins and handles file permissions automatically.
How can I verify a Pro plugin’s trustworthiness before purchase?
Check the vendor’s history and reputation in the WordPress community, review their documentation quality, read customer reviews on independent sites, verify their support response times, and examine their update frequency. Established vendors with years of presence and multiple quality products typically deliver better long-term value and reliability.
What happens when my Pro plugin license expires?
Most Pro plugins continue functioning after license expiration, but you lose access to updates, security patches, and vendor support. Some plugins display admin notices about expired licenses. Renewal policies vary by vendor—some offer grace periods, others cut off access immediately. Check your vendor’s specific license terms for exact details.
Should I install Pro plugins directly on my live site or use staging first?
Always use a staging environment for initial Pro plugin installation and testing. Staging lets you identify conflicts, configuration issues, and performance impacts without risking your live site. Only move the plugin to production after thorough testing confirms it works correctly with your existing setup.
How do I update Pro plugins differently from free plugins?
Pro plugin updates require an active license for automatic update delivery through WordPress admin. With a valid license, updates appear in your WordPress dashboard like free plugins. Without an active license, you must manually download updated versions from the vendor and reinstall via ZIP upload—a process that’s both inconvenient and risky.
Can I use one Pro plugin license on multiple websites?
License terms vary significantly by vendor. Some sell single-site licenses, others offer multi-site packages, and a few provide unlimited site licenses at premium prices. Always check the vendor’s license agreement before installing on multiple sites. Using a single-site license on multiple sites typically violates terms and may result in license deactivation.
Conclusion
Installing a Pro plugin on WordPress involves much more than uploading a ZIP file and clicking activate—though that’s certainly part of it. The process requires careful evaluation before purchase, thorough preparation of your WordPress environment, methodical installation and configuration, and ongoing maintenance to protect your investment. Each step builds on the previous one, creating a foundation for reliable, long-term plugin performance.
The stakes are higher with Pro plugins than with free alternatives. You’re investing money and potentially building core site functionality around these tools, which makes informed decisions critical. Take the time to evaluate vendors properly, test thoroughly on staging, and establish maintenance routines that keep your Pro plugins updated and secure. These practices separate successful WordPress sites from those that accumulate technical debt until a breaking point forces emergency fixes. Knowing how to effectively populate your directory becomes much easier with the right Pro plugins installed and configured correctly.
Remember that WordPress powers more than 43% of all websites globally—a massive user base that attracts both quality plugin developers and bad actors looking to exploit security vulnerabilities. Your vigilance in choosing trustworthy Pro plugins and maintaining them properly contributes to the overall security and reliability of your WordPress site. Don’t treat plugin installation as a one-time task. Think of it as the beginning of an ongoing relationship between your site and the plugin vendor, one that requires attention and maintenance to remain beneficial.
Start with one well-chosen Pro plugin that solves a specific problem, master its installation and configuration, and establish good maintenance habits before adding more. This incremental approach builds expertise and prevents the all-too-common scenario of a WordPress site burdened with too many plugins that interact in unpredictable ways. Quality over quantity always wins in plugin selection—a principle that becomes more important as your site grows and its technical complexity increases.
Was this article helpful?