How to Install a WordPress Plugin Manually: A Beginner’s Guide
Generating summary...
When you’ve downloaded a WordPress plugin from a third-party developer or received a custom-built solution, you’ll quickly realize the standard “Install Now” button isn’t going to cut it. Manual plugin installation might sound intimidating at first—especially if you’re new to WordPress—but it’s actually one of the most empowering skills you can develop as a site administrator. I remember the first time I needed to install a premium plugin I’d purchased; staring at that ZIP file on my desktop, I felt completely stuck until I learned the FTP method. Once I understood the process, it opened up a whole new level of control over my WordPress sites.
Manual installation gives you flexibility when automatic methods fail, when you’re working in restricted hosting environments, or when you need to test beta versions of plugins before they hit the official directory. The reality is that while WordPress powers roughly 42-43% of all websites globally—making it the dominant CMS by a significant margin—not every plugin lives in the official WordPress repository. Understanding how to manually install plugins means you’re never limited by what’s available through the dashboard alone.
TL;DR – Quick Takeaways
- Manual installation is essential when plugins aren’t in the WordPress directory or automatic installation fails
- Three main methods exist: WordPress admin ZIP upload (easiest), FTP/SFTP transfer (most flexible), and server file manager (alternative)
- Always backup first and verify plugin sources to avoid security risks
- Check compatibility with your WordPress version and PHP requirements before installing anything
- Post-installation validation ensures the plugin works correctly and doesn’t conflict with existing functionality
When Manual Installation Makes Sense
You might be wondering why anyone would bother with manual installation when the WordPress dashboard makes it so easy to search and install plugins with a single click. The truth is, there are several scenarios where manual installation becomes not just useful, but necessary. First, premium plugins purchased from third-party marketplaces typically come as ZIP files that you’ll need to upload yourself. These aren’t available in the WordPress.org directory because they’re commercial products.
Another common situation involves custom plugins developed specifically for your organization. If you’ve hired a developer to build a bespoke solution, they’ll hand you the plugin files that need to be manually installed. Additionally, some hosting environments—particularly those with strict security configurations—may disable certain automatic installation features, leaving manual methods as your only option. I’ve worked with enterprise clients whose servers were locked down so tightly that FTP was the only way to get anything onto the server.
Beta testing represents another legitimate use case. When plugin developers release early versions for testing, these pre-release builds typically aren’t available through official channels. Manual installation lets you test cutting-edge features before they’re released to the general public. Finally, if you’re working offline or in a local development environment without internet connectivity, manual installation methods become essential for your workflow.
Essential Pre-Installation Preparations
Before you start uploading files to your WordPress installation, taking proper precautions will save you from potential headaches down the road. The most critical step—and I can’t emphasize this enough—is creating a complete backup of your site. This includes both your files and your database. If you’re considering joining a business directory or installing any new functionality, you want the ability to roll back if something breaks.
Verify Your Access and Permissions
You’ll need either FTP/SFTP credentials or access to your hosting control panel’s file manager. Log into your hosting account and confirm you can access the file management tools. If you’re using FTP, test your connection with credentials your host provided before you need them in a critical situation. The wp-content/plugins directory is where you’ll be working, so make sure you have write permissions there.
Evaluate Your Plugin Source
This step is absolutely crucial for security. Only download plugins from trusted sources—primarily the official WordPress.org directory or reputable commercial vendors with established track records. Security vulnerabilities in plugins have affected hundreds of thousands of sites, with some flaws remaining unpatched for weeks or months. Downloading a plugin from a sketchy forum or “free premium plugin” site is essentially inviting malware onto your server.
Check the plugin’s update history, read user reviews if available, and verify the developer’s reputation. Look for plugins that have been recently updated and actively maintained. Abandoned plugins pose security risks because vulnerabilities discovered after the developer moves on never get patched. When you’re working on a directory site for a specific location, the last thing you need is a compromised plugin exposing your users’ data.
Compatibility Requirements Check
Before downloading anything, verify the plugin’s minimum WordPress version, PHP requirements, and any other dependencies it might have. This information is usually clearly stated on the plugin’s download page or in its documentation. Installing a plugin that requires PHP 8.0 on a server running PHP 7.4 will result in errors at best and a white screen of death at worst.
Three Methods for Manual Plugin Installation
WordPress gives you multiple paths to manually install plugins, each suited to different situations and comfort levels. Understanding all three methods means you’ll always have options regardless of your hosting environment or technical constraints. Let’s break down each approach so you can choose the right one for your specific needs.
Method A: WordPress Admin Upload (Recommended for Most Users)
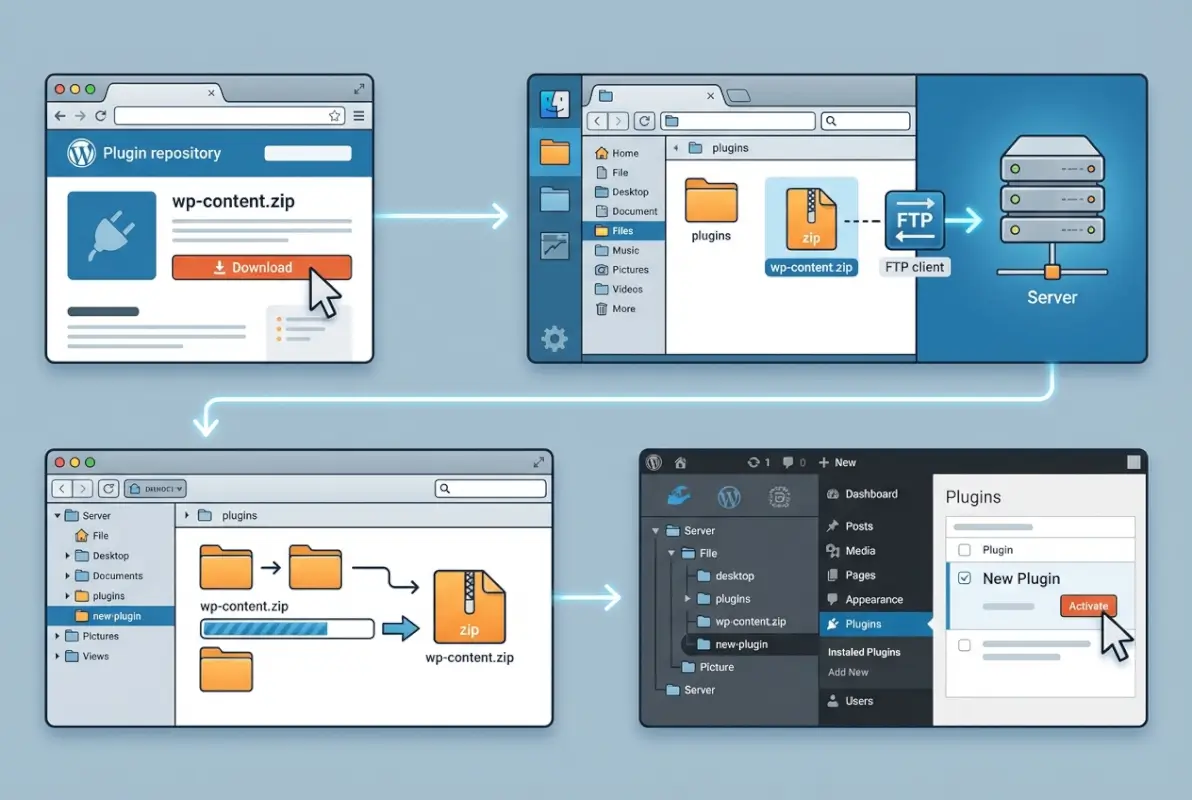
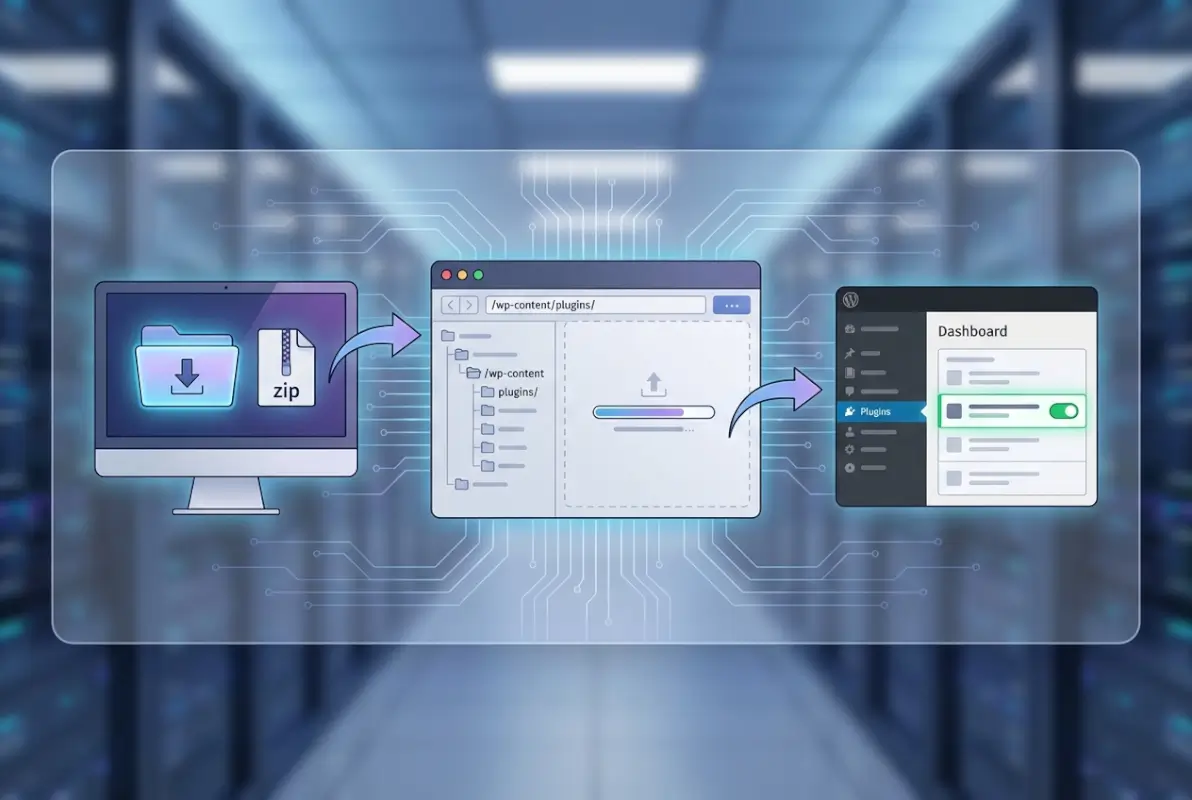
This is the most user-friendly manual installation method and works perfectly when you have a plugin ZIP file ready to go. After downloading your plugin ZIP, log into your WordPress admin dashboard and navigate to Plugins > Add New. You’ll see an “Upload Plugin” button at the top of the page—click it.
A file upload interface appears where you can choose your ZIP file. Click “Choose File,” select your downloaded plugin ZIP, then hit “Install Now.” WordPress automatically extracts the files to the correct location and performs basic validation. Once installation completes, you’ll see an “Activate” link—click it to enable the plugin. This method handles all the file management behind the scenes, making it ideal for beginners.
The main limitation here is that you need a ZIP file and the upload feature must be enabled in your WordPress installation. Some heavily restricted hosting environments disable this functionality, but for most standard WordPress sites, this method works flawlessly. It’s essentially a manual process that still leverages WordPress’s built-in installation handlers, similar to how you might install a directory plugin through the dashboard.
Method B: FTP/SFTP Transfer (Maximum Control)
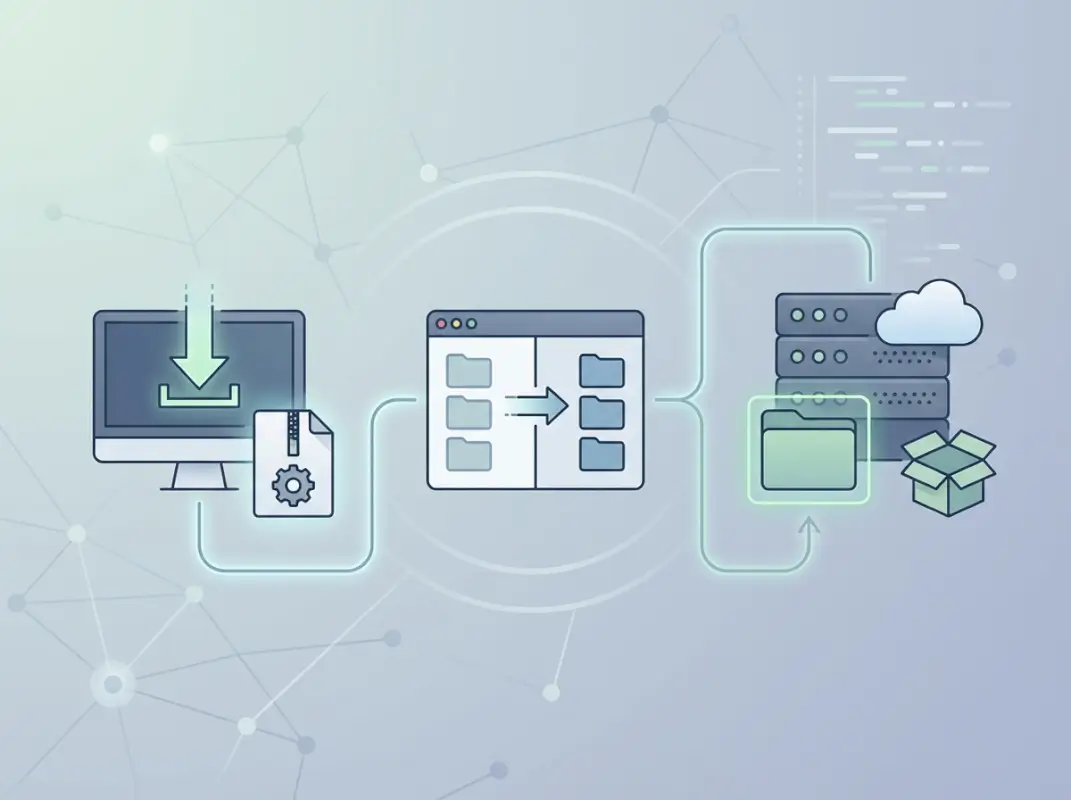
FTP transfer gives you complete control over where files go and how they’re organized, but it requires comfort with file transfer protocols and server file structures. Start by downloading your plugin ZIP file and extracting it on your local computer. You should end up with a folder containing the plugin files—something like “my-plugin” with PHP files and subdirectories inside.
Connect to your server using an FTP client like FileZilla, Cyberduck, or WinSCP using the credentials your hosting provider supplied. Navigate to your WordPress installation’s wp-content/plugins directory. Now upload the entire extracted plugin folder into this plugins directory. The folder structure should look like: /wp-content/plugins/my-plugin/[plugin files].
Once the upload completes, return to your WordPress dashboard, go to the Plugins page, and you’ll see your newly uploaded plugin in the list. Click “Activate” to enable it. This method is particularly useful when you need to install multiple plugins at once, when the admin uploader isn’t working, or when you’re dealing with very large plugin files that might timeout during a web-based upload.
| Method | Difficulty | Best For | Requirements |
|---|---|---|---|
| Admin Upload | Easy | Beginners, single plugins | ZIP file, admin access |
| FTP/SFTP | Moderate | Multiple plugins, large files | FTP credentials, FTP client |
| File Manager | Easy-Moderate | Web-based control preference | cPanel/hosting file manager |
Method C: Server-Side File Manager
Many hosting providers offer web-based file managers through cPanel or custom control panels. This method splits the difference between the admin uploader and FTP—you’re working directly with server files but through a web interface instead of a dedicated FTP client. Access your hosting control panel and open the file manager tool.
Navigate to your WordPress installation’s wp-content/plugins directory. Most file managers let you upload ZIP files directly and extract them in place. Upload your plugin ZIP, then right-click it and select “Extract” or “Unzip.” The file manager will create the plugin folder automatically. Delete the ZIP file after extraction to keep your server tidy, then head to your WordPress admin to activate the plugin.
This method works well when you don’t want to install FTP software but need more control than the WordPress uploader provides. It’s particularly handy for quick installations on shared hosting accounts where cPanel is readily available. Whether you’re building a statewide directory or a simple blog, having multiple installation methods in your toolkit makes you more adaptable.
Detailed FTP Installation Walkthrough
Let’s walk through the FTP method step-by-step since it’s the most versatile approach and the one that works even when other methods fail. This detailed example will give you confidence to handle any manual installation scenario you might encounter. We’ll assume you’ve already downloaded a plugin ZIP file from a trusted source.
Step 1: Prepare the Plugin Files
Locate your downloaded plugin ZIP file—it’s probably in your Downloads folder. Right-click the ZIP and extract or unzip it using your operating system’s built-in tools or an application like WinRAR or 7-Zip. After extraction, you should see a folder with the plugin’s name containing various PHP files, possibly a readme.txt, and subdirectories for assets, languages, or includes.
Take a moment to verify the folder structure looks reasonable. There should be a main PHP file with the same name as the folder (like my-plugin.php inside the my-plugin folder) and typically a readme file with installation instructions. If you see anything suspicious—executable files, oddly named scripts, or encoded PHP code that seems obfuscated—stop and reconsider your source.
Step 2: Connect Via FTP and Locate the Plugins Directory
Open your FTP client and enter your server credentials: hostname (often your domain or something like ftp.yourdomain.com), username, password, and port (usually 21 for FTP or 22 for SFTP). SFTP is preferred because it encrypts your connection, but both work for file transfers. Click connect and wait for authentication.
Once connected, you’ll see your server’s file structure. Navigate to your WordPress installation root—this is where you’ll find folders like wp-admin, wp-content, and wp-includes. Open the wp-content folder, then the plugins folder inside it. This is your destination directory where all WordPress plugins live. You should see folders for any currently installed plugins listed here.
Step 3: Upload the Plugin Folder
In your FTP client’s local file pane (usually on the left side), navigate to where you extracted the plugin. Select the entire plugin folder—not the individual files inside it, but the folder itself. Drag this folder to the remote plugins directory shown in the right pane, or use your FTP client’s upload function.
Watch the transfer progress. For small plugins, this takes seconds; larger plugins with lots of assets might take a minute or two. Most FTP clients show transfer speed and estimated completion time. When the upload finishes, verify that the folder appears in the remote plugins directory with all its contents intact. Click into the uploaded folder to confirm files transferred correctly.
File permissions occasionally cause issues. The uploaded folder and its contents should typically have permissions of 755 for directories and 644 for files. Most FTP clients let you right-click and modify permissions if needed, though default settings usually work fine on properly configured servers.
Step 4: Activate Through WordPress Admin
With the files successfully uploaded, open your WordPress admin dashboard in a web browser. Navigate to Plugins in the left sidebar. Scroll through the plugin list and you should see your newly uploaded plugin listed, probably with a message indicating it’s inactive. The plugin name, description, and version should appear just like plugins installed through the standard method.
Click the “Activate” link beneath your plugin. WordPress will load the plugin files, run any activation hooks the developer included, and refresh the page. If activation succeeds, you’ll see a confirmation message and the plugin will move from the inactive section to your active plugins list. Some plugins immediately display a settings notice or redirect you to their configuration page after activation.
If you’re managing a complex site—perhaps working on how to get listed in a county business directory—you’ll appreciate having this level of control over exactly what code runs on your server and when it gets activated.
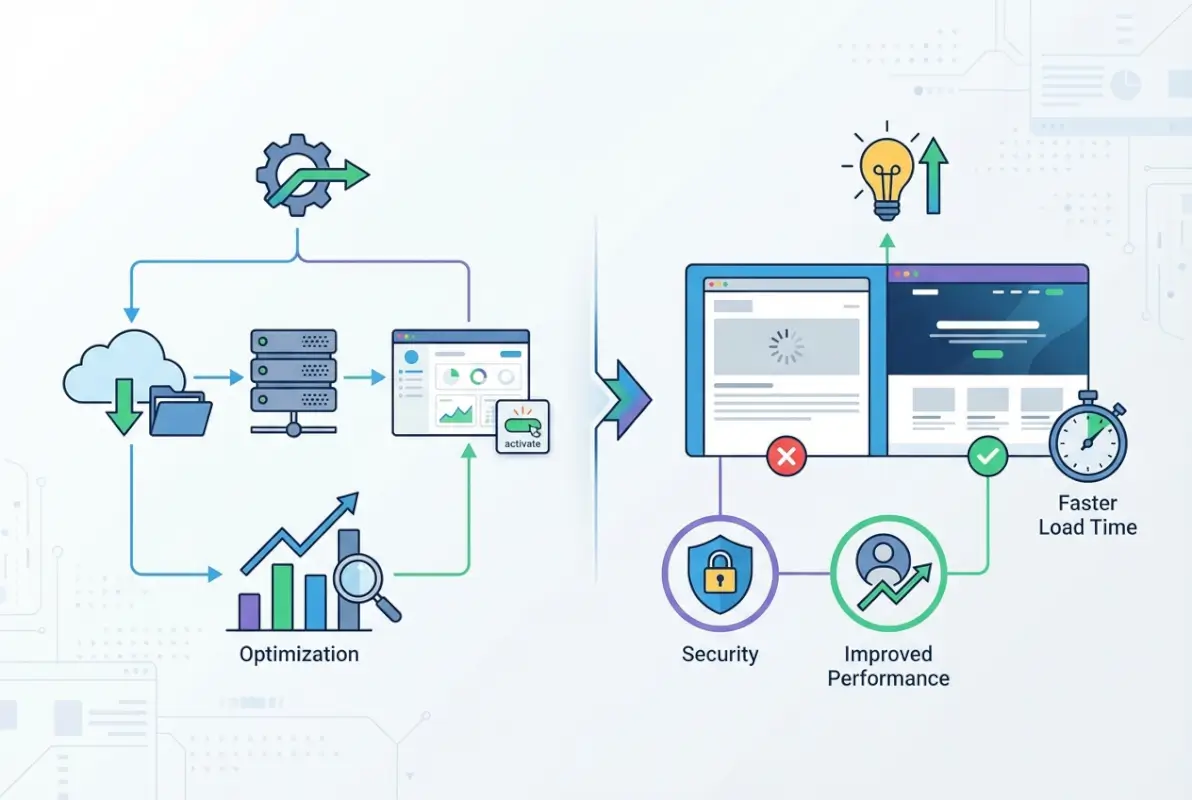
Post-Installation Configuration and Validation
Successfully uploading and activating a plugin is only half the battle; now you need to ensure it actually works as intended and doesn’t break anything on your site. This validation phase catches problems before your visitors encounter them, and it’s where many people rush through when they really shouldn’t.

Initial Setup and Configuration
Many plugins require initial configuration before they function properly. Look for a new menu item in your WordPress admin sidebar, or check under Settings for the plugin’s options page. Common configuration steps include entering API keys, selecting which features to enable, and defining basic operational parameters.
Read through the plugin’s documentation or setup wizard carefully. Don’t just click “Next” through configuration screens without understanding what each setting does. Some plugins create database tables during first-time setup, while others need to connect to external services. Take time to configure these properly rather than accepting all defaults blindly.
Test the plugin’s core functionality immediately after configuration. If it’s a contact form plugin, submit a test form. If it’s a caching plugin, check that pages load with caching active. If it’s a security plugin, verify it’s not blocking legitimate traffic. Early testing identifies configuration mistakes while they’re easy to fix.
Compatibility and Conflict Checking
Even properly coded plugins sometimes conflict with other plugins or themes. After activation, systematically test your site’s key functions: navigation menus, contact forms, e-commerce checkout (if applicable), user registration, and any custom functionality you rely on. Check both the front-end user experience and the admin dashboard.
Watch your browser’s developer console (press F12) for JavaScript errors that might indicate conflicts. Enable WordPress debug mode temporarily to catch PHP warnings or notices that don’t appear in normal operation. Add these lines to your wp-config.php file (then remove them after testing):
define(‘WP_DEBUG’, true);
define(‘WP_DEBUG_LOG’, true);
This logs errors to wp-content/debug.log where you can review them later. If you notice problems, deactivate the new plugin to confirm it’s the cause, then investigate whether settings adjustments resolve the issue or if the plugin is fundamentally incompatible with your setup.
Performance and Security Considerations
Newly installed plugins can impact site performance, sometimes dramatically. Use a tool like GTmetrix or Google PageSpeed Insights to compare your site’s load times before and after plugin activation. A well-coded plugin should have minimal performance impact, but poorly optimized ones can add seconds to page load times.
Security-wise, keep the plugin updated. Subscribe to the developer’s newsletter or enable update notifications in WordPress. Security vulnerabilities get discovered regularly—some affecting hundreds of thousands of installations—and timely updates are your best defense. Remove and delete any plugins you’re no longer actively using; inactive plugins still pose security risks if vulnerabilities are discovered.
Limit the total number of active plugins on your site. There’s no magic number, but each additional plugin adds code that must be loaded, maintained, and secured. Focus on quality over quantity, choosing well-supported, frequently updated plugins from reputable developers.
Troubleshooting Common Installation Problems
Even when you follow instructions precisely, things sometimes go wrong with manual plugin installations. Understanding common problems and their solutions will help you resolve issues quickly instead of panicking when your site behaves unexpectedly. These are the issues I’ve encountered most frequently across hundreds of plugin installations.
Plugin Not Appearing in the Admin List
You’ve uploaded the files via FTP, but the plugin doesn’t show up in your WordPress admin panel. This usually means the plugin folder isn’t in the right location or the folder structure is incorrect. Connect via FTP and double-check that your plugin folder is directly inside wp-content/plugins/, not nested in an extra folder.
Common mistake: unzipping creates a folder inside a folder, like wp-content/plugins/my-plugin/my-plugin/[actual files]. WordPress only looks one level deep, so it won’t find plugins buried further. Move the inner folder up one level so files are directly in wp-content/plugins/my-plugin/.
File permissions can also cause invisibility. The folder and files need to be readable by the web server. Set folder permissions to 755 and file permissions to 644 using your FTP client’s permissions/chmod function. Incorrect ownership (files owned by the wrong user) sometimes causes this on shared hosting, requiring support ticket intervention.
Activation Errors and White Screen of Death
Clicking “Activate” triggers an error message or—worse—a white screen that locks you out of your admin dashboard. This typically indicates a fatal PHP error: incompatible PHP version, missing dependencies, or conflicts with existing plugins. If you can’t access the admin panel, you’ll need to fix this via FTP.
Connect via FTP, navigate to wp-content/plugins/, and rename the problematic plugin’s folder to something like my-plugin-disabled. This deactivates the plugin without needing admin access. Your site should recover immediately. Check your server’s error logs (usually in your hosting control panel) to see the specific error message that caused the failure.
Common causes include PHP version mismatches (plugin requires 7.4, server runs 7.2), missing PHP extensions (plugin needs cURL, server doesn’t have it), or namespace conflicts with other plugins. Review the error message, verify requirements, and contact the plugin developer if you can’t resolve the issue.
Update and Security Management
Manually installed plugins don’t always receive automatic update notifications in the WordPress dashboard, especially if they’re not from the official repository. You’ll need to monitor the developer’s site or newsletter for updates and repeat the manual installation process with newer versions.
For premium plugins, most vendors provide license-based update mechanisms. Enter your license key in the plugin settings, and WordPress will check for updates automatically. Without this connection, you’re responsible for tracking new releases and applying updates manually.
Security vulnerabilities in popular plugins sometimes affect hundreds of thousands of sites. When a security researcher discovers a flaw, responsible disclosure gives developers time to patch it before public announcement. However, once a vulnerability becomes public knowledge, attackers actively scan for vulnerable sites. Applying security updates quickly—within hours or days of release—is critical for protecting your site.
Best Practices for Safe Plugin Management
Manual installation gives you power and flexibility, but with that power comes responsibility for managing plugins safely and efficiently. These best practices emerged from years of WordPress administration experience, including both successes and painful learning experiences when I didn’t follow my own advice.
Source Verification and Trust
Only install plugins from sources you trust completely. The WordPress.org repository maintains quality standards and security review processes. Commercial plugin marketplaces like CodeCanyon have verification systems, though they’re not foolproof. Direct purchases from established plugin developers with strong reputations are generally safe.
Avoid “nulled” or “cracked” premium plugins offered free on shady websites. These frequently contain backdoors, malware, or deliberately broken functionality. The “free” plugin costs far more when it compromises your site and exposes customer data. Legitimate premium plugins cost money because developers need to support their work—pay for quality rather than risking your site’s security.
Before installing, research the developer’s track record. How long have they been in business? Do they respond to support requests? Have their other plugins had security issues? A five-minute investigation before installation beats a five-hour cleanup after compromise.
Backup Discipline and Staging Environments
I’ve already mentioned backups, but it bears repeating: backup before every significant change, including plugin installations. Automated daily backups provide a safety net, but manual backups before major changes give you a precise restore point if something goes wrong immediately.
Ideally, test new plugins on a staging site—a complete copy of your production site where you can experiment safely. Many hosts provide one-click staging environments. Install and test the plugin in staging, verify it works correctly and doesn’t conflict with anything, then replicate the installation on your live site with confidence.
Staging isn’t always practical for small sites, but for business-critical installations or sites with significant traffic, staging prevents you from debugging problems live while users watch. The minor inconvenience of staging saves major embarrassment when a plugin breaks your checkout process during peak shopping hours.
Plugin Inventory and Lifecycle Management
Maintain a list of installed plugins, why each one is necessary, and when you last reviewed each one’s necessity. Every few months, audit your plugins: Are you actually using this? Does it still serve a purpose? Is there a better alternative? Removing unnecessary plugins reduces your attack surface and improves performance.
When a plugin becomes unmaintained—no updates for a year or more—start looking for alternatives. Abandoned plugins accumulate security vulnerabilities that never get patched. The developer may have moved on, lost interest, or gone out of business. Either way, running unmaintained code is a risk that grows over time.
Quick Reference: Mistakes to Avoid
Let’s consolidate the most common mistakes that trip up people doing manual installations. Avoiding these pitfalls will save you troubleshooting time and prevent security incidents that could compromise your site.
Don’t Skip Source Verification
Installing from untrusted sources is the number one preventable security mistake. That “premium plugin for free” isn’t free—you’re paying with your site’s security. Stick to official directories, reputable marketplaces, and established developers. If a deal seems too good to be true, it absolutely is.
Don’t Ignore Compatibility Requirements
Compatibility information exists for a reason. Installing a plugin that requires WordPress 6.0 on your 5.8 installation will fail, often spectacularly. Check minimum WordPress version, PHP version, and any explicitly mentioned dependencies before downloading. Five minutes of verification prevents hours of troubleshooting cryptic error messages.
Don’t Forget Pre-Installation Backups
This one should go without saying, but people skip backups constantly because “it’s just a small plugin” or “what could go wrong?” Plenty can go wrong. Create backups automatically on a schedule and manually before significant changes. When disaster strikes, you’ll wish you’d spent those 30 seconds creating a restore point.
Don’t Upload ZIP Files Via FTP
When using FTP, extract the ZIP file on your computer first, then upload the resulting folder. WordPress won’t automatically unzip files you place in the plugins directory via FTP. The plugin simply won’t appear because WordPress doesn’t know to look inside a ZIP file for plugins.
Don’t Activate Without Testing Access First
Before activating a plugin that might cause problems, open a second browser (or incognito window) and stay logged into your admin panel. Activate the plugin in your first browser. If it causes a white screen or error, you still have admin access in the second browser to fix it. This simple precaution prevents lockouts.
Frequently Asked Questions
Can I install a WordPress plugin manually without FTP access?
Yes, you can use the WordPress admin’s built-in Upload Plugin feature if you have the plugin as a ZIP file. Navigate to Plugins > Add New > Upload Plugin, select your ZIP, and click Install Now. Alternatively, if your host provides a web-based file manager (like cPanel’s File Manager), you can upload and extract the plugin folder directly into wp-content/plugins/ through that interface.
Is manual installation safer than automatic installation from the WordPress directory?
Safety depends entirely on the plugin’s source and quality, not the installation method. Automatic installation from WordPress.org benefits from the directory’s review process, but manual installation of a premium plugin from a reputable developer is equally safe. Manual installation of a sketchy plugin from an unknown source is significantly more dangerous. Always prioritize trusted sources regardless of installation method.
How do I know which plugins are safe to install on my WordPress site?
Evaluate plugins based on multiple criteria: source reputation (WordPress.org or established commercial developers), recent updates (active development within the past few months), user reviews and ratings, number of active installations, and the developer’s track record. Check for compatibility with your WordPress and PHP versions. Avoid plugins that haven’t been updated in over a year or have consistent negative reviews mentioning security or support issues.
What should I do if a manually installed plugin breaks my site?
First, don’t panic. Connect via FTP or file manager and navigate to wp-content/plugins/. Rename the problematic plugin’s folder (add “-disabled” to the folder name) to deactivate it immediately. Your site should recover. Then restore from your pre-installation backup if necessary, review error logs to understand what failed, and contact the plugin developer’s support with specific error messages before attempting reinstallation.
Do I need to unzip plugins before uploading them via FTP?
Yes, when using FTP/SFTP, you must extract the plugin ZIP file on your local computer first. Upload the resulting plugin folder (containing the PHP files and subdirectories) to wp-content/plugins/. If you use the WordPress admin Upload Plugin feature, you upload the ZIP file directly—WordPress handles extraction automatically. FTP requires manual extraction first; admin upload does not.
How can I verify plugin compatibility with my WordPress version and PHP?
Check the plugin’s information page on WordPress.org or the developer’s website for minimum requirements. In your WordPress admin, go to Dashboard > Site Health > Info to see your current WordPress version and PHP version. Compare these to the plugin’s requirements. If your environment doesn’t meet the minimums, either upgrade your WordPress/PHP (carefully, with backups) or find an alternative plugin compatible with your current setup.
Can I install multiple plugins at once using the manual FTP method?
Yes, one advantage of FTP installation is the ability to upload multiple plugin folders simultaneously. Extract all your plugin ZIPs locally, then upload all the resulting folders to wp-content/plugins/ in one FTP session. After upload completes, go to your WordPress admin Plugins page where all newly uploaded plugins will appear. Activate them one at a time to ensure each works correctly before enabling the next.
What permissions should plugin files and folders have on the server?
Standard recommended permissions are 755 for directories and 644 for files. This allows the web server to read and execute plugin code while preventing unauthorized modifications. Most FTP clients display and modify permissions (also called chmod settings). Right-click a folder or file and select Permissions or Properties to change these values. Incorrect permissions can cause plugins to malfunction or not appear.
Why doesn’t my manually installed plugin show update notifications?
Plugins from WordPress.org get automatic update notifications because WordPress checks the directory regularly. Premium or custom plugins from other sources won’t appear in automatic update checks unless the developer implements their own update mechanism (usually license-based). You’ll need to monitor the developer’s website or newsletter for updates and manually reinstall newer versions when released.
How do I remove a manually installed plugin completely?
First deactivate the plugin through WordPress admin (Plugins > Deactivate). Then click Delete, and WordPress removes the plugin files automatically. Alternatively, deactivate through the admin, then connect via FTP and delete the plugin’s folder from wp-content/plugins/. Deleting via FTP without deactivating first is fine but leaves database entries; using the admin Delete function properly cleans up associated database tables and options.
Taking Control of Your WordPress Installation
Manual plugin installation transforms you from a WordPress user into a WordPress administrator who truly understands how the platform works at the file level. While the dashboard’s automatic installation remains easier for plugins in the official directory, knowing how to manually install gives you independence from platform limitations and hosting restrictions. You’re no longer stuck when you need a specific plugin that isn’t available through standard channels.
The skills you’ve learned here—FTP file management, understanding WordPress directory structure, verifying plugin integrity, and troubleshooting activation problems—extend beyond just installing plugins. These same techniques apply to manual theme installation, emergency site repairs when the admin panel is inaccessible, and diagnosing problems that require direct server access. You’ve essentially leveled up your WordPress competence.
Remember that with this power comes responsibility. Always verify sources before downloading, create backups before making changes, check compatibility requirements, and validate that newly installed plugins work correctly without breaking existing functionality. These habits separate professional WordPress administrators from hobbyists who learn through painful trial and error.
The WordPress ecosystem continues growing, with tens of thousands of plugins available and millions of sites depending on them. Being able to manually install plugins means you’re never limited by what’s conveniently available through automated systems—you have access to the full range of WordPress functionality, both free and commercial, mainstream and specialized. That flexibility is invaluable as your site’s needs evolve over time.
So go ahead: download that plugin you’ve been eyeing, follow these instructions carefully, and expand your site’s capabilities. Just remember to backup first (seriously, do it right now if you haven’t already). Welcome to the world of manual WordPress administration—it’s surprisingly empowering once you get past that initial hesitation.
Was this article helpful?