How to Install a WordPress Plugin Using cPanel: A Step-by-Step Guide
Generating summary...
Installing WordPress plugins through cPanel might seem like an unnecessary complication at first – after all, WordPress has a perfectly good plugin installer built right into the dashboard. But here’s something most tutorials won’t tell you: understanding the cPanel route isn’t just about having a backup method. It’s about gaining control over your WordPress site at a deeper level, troubleshooting when things go sideways, and handling situations where the WordPress dashboard becomes inaccessible. I learned this the hard way when a faulty plugin once locked me out of my entire admin area, and the only way back in was through cPanel’s File Manager.
What makes this guide different is that we’re not just covering the “how” – we’re exploring the “why” and “when” of each method. You’ll understand which approach fits your specific scenario, whether that’s a routine plugin addition or an emergency recovery situation. Plus, we’ll dive into security considerations that most quick tutorials skip entirely, because installing plugins from untrusted sources remains one of the top vectors for WordPress compromises.
TL;DR – Quick Takeaways
- Multiple installation paths exist – WordPress dashboard is fastest for trusted plugins, but cPanel tools (File Manager, WP Toolkit, Softaculous) provide critical alternatives when you can’t access admin
- Security must come first – Only install plugins from official WordPress.org repository or verified developers; third-party plugins account for the majority of WordPress security incidents
- Backup before any changes – Always create full site and database backups before installing or updating plugins to avoid catastrophic data loss
- WP Toolkit streamlines management – If your host provides it, WP Toolkit offers the most efficient cPanel-based approach for WordPress and plugin administration
- File permissions matter – Incorrect folder structure or permissions after manual uploads are the most common reasons plugins fail to activate
Prerequisites and Planning: Setting Yourself Up for Success
Before you start uploading files or clicking install buttons, you need to understand your hosting environment and make some strategic decisions. Not all cPanel installations are created equal, and your hosting provider may have configured things differently than the screenshots you’ve seen elsewhere.
First, verify what tools are actually available in your cPanel installation. Log into your cPanel account and look for WordPress-related tools. Some hosts provide WP Toolkit (the premium option), others use Softaculous, and some offer both. A few budget hosts might only give you File Manager access, which means you’ll be doing everything manually. Knowing what you have determines which method you’ll use.
The installation method you choose should match your situation. If you’re simply adding a well-known plugin like Yoast SEO or Contact Form 7, the WordPress dashboard route is absolutely the way to go – it’s faster, safer, and requires no technical knowledge. But if you’re locked out of your dashboard, need to install a custom plugin that isn’t in the repository, or are troubleshooting an existing plugin issue, that’s when cPanel methods become essential.
Now let’s talk about backups, because this is where many people skip a critical step. You might think “it’s just a small plugin, what could go wrong?” – but I’ve seen a single poorly-coded plugin bring down entire sites. Before making any plugin changes, create backups of three things: your complete file system, your WordPress database, and a list of currently active plugins with their version numbers.
Most cPanel installations include backup tools under “Files” → “Backup” or “Backup Wizard.” Generate a full home directory backup and download it to your local computer. For the database, use phpMyAdmin (found under “Databases”) to export your WordPress database. Yes, this takes time. Yes, you’ll probably never need these backups. But the one time you do need them, they’ll save you from catastrophic data loss that could take weeks to recover from (or might be unrecoverable entirely).
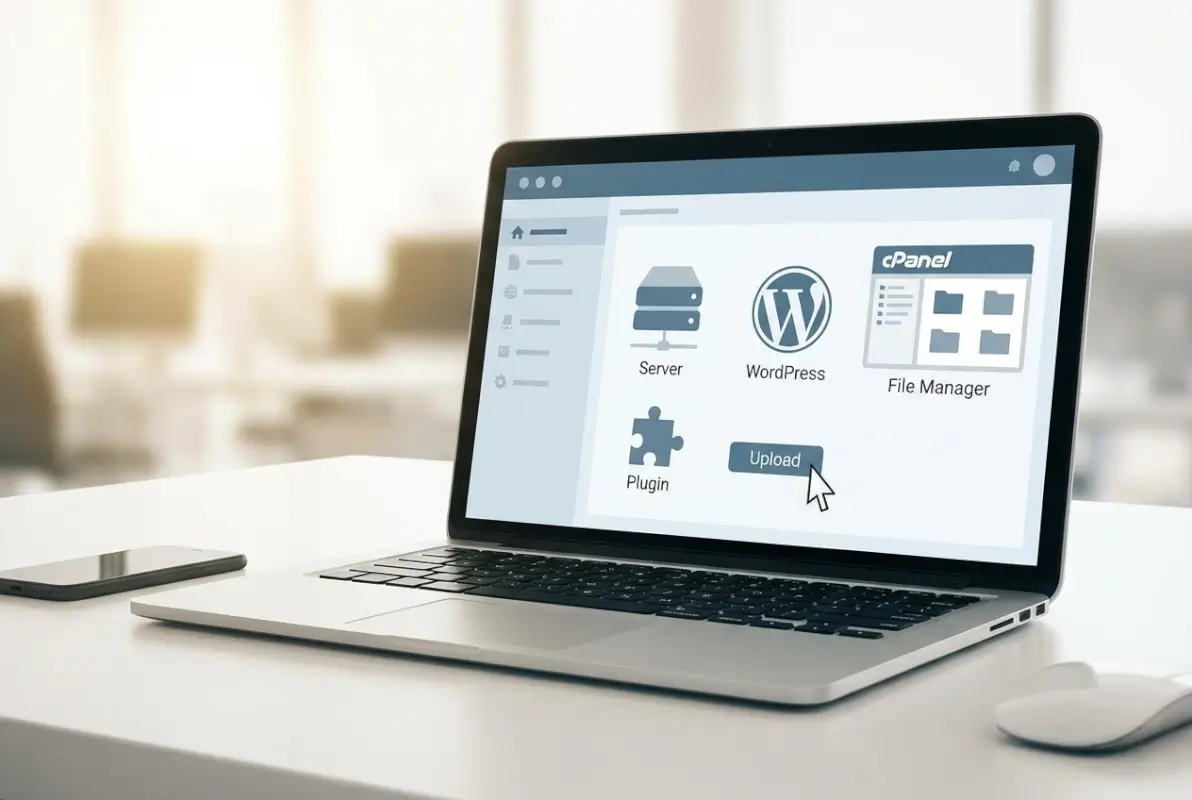
Accessing WordPress Through cPanel: Your Available Options
Understanding how to manage WordPress from within cPanel opens up capabilities that go far beyond simple plugin installation. Let’s explore the primary tools you’ll encounter and when each one makes the most sense.
WP Toolkit is the premium solution that many quality hosting providers include. It’s developed by cPanel and provides a centralized dashboard for managing multiple WordPress installations from one place. When you open WP Toolkit, you’ll see all your WordPress sites listed with their versions, plugin counts, and security statuses. From here, you can install new WordPress instances, manage existing ones, update core files, and yes – install and manage plugins across all sites.
The beauty of WP Toolkit is that it gives you visibility into plugin versions, security vulnerabilities, and update status without logging into each individual WordPress admin area. If you’re managing multiple sites, this is genuinely a time-saver. You can also create staging environments with a single click, which is perfect for testing new plugins before deploying them to your live site.
| Tool | Best For | Learning Curve | Limitations |
|---|---|---|---|
| WP Toolkit | Multi-site management, updates, staging | Low | Not available on all hosts |
| Softaculous | Quick WordPress installation, basic updates | Low | Limited plugin management features |
| File Manager | Manual uploads, troubleshooting, custom plugins | Medium | Requires understanding of file structure |
| WordPress Dashboard | Standard plugin installation from repository | Very Low | Requires dashboard access |
Softaculous is the more common auto-installer you’ll find on budget and mid-tier hosting. It’s primarily designed for installing WordPress (and other CMS platforms) with just a few clicks, but it also provides basic management capabilities. You’ll find it under “Software” or sometimes labeled as “WordPress Manager by Softaculous.” While it doesn’t offer the comprehensive plugin management that WP Toolkit does, it handles WordPress installation smoothly and provides one-click updates for core files.
Some hosting providers are transitioning away from Softaculous toward their own “Add a Site” or “Website Builder” interfaces. These proprietary systems vary wildly in capability, so you’ll need to explore what your specific host offers. The key question to ask: can you manage plugins from this interface, or is it only for site creation?
The File Manager deserves special attention because it’s your universal fallback. Every cPanel installation includes it, and it provides direct access to your site’s file system. Think of it as Windows Explorer or Mac Finder for your web hosting account. You can upload files, create folders, edit files, change permissions, and more. When every other method fails, File Manager is your lifeline.
Installing Plugins From WordPress Admin Dashboard: The Standard Approach
Let’s start with the method you’ll use 90% of the time, because it’s simple, safe, and exactly what WordPress was designed for. If you have access to your WordPress admin dashboard and you’re installing a plugin from the official repository, this is absolutely the route to take.
Log into your WordPress admin area (usually yoursite.com/wp-admin) and navigate to Plugins → Add New from the left sidebar. You’ll see a search box at the top right of the screen. Type in the name or functionality of the plugin you’re looking for – for example, “contact form” or “SEO optimization.” WordPress will display results from the official plugin repository, showing you the plugin name, description, active installation count, and star rating.
Here’s where many people make their first mistake: they install the first result without checking any details. Before clicking that Install Now button, take 30 seconds to verify a few things. Look at the “Last Updated” date – if it hasn’t been updated in over a year, that’s a red flag that the developer may have abandoned it. Check the “Active Installations” count; higher numbers generally indicate more thoroughly tested plugins. Read through the star ratings and skim a few recent reviews for any mentions of conflicts or security issues.
The business directory ecosystem demonstrates this perfectly. Popular directory plugins show millions of active installations and consistent updates, while abandoned alternatives languish with outdated code that can create security vulnerabilities. This pattern holds true across all plugin categories.
Once you’ve verified the plugin looks legitimate and actively maintained, click the “Install Now” button. WordPress will download and extract the plugin files automatically. This process usually takes just a few seconds. When it completes, the button changes to “Activate.” Clicking Activate enables the plugin on your site. Some plugins will immediately redirect you to a settings or welcome screen; others simply activate in the background.
After activation, always test your site’s core functionality. Visit your homepage, check that forms still work, ensure your admin area is still accessible, and verify that any critical features (e-commerce checkout, membership login, etc.) still function properly. I’ve seen plugins that seemed harmless create conflicts that broke essential site features, so this quick check can save you from discovering issues when a customer tries to make a purchase.
What happens when you encounter compatibility issues or updates? The WordPress admin area will show you notifications when updates are available for plugins. Before updating, especially for major version jumps, check the plugin’s changelog (found on the plugin’s WordPress.org page or in your admin area) for any notes about compatibility requirements. Some updates require specific PHP versions or WordPress core versions, and installing them on incompatible systems can break your site.
Manual Plugin Installation Via cPanel: When You Need Direct Server Access
Now we’re getting into the territory where things become more hands-on. Manual installation through cPanel is what you need when the WordPress dashboard isn’t an option – whether because you’re locked out, you’re installing a custom plugin not in the repository, or you’re troubleshooting an issue that requires direct file access.
The first critical step is obtaining the plugin ZIP file from a trusted source. If it’s an official plugin, download it directly from WordPress.org – navigate to the plugin’s page and click the Download button. If it’s a premium plugin you purchased, download it from the developer’s official website using your account credentials. Never, and I mean never, download plugins from file-sharing sites, torrent repositories, or sketchy “free premium plugin” websites. These are overwhelmingly infected with malware, backdoors, or obfuscated code that will compromise your site.
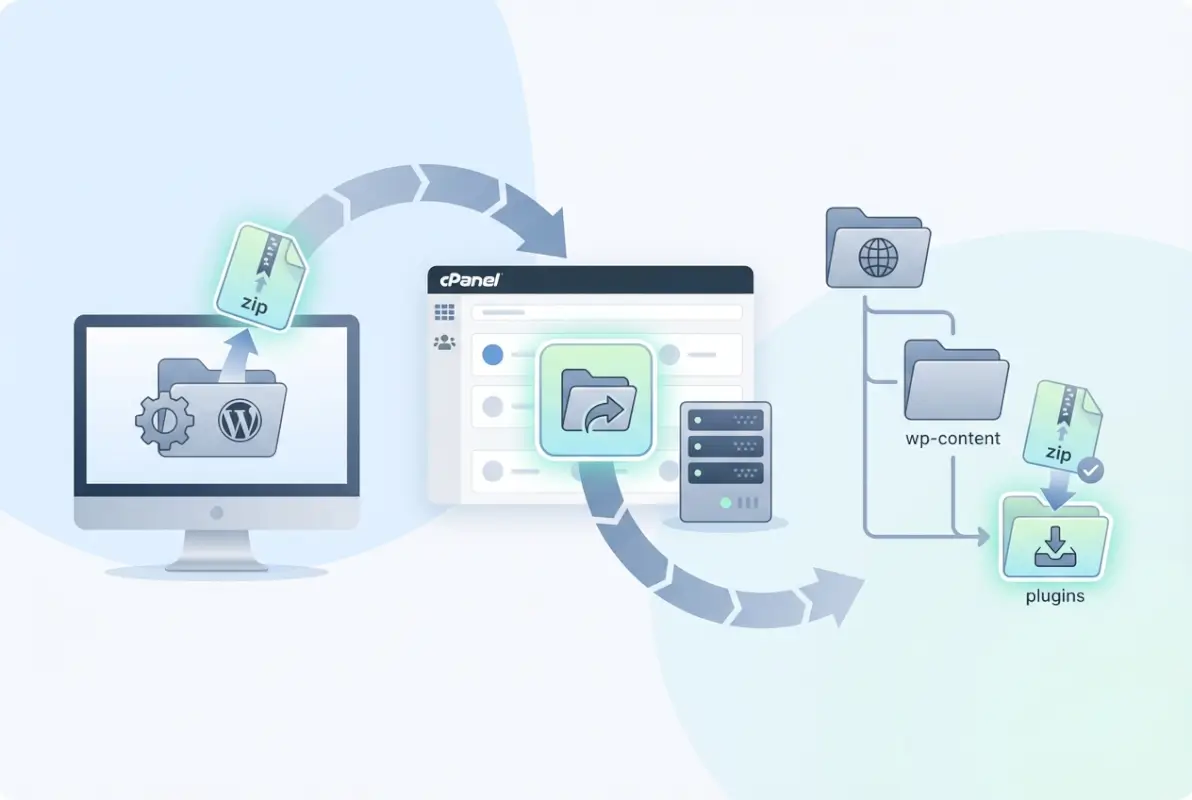
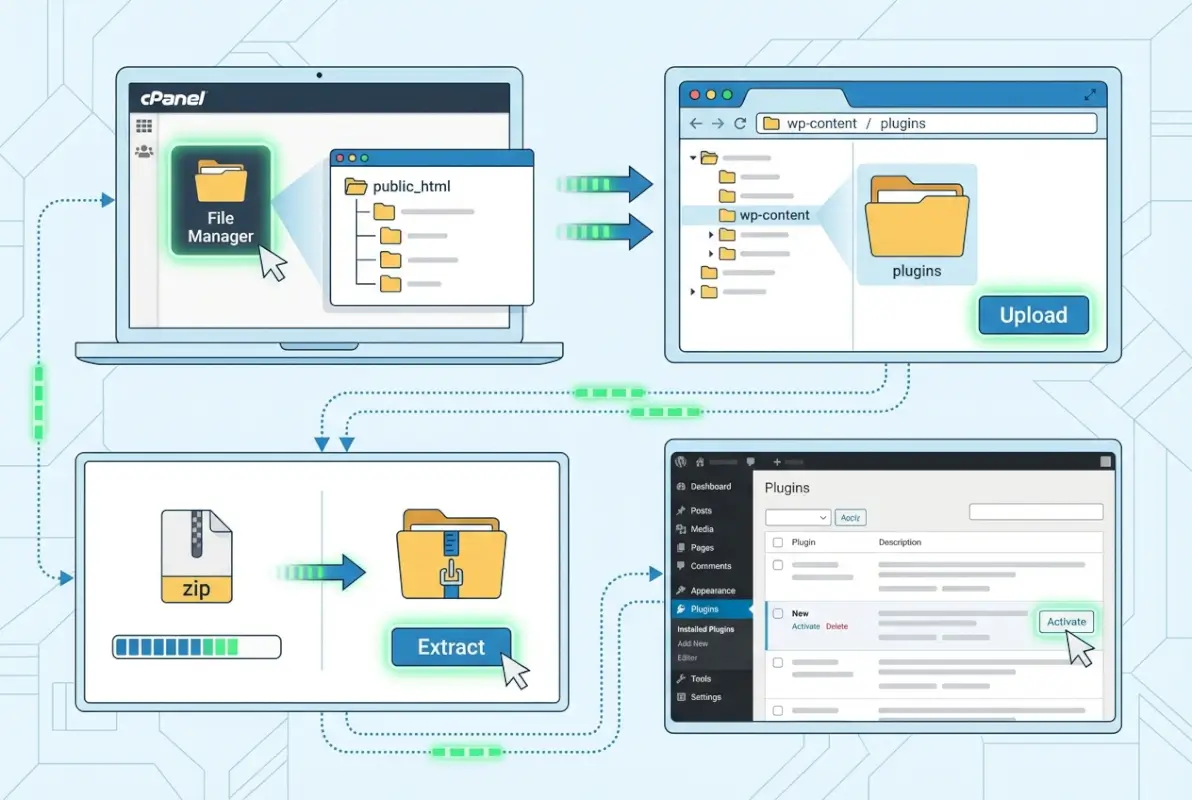
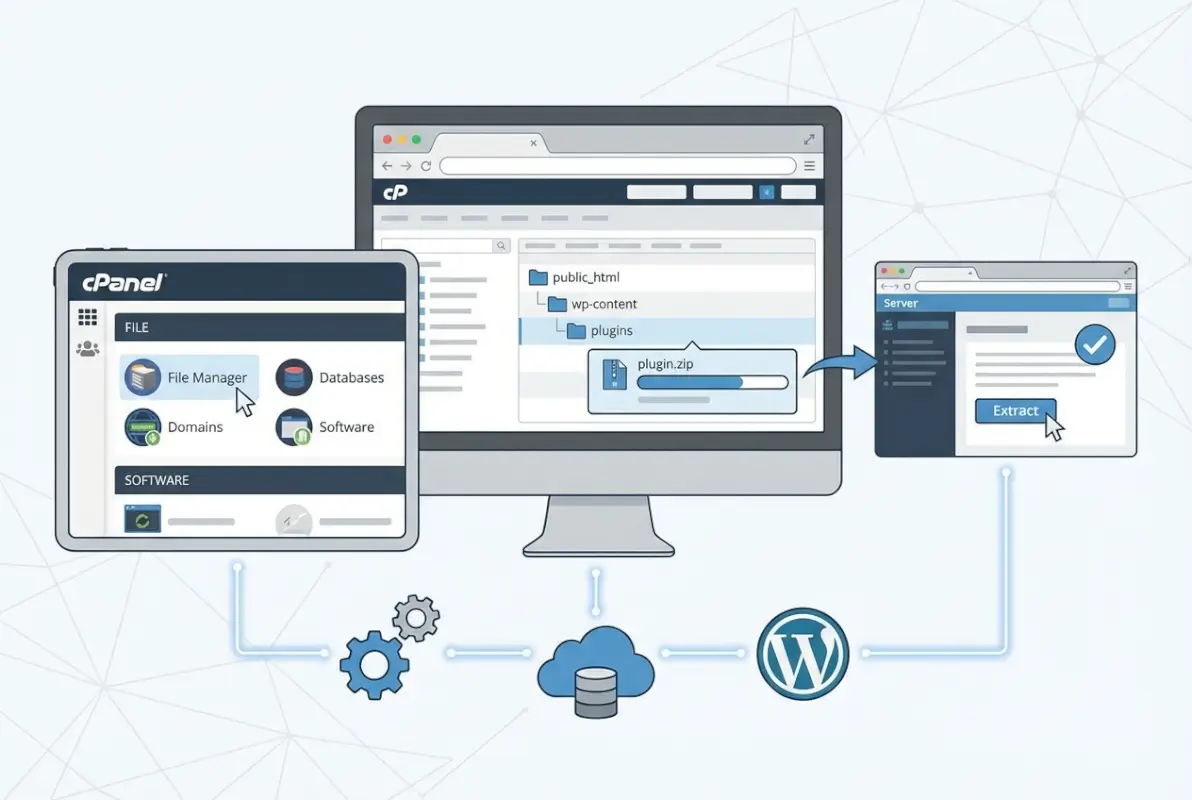
With your legitimate plugin ZIP file downloaded to your computer, open cPanel and navigate to the File Manager (usually found under “Files”). File Manager will open showing your hosting account’s file structure. You need to navigate to your WordPress installation directory – typically public_html for the main domain, or public_html/subdirectory-name for sites in subfolders. Once you’re in the WordPress root directory, open the wp-content folder, then the plugins folder. This is where all WordPress plugins live.
Click the Upload button at the top of File Manager. This opens a simple upload interface. Drag your plugin ZIP file onto the upload area or click to browse and select it. The upload progress bar will show the transfer. Once complete, close the upload interface and return to the File Manager view. You should now see your plugin ZIP file listed in the plugins directory.
Now comes the extraction step, which is where most manual installation problems occur. Right-click on the ZIP file and select “Extract.” File Manager will ask you to confirm the destination path – make absolutely certain it shows the path to your plugins directory (something like /home/username/public_html/wp-content/plugins/). Click the Extract button and wait for it to complete. When finished, you should see a new folder with the plugin’s name appear in the plugins directory.
Here’s a mistake I see constantly on WordPress support forums: people extract the ZIP to the wrong location or create nested folders. The correct structure is wp-content/plugins/plugin-name/ with the plugin’s PHP files directly inside that folder. If you accidentally created wp-content/plugins/plugin-name/plugin-name/, WordPress won’t recognize it. If this happens, use File Manager’s move function to correct the structure.
After extraction, you can safely delete the ZIP file to save space. Now comes the crucial step: activating the plugin. You can’t do this from cPanel – you must log into your WordPress admin area, go to Plugins → Installed Plugins, and you’ll see your newly uploaded plugin in the list (probably marked as inactive). Click the Activate link beneath it.
File permissions deserve a quick mention because they occasionally cause problems. WordPress expects plugin directories to have 755 permissions and plugin files to have 644 permissions. If you’re experiencing issues and have verified the folder structure is correct, right-click the plugin folder in File Manager, select “Change Permissions,” and set the folder to 755. Then change the PHP files inside to 644. This resolves many mysterious “plugin not working” issues.
Leveraging cPanel Tools for Enhanced Plugin Management
Beyond simple installation, cPanel tools offer capabilities that can streamline your entire WordPress plugin workflow. Let’s explore how to use these tools effectively, because many people don’t realize the full potential of what they have available.
If your hosting provides WP Toolkit, you’re sitting on a goldmine of functionality that most site owners underutilize. Open WP Toolkit from your cPanel main menu – it usually has its own prominent icon. Once inside, you’ll see all your WordPress installations listed. Click on the site you want to manage, and you’ll enter a detailed dashboard showing security status, update availability, and installed plugins.

The plugin management section in WP Toolkit shows not just your installed plugins, but also highlights which ones have available updates and, crucially, which ones have known security vulnerabilities. This security scanning is integrated with vulnerability databases, giving you early warning when a plugin you’re using has been compromised or has a newly discovered security flaw. You can install, activate, deactivate, and remove plugins directly from this interface without ever logging into WordPress.
WP Toolkit’s staging environment feature is particularly valuable for plugin testing. Create a clone of your live site with one click, install and test new plugins on the staging version, and if everything works properly, push the changes to your live site. This workflow prevents the all-too-common scenario of installing a plugin on your live site only to discover it conflicts with your theme or another plugin, leaving you scrambling to fix issues while customers are trying to access your site.
For those using Softaculous or similar WordPress Manager tools, the functionality is more limited but still useful. You can typically install WordPress instances, manage core updates, and access basic site information. Comprehensive business directories and other complex WordPress setups often benefit from the streamlined installation Softaculous provides, even if ongoing management happens through WordPress admin or WP Toolkit.
The File Manager approach requires more technical knowledge but offers unmatched control. You can directly edit plugin files (useful for debugging or applying hotfixes while waiting for official updates), mass-upload multiple plugins simultaneously, and troubleshoot issues that would be impossible to resolve through WordPress admin alone. For example, if a faulty plugin is causing white screen errors that prevent dashboard access, File Manager lets you rename the plugin folder (which deactivates it) so you can regain access to your site.
When uploading plugins via File Manager for multiple sites, you can significantly speed up the process by uploading plugin ZIPs to a temporary folder first, then extracting and moving them to the appropriate sites’ plugin directories. This avoids re-uploading the same file multiple times. Just remember that each WordPress installation is independent – you can’t “share” a plugin across multiple sites at the file level without creating a multisite network.
Security Considerations That Actually Matter
I’ve deliberately separated security into its own section because this is where theory meets reality, and where cutting corners can have devastating consequences. The WordPress ecosystem is fundamentally secure, but plugins represent the weakest link in that security chain.
Let’s start with source reputation, because this is your first and most important line of defense. The official WordPress.org plugin repository implements code review processes and monitors for malicious behavior. It’s not perfect – vulnerabilities do make it through – but it’s exponentially safer than downloading from random websites. Premium plugins from established companies like WooCommerce, Advanced Custom Fields, or Gravity Forms have their reputations on the line and generally maintain high security standards.
What you must avoid entirely are nulled plugins (premium plugins offered for free on shady websites). These are almost universally compromised with backdoors, malware, or code that will eventually hold your site hostage. The “savings” from not paying for a $50 plugin aren’t worth the thousands you’ll spend on security cleanup or the permanent reputation damage from serving malware to your visitors. I’ve helped recover sites from nulled plugin infections, and it’s a nightmare of obfuscated code hidden in dozens of files across the installation.
This brings us to updates, which deserve a more nuanced discussion than the standard “always update immediately” advice. Yes, keeping plugins updated is critical for security. But blindly updating everything the moment a new version appears can break your site if the update introduces bugs or compatibility issues. The balanced approach: enable automatic updates for security-only patches, but test major version updates on a staging environment first.
WordPress added automatic background updates for plugins specifically to address the long patch delay problem. Most people should enable this feature (found in WordPress 5.5+ under Plugins → Auto-updates) at least for established plugins from trusted developers. This ensures security patches are applied quickly while you’re sleeping or away from your computer, closing the window of vulnerability.
| Security Practice | Impact | Difficulty |
|---|---|---|
| Only install from official repository or verified developers | High | Easy |
| Enable automatic security updates | High | Easy |
| Remove unused/inactive plugins | Medium | Easy |
| Regular security audits of installed plugins | Medium | Medium |
| Monitor for vulnerability announcements | High | Medium |
Web hosting security deserves mention because your hosting environment provides the foundation for everything else. Choose a host that implements server-level security measures: firewalls, malware scanning, automatic backups, and PHP version management. Many compromises happen not because of plugin vulnerabilities per se, but because outdated server software allows attackers to exploit those vulnerabilities in ways that would be blocked on properly hardened hosting.
The official WordPress Security Team publishes guidance at wordpress.org/about/security that covers hardening practices beyond plugins. Implementing recommendations like disabling file editing, using strong authentication, and limiting login attempts creates a defense-in-depth approach where even if a plugin vulnerability exists, exploiting it becomes significantly harder.
Finally, let’s address the elephant in the room: plugin quantity. I’ve seen sites running 80+ plugins, and while WordPress can technically handle that, each additional plugin is another potential vulnerability, another source of conflicts, and another thing that can break. Quality over quantity applies here – often you can replace five mediocre plugins with one well-designed comprehensive solution, reducing complexity while improving functionality.
Troubleshooting Common Plugin Installation Problems
Even when you follow best practices, things sometimes go wrong. Understanding common failure modes and their solutions will save you hours of frustration and prevent panic when issues arise.
The most frequent problem people report is “plugin not appearing after upload.” You’ve used File Manager to upload the ZIP, you’ve extracted it, but it doesn’t show up in your WordPress plugin list. In 90% of cases, this is a folder structure issue. Log back into File Manager and navigate to wp-content/plugins. Look at your plugin folder. Open it. Do you see PHP files and folders immediately, or do you see another folder with the plugin name? If it’s the latter, you have a nested folder problem. The files need to be one level higher. Select all the contents of that inner folder, move them up one level, and delete the now-empty nested folder.
Permission issues present differently. The plugin appears in your list but won’t activate, or it activates but doesn’t function properly. Sometimes you’ll see error messages about being unable to write files or create directories. This indicates incorrect file permissions. The standard WordPress file permission structure is 755 for directories and 644 for files. Use File Manager to set these permissions recursively on the plugin folder. Right-click the folder, choose Change Permissions, set it to 755, and check the “Recurse into subdirectories” option.
PHP version incompatibility creates interesting failure modes. Modern plugins increasingly require PHP 7.4 or higher, but some hosting accounts still run older versions. When a plugin requires a newer PHP version than your server provides, you might see white screen errors, fatal error messages mentioning undefined functions, or the plugin simply won’t activate with a vague error message. Check your PHP version in cPanel (usually under “Select PHP Version” or in the PHP information section). If it’s outdated, you can usually upgrade through cPanel, though you should test on a staging site first since updating PHP can break old themes and plugins.
Conflict scenarios are particularly tricky to diagnose. You install a new plugin and suddenly your contact forms stop working, or your admin area loads with a broken layout. This happens when plugins try to use the same JavaScript libraries in incompatible versions, or when two plugins both try to modify the same WordPress hooks in conflicting ways. The solution is systematic elimination: deactivate all plugins except the new one, verify your site works, then reactivate plugins one by one until the conflict reappears. When you identify the conflicting plugin, you’ll need to choose which one is more important or find an alternative that doesn’t conflict.
Memory limit errors present as “Allowed memory size exhausted” messages. Some plugins, particularly those handling image processing or complex operations, require more PHP memory than the default allocation. You can increase this by editing your wp-config.php file in File Manager. Add the line define(‘WP_MEMORY_LIMIT’, ‘256M’); before the “That’s all, stop editing!” comment. This increases WordPress’s memory limit to 256MB, which resolves most memory-related plugin issues.
For statewide business directory platforms and other data-intensive applications, resource limits become even more important. These sites often handle thousands of listings with complex queries, requiring not just adequate memory but also proper caching and optimization strategies.
Practical Best Practices and Installation Checklist
Let’s consolidate everything into actionable practices you can implement immediately. These aren’t theoretical ideals – they’re the workflow I use personally and recommend to clients managing WordPress sites of all sizes.
Before installing any plugin, do your due diligence. Visit the plugin’s page on WordPress.org (if it’s free) or the developer’s official website (if premium). Read the description thoroughly to ensure it actually does what you need – plugin names can be misleading. Check the ratings, but read the actual reviews, paying special attention to recent ones. Look at the support forum to see how responsive the developer is and what kinds of issues people report. Check the “Last Updated” date and verify it’s been updated within the last six months.
Test compatibility on a staging site whenever possible. This is especially critical for e-commerce sites, membership platforms, or any site where downtime translates to lost revenue. Create a staging clone (using WP Toolkit, a plugin like WP Staging, or manual duplication), install and test the new plugin there, and only move it to production after confirming everything works correctly. Yes, this takes extra time. But it’s far less time than recovering from a broken production site.
Implement a plugin documentation system, even if it’s just a simple spreadsheet. Record which plugins you have installed, their version numbers, their purposes, and when you last reviewed them. Include notes about any special configuration or dependencies. This becomes invaluable when troubleshooting issues months later or when handing off site management to someone else.
After installing and activating a plugin, perform a complete site functionality test. Click through your main navigation, submit test forms, verify search works, check that user login functions properly, and browse different page types. Look at your site on mobile devices and different browsers. Many plugin conflicts only manifest under specific conditions that you won’t notice unless you actively test.
Set up ongoing hygiene routines. Monthly: check for plugin updates and review security announcements. Quarterly: audit your full plugin list and remove anything you’re not actively using. Annually: evaluate whether plugins that were once necessary might now be replaced by WordPress core features or better alternatives that have emerged. The business directory sector in areas like Douglas County shows how local business needs evolve, requiring periodic reassessment of the tools you’re using.
Quick-Start Installation Workflows
Sometimes you just need the step-by-step without all the context. Here are three streamlined workflows for different scenarios, like recipes you can follow exactly.
Standard Dashboard Installation (Recommended for Most Cases):
- Log into WordPress Admin at yoursite.com/wp-admin
- Navigate to Plugins → Add New
- Search for your desired plugin by name or functionality
- Verify: last updated within 6 months, 4+ star rating, substantial active installations
- Click “Install Now” and wait for completion
- Click “Activate” when the button appears
- Follow any setup wizard or configure plugin settings as needed
- Test core site functionality to ensure no conflicts
Manual Upload Via cPanel File Manager (For Custom or Premium Plugins):
- Download plugin ZIP from official source only
- Create full site backup before proceeding
- Log into cPanel and open File Manager
- Navigate to public_html/wp-content/plugins/ (adjust path for your installation)
- Click Upload button and select your plugin ZIP file
- After upload completes, right-click ZIP file and select Extract
- Verify extraction path is correct, then extract
- Delete the ZIP file after successful extraction
- Verify folder structure: wp-content/plugins/plugin-name/[PHP files here]
- Log into WordPress Admin → Plugins → Installed Plugins
- Locate your new plugin and click Activate
- Configure settings and test functionality
WP Toolkit Installation (When Available):
- Open WP Toolkit from cPanel main menu
- Click on your WordPress site to open its dashboard
- Navigate to the Plugins section
- Click “Install” and search official repository
- Select your desired plugin and click Install
- Enable activation and configure as needed
- Use WP Toolkit’s security scan to verify no vulnerabilities
Frequently Asked Questions About Installing WordPress Plugins Through cPanel
How do I install a WordPress plugin in cPanel?
You can install plugins through cPanel using File Manager by uploading the plugin ZIP to wp-content/plugins, extracting it, and activating from WordPress admin. Alternatively, use WP Toolkit if available for streamlined management. The standard WordPress dashboard method is recommended for plugins from the official repository, while cPanel methods are best for manual uploads or troubleshooting.
Is it safer to install plugins from WordPress admin or via cPanel?
Installing through the WordPress admin dashboard is generally safer because WordPress automatically validates plugins from the official repository and handles file permissions correctly. cPanel installation is equally safe when done properly but introduces more opportunities for errors like incorrect folder structure or permissions. Use cPanel methods when dashboard access isn’t available or for custom plugins.
What should I do if a plugin doesn’t appear after upload?
Check the folder structure in File Manager at wp-content/plugins. The plugin files should be directly inside a folder with the plugin name, not nested in multiple folders. Verify you extracted the ZIP file rather than just uploading it. Check file permissions are set to 755 for directories and 644 for files. If still not appearing, re-download the plugin and try again.
Can I install plugins without WordPress admin access?
Yes, you can upload plugins via cPanel File Manager to the wp-content/plugins directory and they’ll appear in your plugin list. However, you still need WordPress admin access to activate them. If you’re completely locked out, you can manually activate plugins by adding their names to the active_plugins option in your WordPress database using phpMyAdmin, though this is advanced and risky.
How do I keep plugins secure and up to date in WordPress?
Enable automatic updates for plugins in WordPress admin under Plugins → Auto-updates. Regularly check for updates manually, especially for security-critical plugins. Only install plugins from official repositories or trusted developers. Remove unused plugins entirely rather than just deactivating them. Subscribe to security newsletters and monitor vulnerability announcements for plugins you use.
What are common issues when installing plugins from ZIP via cPanel?
The most common problems are incorrect folder structure after extraction, uploading to wrong directory, file permission errors, and PHP version incompatibility. Always verify the plugin folder contains PHP files directly, not another nested folder. Ensure you’re uploading to wp-content/plugins specifically. Set proper permissions (755/644) and confirm your PHP version meets plugin requirements.
How can I verify a plugin’s reliability before installing it?
Check the plugin’s last update date (should be within 6 months), active installation count (higher is generally better), star rating (4+ stars), and reviews for recent issues. Visit the support forum to see developer responsiveness. Research the developer’s reputation and check for known security vulnerabilities. Test on staging environment before production deployment if the site is business-critical.
Should I use WP Toolkit or Softaculous for plugin management?
WP Toolkit offers more comprehensive plugin management features including security scanning, update management, and staging environments. Softaculous focuses primarily on WordPress installation with basic update capabilities. If your host provides WP Toolkit, use it for plugin management. Softaculous is sufficient for simple installations but less useful for ongoing plugin administration.
What file permissions should WordPress plugins have?
Plugin folders should have 755 permissions (readable and executable by everyone, writable by owner), while plugin files should have 644 permissions (readable by everyone, writable by owner). These settings provide security while allowing WordPress to function properly. Never set permissions to 777 as this creates serious security vulnerabilities that attackers can exploit.
Can I copy plugins directly between WordPress installations?
Technically yes – you can copy plugin folders from one site’s wp-content/plugins directory to another’s. However, this bypasses proper installation procedures and doesn’t transfer database tables or settings. It’s better to install plugins properly on each site. If you manage multiple sites with similar plugins, WP Toolkit can help synchronize updates across installations safely.
Understanding how to install WordPress plugins through cPanel isn’t just about knowing the technical steps – it’s about having multiple tools in your arsenal for different situations. The WordPress dashboard remains your primary method for routine installations, offering simplicity and safety for the vast majority of plugin additions. But when things go wrong, when you need more control, or when you’re working with custom solutions, knowing your way around cPanel’s File Manager, WP Toolkit, and Softaculous becomes invaluable.
The security implications matter more than the installation mechanics. A perfectly installed plugin from an untrusted source is far more dangerous than a slightly messy installation from the official repository. Always prioritize source verification, regular updates, and periodic audits of what you actually have installed and running.
Take what you’ve learned here and implement it systematically. Start by auditing your current plugins – document what you have, remove what you don’t need, and ensure everything is updated. Then experiment with the different installation methods in a staging environment so you’re comfortable with them before an emergency arises. Create your backup routine now, before you need it desperately.
The WordPress plugin ecosystem continues evolving with thousands of new plugins and updates released every week. Staying informed about security best practices and maintaining good plugin hygiene isn’t a one-time task, it’s an ongoing commitment that directly impacts your site’s security, performance, and reliability. With the knowledge you’ve gained here, you’re equipped to make informed decisions and handle whatever plugin-related challenges come your way.
Was this article helpful?