How to Install WordPress Plugins Manually: A Step-by-Step Tutorial
Generating summary...
Let me be honest with you: most WordPress tutorials make manual plugin installation sound either scary or trivial. The truth lives somewhere in between. I’ve spent years managing WordPress sites—from small personal blogs to multi-author platforms—and I can tell you that knowing how to install plugins manually isn’t just a technical party trick. It’s essential knowledge that gives you control when automatic installations fail, when you’re working with premium plugins, or when you need to troubleshoot issues that the WordPress repository can’t solve for you.
Here’s what most guides won’t tell you upfront: manual plugin installation is actually your safety net. When hosting environments restrict automatic updates, when you’re testing custom code, or when you need a plugin that hasn’t made it to the official directory yet, understanding these manual methods keeps your site running. And honestly? Once you’ve done it a few times, it becomes second nature.
TL;DR – Quick Takeaways
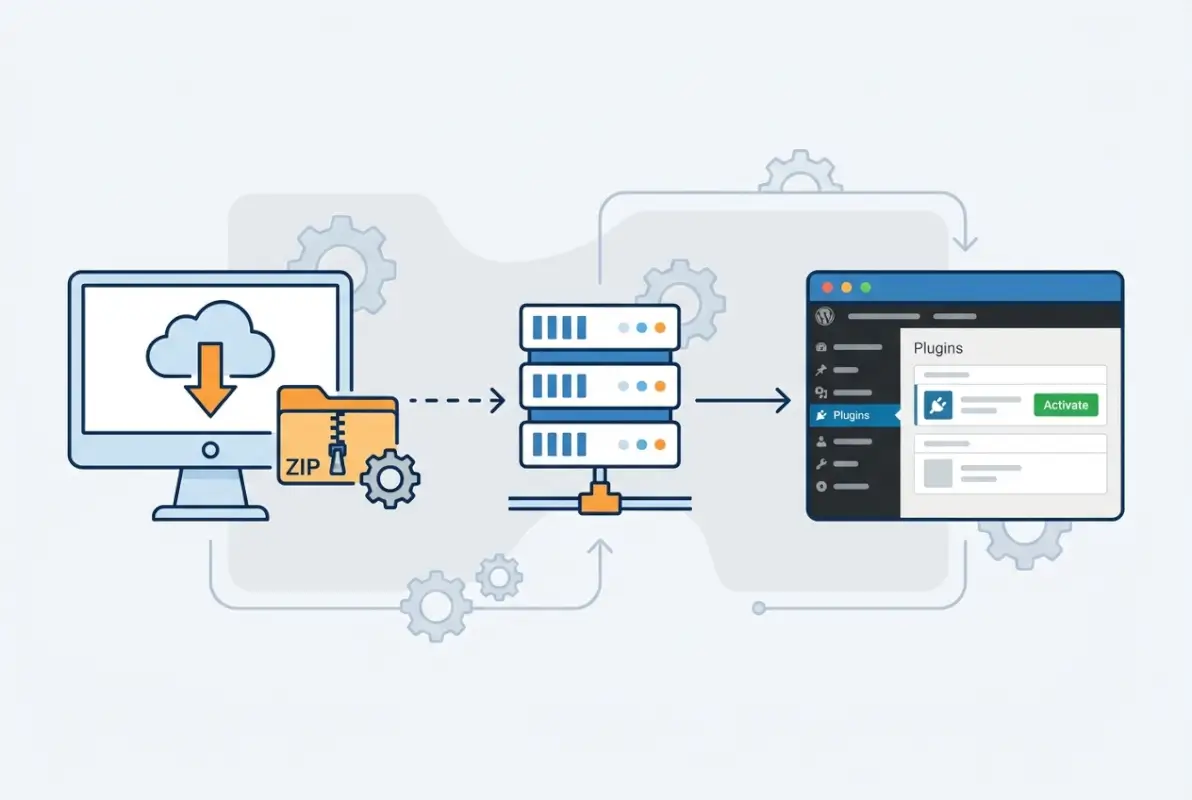
- Three primary methods exist – Dashboard ZIP upload (easiest), FTP/SFTP upload (most control), and WP-CLI (fastest for bulk operations)
- Always backup first – Manual installation carries risks; create full site backups before touching plugins
- Source verification matters – Only download plugins from trusted sources to avoid malware and compatibility issues
- File permissions are critical – Use 755 for directories and 644 for files when uploading via FTP/SFTP
- Test before production – Staging environments save you from breaking live sites with incompatible plugins
Understanding When to Use Manual Plugin Installation
Not every plugin situation calls for manual installation. The WordPress plugin repository handles most needs beautifully with its one-click install system. But certain scenarios absolutely demand the manual approach, and recognizing these situations separates confident site administrators from frustrated ones.
Premium plugins represent the most common reason for manual installation. When you purchase plugins from third-party marketplaces like CodeCanyon or directly from developers, you receive ZIP files that won’t appear in the WordPress repository. These plugins often provide advanced functionality that justifies their price tag, but they require you to handle installation yourself. Similarly, custom or bespoke plugins developed specifically for your project need manual deployment since they exist nowhere else.
Another frequent scenario involves plugins removed from the official repository. Sometimes developers discontinue support, or WordPress.org removes plugins for guideline violations. If you’re running a legacy version of such a plugin (and have verified it’s safe), manual installation becomes your only option. The same applies to beta versions and development releases—testing cutting-edge features means working outside the repository system.
Let’s talk about the risks nobody wants to discuss. Manual installation opens doors for malware if you’re not careful about sources. I remember downloading what looked like a legitimate SEO plugin from a random forum—it turned out to be malware that injected spam links into my footer. That painful lesson taught me to verify every single source. Check developer credentials, read reviews from multiple platforms, and when possible, compare file checksums if the developer provides them.
File permissions present another common pitfall. Upload plugins with incorrect permissions, and you’ll either expose security vulnerabilities or prevent WordPress from accessing necessary files. Your hosting environment matters too—shared hosting often restricts certain operations that dedicated or VPS hosting allows freely.
| Installation Method | Best For | Difficulty Level | Speed |
|---|---|---|---|
| Repository Auto-Install | Free, verified plugins | Beginner | Instant |
| Dashboard ZIP Upload | Premium plugins, single installs | Beginner | Fast |
| FTP/SFTP Upload | Troubleshooting, permission control | Intermediate | Moderate |
| WP-CLI | Bulk operations, automation | Advanced | Very Fast |
Version compatibility checking becomes your responsibility with manual installation. WordPress repository installations warn you about compatibility issues automatically, but manual methods skip these checks. You need to verify that the plugin supports your WordPress version, your PHP version, and doesn’t conflict with your theme or other active plugins. This due diligence seems tedious until you’ve experienced a site crash from an incompatible plugin (trust me, it’s not fun).
Preparation and Prerequisites
Preparation separates successful manual installations from disaster recovery scenarios. I’ve learned this through experience—both my own mistakes and watching others skip crucial preparatory steps. The few extra minutes you invest in preparation can save hours of troubleshooting later.
Creating a complete backup before any plugin installation should be non-negotiable. Your backup needs to include both your database and your files. Most quality hosting providers offer automated backup solutions, but verify these backups actually exist and can be restored. I prefer using backup plugins like UpdraftPlus or BackupBuddy for complete control over backup timing and storage location.
If you’re working with a production site that generates revenue or serves important functions, consider creating a staging environment first. Staging sites let you test plugin installations without risking your live environment. Many modern hosting platforms include staging functionality built-in—Kinsta, WP Engine, and SiteGround all offer one-click staging creation. For those without built-in staging, plugins like WP Staging can create testing environments on shared hosting.
Verifying plugin legitimacy requires detective work. Start by researching the plugin developer—do they have a legitimate web presence? Check multiple sources for reviews, not just the developer’s own site. Trustpilot and similar review platforms can reveal red flags. Look for recent updates in the plugin’s changelog; abandoned plugins pose security risks regardless of their initial quality.
Check PHP version requirements carefully. WordPress itself might run on PHP 5.6 (though it shouldn’t), but modern plugins often require PHP 7.4 or higher. You can check your site’s PHP version through WordPress dashboard (Tools → Site Health) or by asking your hosting provider. Mismatched PHP versions cause cryptic error messages or worse—white screens of death that require emergency intervention.
Gathering necessary access credentials means different things depending on your chosen installation method. For dashboard uploads, you need administrator-level WordPress credentials. FTP/SFTP installations require server access credentials—typically a hostname, username, password, and port number (usually 21 for FTP or 22 for SFTP). Your hosting control panel should provide these details, though SFTP access sometimes needs explicit activation.
The tools you’ll need vary by method, but here’s what I keep ready: A reliable ZIP extraction utility (7-Zip for Windows, The Unarchiver for Mac), an FTP client like FileZilla or Cyberduck, and a text editor like Notepad++ or Sublime Text for quick file inspections. Having these tools installed and configured before you start saves frustration mid-process.
Method 1 — Upload and Activate via WordPress Dashboard (ZIP Upload)
The dashboard ZIP upload method offers the perfect balance between manual control and user-friendliness. This approach works for most users most of the time, and it’s where I recommend starting unless you have specific reasons to use FTP or command-line tools.
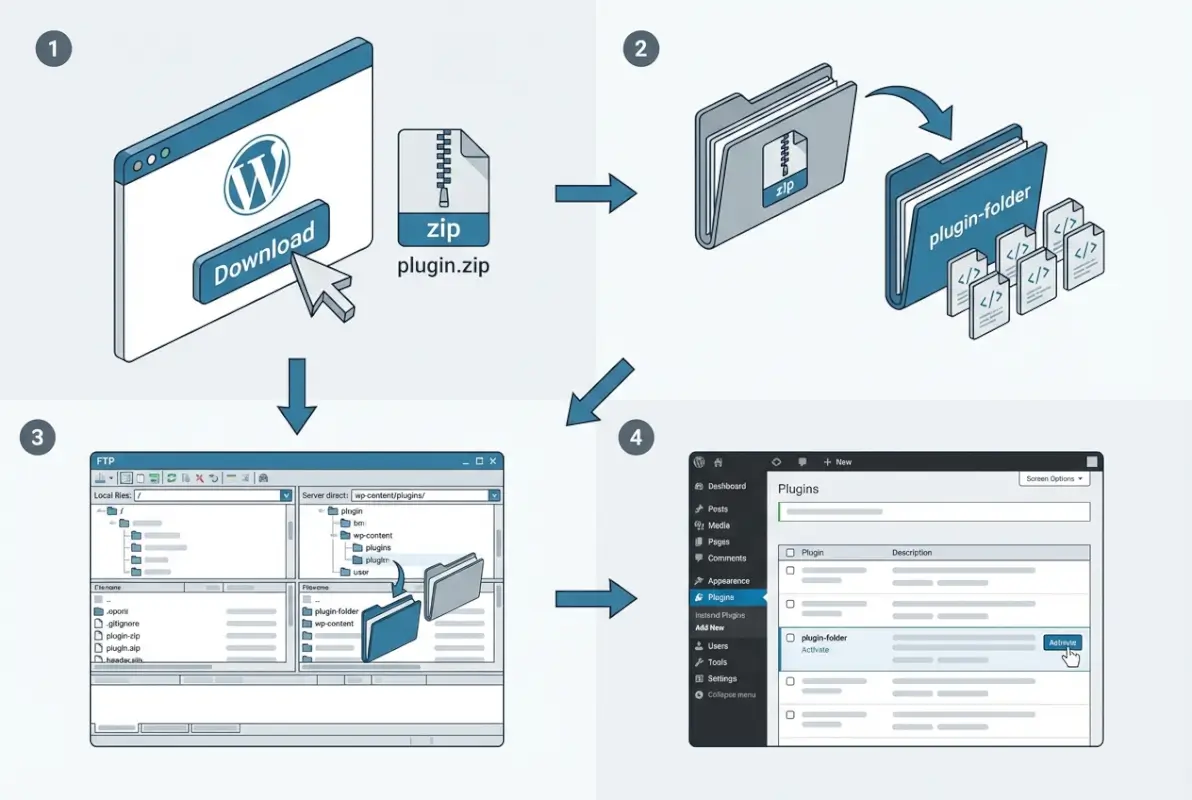
Start by obtaining your plugin ZIP file from a trusted source. This might be a premium plugin marketplace, a developer’s website, or a plugin you’ve received directly. The key requirement: the file must remain in ZIP format. Don’t extract it yet—WordPress needs the compressed archive to properly install the plugin structure. I keep a dedicated downloads folder for WordPress plugins to avoid confusion with other files.
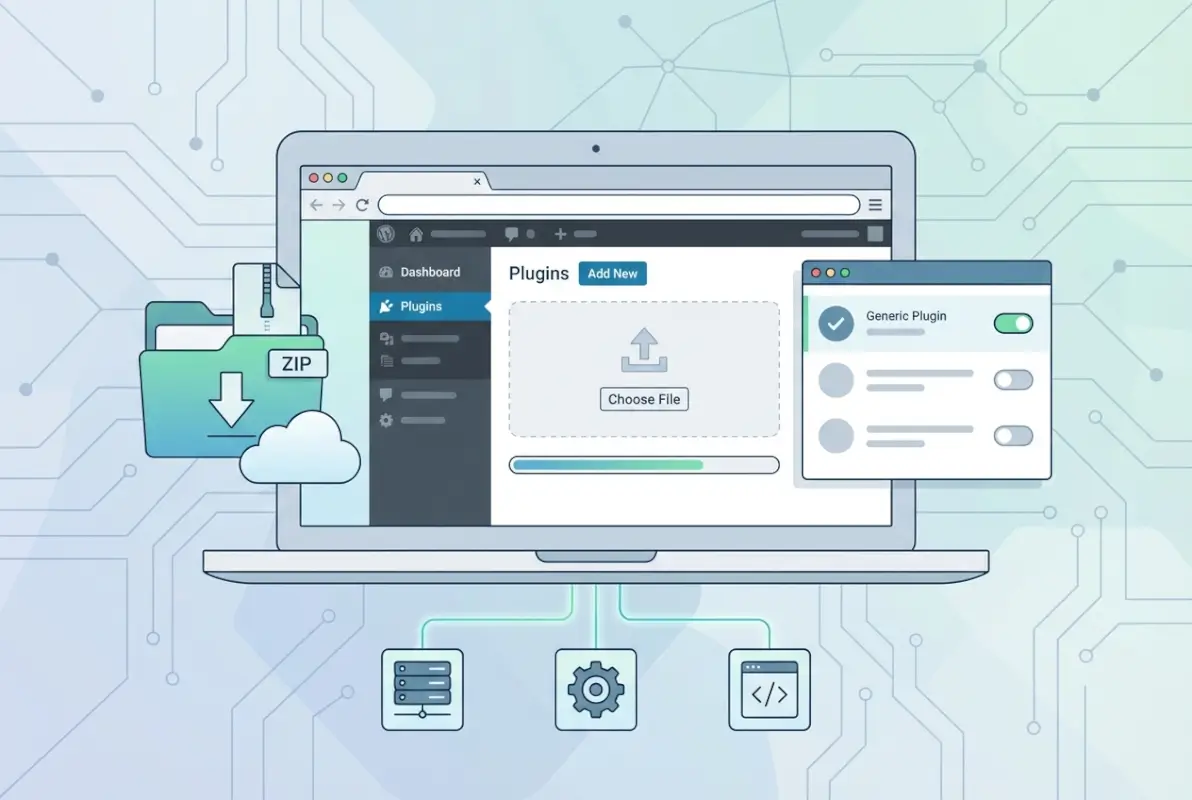
Log into your WordPress admin dashboard with administrator credentials. Navigate to Plugins → Add New, then look for the “Upload Plugin” button near the top of the page. Click it, and you’ll see a simple interface asking you to choose a file. Click “Choose File” and browse to your plugin ZIP. Once selected, click “Install Now” and WordPress begins the upload process.
Installation typically takes 10-30 seconds depending on plugin size and your connection speed. You’ll see a progress indicator, then a success message if everything goes smoothly. The success screen presents an “Activate Plugin” link—but don’t click it immediately. This is where patience pays off.
Before activating, take a moment to verify the installation. Navigate back to Plugins → Installed Plugins and locate your newly installed plugin in the list. Check the version number, author name, and description against what you expected. This verification catches problems before they affect your site. If you’re working with a business directory or community platform, double-checking compatibility becomes even more critical since these sites often have complex plugin ecosystems.
When you’re confident everything looks correct, activate the plugin. Most plugins redirect you to their settings page immediately after activation. Take time to configure critical settings before testing your site. Some plugins work perfectly with default settings, others require configuration to avoid conflicts or performance issues.
Common pitfalls with ZIP uploads include corrupted downloads—if your internet connection interrupted the download, the ZIP might be incomplete. WordPress usually catches this with an “incompatible archive” error, but not always. Re-downloading from a reliable source typically solves this problem. Another frequent issue involves nested ZIP files, where the plugin ZIP contains another ZIP inside it. This happens when developers package files incorrectly; you need to extract the outer ZIP and use the inner one instead.
Naming conflicts represent another headache. If you already have a plugin folder with the same name, WordPress refuses to install the new version. This situation happens when updating plugins manually or when you’ve installed different versions for testing. You’ll need to deactivate and delete the existing plugin first, or use FTP to rename the old plugin folder before uploading.
Method 2 — Manual Installation via FTP/SFTP (Uploading plugin folder)
FTP and SFTP uploads give you direct server access and maximum control over the installation process. This method becomes essential when dashboard uploads fail due to server restrictions, PHP timeout limits, or file size constraints. I’ve used this approach countless times when dealing with hosting environments that limit upload sizes or when WordPress admin access becomes unavailable.
Begin by downloading your plugin ZIP file and extracting it to a local folder. This step differs from the dashboard method—you need the actual plugin folder, not the ZIP archive. When you extract the ZIP, you should see a single folder named after the plugin. Inside that folder, you’ll find PHP files, subdirectories for assets, and typically a readme file. This folder structure is what you’ll upload to your server.
Open your FTP client and enter your server credentials. SFTP (the secure version) should be your default choice if your hosting supports it—it encrypts all data transmission, protecting your credentials and files. Most modern hosting providers support SFTP on port 22. Once connected, navigate to your WordPress installation directory, then into wp-content/plugins. This plugins directory houses all WordPress plugins, and you’ll see folders for each currently installed plugin.
Upload your extracted plugin folder into this plugins directory. Drag and drop usually works, though you can also right-click and select upload. Large plugins take several minutes to transfer, especially on slower connections. Watch for upload errors—interrupted transfers create incomplete installations that cause mysterious errors later. Some FTP clients resume interrupted transfers automatically, others require manual restart of the entire process.
After upload completion, check file permissions if your FTP client provides this functionality. Most quality FTP clients let you right-click folders and files to view and modify permissions. If permissions look wrong, you can usually fix them by selecting the plugin folder, right-clicking, choosing “File Permissions” or similar, and setting directories to 755 and files to 644. Some hosts set correct permissions automatically, others don’t.
Ownership verification represents an advanced consideration but matters on shared hosting. Your web server user (often www-data or apache) needs to own these files. Incorrect ownership prevents WordPress from updating or modifying plugin files. Most hosting environments handle ownership correctly automatically, but if you encounter permission errors even with correct numeric permissions, contact your hosting support about ownership issues.
Once files are uploaded with correct permissions, log into your WordPress dashboard and navigate to Plugins. Your manually uploaded plugin should appear in the list, showing as inactive. Activate it just like any other plugin. If you don’t see your plugin in the list, check the folder name—it should exactly match what the plugin expects, without extra characters or spaces.
Configuration follows activation. Most plugins redirect to their settings page or display a configuration notice. Don’t skip this step—unconfigured plugins can behave unpredictably. After configuration, test key site functionality. Check your front-end pages, test forms or features the plugin affects, and browse error logs if you have access to them.
This method shines when you’re troubleshooting failed automatic installations or working with hosting environments that restrict admin uploads. I’ve encountered situations where shared hosting limits PHP execution time so severely that dashboard uploads time out consistently. FTP uploads bypass these limitations entirely, though they require more technical comfort. Similar to managing community directory platforms, FTP access gives you the control needed for complex configurations.
Method 3 — Using WP-CLI for Manual Plugin Installation
WP-CLI represents the power-user approach to WordPress management. This command-line interface lets you install, activate, update, and manage plugins through terminal commands. While it requires technical comfort with command-line interfaces, WP-CLI’s speed and scriptability make it invaluable for managing multiple sites or performing bulk operations.

Before using WP-CLI, verify it’s installed on your server. Many managed WordPress hosts include WP-CLI by default—WP Engine, Kinsta, and Flywheel all provide it out of the box. Shared hosting often doesn’t include it, though you can request installation. To check availability, SSH into your server and type “wp –info” (without quotes). If WP-CLI is installed, you’ll see version information; if not, you’ll get a “command not found” error.
Installing WP-CLI on your own server requires downloading the PHAR file and making it executable. The official WP-CLI website provides detailed installation instructions for various operating systems. For most Linux servers, it’s a simple matter of downloading the file, renaming it to “wp”, making it executable with chmod, and moving it to your system path. Windows and Mac installations differ slightly but remain straightforward.
Once WP-CLI is ready, navigate to your WordPress installation directory using the cd command. For example: “cd /var/www/html/wordpress” or wherever your WordPress files live. You can then install plugins directly from the WordPress repository using: wp plugin install plugin-name –activate. This single command downloads, installs, and activates the plugin instantly.
For plugins not in the repository, use the ZIP file URL: wp plugin install https://example.com/plugin.zip –activate. This downloads the ZIP from the specified URL, extracts it, and activates it. You can omit the –activate flag if you prefer to activate manually later. This approach works perfectly for premium plugins hosted on developer websites or for custom plugins stored in your own repositories.
WP-CLI excels at bulk operations. Need to install five plugins at once? Chain commands together or create a simple script. Want to update all plugins across multiple sites? WP-CLI handles it in seconds rather than the minutes or hours manual updates require. For anyone managing more than a handful of sites, learning WP-CLI pays immediate dividends in saved time.
The learning curve does exist though. Command-line interfaces intimidate many users, and typos in commands can cause problems. Start with non-critical test sites when learning WP-CLI. Practice basic commands until they feel natural, then gradually incorporate more advanced operations. The official WP-CLI documentation is comprehensive and includes examples for most common tasks.
Security considerations with WP-CLI mirror those of other installation methods—verify plugin sources, maintain backups, and test before deploying to production. The speed of WP-CLI doesn’t eliminate the need for caution; if anything, it makes careful verification more important since you can make sweeping changes very quickly.
| WP-CLI Command | Purpose | Example |
|---|---|---|
| wp plugin install | Install from repository | wp plugin install contact-form-7 |
| wp plugin install [URL] | Install from ZIP URL | wp plugin install https://site.com/plugin.zip |
| wp plugin activate | Activate installed plugin | wp plugin activate contact-form-7 |
| wp plugin list | Show all plugins | wp plugin list –status=active |
Verifying After Install
Installation completion doesn’t mean your job is done. Post-installation verification catches problems before they affect users or site functionality. I’ve seen too many instances where plugins appeared to install successfully but were actually broken or conflicting with other components.
Start with the Plugins page in WordPress admin. Your newly installed plugin should appear with correct version information, author name, and description. Compare these details against what you expected from the plugin documentation. Check the “Last Updated” date if available—plugins that haven’t been updated in years might work fine, but they represent potential security risks as WordPress core evolves.
Verify WordPress compatibility explicitly. Look for compatibility notices on the plugin’s listing page or in its readme file. WordPress usually displays warnings if a plugin hasn’t been tested with your current WordPress version, though the absence of warnings doesn’t guarantee compatibility. If you’re running the latest WordPress version and the plugin shows compatibility with versions from several years ago, proceed cautiously.
Test core functionality immediately. Don’t wait for users to discover problems. If you installed a contact form plugin, create a test form and submit it. If it’s a security plugin, verify the security measures activated properly. For e-commerce or payment plugins, use test mode to verify transaction processing works. The specific tests depend on plugin purpose, but the principle remains constant—actively verify functionality rather than assuming it works.
Review error logs after activation. WordPress debug logs (if enabled) show PHP errors, warnings, and notices that might not appear visibly on your site. Access these logs through your hosting control panel or by FTP; they’re typically located in the wp-content directory as debug.log. Don’t panic over every notice—some are benign—but errors related to your new plugin warrant investigation.
Performance monitoring becomes crucial for resource-intensive plugins. Install a performance monitoring plugin or use your hosting provider’s performance tools to check page load times before and after plugin activation. Dramatic slowdowns indicate optimization problems or server resource conflicts. A plugin that doubles page load time might need configuration adjustments or might not be suitable for your hosting environment.
Site Health checks in WordPress (Tools → Site Health) provide automated verification of many potential issues. Run this check after installing new plugins to catch configuration problems, PHP warnings, or compatibility issues. The Site Health tool isn’t perfect—it occasionally reports false positives—but it catches many common problems automatically.
For staging environment users, this is where that investment pays off. Test extensively on staging before deploying to production. Run through user journeys, test various scenarios, and leave the plugin active for a day or two to catch delayed issues. When you’re confident everything works correctly, repeat the installation process on your production site.
Security, Maintenance, and Best Practices
Security concerns escalate with manual plugin installation because you bypass WordPress’s automated vetting process. The repository team reviews plugins for malicious code and obvious security flaws. Manual installations receive no such screening, placing full responsibility on you to ensure plugin safety and ongoing security.
Source verification deserves repeated emphasis because it’s that important. Download plugins only from developers’ official websites, established marketplaces, or the WordPress repository. Avoid file-sharing sites, random forums, or “nulled” plugin sites that promise free premium plugins. These sources frequently inject malware into otherwise legitimate plugins. The money you save isn’t worth the security nightmare that follows.
Scan every plugin file before installation using antivirus software. Modern antivirus programs detect common WordPress malware patterns. This scan catches obvious threats, though sophisticated malware might slip through. For critical sites, consider using specialized WordPress security scanners like Wordfence or Sucuri that understand WordPress-specific malware patterns.
Keep documentation of every manually installed plugin. Create a simple spreadsheet tracking plugin names, versions, download sources, installation dates, and any configuration details. When updates release, you’ll know where to download them and what version you’re updating from. This documentation becomes essential when troubleshooting problems months later—trust me, you won’t remember these details without notes.
Staging environments aren’t optional for production sites—they’re essential safety nets. Test all plugin installations, updates, and configuration changes on staging before touching production. This practice prevents the embarrassing (and costly) scenario where a plugin update breaks your live site during peak traffic hours. Many hosting providers offer built-in staging; use it religiously.
Read plugin changelogs and release notes before updating. Developers document breaking changes, new requirements, and known issues in these notes. A plugin update might require PHP 8.0 when you’re still running PHP 7.4, or it might introduce breaking changes requiring configuration updates. Understanding these changes before updating prevents unexpected problems.
Consider update strategies for manually installed plugins. Some developers provide automatic update mechanisms even for premium plugins—configure these when available. Others require manual re-download and installation for every update. Factor this maintenance burden into your decision to use plugins that require manual updates. A plugin requiring monthly manual updates becomes a significant time investment across multiple sites.
Implement backup schedules that capture pre-update states. Before updating any manually installed plugin, create a fresh backup. If the update causes problems, you can restore the previous version instantly rather than troubleshooting under pressure. Automated backup systems that create backups before every plugin change eliminate the need to remember this step manually.
Whether you’re managing a startup directory platform or a personal blog, security and maintenance practices remain equally important. The complexity of your site affects the impact of security failures, not whether you should implement these practices in the first place.
Common Scenarios and Troubleshooting
Even following best practices, you’ll encounter problems sometimes. Recognizing common failure patterns and knowing how to respond saves hours of frustrated troubleshooting. Here are the scenarios I’ve dealt with most frequently, along with solutions that actually work.
Plugin installation failures often stem from corrupted ZIP files. If WordPress reports “incompatible archive” or similar errors, re-download the plugin ZIP from the original source. Download corruption happens more frequently than you’d expect, especially on unreliable connections. Clear your browser cache before downloading again to ensure you’re not downloading a corrupted cached version.
Server timeout errors during upload indicate file size exceeds your hosting environment’s limits. Shared hosting often restricts uploads to 2MB, 8MB, or 32MB. Large plugins exceed these limits easily. The solution involves either increasing upload limits (requires hosting control panel access or contacting support) or switching to FTP upload which bypasses these restrictions entirely.
White screens of death after plugin activation usually indicate fatal PHP errors. The plugin conflicts with your PHP version, another plugin, or your theme. Don’t panic—you can fix this. Access your server via FTP, navigate to wp-content/plugins, and rename the problematic plugin’s folder (add “-disabled” to the end). This deactivates the plugin without requiring WordPress access. You can then log into WordPress normally and troubleshoot the cause.
Plugins showing as inactive immediately after activation suggest incomplete installations or missing dependencies. Check the plugin’s requirements—it might need specific PHP extensions, WordPress features, or other plugins to function. Install any required dependencies first, then try activating again. Some plugins fail silently if dependencies are missing, which is frustrating but fixable once you identify the missing component.
Permission errors prevent plugins from writing to directories or creating files. These manifest as configuration settings not saving, cache files not generating, or uploads failing within the plugin. Fix permissions using FTP—ensure the plugin directory and subdirectories use 755, and files use 644. If permission errors persist after fixing numeric permissions, contact hosting support about ownership issues.
Database errors after plugin activation indicate the plugin couldn’t create necessary database tables or entries. This happens when database user permissions are too restrictive or when database resources are exhausted. Check error logs for specific database error messages. Most hosting control panels show MySQL error logs separately from web server logs. These logs reveal whether permissions, resource limits, or syntax errors caused the problem.
Upgrading versus replacing plugins requires different approaches depending on how the plugin was initially installed. For plugins installed via ZIP upload, you can usually upload a new version directly—WordPress detects the existing installation and upgrades it. For FTP-installed plugins, delete the old plugin folder first (after deactivating and backing up), then upload the new version. Some premium plugins include upgrade mechanisms that handle this automatically.
Update failures for manually installed plugins often occur when developers change folder names between versions. If version 1.0 used folder name “my-plugin” but version 2.0 uses “my-plugin-pro”, WordPress treats these as separate plugins. You must deactivate version 1.0, delete its folder, then install version 2.0 as a new plugin. This scenario also applies when migrating from free to premium versions of the same plugin.
Best Practices for Teams and Multisite Environments
Managing plugins across teams or WordPress multisite installations introduces complexity beyond single-site scenarios. These environments require coordination, consistent procedures, and clear communication to prevent conflicts and maintain security.
WordPress multisite networks present unique plugin installation considerations. Network administrators can install plugins network-wide or allow individual site administrators to activate plugins for their specific sites. Manually installed plugins on multisite require careful placement—plugins in the network’s plugins directory become available network-wide, while plugins in individual site directories remain site-specific (though this latter approach is discouraged).
For network-wide plugins on multisite, use FTP or WP-CLI to upload to wp-content/plugins in your network’s root directory. Network administrators then “Network Activate” plugins to make them active across all sites, or simply make them available for site administrators to activate individually. Security plugins, backup plugins, and core functionality plugins typically warrant network activation, while specialized plugins might be activated per-site.
Team coordination becomes critical when multiple people manage WordPress installations. Implement a plugin approval process where team members request permission before installing new plugins. This review catches potential conflicts, duplicate functionality, and security concerns before they affect production. Document approved plugins in a shared resource that all team members can access.
Version control for manually installed plugins helps teams track changes and roll back problematic updates. Some teams maintain Git repositories containing all custom and premium plugins, making deployment across multiple sites or team members straightforward. This approach requires discipline but pays dividends in consistency and reproducibility.
Communication protocols matter especially for manually installed plugins since these don’t benefit from WordPress’s automatic update notifications. Assign responsibility for monitoring updates to specific team members. Create a regular schedule—weekly or monthly depending on site complexity—to check for available updates and test them on staging environments.
Just as specialized directory platforms require careful management across different regions or categories, multisite WordPress installations need coordinated plugin management to maintain consistency and functionality across all network sites.
Frequently Asked Questions
How do I know if a plugin is safe to install manually?
Verify the plugin source by checking the developer’s official website, reading reviews from multiple platforms, and researching the developer’s reputation. Scan the plugin files with current antivirus software and check for recent updates. Avoid plugins from file-sharing sites or forums offering “nulled” premium plugins. When possible, test plugins on staging environments before production deployment to catch security issues early.
What is the difference between uploading a plugin ZIP and uploading the plugin folder via FTP?
Dashboard ZIP upload involves uploading a compressed archive through WordPress admin, which automatically extracts and places files correctly. FTP folder upload requires manually extracting the ZIP locally then uploading the entire plugin folder to wp-content/plugins via FTP client. ZIP upload is simpler but subject to file size limits, while FTP upload provides more control and bypasses upload restrictions.
Can I install a premium plugin manually without a WordPress.org account?
Yes, premium plugins don’t require WordPress.org accounts for installation. Download the plugin ZIP from the developer or marketplace where you purchased it, then install via WordPress dashboard ZIP upload or FTP. WordPress.org accounts are only needed for free plugins from the official repository. Premium plugins authenticate separately through license keys entered after installation.
How do I update a manually installed plugin safely?
Create a complete site backup before updating any plugin. Download the latest plugin version from the original source, verify its authenticity, and test on a staging site if possible. For ZIP uploads, upload the new version through the WordPress dashboard—it will detect and upgrade the existing installation. For FTP uploads, deactivate the current version, delete its folder, then upload the new version’s folder and reactivate.
What permissions should I set when uploading plugins via FTP?
Set directory permissions to 755 (read, write, execute for owner; read and execute for others) and file permissions to 644 (read and write for owner; read for others). These permissions allow WordPress to access and execute plugin files while preventing unauthorized modifications. Some hosts automatically set correct permissions, but always verify after upload. Incorrect permissions create security vulnerabilities or functionality problems.
Can I install plugins on a WordPress.com site that doesn’t allow plugin uploads?
WordPress.com’s free and personal plans don’t allow custom plugin installations, including manual uploads. Only Business and Commerce plans support custom plugins. This restriction is fundamental to WordPress.com’s managed hosting model and cannot be bypassed. For custom plugin installation, upgrade to a qualifying plan or migrate to self-hosted WordPress.org where you control all aspects of installation.
How do I install multiple plugins quickly using WP-CLI?
Use WP-CLI’s bulk installation capability with space-separated plugin names: “wp plugin install plugin-one plugin-two plugin-three –activate”. For plugins from URLs, create a shell script listing multiple “wp plugin install [URL]” commands. You can also create a text file with plugin names (one per line) and loop through it: “while read plugin; do wp plugin install $plugin –activate; done < plugins.txt".
What should I do if a manually installed plugin breaks my site?
Access your server via FTP, navigate to wp-content/plugins, and rename the problematic plugin’s folder (add “-disabled” to deactivate it). This restores site functionality without needing WordPress access. Investigate the cause—check error logs, verify PHP version compatibility, and test for conflicts with other plugins. If necessary, restore from your pre-installation backup and research alternatives to the problematic plugin.
Are manually installed plugins less secure than repository plugins?
Manual installation bypasses WordPress repository security reviews, placing full verification responsibility on you. Plugins from trusted sources can be equally secure, but lack automatic update notifications that repository plugins provide. The security difference lies in vetting and maintenance rather than installation method. Follow strict source verification, scan files before installation, and diligently monitor for updates to maintain security comparable to repository plugins.
How do I verify plugin compatibility before manual installation?
Check the plugin’s readme.txt file or documentation for “Requires at least” and “Tested up to” WordPress version specifications. Verify PHP version requirements match your server’s PHP version (check in WordPress → Tools → Site Health). Research potential conflicts with your theme and existing plugins by searching for known compatibility issues. Test on a staging environment identical to production to catch compatibility problems before they affect users.
Taking Control of Your WordPress Plugin Management
Manual plugin installation represents more than a technical skill—it’s about maintaining control over your WordPress environment when circumstances demand flexibility. Whether you’re working with premium plugins that bring advanced functionality to your site, troubleshooting failed automatic installations, or managing complex multisite networks, understanding these three core methods equips you to handle whatever challenges arise.
The dashboard ZIP upload method serves most manual installation needs with its balance of simplicity and control. FTP/SFTP uploads provide the granular access needed for troubleshooting and environments with restricted admin capabilities. WP-CLI offers speed and automation for power users managing multiple sites or performing bulk operations. Each method has its place, and knowing when to use which one separates confident administrators from those constantly fighting their WordPress installations.
But here’s the thing that really matters: none of these methods eliminate the need for careful preparation and verification. Backups before installation, source verification before download, testing before production deployment—these practices prevent the disasters that make manual installation seem risky. The risk isn’t in the installation method; it’s in skipping the safety steps that protect your site and its users.
Your Next Steps: Choose one manual installation method to master first—probably the dashboard ZIP upload for its accessibility. Practice on a test site or staging environment until the process feels comfortable. Document your procedures so you don’t need to remember every detail six months from now. Most importantly, never install plugins on production sites without testing them elsewhere first.
Manual plugin installation becomes routine with practice. That first time feels intimidating, the tenth time feels mechanical, and by the hundredth time you’re troubleshooting complex multisite configurations without breaking a sweat. Start small, follow the procedures outlined here, and gradually expand your skills as confidence grows.
The WordPress ecosystem continues evolving, but these fundamental manual installation methods remain remarkably stable across versions. Learn them once, use them for years. And remember—the goal isn’t to avoid the repository system, it’s to supplement it with manual skills that expand your capabilities. Most plugins still work best when installed from the repository with automatic updates enabled. Manual installation fills the gaps where automatic installation can’t reach.
Now go forth and install plugins manually with confidence. Your WordPress sites—and the users who depend on them—will thank you for the care and attention you bring to these critical tasks.
Was this article helpful?