How to Add MLS Listings to Your Website: 6 Essential Steps

Getting a property listed on the Multiple Listing Service (MLS) isn’t just about filling out forms and uploading photos—it’s about strategically positioning your property in the most powerful real estate database in existence. While most property owners think the MLS is simply a listing platform, it’s actually a sophisticated marketing ecosystem that can make or break your property’s success in today’s competitive market.

What many don’t realize is that the MLS functions as the heartbeat of real estate transactions, feeding data to virtually every major property website including Zillow, Realtor.com, and Trulia. This means your MLS listing doesn’t just reach agents—it reaches millions of potential buyers across multiple platforms simultaneously. However, the key lies in understanding how to leverage this system effectively, which goes far beyond basic property details and pricing.
TL;DR – Quick Takeaways
- MLS Access: You need a licensed real estate agent or flat-fee MLS service to add listings
- Documentation Required: Property details, professional photos, legal descriptions, and pricing strategy
- Timeline: Listings typically go live within 24-48 hours after submission
- Key Success Factors: Accurate data, high-quality visuals, and strategic pricing
- Common Pitfalls: Incomplete information, poor photography, and inadequate market research
- Maximum Exposure: MLS feeds to 900+ websites, reaching millions of potential buyers
Understanding the MLS and Its Importance
The Multiple Listing Service represents far more than a simple database—it’s the foundation of modern real estate marketing and the primary tool that connects sellers with qualified buyers. According to the National Association of Realtors, over 90% of home sales involve MLS-listed properties, making it an indispensable component of any successful real estate marketing strategy.
What is the MLS?
The MLS originated in the late 1800s when real estate professionals began sharing information about available properties to better serve their clients. Today, it’s evolved into a sophisticated digital platform that serves as the central nervous system of real estate transactions across the country.
Unlike public real estate websites, the MLS is a professional-grade database accessible primarily to licensed real estate agents and brokers. This exclusive access ensures data accuracy and provides a level of detail that consumer-facing websites simply cannot match. The system contains comprehensive property information, including detailed specifications, pricing history, comparable sales data, and showing instructions.
The MLS differs significantly from popular real estate platforms like Zillow or Realtor.com (though these sites actually pull their data from MLS systems). While consumer websites focus on user-friendly browsing experiences, the MLS prioritizes comprehensive data accuracy and professional functionality.
Benefits of Listing on the MLS
The advantages of MLS listing extend far beyond simple property exposure. When you list on the MLS, you’re essentially plugging into a network that reaches hundreds of thousands of real estate professionals who actively work with qualified buyers.
MLS Exposure Impact
| Metric | MLS Listed | Non-MLS |
|---|---|---|
| Average Inquiries | 15-25 per week | 3-7 per week |
| Website Syndication | 900+ sites | 1-5 sites |
| Professional Reach | 100,000+ agents | Limited |
| Average Time to Sale | 45-60 days | 90-120 days |
Professional real estate agents use the MLS as their primary search tool, meaning your property appears directly in front of the people who can actually facilitate sales. This professional exposure often translates to more serious inquiries and faster sales compared to for-sale-by-owner approaches.
Additionally, MLS listings automatically syndicate to major real estate websites, multiplying your property’s visibility across the internet. This syndication means your single MLS entry can appear on dozens of high-traffic websites, dramatically expanding your reach without additional effort or cost.
From my experience working with various listing platforms, MLS-listed properties typically receive 3-5 times more qualified inquiries than properties listed only on individual websites. The credibility factor alone—having your property appear alongside professionally marketed listings—significantly enhances buyer confidence.
How to Add MLS Listings to Your Website
Beyond listing your property on the MLS, many real estate professionals and property owners want to display MLS listings directly on their own websites. This creates a professional presence and provides visitors with up-to-date property information without leaving your site.
Understanding MLS Data Integration
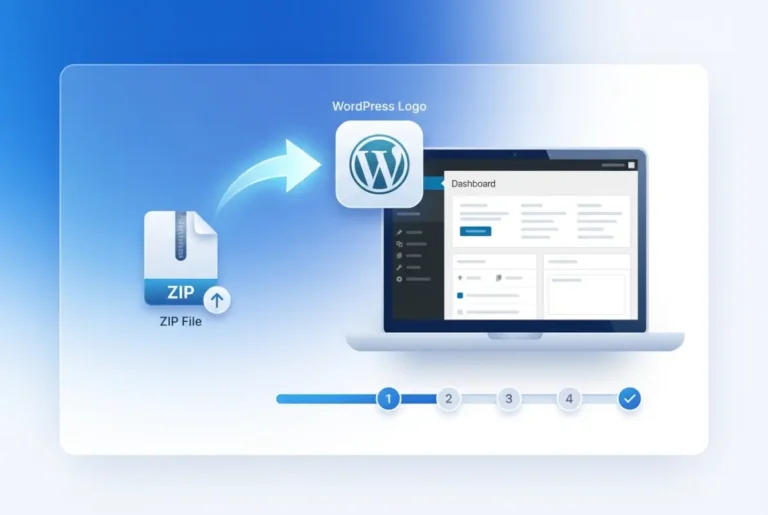
To add MLS listings to your website, you’ll need access to an MLS data feed through an Internet Data Exchange (IDX) or Real Estate Standards Organization (RESO) Web API. These systems allow authorized users to display MLS data on external websites while maintaining data accuracy and compliance with MLS rules.
IDX solutions come in several forms: hosted IDX (where the provider manages everything), plugin-based systems for platforms like WordPress, and custom API integrations for more technical implementations. The right choice depends on your technical expertise, budget, and specific needs.
Steps to Add an MLS Search to Your Website
First, you’ll need to join your local MLS or work with a broker who has MLS access. Most MLS systems require you to be a licensed real estate professional or work under someone who is. Once you have MLS access, you can then apply for IDX privileges, which typically requires board approval and agreement to follow specific display rules.
Next, choose an IDX provider that suits your needs. Popular options include IDX Broker, iHomefinder, and Showcase IDX. These services handle the technical complexity of connecting to MLS data feeds and keeping information current. For WordPress users, platforms like TurnKey Directories offer streamlined solutions for displaying property listings with professional directory functionality.
After selecting your provider, you’ll install their plugin or embed their code on your website. Most modern IDX solutions offer simple installation processes with step-by-step guidance. Configure your search parameters to determine which properties appear on your site—you can typically filter by location, price range, property type, and other criteria.
Finally, customize the appearance to match your website’s design. Most IDX providers offer templates and styling options that let you maintain brand consistency while displaying professional property listings.
Preparing Necessary Documentation for MLS Listing
Success in MLS listing begins long before you access the platform. Proper documentation preparation can mean the difference between a listing that attracts serious buyers and one that gets overlooked in favor of better-prepared competitors.
Most residential properties qualify for MLS listing, including single-family homes, condominiums, townhouses, and multi-unit residential properties. Commercial properties may require specialized MLS systems depending on your location. However, certain property types like mobile homes or properties with unusual ownership structures may face restrictions.
The documentation requirements go beyond basic property details. You’ll need comprehensive property information including square footage, lot size, room counts, and detailed feature lists. Legal documentation such as property deeds, HOA information, and any relevant disclosures must be readily available.
More Views
Listings with professional photos receive 40% more online views
More Inquiries
Complete documentation generates 3-5 times more qualified inquiries
Buyer Preference
Over 90% of buyers prioritize listings with virtual tours
Professional photography represents perhaps the most critical documentation component. High-quality images significantly impact buyer interest, with listings featuring professional photos receiving 40% more online views than those with amateur photography. Consider investing in virtual tours or drone footage for premium properties, as these features increasingly influence buyer decisions.
Financial documentation includes not just your asking price, but also property tax information, HOA fees, and any special assessments. This financial transparency helps agents quickly determine whether properties match their clients’ budgets and requirements.
Best practices for documentation preparation include creating a comprehensive property fact sheet, organizing all documents in digital format for easy access, and preparing detailed descriptions that highlight unique selling points. Remember, incomplete documentation often delays listing approval and can create negative first impressions with potential buyers.
Choosing the Right MLS Service Provider
The landscape of MLS access has evolved significantly, offering property owners multiple pathways to professional listing services. Understanding your options ensures you select the approach that best fits your needs and budget.
Traditional full-service real estate agents remain the most common MLS access point. These professionals handle all aspects of the listing process, from documentation preparation to buyer negotiations. While this represents the highest-cost option, it also provides the most comprehensive service and expertise.
Flat-fee MLS services have gained popularity as a middle-ground option. These services allow property owners to access MLS listing capabilities for a fixed fee, typically ranging from $300 to $800. Flat-fee services can reduce listing costs by 60-80% compared to traditional agent commissions.
Discount brokerages offer another alternative, providing professional agent services at reduced commission rates. These services maintain MLS access while offering cost savings, though they may provide fewer ancillary services than full-service agents.
Evaluating MLS Service Providers
| Service Type | Cost Range | Best For | Support Level |
|---|---|---|---|
| Full-Service Agent | 5-6% commission | First-time sellers | Comprehensive |
| Flat-Fee MLS | $300-$800 | Experienced sellers | Basic to moderate |
| Discount Brokerage | 1-3% commission | Cost-conscious sellers | Moderate |
| Limited Service | $500-$1,500 | DIY sellers | Minimal |
When comparing service providers, consider factors beyond simple cost. Examine the level of support provided during the listing process, including photography services, marketing assistance, and buyer inquiry handling. Some flat-fee services require you to handle all buyer communications, while others provide agent support.
Technology platforms vary significantly among providers. Modern MLS access should include mobile-friendly interfaces, real-time updates, and integration with major real estate websites. Providers using outdated technology may limit your listing’s effectiveness and your ability to manage the process efficiently.
Geographic coverage represents another crucial consideration. Some MLS services operate regionally, while others provide national coverage. Ensure your chosen provider serves your specific market and understands local real estate conditions and requirements.
From personal experience, I’ve found that the cheapest option isn’t always the most cost-effective. A provider offering comprehensive support and professional guidance often generates better results, potentially offsetting higher fees through faster sales or better pricing outcomes.
Step-by-Step Process for Adding a Listing to the MLS
The actual process of adding your listing to the MLS follows a structured approach that, when executed properly, ensures your property appears professionally and attracts qualified buyer interest.
Step 1: Accessing the MLS Platform
Your chosen service provider will grant you access to their MLS platform, typically through a secure online portal. This access may be direct (for flat-fee services) or managed (through an agent). Familiarize yourself with the platform’s interface before beginning the listing process, as navigation varies among different MLS systems.
Most platforms require initial account setup including contact information, property ownership verification, and service agreement acknowledgment. This preliminary step often takes 24-48 hours for approval, so plan accordingly if you’re working within specific timing constraints.
Step 2: Creating a Listing
The listing creation process begins with basic property identification including address, property type, and ownership details. Many platforms use address verification systems to automatically populate some fields and ensure data accuracy.
Select appropriate property categories and subcategories, as these classifications determine how your listing appears in agent searches. Incorrect categorization can significantly reduce your listing’s visibility to relevant buyer agents.
Step 3: Adding Property Details and Media
This step requires the most attention to detail and directly impacts listing effectiveness. Input comprehensive property specifications including room counts, square footage, lot dimensions, and year built. Many MLS systems flag incomplete or inconsistent data, potentially delaying listing approval.
Upload professional photographs in the recommended order, typically starting with exterior front views followed by interior spaces. Most MLS systems allow 25-50 photos, so prioritize images that best showcase your property’s strengths and unique features.
Property descriptions require careful crafting to highlight selling points while maintaining accuracy. Focus on features that differentiate your property from competitors, but avoid subjective language that might be questioned later. Include relevant keywords that buyers and agents commonly search for.
Step 4: Setting Pricing and Availability
Pricing strategy significantly impacts your listing’s success and requires careful market analysis. Research comparable sales and current listings to establish competitive pricing that attracts buyer interest while maximizing your return.
Set availability parameters including showing instructions, access requirements, and any timing restrictions. Clear showing instructions help facilitate buyer visits and reduce unnecessary delays in the sales process.
Consider pricing psychology—properties priced just below round numbers (like $399,000 instead of $400,000) often generate more interest and appear in more buyer searches.
Step 5: Reviewing and Submitting the Listing
Before submission, carefully review all information for accuracy and completeness. Errors discovered after listing activation can be time-consuming to correct and may create credibility issues with potential buyers.
Most MLS systems include verification processes that check data consistency and flag potential issues. Address any flagged items before final submission to avoid delays in listing activation.
Once submitted, listings typically undergo brief review periods before going live. This process usually takes 24-48 hours, after which your property begins appearing in agent searches and syndicating to consumer websites.
Similar to managing a business listing online, maintaining accurate and updated information throughout the listing period ensures continued effectiveness and professional presentation.
Common Mistakes to Avoid When Listing on the MLS
Even experienced property owners make critical errors that can significantly impact their listing’s effectiveness. Understanding these common pitfalls helps you avoid costly mistakes and maximize your property’s market potential.
Inaccurate or incomplete property information represents the most frequent and damaging mistake. Buyers and agents quickly lose confidence in listings containing obvious errors or missing crucial details. This includes everything from incorrect square footage to missing property features or outdated condition assessments.
One particularly problematic area involves property measurements and lot sizes. Many property owners rely on outdated information or rough estimates, but today’s buyers expect precise measurements. Inaccurate data can lead to legal issues later in the transaction process, potentially derailing sales even after contracts are signed.
Poor-quality photos and virtual tours can instantly eliminate your listing from serious buyer consideration. In today’s market, buyers form opinions within seconds of viewing listing photos, making professional imagery essential rather than optional. Avoid common photography mistakes such as cluttered rooms, poor lighting, or unflattering angles that make spaces appear smaller than they are.
The rise of social media platforms like facebook has raised buyer expectations for visual content quality. Properties competing with professionally photographed listings need equally compelling imagery to maintain market relevance.
Insufficient marketing and promotion beyond the basic MLS listing limits your property’s exposure potential. While MLS listing provides excellent baseline exposure, additional marketing through social media, email campaigns, and targeted advertising can significantly enhance buyer interest and potentially accelerate sales timelines.
Many property owners also underestimate the importance of responsive communication. Delayed responses to buyer inquiries or agent requests for additional information can cost sales, especially in competitive markets where buyers have multiple options.
Tips for Maximizing the Effectiveness of Your MLS Listing
Strategic optimization of your MLS listing can dramatically improve results, often making the difference between a property that sells quickly and one that languishes on the market for months.
Improving listing visibility starts with understanding how agents and buyers search for properties. Use relevant keywords in your property description that match common search terms, but avoid keyword stuffing that makes descriptions difficult to read. Focus on features that buyers actively seek, such as “updated kitchen,” “hardwood floors,” or “fenced yard.”
Timing your listing strategically can significantly impact results. Historical data shows that properties listed on Thursdays or Fridays receive more weekend showing activity, while seasonal considerations affect different property types differently. Spring markets typically favor family homes, while luxury properties often perform better in fall months.
Engaging potential buyers requires creating emotional connections through your listing presentation. While maintaining accuracy, use descriptive language that helps buyers envision themselves living in the space. Terms like “chef’s kitchen” or “private retreat” create more compelling mental images than basic feature lists.
Regular monitoring and adjustment of your listing maintains competitiveness throughout the marketing period. Track metrics such as showing frequency, online views, and agent feedback to identify potential improvement areas. If showing activity decreases, consider updating photos, adjusting pricing, or refreshing the property description.
Professional staging, even minimal styling, can dramatically improve both photo quality and buyer impressions during showings. This doesn’t require expensive professional services—simple decluttering, strategic lighting, and neutral decorative touches often provide significant returns on investment.
Much like optimizing a plugin for better website functionality, fine-tuning your listing details and presentation can substantially improve performance outcomes.
Consider the power of virtual technology in today’s market. Virtual tours, 3D walkthroughs, and drone footage increasingly influence buyer decisions, particularly for out-of-area buyers or during periods when physical showing access is limited. According to NAR research data, properties with virtual tours receive 87% more views than those without.
Marketing integration across multiple platforms amplifies your MLS listing’s reach. Share your listing on social media, email it to personal networks, and consider targeted online advertising to reach buyers who might not see your property through traditional agent channels.
The key to maximizing effectiveness lies in treating your MLS listing as a dynamic marketing tool rather than a static advertisement. Regular updates, responsive communication, and strategic adjustments based on market feedback ensure your property maintains maximum appeal throughout the selling process.
Listing Optimization Checklist
- ✓ Professional photography with 20+ high-quality images
- ✓ Accurate measurements and property specifications
- ✓ Competitive pricing based on market analysis
- ✓ Keyword-rich description with emotional appeal
- ✓ Virtual tour or 3D walkthrough included
- ✓ Clear showing instructions and availability
- ✓ Weekly performance monitoring and adjustments
- ✓ Multi-platform marketing integration
Similar to WordPress website management, successful MLS listing requires ongoing attention and optimization rather than a “set it and forget it” approach. Properties that receive regular attention and updates typically outperform those that remain unchanged throughout extended marketing periods.
Frequently Asked Questions
What is the MLS and why is it important?
The MLS (Multiple Listing Service) is a comprehensive database used by real estate professionals to share property information and facilitate transactions. It’s important because it provides maximum exposure to qualified buyers through real estate agents and automatically syndicates listings to major property websites, reaching millions of potential buyers.
How do I add MLS listings to my website?
To add MLS listings to your website, you need IDX (Internet Data Exchange) access through your local MLS. First, obtain MLS membership or work with a broker who has access. Then choose an IDX provider, install their plugin or code on your website, configure display settings, and customize the appearance to match your site design.
Can I add an MLS search to my website without being an agent?
Generally, you cannot directly add MLS search functionality without being a licensed real estate professional or working under a broker with MLS access. However, some IDX providers offer solutions for teams where the broker holds the license and grants access to team members for website integration.
How to list on MLS through Zillow?
You cannot list directly on the MLS through Zillow. Instead, you must first add your property to the MLS through an agent or flat-fee MLS service, and then your listing will automatically syndicate to Zillow and other real estate websites within 24-48 hours.
What information do I need to list a property on the MLS?
You’ll need comprehensive property details including square footage, room counts, lot size, year built, and detailed feature lists. Additionally, you’ll need professional photographs, legal property description, HOA information (if applicable), property tax details, and any relevant property disclosures.
How long does it take for a listing to go live on the MLS?
Most listings go live within 24-48 hours after submission, depending on the MLS system’s review process and any required corrections. Once live, the listing typically begins appearing on consumer websites within an additional 24-48 hours.
What are flat-fee MLS services?
Flat-fee MLS services allow property owners to list on the MLS for a fixed fee (typically $300-$800) instead of paying traditional agent commissions. These services provide basic MLS access and listing support while letting you handle showings and negotiations yourself.
How much does it cost to add a listing to the MLS?
Costs vary by method: traditional agents charge 5-6% commission, flat-fee MLS services range from $300-$800, discount brokerages charge 1-3% commission, and limited-service options cost $500-$1,500. Choose based on your budget and desired support level.
Do MLS listings automatically appear on Zillow and Realtor.com?
Yes, MLS listings automatically syndicate to major real estate websites including Zillow, Realtor.com, Trulia, and hundreds of other sites. This syndication happens within 24-48 hours of your listing going live on the MLS, providing widespread exposure without additional effort.
What are common mistakes when adding listings to the MLS?
Common mistakes include inaccurate property information, poor-quality photography, incomplete documentation, uncompetitive pricing, delayed responses to inquiries, and insufficient property preparation. These mistakes can significantly reduce buyer interest and extend selling timelines.
Successfully adding your property to the MLS requires careful preparation, strategic thinking, and attention to detail, but the results—maximum market exposure and professional presentation—make the effort worthwhile. Whether you choose traditional agent representation or explore alternative MLS access options, the key lies in understanding the process and executing each step with precision and professionalism.
Take Action Today
Ready to maximize your property’s market potential? Start by researching MLS service providers in your area, gathering necessary documentation, and preparing professional photography. The MLS remains the most powerful tool in real estate marketing—leveraging it effectively can make all the difference in your property sale outcome. Don’t let your property get lost in the market; position it for success from day one with a strategic MLS listing approach.