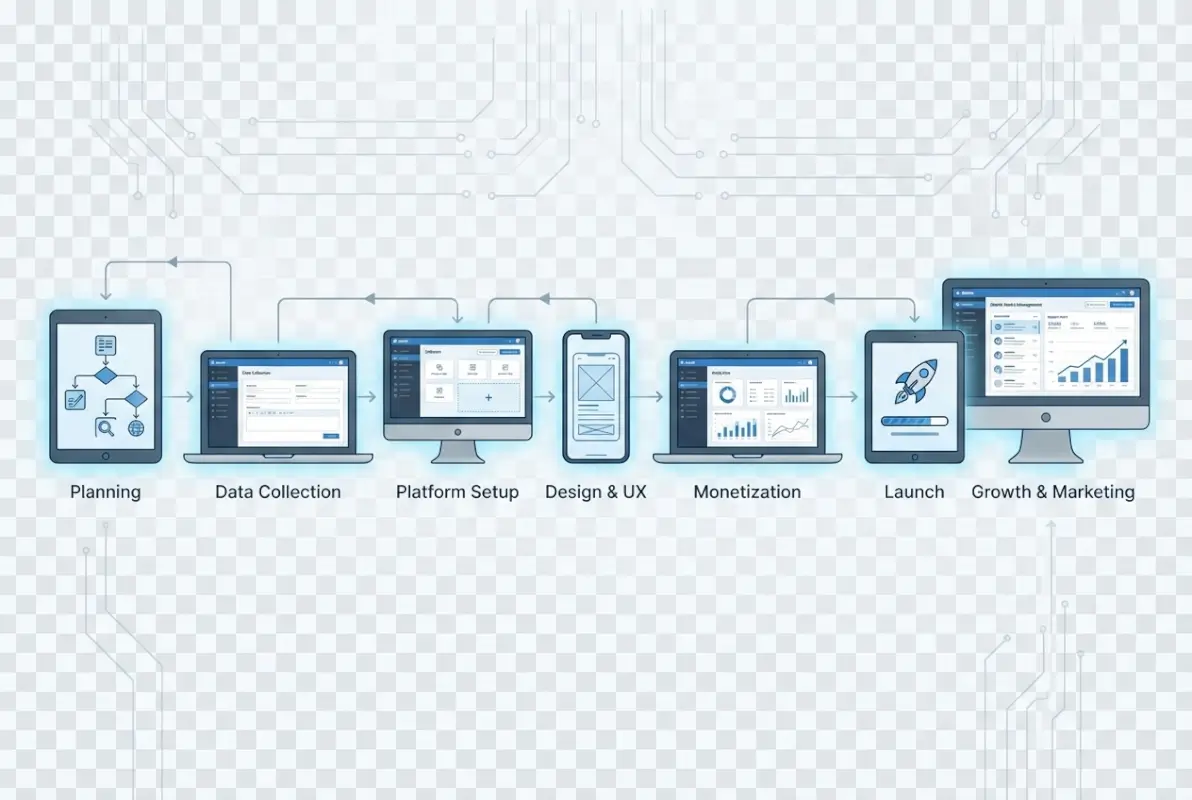
How to Create a Business Directory: 7 Steps to Success

Generating summary...
Creating a business directory can be one of the most lucrative online ventures you’ll ever pursue, but here’s what nobody tells you upfront: most people fail because they treat it like building a simple list instead of architecting a valuable ecosystem. I remember launching my first directory back when yellow pages were still relevant (yes, I’m dating myself here), and the biggest mistake I made was thinking the technology mattered more than the community. The truth is, a successful business directory isn’t about having the fanciest features or the most listings—it’s about solving a specific problem for a clearly defined audience better than anyone else. Whether you’re planning to create a niche industry directory or a local business hub, understanding the strategic framework behind directory success will save you months of frustration and thousands of dollars in wasted effort.
TL;DR – Quick Takeaways
- Niche focus beats broad coverage – Dominating a specific vertical or geographic area generates more value than competing with established general directories
- Revenue models require planning – Decide between subscription fees, premium listings, advertising, or hybrid approaches before you build
- User experience drives success – Advanced search functionality and mobile optimization aren’t optional extras anymore
- Content quality matters more than quantity – 100 verified, detailed listings outperform 1,000 basic entries
- Marketing starts on day one – Building the directory is only 30% of the work; attracting businesses and users is the real challenge
- Technology choices have long-term consequences – Select platforms and tools that can scale with your growth plans
Step 1: Define Your Directory’s Niche and Target Audience
The single biggest determinant of your directory’s success happens before you write a single line of code or choose a platform. You need to identify a specific niche where demand exists but supply is fragmented or poorly served. Generic business directories are a graveyard of failed ventures because you’re competing against Google My Business, Yelp, and dozens of entrenched players with unlimited resources. Instead, think about specialized industries, professional services, or geographic regions that major platforms overlook or underserve.

In my experience working with directory owners, the most profitable niches share three characteristics: they serve businesses willing to pay for visibility, they address a clear search intent that existing solutions don’t satisfy well, and they have enough potential listings to create critical mass without being so broad that you can’t compete. For example, a directory focused exclusively on certified sustainable contractors in the Pacific Northwest has far better prospects than “all contractors everywhere.” The narrow focus lets you become the definitive resource, which makes both business owners and searchers choose you over general alternatives.
Research your target audience from both sides of the marketplace. Who are the businesses you’ll list, and what pain points drive them to seek directory placement? Equally important, who are the end users searching for these businesses, and what specific problems are they trying to solve? A directory for wedding vendors needs to understand both the marketing challenges facing photographers and caterers, and the planning anxieties of engaged couples searching for reliable service providers. This dual perspective shapes everything from your feature set to your pricing model.
Validate your concept before investing heavily. Use tools like Google Trends to verify search volume for relevant queries, examine existing competitors to identify gaps in their offerings, and survey potential business clients about their willingness to pay. I’ve seen too many entrepreneurs build technically impressive directories for markets that simply don’t exist or won’t monetize. A few hours of unglamorous market research can prevent months of building something nobody wants.
Step 2: Choose the Right Technology Platform
Your platform decision carries consequences you’ll live with for years, so resist the temptation to just pick the cheapest or easiest option without strategic consideration. The directory landscape offers three main paths: custom development, WordPress with directory plugins, or specialized directory software platforms. Each has distinct advantages and limitations that align with different business models, technical capabilities, and growth trajectories.

WordPress with plugins like Business Directory Plugin or GeoDirectory offers the most accessible entry point for non-technical founders. You get reasonable functionality quickly, extensive customization through themes and plugins, and manageable hosting costs (typically starting around what you’d pay for basic website hosting). However, you’ll eventually hit scaling limitations if your directory grows to thousands of listings with heavy traffic, and you’re dependent on plugin developers maintaining compatibility with WordPress updates. For testing concepts or serving smaller markets, this approach makes considerable sense.
| Platform Type | Best For | Typical Cost | Technical Skill Required |
|---|---|---|---|
| WordPress + Plugins | Small to medium directories, budget-conscious starts | $200-$500 initial | Low to Medium |
| Directory SaaS Platforms | Fast launches, non-technical owners | $50-$300/month | Low |
| Custom Development | Unique requirements, scalability priority | $5,000-$50,000+ | High (requires developers) |
| Specialized Directory Software | Established businesses, specific industries | $1,000-$10,000 license | Medium |
SaaS platforms designed specifically for directories provide another viable route, especially if you want to launch quickly without technical headaches. These services handle hosting, updates, and core functionality while letting you focus on content and marketing. The tradeoff is ongoing monthly fees and less control over customization, which can be fine for many business models. When evaluating these platforms, scrutinize their search functionality, payment processing options, and whether they allow you to export your data if you eventually outgrow their service.
Custom development makes sense when you have specific requirements that off-the-shelf solutions can’t address, substantial budget, or technical expertise in-house. Building custom gives you complete control over features, user experience, and scalability architecture. However, you’re looking at development timelines measured in months rather than days, and ongoing maintenance costs that many founders underestimate. Unless your directory concept has truly unique technical requirements or you’ve validated strong market demand worth significant investment, start with a proven platform and customize later when you have revenue justifying the expense.
Step 3: Design Essential Features and User Experience
The features you include should flow directly from your audience research, not from what seems cool or what competitors have. Every feature adds complexity, development time, and maintenance burden, so prioritize ruthlessly. A directory with five excellent features that work flawlessly beats one with twenty mediocre features that confuse users. Start with the absolute minimum viable product that solves your audience’s core problem, then expand based on actual user feedback rather than assumptions.
Search functionality is your directory’s engine, and it deserves more attention than any other feature. Users come to directories with specific intent—they’re looking for something—so your search needs to handle the way real people actually look for businesses. This means supporting multiple search criteria (location, category, keywords, attributes), autocomplete suggestions, and filtered results that narrow options without overwhelming choices. Poor search is the fastest way to send frustrated users back to Google, never to return.
Business listing pages need to balance comprehensiveness with scannability. Required elements include business name, categories, contact information, location with map integration, description, and images. Beyond these basics, consider what information your specific audience needs to make decisions. A restaurant directory needs hours and menu highlights; a B2B service directory needs case studies and certifications. Let businesses create directory listings that showcase their unique value propositions while maintaining consistent structure across your directory.
Mobile responsiveness isn’t optional anymore, it’s foundational. More than half of directory searches now happen on mobile devices, and Google’s mobile-first indexing means your mobile experience directly affects search rankings. Test your directory extensively on actual phones and tablets, not just desktop browsers resized to mobile dimensions. Pay special attention to tap targets, form inputs, and map interactions—elements that work fine with a mouse often frustrate users on touchscreens.
Consider which features justify premium listings versus what should be available to all businesses. Common premium features include enhanced placement in search results, additional images or videos, social media integration, analytics about profile views, and removal of competitor ads from their listing pages. The key is making free listings valuable enough that businesses want to be included, while creating clear premium benefits worth paying for. If your free listings are too limited, businesses won’t bother; if premium offers too little advantage, they won’t upgrade.
Step 4: Build or Choose Your Directory Platform
The technical foundation of your business directory determines its functionality, scalability, and user experience. You’ll need to decide whether to build a custom solution, use a website builder, or leverage a specialized directory platform based on your technical skills, budget, and long-term goals.

Custom-Built Solutions
Developing a custom directory from scratch offers maximum flexibility and control. This approach works best for directories with unique requirements or those planning significant scale. You’ll typically use frameworks like WordPress with directory plugins, Laravel, Django, or React combined with a headless CMS.
Custom development requires either in-house technical expertise or hiring developers. While initial costs are higher—ranging from $5,000 to $50,000+ depending on complexity—you own the codebase and can modify any aspect of functionality. This option makes sense when your directory concept requires features that off-the-shelf solutions don’t provide.
WordPress Directory Plugins
WordPress powers approximately 43% of all websites and offers numerous directory-specific plugins that dramatically reduce development time. Popular options include Business Directory Plugin, GeoDirectory, and Listable. These plugins provide listing submission forms, search filters, user reviews, and payment integration out of the box.
Implementation Tip: If you choose WordPress, select a hosting provider optimized for WordPress performance like WP Engine or Kinsta. Directory sites with hundreds or thousands of listings require more resources than typical blogs or business websites.
No-Code Directory Builders
Platforms like Brillant Directories, Memberstack with Webflow, or Airtable combined with Softr allow you to create functional directories without writing code. These solutions offer pre-built templates, drag-and-drop customization, and integrated payment processing. Monthly costs typically range from $50 to $300.
No-code platforms significantly reduce time to launch—you can have a basic directory operational in days rather than months. The trade-off is less customization flexibility and ongoing subscription costs. Evaluate whether the platform’s feature set aligns with your required functionality before committing.
Essential Technical Features
Regardless of your platform choice, ensure your directory includes these core technical capabilities:
- Responsive design: Your directory must function flawlessly on smartphones, tablets, and desktops since over 60% of directory searches occur on mobile devices
- Fast loading speeds: Aim for page load times under 3 seconds to reduce bounce rates and improve search engine rankings
- Advanced search and filtering: Users should find relevant businesses through category, location, ratings, features, and keyword searches
- User account management: Business owners need dashboards to manage their listings, respond to reviews, and track analytics
- Payment processing: Integrate Stripe, PayPal, or similar platforms to handle subscription payments securely
- SEO optimization: Include proper meta tags, schema markup, XML sitemaps, and clean URL structures
- Security measures: Implement SSL certificates, regular backups, spam prevention, and data protection compliance
Step 5: Implement Monetization Strategies
Transforming your business directory from a useful resource into a profitable venture requires strategic monetization. The most successful directories typically combine multiple revenue streams rather than relying on a single source, creating stable and diversified income.

Freemium Listing Model
This approach offers basic listings at no cost while charging for premium features. Free listings might include company name, address, phone number, and a brief description. Premium listings add enhanced visibility, photos, videos, social media links, customer reviews, and priority placement in search results.
The freemium model reduces barriers to entry, helping you build initial directory population quickly. Once businesses see traffic value from free listings, conversion rates to paid plans typically range from 2% to 10%. Price premium listings between $20 and $200 monthly depending on your niche’s market size and competition.
| Listing Tier | Features Included | Typical Monthly Price |
|---|---|---|
| Free | Basic contact info, company description (100 words), category listing | $0 |
| Basic | Logo, 5 images, extended description, website link, social links | $25-$50 |
| Premium | Unlimited images, video, priority search placement, review highlights, analytics | $75-$150 |
| Featured | Homepage featuring, category sponsorship, lead generation tools, API access | $200-$500 |
Display Advertising
Once your directory attracts consistent traffic—typically 10,000+ monthly visitors—display advertising becomes viable. Google AdSense provides the easiest entry point, though direct ad sales to relevant businesses generate higher revenue per impression.
Strategic ad placement maximizes revenue without degrading user experience. Position ads in the header, sidebar, between search results, and within listing pages. Avoid intrusive pop-ups or autoplay videos that frustrate users and increase bounce rates. Well-implemented display advertising can generate $500 to $5,000+ monthly depending on traffic volume and niche.
Lead Generation Fees
Some directory niches support lead generation models where you charge businesses per qualified inquiry received through your platform. This works particularly well for high-value services like legal, financial, medical, or home improvement industries where single customers generate substantial revenue.
Implement contact forms, quote request systems, or call tracking that attributes leads to your directory. Charge $5 to $100+ per lead depending on industry average customer values. This performance-based model aligns your success with business outcomes, making it easier to justify costs to listed companies.
Sponsored Listings and Featured Placements
Allow businesses to purchase prominent positioning in search results, category pages, or homepage sections. Unlike standard premium listings, sponsored placements focus specifically on visibility rather than additional features. These spots typically command premium prices—$100 to $1,000+ monthly—in competitive categories.
Clearly label sponsored content to maintain user trust and comply with advertising disclosure requirements. Rotate featured businesses weekly or monthly to create fairness and provide value to multiple paying customers rather than allowing a single business to dominate permanently.
Affiliate Marketing and Referrals
Partner with service providers relevant to your directory’s niche and earn commissions on referrals. For example, a restaurant directory might affiliate with reservation systems, point-of-sale providers, or food delivery platforms. A professional services directory could partner with accounting software, project management tools, or insurance providers.
Integrate affiliate links naturally within listing pages, resource sections, or blog content. Focus on products that genuinely benefit your listed businesses rather than promoting irrelevant services solely for commission potential. This approach generates passive income while providing additional value to your community.
Premium Content and Resources
Create valuable content like industry reports, market analyses, best practice guides, or training courses that businesses will pay to access. A legal directory might offer continuing education courses, while a restaurant directory could provide food safety certification training or marketing templates.
This strategy positions your directory as an industry authority while diversifying revenue beyond advertising and listings. Price digital products between $50 and $500 depending on depth and specialization. Bundle premium content access with higher-tier listing packages to increase perceived value.
Monetization Reality Check: Most new directories should expect 6-12 months before generating meaningful revenue. Focus initially on building traffic and credibility rather than aggressive monetization that could deter early users and listings.
Step 6: Attract and Grow Your User Base
A business directory’s value increases exponentially with the number of quality listings and engaged users it attracts. Your growth strategy must balance two distinct audiences: the businesses you list and the consumers searching for those businesses. Success requires coordinated efforts across multiple channels with consistent execution over time.
Search Engine Optimization (SEO)
SEO represents the most sustainable long-term traffic source for directories. Each listing page, category page, and location page presents an opportunity to rank for relevant searches. Focus on creating unique, detailed content for every listing rather than thin pages with minimal information.
Implement local SEO strategies by creating dedicated pages for each geographic area you cover. A nationwide directory should have city-level and neighborhood-level pages with unique content about local businesses, market characteristics, and area-specific information. Include structured data markup using LocalBusiness schema to help search engines understand your content.
Build authoritative backlinks by creating shareable resources, contributing expert commentary to industry publications, and developing partnerships with complementary websites. Quality backlinks from relevant sources signal to search engines that your directory provides valuable information worth ranking highly.
Direct Business Outreach
Proactively contact businesses in your target niche to claim and enhance their listings. Develop email templates explaining your directory’s value proposition, current traffic statistics, and competitive advantages. Personalize outreach by mentioning specific aspects of their business to demonstrate genuine interest rather than sending obvious mass emails.
Offer initial promotional pricing or extended free trials to early adopters. These businesses become case studies demonstrating results, which you’ll use to convince later prospects. Track which outreach messages generate the highest response rates and continuously refine your approach based on data.
Content Marketing
Publish regular blog content addressing questions your target audiences ask. A wedding vendor directory might create planning guides, budget calculators, and trend reports. A B2B services directory could publish industry analyses, vendor selection frameworks, and case studies.
Each content piece should naturally link to relevant directory categories and listings, driving readers deeper into your platform. Optimize articles for search engines to attract organic traffic, then convert visitors into users through strategic calls-to-action and email capture forms.
Social Media Presence
Establish profiles on platforms where your target audiences actively engage. B2B directories typically find success on LinkedIn, while consumer-focused directories perform better on Facebook, Instagram, or TikTok depending on demographic fit.
Share featured listings, new additions, industry news, and user-generated content to maintain engagement. Create shareable content formats like “top 10” lists, comparison guides, or video interviews with listed businesses. Encourage businesses to share their listing pages on their own social channels, expanding your reach through their networks.
Email Marketing
Build an email list from day one by offering valuable resources in exchange for email addresses. Create separate nurture sequences for businesses and consumers, addressing each group’s specific interests and needs.
Send regular newsletters featuring new listings, industry insights, platform updates, and relevant content. Segment your list based on interests, location, or engagement levels to deliver more targeted, relevant messages. Email marketing typically generates 10-30% of ongoing traffic for established directories.
Paid Advertising (Strategic Use)
While organic growth should form your foundation, strategic paid advertising accelerates initial traction and tests messaging effectiveness. Google Ads targeting high-intent keywords like “[niche] directory” or “find [service] near me” can drive qualified traffic.
Social media advertising works well for targeting specific business types to claim listings. Create lookalike audiences based on your best customers to find similar prospects efficiently. Set modest budgets—$500 to $2,000 monthly—until you establish clear ROI metrics.
Growth Milestone: Focus on reaching your first 100 quality listings before scaling other efforts. This critical mass provides enough content for search engines to index and gives visitors sufficient options to find value, creating positive feedback loops that accelerate subsequent growth.
Partnership and Co-Marketing
Identify complementary businesses, associations, or media outlets that reach your target audience. Develop mutually beneficial partnerships where you provide exclusive content, tools, or resources in exchange for exposure to their community.
Industry associations often maintain member directories or resource pages where you can secure listings. Offer to provide the association’s members with free or discounted premium listings, creating value for both the association and expanding your business base.
Step 7: Maintain and Scale Your Directory
Launching your directory marks the beginning rather than the end of your journey. Long-term success requires consistent maintenance, quality control, community engagement, and strategic scaling. Directories that stagnate with outdated information quickly lose traffic and credibility, while those that continuously improve build compounding advantages.
Quality Control and Data Accuracy
Directory value depends entirely on information accuracy. Implement regular verification processes to ensure business details remain current. Schedule quarterly reviews of all listings, contacting businesses to confirm information or removing defunct companies.
Enable user reporting for incorrect information, providing a simple “suggest an edit” button on every listing page. Review submissions within 48 hours to maintain data quality without creating burdensome manual workloads. Consider automated verification systems that cross-reference business details against authoritative sources like government business registries.
Establish clear listing guidelines covering acceptable business types, prohibited content, and quality standards. Moderate new submissions before publication to prevent spam, duplicate listings, or inappropriate content from degrading your directory’s reputation.
User Engagement and Community Building
Transform your directory from a static database into an active community where businesses and consumers interact. Enable and moderate reviews, questions and answers, and comment sections that provide social proof and additional value beyond basic business information.
Recognize and reward active participants through badges, featured profiles, or “most helpful reviewer” designations. These gamification elements encourage continued engagement while highlighting quality contributors to other users.
Host virtual or in-person events connecting businesses with potential customers or with each other. A local business directory might organize networking mixers, while a niche professional directory could host webinars on industry topics. Events strengthen community bonds and position your directory as a central industry hub.
Analytics and Performance Tracking
Implement comprehensive analytics tracking user behavior, traffic sources, popular categories, search patterns, and conversion rates. Google Analytics provides foundational insights, while directory-specific metrics include listings viewed per session, search-to-click rates, and contact form submissions.
Monitor business-side metrics like listing claim rates, premium conversion rates, renewal rates, and customer lifetime value. Identify which acquisition channels deliver the highest-quality businesses and allocate resources accordingly.
Establish key performance indicators (KPIs) aligned with your business goals and review them weekly or monthly. Track trends over time rather than obsessing over day-to-day fluctuations, making strategic adjustments based on sustained patterns rather than temporary variations.
| Key Metric | What It Measures | Healthy Benchmark |
|---|---|---|
| Monthly Active Users | Unique visitors who engage with your directory | 20%+ month-over-month growth in early stages |
| Listing Growth Rate | New business listings added monthly | 50+ monthly in year one, accelerating thereafter |
| Premium Conversion Rate | Percentage of free listings upgrading to paid | 5-15% after directory establishes traffic |
| Customer Renewal Rate | Paid listings that renew subscriptions | 70%+ indicates strong value delivery |
| Pages Per Session | Average listings viewed per visitor | 3-5 pages indicates engaged users |
| Organic Traffic Share | Percentage of visits from search engines | 60%+ indicates strong SEO foundation |
Technical Maintenance and Updates
Regularly update your platform’s software, plugins, and security measures to prevent vulnerabilities and maintain performance. Schedule monthly backups stored in multiple locations to protect against data loss from technical failures or security breaches.
Monitor site speed continuously, optimizing images, implementing caching, and upgrading hosting resources as traffic grows. Page load times directly impact both user experience and search rankings, making performance optimization an ongoing priority rather than a one-time task.
Stay current with web standards and best practices, particularly regarding mobile experience, accessibility, and privacy compliance. As regulations like GDPR, CCPA, and others evolve, ensure your data collection and processing practices remain compliant.
Strategic Scaling Approaches
Once your directory achieves product-market fit in your initial niche or geography, consider strategic expansion. Options include geographic expansion (adding new cities, regions, or countries), category expansion (adding related business types), or feature expansion (adding booking, e-commerce, or other transactions).
Evaluate expansion opportunities based on available resources, competitive dynamics, and community demand. Geographic expansion typically presents the clearest path, applying your proven model to new locations with similar characteristics to your initial success.
Consider whether to pursue horizontal scaling (serving more of the same customer type) or vertical scaling (adding depth to existing relationships through additional services). Horizontal scaling increases reach and market share, while vertical scaling increases revenue per customer and strengthens competitive moats.
Building a Sustainable Business Model
Long-term directory success requires transitioning from founder-dependent operations to systematized processes that scale without proportional time investment. Document standard operating procedures for listing approval, customer support, content creation, and other recurring tasks.
Gradually build a team or leverage contractors to handle routine operations, freeing your time for strategic initiatives that drive growth. Consider hiring or contracting specialists for content creation, technical development, sales outreach, and customer success as revenue supports additional resources.
Establish financial discipline by tracking unit economics—the cost to acquire a customer versus their lifetime value. Profitable directories typically achieve customer lifetime values 3-5x higher than acquisition costs, providing margin for sustainable growth investments.
Long-Term Perspective: Successful directories typically require 2-3 years to reach significant scale and profitability. Maintain realistic expectations and sufficient runway to persist through the initial growth phase when expenses exceed revenue. The businesses that survive this period often build substantial, defensible market positions.
Frequently Asked Questions
How much does it cost to create a business directory?
Creating a business directory costs between $500 and $50,000 depending on your approach. Using WordPress with directory plugins costs $500-$2,000, while custom development ranges from $10,000-$50,000. Ongoing expenses include hosting ($20-$200 monthly), domain registration ($10-$15 yearly), and marketing budget for acquisition.
What features should a business directory website have?
Essential directory features include advanced search filters, business profile pages, user reviews and ratings, contact forms, map integration, and mobile responsiveness. Premium features should include analytics dashboards, claim listing functionality, featured placement options, and email verification. Include social media integration and multimedia support for comprehensive listings.
How do business directories make money?
Business directories generate revenue through multiple streams: premium listing subscriptions ($20-$200 monthly), featured placement advertising, banner ads, lead generation fees, and affiliate commissions. Additional income comes from sponsored content, directory submission fees, and data licensing. Successful directories typically combine three to four revenue streams.
Can I build a business directory without coding skills?
Yes, you can build a professional directory without coding using platforms like WordPress with plugins such as GeoDirectory or Business Directory Plugin. No-code solutions like Brilliant Directories offer complete packages starting at $67 monthly. These platforms provide drag-and-drop interfaces, pre-built templates, and automated features requiring zero technical knowledge.
How long does it take to build a business directory?
Building a basic directory takes two to four weeks using existing platforms and templates. Custom development requires three to six months for a fully-featured solution. Timeline factors include feature complexity, design customization, initial business population, testing phases, and SEO optimization. Plan additional time for content creation and business outreach.
What makes a business directory successful?
Successful directories focus on specific niches, maintain accurate updated listings, and provide genuine value to both businesses and searchers. Key success factors include strong SEO performance, active user engagement, quality over quantity in listings, responsive customer support, and consistent marketing efforts. Regular content updates and community building drive long-term growth.
Should I allow free or only paid listings?
Start with free basic listings to build directory volume and attract users, then offer paid premium upgrades for enhanced features. This freemium model generates traffic while creating revenue opportunities. Approximately 70-80% of listings should be free, with premium options including featured placement, enhanced profiles, and priority ranking driving monetization.
How do I get businesses to join my directory?
Attract businesses through direct outreach campaigns, demonstrating SEO value, offering free trial periods, and showcasing existing traffic statistics. Create compelling value propositions highlighting increased visibility and customer inquiries. Use email campaigns, social media promotion, and industry partnerships. Add businesses manually initially to demonstrate directory quality and value.
What are the best niches for business directories?
Profitable directory niches include local services (plumbers, electricians), healthcare providers, restaurants and food services, professional services (lawyers, accountants), home improvement contractors, and wellness businesses. Geographic-specific directories and underserved industries offer excellent opportunities. Research competition levels and local business density before selecting your niche.
Ready to Launch Your Business Directory?
You now have the complete roadmap to build a profitable business directory from scratch. The key to success lies in taking action today. Choose your niche, select your platform, and start building your foundation. Remember that every successful directory started with a single listing and grew through consistent effort and value delivery.
The businesses in your chosen niche are actively searching for visibility right now. Searchers are looking for curated, trustworthy recommendations. Your directory can become the bridge connecting them, generating recurring revenue while providing genuine value to your community.
Your Next Steps
- Define your specific niche and target audience this week
- Research your top three competitors and identify gaps
- Choose your platform and register your domain name
- Set up your basic directory structure and test functionality
- Add your first 20-30 quality business listings manually
- Implement SEO best practices and submit to search engines
- Launch your marketing campaign and start acquiring users
Don’t wait for the perfect moment. Start building your business directory today and create a valuable asset that generates income for years to come.
Was this article helpful?