How to Import Listings from IDX to WordPress: 6 Simple Steps

If you’re a real estate professional running a WordPress site, you’ve probably wrestled with the challenge of keeping your property listings fresh and up-to-date. Manually adding each listing? That’s a nightmare. The solution lies in IDX (Internet Data Exchange) integration, which automatically pulls MLS listings directly into your WordPress site. But here’s what most articles won’t tell you: the real power isn’t just in importing listings—it’s in creating a seamless, automated ecosystem that updates itself while you focus on closing deals.

I remember working with a broker who spent 15 hours weekly uploading listings manually. After implementing IDX import to WordPress, that dropped to less than an hour of maintenance per month. The difference wasn’t just time saved—it was the credibility boost from having listings appear within minutes of hitting the MLS, often before competing agents’ websites showed them.
TL;DR – Quick Takeaways
- IDX integration automates listing imports – No more manual data entry; listings sync automatically from your MLS
- Six core steps – Select feed, connect WordPress, import data, create templates, configure sync, and validate
- Multiple plugin options exist – IMPress for IDX Broker, uListing, and FlexMLS each offer different features and pricing
- Performance matters – Proper setup prevents site slowdowns and ensures fast loading times
- MLS compliance is non-negotiable – Follow display rules and data handling requirements to avoid penalties
Understanding IDX, WordPress, and Integration Options
Before diving into the technical steps, let’s establish what we’re actually dealing with. IDX isn’t just a fancy acronym—it’s the backbone of how real estate listings move from Multiple Listing Services (MLSs) into your website. At its core, IDX allows brokers and agents to display property listings from their MLS on their own websites, creating a centralized hub where potential buyers can search properties without leaving your domain.
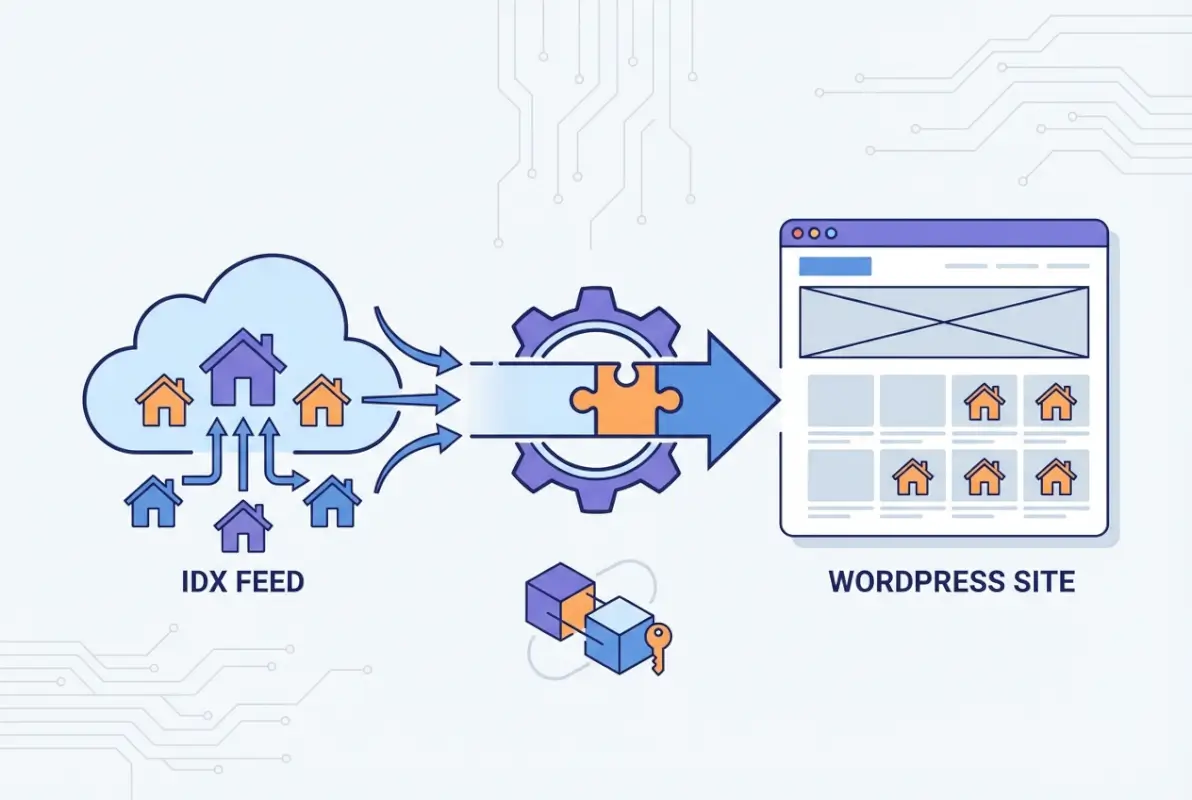
What IDX Data Is and How It Flows Into WordPress
The technical pipeline works like this: your MLS maintains a database of all active, pending, and sold listings. Through RETS (Real Estate Transaction Standard) or the newer RESO Web API, this data becomes accessible to approved IDX vendors. These vendors then provide feeds—either through direct API connections, iFrames, or widget embeds—that WordPress can consume.
The difference between these methods is substantial. iFrame integrations essentially embed a separate website within yours (think of it as a window into another site). They’re quick to set up but offer limited customization and can hurt SEO since search engines can’t easily crawl that content. Direct API feeds, on the other hand, import listings as actual WordPress posts or custom post types, giving you full control over design, SEO, and user experience.
Overview of Common IDX Integration Approaches for WordPress
The WordPress ecosystem offers several paths for IDX integration. The most popular official plugin is IMPress for IDX Broker, which works specifically if you have an IDX Broker account. It handles everything from listing imports to lead capture forms, search widgets, and automatic updates.
Alternative solutions include the uListing IDX Broker Importer (particularly useful if you’re running the HomePress theme), FlexMLS IDX Plugin for agents working with FBS vendors, and various generic RETS-based importers. Each has different strengths: some excel at customization, others prioritize speed, and some focus on specific MLS ecosystems.
Widget-based integrations offer the fastest setup—often just copying and pasting embed codes into widget areas. However, they sacrifice flexibility. Full-page listing templates require more initial configuration but reward you with complete control over layout, schema markup, and integration with your existing WordPress theme. If you want your listings to truly feel like part of your site (not bolted on), invest in the template approach.
Choosing the Right Solution for Your Needs
Your choice should hinge on four factors: MLS coverage (does the solution support your specific MLS or MLSs?), update frequency (how often do listings refresh?), pricing structure, and technical support quality. Some solutions charge monthly fees based on listing volume, while others offer flat rates or tiered plans.
Here’s something most articles gloss over: check whether the solution supports sold and pending listings, not just active ones. Showcasing your closed deals builds credibility and demonstrates market knowledge to potential clients. Some MLS agreements restrict sold data visibility, but if yours allows it, make sure your chosen plugin can display it.
| Solution | Best For | Customization | Ease of Setup |
|---|---|---|---|
| IMPress for IDX Broker | IDX Broker subscribers | High | Medium |
| uListing IDX Importer | HomePress theme users | Very High | Medium |
| FlexMLS IDX | FBS/FlexMLS users | Medium | Easy |
| Widget-based embeds | Quick launches | Low | Very Easy |
Prepare Your WordPress Site for IDX Import
The difference between a smooth IDX integration and a frustrating troubleshooting marathon usually comes down to preparation. Before you install any plugin or connect any API, you need to ensure your WordPress site is actually ready to handle real estate data at scale. This is where many agents rush through and pay for it later with broken imports, slow page loads, or compliance issues.

Prerequisites You Should Lock Down Before Importing
First, verify your hosting environment can handle the data load. IDX feeds often include thousands of listings, each with multiple high-resolution images. If you’re on a basic shared hosting plan with 1GB storage and minimal processing power, you’re going to hit performance walls quickly. Look for managed WordPress hosting with at least 10GB storage, PHP 7.4 or higher, and adequate memory limits (256MB minimum, 512MB recommended).
Check your WordPress core version, theme, and existing plugins for compatibility. Most modern IDX plugins require WordPress 5.0 or later and may conflict with certain caching plugins or page builders. Run a staging site test if possible—duplicate your live site to a test environment, install the IDX plugin there first, and watch for conflicts before deploying to production.
You’ll also need credentials from your IDX provider. For IDX Broker users, that means your API key (found in your IDX Broker dashboard under API settings). For RETS-based solutions, you’ll need the RETS login URL, username, and password provided by your MLS or data vendor. Have these ready before starting the plugin configuration.
Security and Compliance Considerations
MLS compliance isn’t optional—it’s a legal requirement. Each MLS has specific rules about how you can display listings, how often data must update, mandatory disclaimers, and how you handle leads who inquire about properties. Violating these rules can result in fines, suspension of IDX privileges, or even loss of MLS access.
Common compliance requirements include displaying the listing agent’s information, showing data source attribution (“Listings courtesy of [MLS Name]”), including last-updated timestamps, and automatically removing sold or expired listings within specified timeframes (often 24-48 hours). Review your MLS’s IDX policy document before going live—seriously, read the whole thing. Your IDX plugin should help automate compliance, but you’re ultimately responsible for adherence.
Lead data handling is another critical area. When visitors save searches or request property information, you’re collecting personal data. Depending on your location, GDPR, CCPA, or other privacy regulations may apply. Ensure your privacy policy covers how you collect, store, and use this information, and implement proper consent mechanisms.
Site Structure and UX Readiness
Before importing thousands of listings, plan where they’ll live on your site. Most IDX plugins create dedicated archive pages (example: yoursite.com/listings/) and individual property detail pages (yoursite.com/listings/123-main-street/). Decide whether these should integrate into your existing site navigation or exist as a separate “Search Properties” section.
Create SEO-friendly URL structures from the start. Slug formats like /listings/city/address/ are more descriptive and valuable than /property/12345/. Many plugins let you customize this during setup, but changing it later can break existing links and lose search rankings.
Schema markup for real estate listings helps search engines understand and potentially feature your properties in rich results. Look for plugins that automatically add structured data for properties, or be prepared to implement it manually using schema.org/RealEstateListing format. The payoff is enhanced visibility in search results with details like price, bedrooms, and images showing directly in Google.
Similar to how you’d approach getting your directory on the first page of Google through SEO strategies, your listing pages need proper optimization to rank well in local real estate searches.
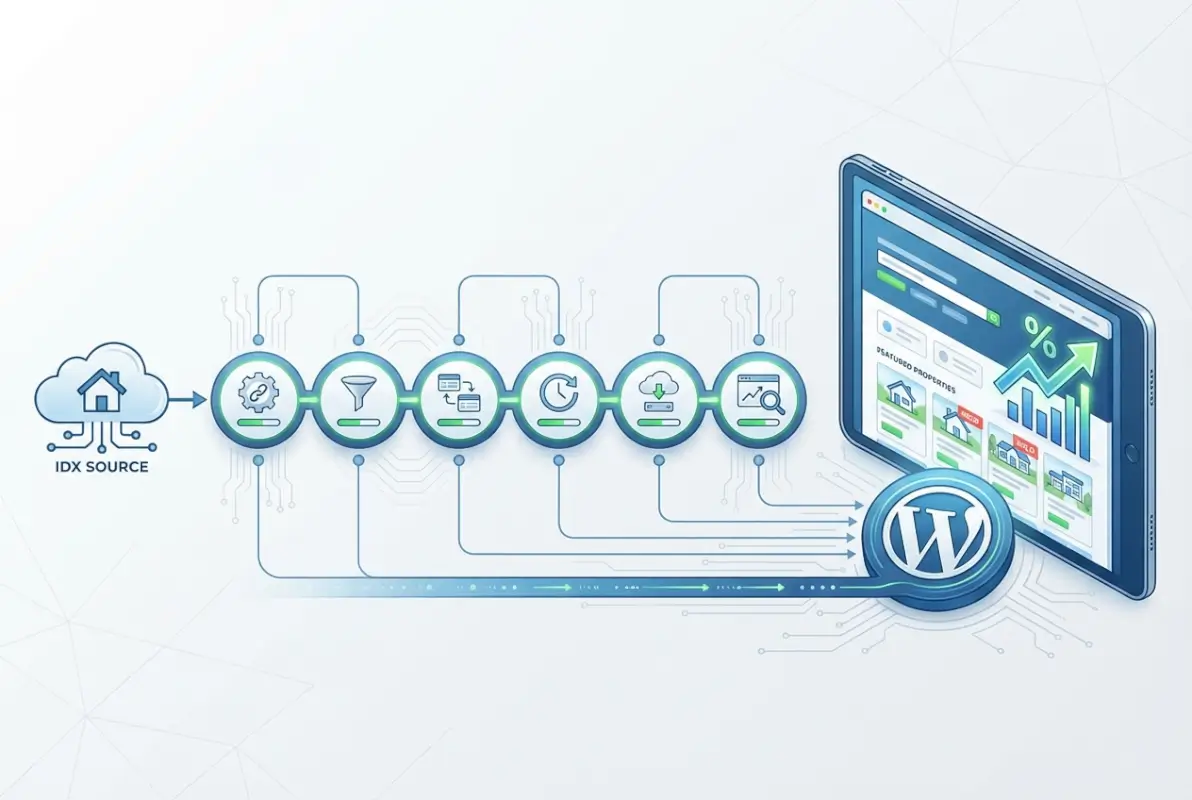
The 6-Step, Step-by-Step Import Process
Now we get to the actual mechanics of pulling listings from your MLS into WordPress. These six steps form the core workflow regardless of which specific plugin you choose, though the interface and terminology may vary. I’ll walk through the universal principles that apply across solutions, with specific callouts where major plugins differ.
Step 1 — Select and Configure Your IDX Feed
Log into your IDX provider’s dashboard (IDX Broker, your RETS vendor, etc.) and identify which feeds you want to import. You typically have options: import all listings from specific MLSs, filter by geography (only properties in certain cities or zip codes), filter by property type (residential only, commercial only, etc.), or import only listings from specific “saved searches.”
The “import everything” approach sounds comprehensive, but it can bloat your database with irrelevant listings. If you primarily serve buyers in three specific neighborhoods, importing listings from the entire county wastes resources and dilutes your site’s focus. Create targeted saved searches in your IDX provider’s dashboard—for example, “Single Family Homes, $200K-$500K, Neighborhoods A, B, C”—and import only those results.
Confirm the update cadence during this step. Most IDX feeds offer update intervals ranging from every 15 minutes to once daily. More frequent updates mean fresher data but higher server load. For most agents, hourly updates strike a good balance between currency and performance.
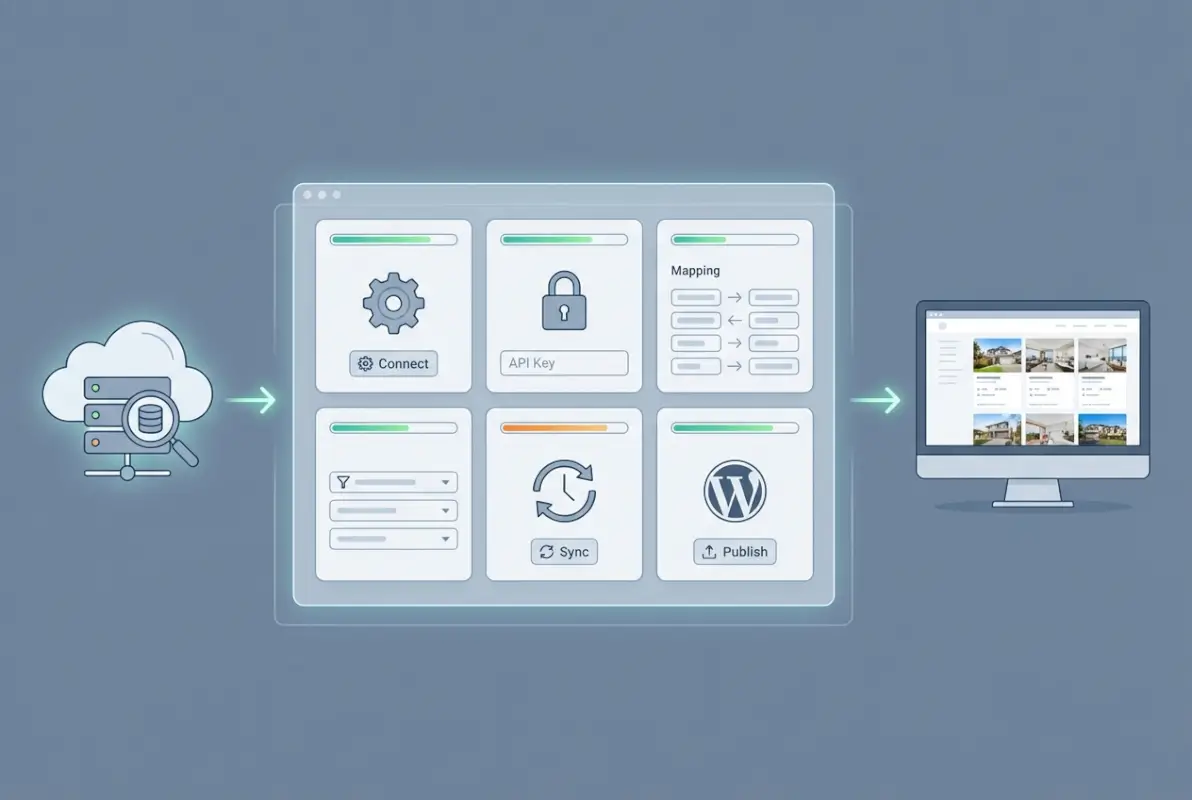
Step 2 — Connect WordPress to IDX
Install your chosen IDX plugin from the WordPress plugin repository or via upload (if it’s a premium plugin). Navigate to the plugin’s settings page—usually found under Settings or a dedicated menu item in your WordPress admin sidebar.
This is where you’ll enter those API credentials you gathered earlier. For IMPress for IDX Broker, you’ll paste your IDX Broker API key. For RETS-based plugins, you’ll enter the RETS URL, username, and password. Some plugins include a “Test Connection” button—use it. This validates that your credentials work and that WordPress can communicate with the IDX data source before attempting a full import.
Authentication failures at this stage usually stem from typos in credentials, IP whitelist issues (some RETS servers require you to whitelist your website’s IP address), or expired API keys. If the connection test fails, double-check your credentials and contact your IDX provider to verify your account is properly configured for API access.
Step 3 — Import Listings Into WordPress
With the connection established, initiate your first data pull. Most plugins offer a manual “Import Now” button alongside automated scheduling. Use the manual option first to monitor the process and catch any errors before setting up automation.
During import, the plugin fetches listing data and media from the IDX feed and creates WordPress posts (or custom post types). Pay attention to how images are handled. Some plugins store images on external CDNs (reducing your server load), while others download and host images directly in your WordPress media library (giving you more control but consuming storage).
The initial import can take anywhere from a few minutes to several hours depending on listing volume and your server resources. Don’t panic if it seems slow—importing 2,000 listings with 20 images each means processing 40,000+ media files. Let it run, and monitor your server’s resource usage. If the import times out or fails, you may need to temporarily increase PHP max execution time or memory limits (check with your host).
Step 4 — Create Listing Templates and Search Templates
Raw data in your database means nothing if visitors can’t view it properly. This step involves designing how listings appear on your site. Many premium IDX plugins include pre-built templates, but you’ll likely want to customize them to match your brand.
Your listing detail template should showcase property images (ideally in a gallery or slider format), key details (price, bedrooms, bathrooms, square footage), full description, map with property location, and a lead capture form (“Contact me about this property”). Don’t forget MLS compliance elements—listing agent info, data source attribution, and last-updated timestamp must appear on each detail page.
Search results templates display lists of properties with filtering options. Include filters for price range, bedrooms, bathrooms, property type, and location at minimum. Advanced implementations add filters for features like “pool,” “waterfront,” “new construction,” etc., based on what data your MLS provides.
If your plugin supports custom templates, you’ll typically create PHP template files in your theme (or child theme) following the plugin’s template hierarchy. If you’re not comfortable with PHP, look for plugins that offer visual page builders or shortcode-based layouts that you can configure through the WordPress admin without code.
Think of this process like getting your business listed on directories—presentation and consistency across all your listing pages matter immensely for user trust and engagement.
Step 5 — Configure Automatic Updates and Sync
One-time imports are useful for testing, but the real power comes from automation. Configure your plugin to check for updates on a regular schedule—this is usually done via WordPress cron jobs that run in the background.
Set up your preferred sync interval (hourly is typical) and enable automatic handling of listing status changes. When a property sells or expires in the MLS, your plugin should automatically remove it from your site or mark it as “sold” (depending on your MLS rules and your preference). Similarly, new listings hitting the MLS should appear on your site automatically.
Some plugins offer “force refresh” options that re-import all data on each sync, while others use incremental updates that only process changes. Incremental syncing is more efficient but requires the plugin to track what’s changed since the last update. For most sites, incremental syncing with a weekly or monthly full refresh provides the best balance.
Step 6 — Test, Validate, and Publish
Before announcing your new IDX integration to the world, systematically test everything. Start by verifying data accuracy—pick 10 random listings and compare the data on your site to the same listings in the MLS. Check that addresses, prices, images, and descriptions match. Mismatched or outdated data undermines credibility fast.
Test image rendering across devices. Do property photos load properly on mobile? Are they optimized for fast loading, or do they slow your pages to a crawl? Run a few pages through Google PageSpeed Insights to check performance and identify optimization opportunities.
Validate that maps display correctly with accurate property locations. Geolocation errors can show properties in the wrong neighborhood or even the wrong city, which is embarrassing at best and compliance-violating at worst.
Test lead capture forms by submitting test inquiries. Do they arrive in your inbox? Are they logged in your CRM (if integrated)? Do automated responses work as expected? Run through the entire user journey from search to inquiry to ensure nothing’s broken in the chain.
Finally, check mobile responsiveness comprehensively. Over 60% of real estate searches happen on mobile devices. If your listings look great on desktop but broken on phones, you’re losing the majority of potential leads.
Display, Customize, and Optimize IDX Listings on WordPress
Getting listings onto your site is one thing, making them actually convert visitors into leads is another. The difference between a mediocre IDX implementation and a lead-generating machine comes down to how you present, optimize, and maintain that data. Let’s talk about turning those imported listings into a competitive advantage.
Designing User-Friendly Listing Pages
Your listing detail page is where buying decisions begin. The layout should follow a proven hierarchy: high-quality images first (people are visual), followed by price and key stats (beds/baths/sqft), then full description, location map, and finally the contact form. Visitors scan in F-patterns, so place your most compelling elements in the top-left and along the left edge.
Image galleries should be interactive but not overwhelming. Implement a lightbox or modal viewer that lets users click through photos without leaving the page. Include virtual tours or video walkthroughs if available—listings with video receive 403% more inquiries than those without (according to National Association of Realtors data).
Maps are non-negotiable. Use Google Maps or Mapbox to show the exact property location (if MLS rules allow precise pins) and nearby amenities—schools, shopping, transit. Some advanced implementations include “street view” integration and neighborhood statistics like walkability scores.
The contact form should be frictionless. Require only essential fields (name, email, phone, and maybe message). Every additional field you add decreases conversion rates. Make the form sticky or fixed so it remains accessible as users scroll through property details—out of sight means out of mind.
Improving Search and Discovery
The search experience makes or breaks your IDX implementation. Users come to your site to find properties that match specific criteria—make that effortless. Your search interface should support multiple filter combinations: location (by city, neighborhood, zip, or map drawing), price range (with slider controls), bedrooms/bathrooms (minimum counts), property type (single family, condo, townhouse, etc.), and common features.
Advanced search widgets that let users draw custom boundary shapes on maps or search by school district dramatically improve the user experience for buyers with specific location requirements. This level of sophistication sets you apart from agents using basic zip code searches.
Implement saved searches with email alerts. When users find search criteria they like, let them save it and receive automatic emails when new matching listings arrive. This transforms one-time visitors into ongoing leads—they return to your site repeatedly to check new results, and you stay top-of-mind throughout their property search journey.
Don’t neglect accessibility. Search filters should work with keyboard navigation, screen readers should be able to interpret property data, and color contrast should meet WCAG standards. Accessibility isn’t just ethical—it’s often legally required and expands your potential audience.
Performance Optimization
IDX implementations can tank site performance if you’re not careful. Thousands of images and database queries per page load will slow even powerful servers. Start with image optimization—compress photos before upload (or use plugins that automatically compress), implement lazy loading so images only load as users scroll to them, and consider a CDN to serve images from geographically distributed servers.
Caching gets complicated with IDX because you need fresh data but also fast page loads. Full-page caching can serve stale listing information, which violates MLS compliance. Instead, use object caching for database queries and cache listing pages with shorter TTLs (time-to-live)—perhaps 1 hour instead of 24. This balances performance and data freshness.
Database indexing dramatically speeds up search queries. Ensure your database has proper indexes on commonly searched fields (price, bedrooms, bathrooms, location, status). Most quality IDX plugins handle this automatically, but it’s worth verifying if you notice slow search performance.
SEO and Schema Markup for IDX Content
Here’s a controversial truth: many IDX implementations hurt SEO more than they help. Why? Because they create thousands of duplicate or thin content pages that search engines either ignore or penalize. To avoid this, you need a deliberate SEO strategy.
First, implement proper schema markup using schema.org/RealEstateListing structured data. This tells search engines exactly what each field represents—price, bedrooms, address, etc.—and can result in rich snippets in search results showing property details directly.
Handle canonical URLs carefully. If the same listing appears on multiple agent sites (which it will), search engines need to know which version to prioritize. Some MLSs designate the listing agent’s site as canonical; others allow each agent to show the listing with their own canonical URL. Follow your MLS’s guidance here.
Create XML sitemaps specifically for your listings, separate from your main content sitemap. This helps search engines discover and crawl property pages efficiently. Configure sitemap priorities and change frequencies appropriately—active listings might have daily change frequency, while sold properties might have weekly.
Add unique content to listing pages beyond the MLS description. Include neighborhood guides, school information, local market statistics, or your own property analysis. This differentiation gives search engines a reason to rank your version of the listing over competitors’ identical MLS data.
The approach parallels strategies for getting business listings on the first page of Google—you need unique value, proper technical setup, and strategic optimization to stand out.
Compliance, Data Accuracy, and Cadence
MLS data changes constantly. Prices drop, listings go under contract, properties sell, new listings appear. Your site must reflect these changes promptly to maintain compliance and credibility. Configure your sync settings to match your MLS’s required update frequency—many require updates at least once daily, some demand hourly.
Display last-updated timestamps prominently on each listing. This manages user expectations (they know if they’re looking at this morning’s data or yesterday’s) and satisfies most MLS compliance requirements.
When listings expire or sell, handle them appropriately. Some MLSs require immediate removal; others allow you to display sold listings with clear “SOLD” status. Check your specific rules. If allowed to show sold properties, leverage them—they demonstrate your activity and success in the market.
Implement automated compliance notices. Required disclaimers like “Listing information deemed reliable but not guaranteed” or “Data provided by [MLS Name]” should appear automatically on all listing pages via template includes, not manually added to each page.
Maintenance, Troubleshooting, and Best Practices
The work doesn’t end once your IDX import is running. Ongoing maintenance separates reliable, professional implementations from abandoned projects that gradually break down. I’ve seen too many agents launch IDX integrations with enthusiasm, then ignore them for months until someone points out that all the listings are six weeks out of date and half the images are broken.

Ongoing Maintenance Routines
Establish a monthly review checklist. Verify that automatic syncs are running as scheduled (check sync logs in your plugin dashboard), spot-check 5-10 random listings for data accuracy against the MLS, review site performance metrics to catch slowdowns early, and ensure all images are loading properly.
Keep your IDX plugin updated. Developers release updates to fix bugs, improve compatibility with new WordPress versions, and maintain compliance with changing MLS rules. Delaying updates can lead to security vulnerabilities or broken functionality. Test updates on a staging site first when possible, but don’t let plugins fall more than a few versions behind current releases.
Monitor your WordPress error logs for IDX-related issues. Connection failures, timeout errors during syncs, or database query problems often appear in logs before they become visible problems to users. Catching them early prevents larger issues.
Back up your database regularly, with special attention before major plugin updates or configuration changes. If something goes wrong during an import or update, you need the ability to roll back to a known good state without losing weeks of data.
Common Issues and Their Fixes
API authentication failures happen when keys expire or provider accounts lapse. If syncs suddenly stop working, verify your IDX account is active and your API key hasn’t been regenerated (which invalidates the old key). Log into your provider dashboard and confirm account status before diving into complex troubleshooting.
MLS feed outages occur occasionally. Sometimes the MLS server goes down for maintenance, the RETS feed has temporary connectivity issues, or API rate limits get exceeded. Before assuming your site is broken, check your IDX provider’s status page or contact their support to confirm the feed is operational.
Data mapping mismatches cause fields to display incorrectly—prices in the wrong format, bathrooms showing as bedrooms, etc. This usually stems from MLS schema changes (the MLS adds or renames fields) that your plugin hasn’t adapted to yet. Check for plugin updates that address schema changes, or contact plugin support to report the mapping issue.
Missing images typically result from one of three causes: the original listing lacked images (yes, some agents list properties without photos), the image URLs from the MLS changed, or your server couldn’t download the images during import (timeout or permission issues). Check the specific listing in the MLS to confirm images exist, then review your plugin’s image import settings and server resource limits.
Performance degradation over time happens as your database grows with thousands of listing records and hundreds of thousands of image files. Implement regular database optimization (many plugins include cleanup tools that remove old sold listings beyond a certain age), archive old data, and ensure your hosting resources scale with your data growth.
Data Governance and User Experience Considerations
When users submit lead forms on your listing pages, you’re collecting personal information. Be transparent about how you use it. Your privacy policy should explicitly state that you collect contact info from property inquiries, how you’ll use it (to respond to their request, send market updates, etc.), and whether you share it with third parties (other agents, CRM systems, email marketing platforms).
Obtain proper consent before adding leads to marketing automation sequences. Some users want information about one specific property—bombarding them with emails about unrelated listings is pushy and often legally problematic (depending on your jurisdiction’s marketing laws). Provide clear opt-in mechanisms for ongoing communication separate from single-property inquiries.
Respect user preferences. If someone unsubscribes from emails or requests data deletion, honor it promptly. Many CRMs and email platforms now include compliance tools for GDPR, CCPA, and similar regulations—use them.
Scaling Considerations for Larger Sites or Multi-MLS Setups
If you operate in multiple markets served by different MLSs, you’ll need IDX feeds from each. This multiplies your data volume and complexity. Some plugins handle multi-MLS setups elegantly with per-feed configuration; others struggle. Verify multi-MLS support before committing to a solution if this applies to you.
Database indexing becomes critical at scale. A few hundred listings work fine with basic indexes; tens of thousands require optimized indexes on every searchable field. Work with a developer experienced in database optimization if you’re handling very large listing volumes.
Consider dedicated or VPS hosting once you exceed 5,000 listings or notice performance issues on shared hosting. The server resources required to serve thousands of property pages with image galleries to hundreds of concurrent users exceed what most shared hosting plans provide.
CDN usage transitions from “nice to have” to “essential” for large multi-MLS implementations. Serving images from a CDN reduces your server load dramatically and improves load times for users across geographic regions.
Comparing IDX Solutions: Making the Right Choice
Not all IDX plugins are created equal, and choosing the wrong one for your specific needs can mean months of frustration or expensive do-overs. Let’s compare the major players to help you make an informed decision based on your situation, budget, and technical comfort level.
| Plugin/Solution | Pricing Model | Best For | Key Strengths | Limitations |
|---|---|---|---|---|
| IMPress for IDX Broker | Requires IDX Broker subscription ($50-300+/mo) | Agents with existing IDX Broker accounts | Deep integration, lead management, extensive customization | IDX Broker subscription required, steeper learning curve |
| uListing IDX Importer | Part of HomePress theme package | HomePress theme users wanting native WordPress listings | Creates native WP posts, highly customizable templates | Requires HomePress theme, theme-dependent functionality |
| FlexMLS IDX | Included with FBS/FlexMLS subscription | FBS data feed subscribers | Easy setup, widget-based, solid support | Limited to FBS feeds, less customization than API-based options |
| Direct RETS Plugins | Varies ($100-500 one-time or annual) | Tech-savvy users wanting direct MLS connection | No middleman, full control, maximum customization | Technical setup complexity, requires RETS knowledge |
IMPress for IDX Broker: The Established Leader
If you’re already an IDX Broker subscriber, IMPress offers the deepest integration with WordPress. It creates native post types for listings, supports advanced lead capture workflows, and includes built-in compliance features. The plugin is actively maintained, regularly updated for WordPress compatibility, and backed by IDX Broker’s dedicated support team.
The downside is cost and complexity. IDX Broker subscriptions start around $50/month for basic service and scale up based on listing volume and features. The plugin itself has a learning curve—you’re not just installing a simple widget, you’re implementing a complete lead management system.
Choose IMPress if you want a comprehensive solution, don’t mind monthly subscription costs, and value professional support. It’s particularly strong for teams or brokerages that need lead routing, CRM integration, and detailed analytics.
uListing IDX Importer: The Customization Champion
Part of the HomePress real estate theme ecosystem, uListing IDX Importer excels at creating beautiful, highly customized listing displays. Since it’s designed specifically for real estate themes, the integration feels more native than general-purpose solutions.
The plugin imports listings as standard WordPress posts, making them searchable by default WordPress search, compatible with SEO plugins, and customizable through standard WordPress post editing. This approach gives you maximum flexibility but requires more initial configuration.
The limitation is theme dependency. uListing IDX Importer works best (or only) with HomePress and similar real estate themes. If you’re using a different theme or want to switch themes later, this creates complications.
FlexMLS IDX: The Simplicity Solution
For agents using FBS (FlexMLS) data feeds, the official FlexMLS IDX plugin offers the path of least resistance. Setup is straightforward—mostly widget configuration and shortcode placement—and the plugin handles MLS compliance automatically.
Performance is good since listings are served from FlexMLS’s CDN rather than your WordPress database. Updates happen in real-time without impacting your site’s performance, and you don’t have to worry about database growth or image storage.
The tradeoff is customization. Widget-based implementations look professional but offer limited design flexibility. You can’t easily modify the search interface, add custom fields, or integrate deeply with marketing automation tools.
Direct RETS Plugins: Maximum Control
For developers or technically sophisticated users, direct RETS plugins eliminate the middleman. You connect straight to your MLS’s RETS server, import exactly the data you want, and have complete control over how it’s stored and displayed.
This approach offers maximum flexibility and often lower long-term costs (one-time plugin purchase instead of monthly subscriptions). You can implement custom search algorithms, integrate with any CRM or marketing platform, and optimize performance exactly for your use case.
The challenge is technical complexity. RETS integration requires understanding database schemas, handling authentication, managing compliance requirements, and troubleshooting connection issues. Unless you’re comfortable with technical implementation or have developer support, this approach can become overwhelming.