How to Install Plugins Using FileZilla: A Step-by-Step Tutorial

Create a striking, professional hero image for a blog article titled: How to Install Plugins Using FileZilla: A Step-by-Step Tutorial. Style: Modern, clean, eye-catching design that represents the main topic. No text overlays. High quality 1200x800 professional blog header.
Translated to

Let’s be honest—uploading WordPress plugins via FTP isn’t exactly the first thing that comes to mind when you think about managing your website. Most people click a few buttons in the WordPress dashboard and call it a day. But here’s what nobody talks about: there are situations where FTP-based installation isn’t just useful, it’s necessary. Maybe you’re dealing with a massive premium plugin that times out during dashboard upload. Perhaps your hosting provider has strict file size limits that make traditional installation impossible. Or you might be working with a custom-built plugin that doesn’t exist in the WordPress repository at all.

I remember the first time I encountered this scenario myself—a client’s website dashboard completely locked up during a plugin update, and the only way forward was through FileZilla. What seemed intimidating at first turned out to be surprisingly straightforward, and it opened up a whole new level of control over WordPress installations. The truth is, understanding FTP-based plugin installation gives you a backup plan when things go wrong, and trust me, things will go wrong eventually.

TL;DR – Quick Takeaways

  • FTP installation is essential when dashboard uploads fail, file size limits prevent traditional installation, or you’re working with premium/custom plugins
  • FileZilla connects your computer to your server using FTP credentials provided by your hosting company
  • Always upload to wp-content/plugins as an extracted folder, then activate through WordPress admin
  • Security matters—only download plugins from trusted sources and use SFTP when available
  • Dashboard upload is simpler for most scenarios, but FTP knowledge is your safety net

Understanding the Landscape: Why Use FileZilla to Install Plugins?

The WordPress ecosystem has evolved beautifully over the years, making plugin installation almost ridiculously easy for most users. Click “Add New,” search for what you need, hit install, and you’re done. So why would anyone voluntarily choose the more technical route of FTP installation? The answer lies in understanding the limitations that even the best-designed systems face.

Image for How to Install Plugins Using FileZilla: A Step-by-Step Tutorial

Large plugins—especially those bundled with themes or premium features—can easily exceed 50MB or even 100MB. Many shared hosting environments impose strict upload limits through PHP configuration, typically capping uploads at 8MB, 32MB, or 64MB. When you hit these walls, the WordPress dashboard simply refuses to process your plugin file. FTP bypasses these restrictions entirely because you’re transferring files directly to the server without going through PHP’s upload handlers.

There’s also the scenario where admin access becomes problematic. I’ve worked with clients whose WordPress dashboards became inaccessible due to conflicting plugins or memory exhaustion. In these situations, the only way to install a fix or remove the problematic code is through direct file access. Building a successful business directory often involves working with specialized plugins that require this level of control.

Installation MethodBest ForLimitations
WordPress DashboardSmall to medium plugins, repository pluginsFile size limits, requires working dashboard
FTP UploadLarge plugins, custom code, troubleshootingRequires technical knowledge, FTP credentials
Manual ZIP UploadPremium plugins, non-repository pluginsSame file size restrictions as dashboard

Security and source integrity deserve attention here too. When you install plugins through the WordPress repository, there’s an inherent layer of verification—the plugin has been reviewed and scanned. With FTP installation, particularly for premium or custom plugins, you’re responsible for ensuring the source is legitimate. This isn’t a weakness of FTP itself, it’s just a reminder that with greater control comes greater responsibility. Always download from the official vendor website or trusted marketplaces like ThemeForest or CodeCanyon.

💡 Pro Tip: Before downloading any plugin from a third-party source, check reviews, update frequency, and support responsiveness. A plugin that hasn’t been updated in two years is a security risk waiting to happen.

Prerequisites and Getting Ready

Jumping straight into FTP installation without proper preparation is like trying to build furniture without checking if you have all the parts first—frustrating and ultimately unsuccessful. The good news is that the prerequisites are straightforward, and once you have them organized, the actual installation process flows naturally.

Image for How to Install Plugins Using FileZilla: A Step-by-Step Tutorial

Prerequisites

First and foremost, you need administrative access to your hosting server. This means having valid FTP or SFTP credentials, which typically include a hostname (often your domain name or server IP address), a username, a password, and a port number. Most hosting providers include these details in your welcome email, or you can find them in your hosting control panel under sections labeled “FTP Accounts” or “File Manager.”

The plugin itself should be downloaded and ready on your local computer as a ZIP file from a reputable source. This is critical—never download plugins from random websites or file-sharing services. Stick with official plugin developers, the WordPress repository (if you’re downloading the ZIP manually), or established marketplaces. The ZIP file should remain zipped at this stage; you’ll extract it during the upload process (though methods vary slightly depending on your approach).

Tools and Accounts You’ll Need

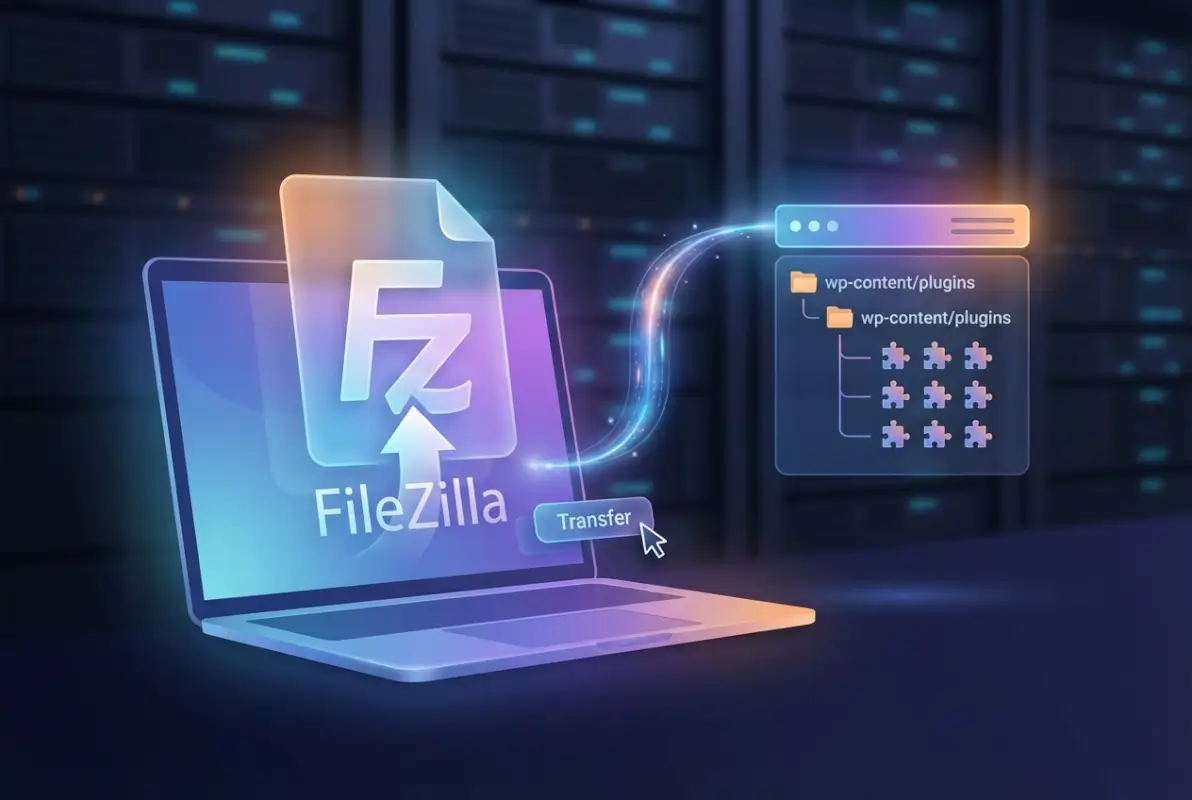
FileZilla is the free, open-source FTP client that most people use for this task, and for good reason—it’s reliable, actively maintained, and works across Windows, Mac, and Linux. You can download it from the official FileZilla website. There are alternatives like Cyberduck or WinSCP, but FileZilla’s interface is particularly beginner-friendly while still offering advanced features for power users.

You also need to know exactly where WordPress is installed on your server. For most standard installations, this is the public_html or www directory, and within that you’ll find the wp-content/plugins folder. However, if WordPress is installed in a subdirectory (like public_html/blog or public_html/wp), you’ll need to navigate accordingly. Creating a business directory website often involves understanding these file structures intimately.

⚠️ Important: If you’re not sure where WordPress is installed, look for the wp-config.php file—that’s your WordPress root directory. The plugins folder will be inside wp-content from there.

Quick Checklists

Before you start the upload process, verify a few things to avoid common headaches. Check that the plugin folder name matches what you expect—sometimes developers use unconventional naming that can cause confusion later. Confirm WordPress version compatibility by checking the plugin’s documentation or readme file; installing a plugin designed for WordPress 5.x on a WordPress 4.x site (or vice versa) can cause serious conflicts.

Also verify your server’s PHP version meets the plugin’s requirements. Many modern plugins require PHP 7.4 or higher, but some shared hosting environments still run older versions. You can usually check this in your hosting control panel or by using a simple PHP info plugin. If there’s a mismatch, you might need to upgrade your PHP version before proceeding—most hosts make this a one-click operation now.

✅ Key Insight: Taking five minutes to verify compatibility before uploading can save you hours of troubleshooting mysterious errors later.

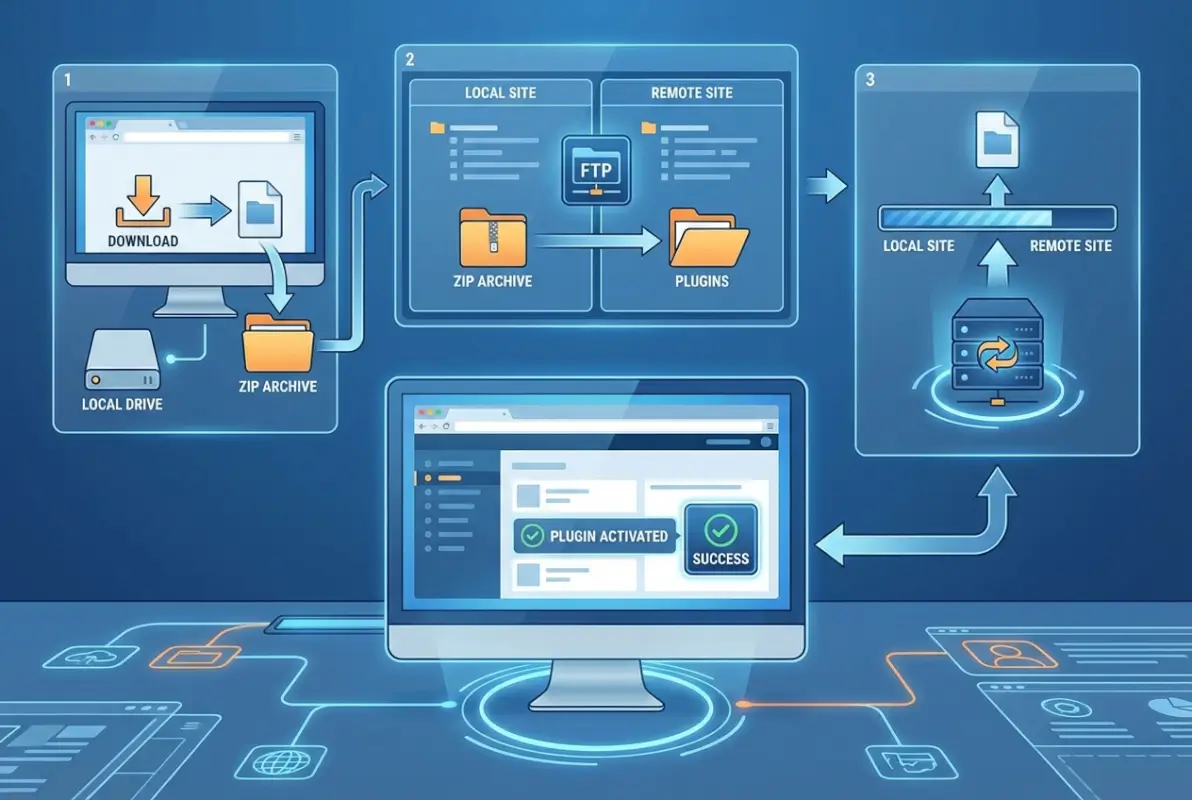
Step-by-Step: Installing a Plugin via FileZilla (FTP)

Now we get to the actual installation process, and I promise it’s less intimidating than it looks at first glance. The key is following the steps methodically without skipping ahead. Each step builds on the previous one, and rushing through usually means backtracking to fix overlooked details.

Image for How to Install Plugins Using FileZilla: A Step-by-Step Tutorial

Step 1 — Prepare the Plugin

Download the plugin ZIP file from your trusted source and save it somewhere easily accessible on your computer—your Desktop or Downloads folder works perfectly. Now here’s where it gets slightly nuanced: some hosting environments and workflows want you to upload the ZIP file directly and extract it on the server, while others prefer you extract it locally first then upload the folder. The most common approach, and the one I recommend for beginners, is to extract the ZIP file on your local computer first.

When you extract the ZIP, you should get a single folder with the plugin’s name containing all the plugin files (PHP files, CSS, JavaScript, images, etc.). If you see multiple folders or loose files, something’s wrong with the ZIP structure, and you should re-download it. A properly packaged WordPress plugin always has one main folder containing everything else.

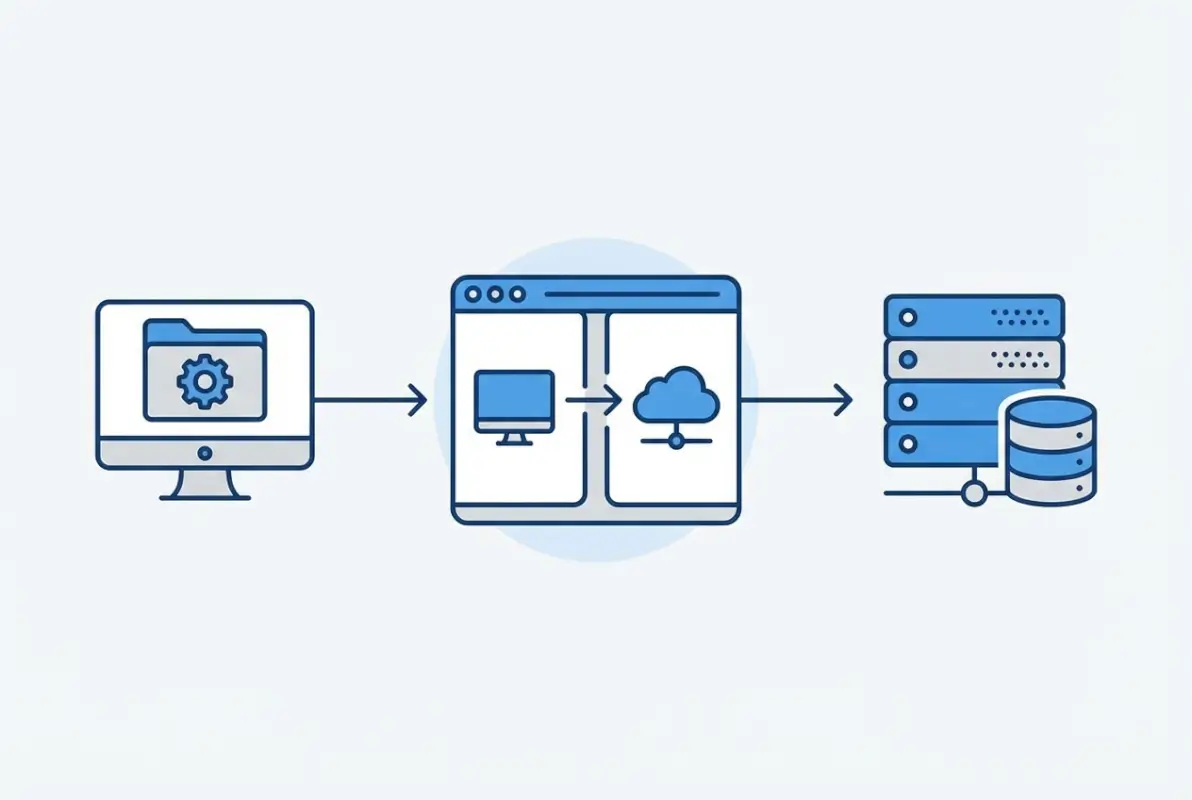
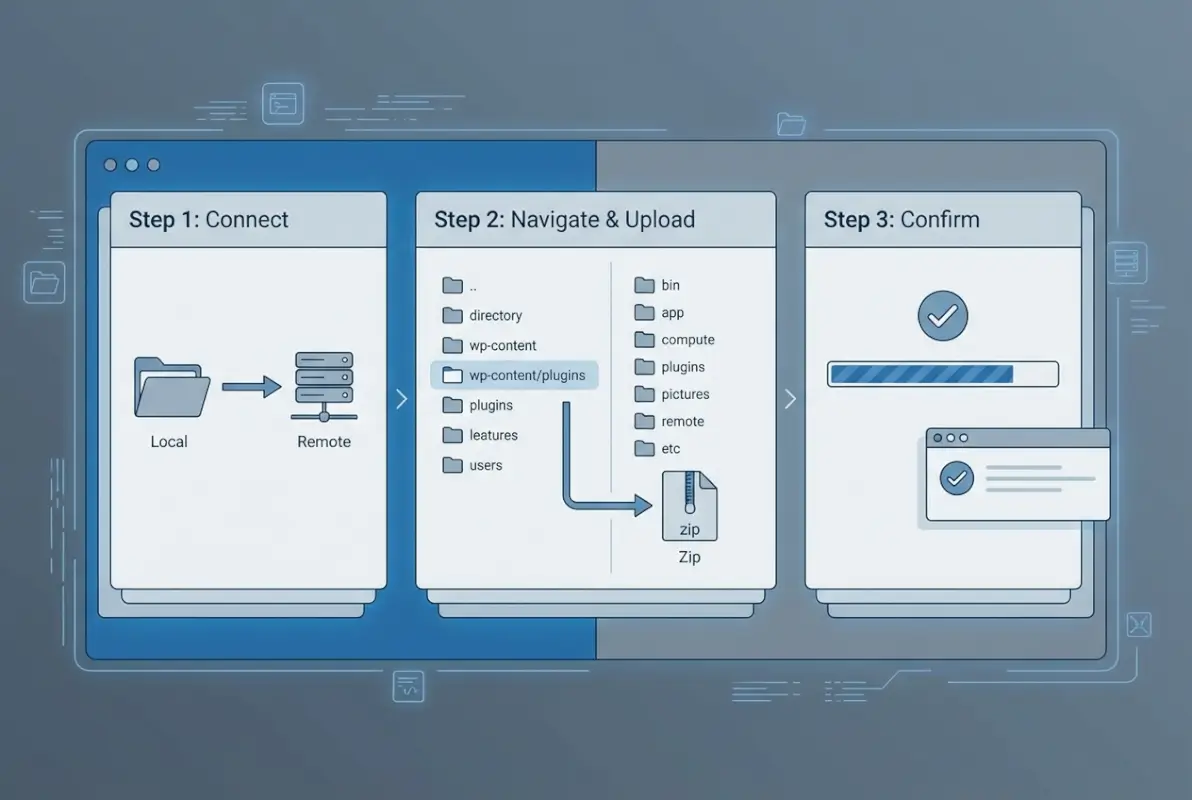
Step 2 — Connect with FileZilla

Open FileZilla, and you’ll see a clean interface divided into sections—local site on the left, remote site on the right, with connection fields at the top. Enter your FTP credentials in the Quickconnect bar: Host (your server address), Username, Password, and Port. For standard FTP, the port is typically 21; for SFTP (more secure), it’s usually 22. If your hosting provider supports SFTP, always choose that option—it encrypts your connection and credentials.

Click “Quickconnect” and FileZilla will attempt to establish the connection. You might see a certificate warning on first connection, especially with SFTP—this is normal. Review the certificate details (make sure the hostname matches your server) and click “OK” to trust it for future sessions. Once connected, the right pane will populate with your server’s directory structure.

💡 Pro Tip: Save your connection details in FileZilla’s Site Manager (File > Site Manager) so you don’t have to re-enter credentials every time. Just make sure your computer is secure if you choose to save passwords.

Step 3 — Navigate to the Target Directory

In the Remote site pane (right side), you need to navigate to your WordPress installation’s plugins directory. Start by looking for public_html, www, or httpdocs—these are common root directories for web content. Double-click folders to open them, and look for the telltale WordPress folders: wp-admin, wp-content, and wp-includes.

Once you’ve found the WordPress root, open wp-content, then open the plugins folder inside it. You should see folders for any plugins already installed on your site. This is your destination. The full path typically looks like: /public_html/wp-content/plugins/ or /www/wp-content/plugins/. If you’re managing a business directory website, you’ll likely recognize some familiar directory-related plugins here.

Step 4 — Upload the Plugin

Now the moment you’ve been preparing for—the actual upload. In the Local site pane (left side), navigate to where you extracted the plugin folder on your computer. You should see the plugin folder itself (not the contents of the folder, but the folder as a single item). Right-click on this folder and select “Upload,” or simply drag it from the left pane to the right pane where you have the plugins directory open.

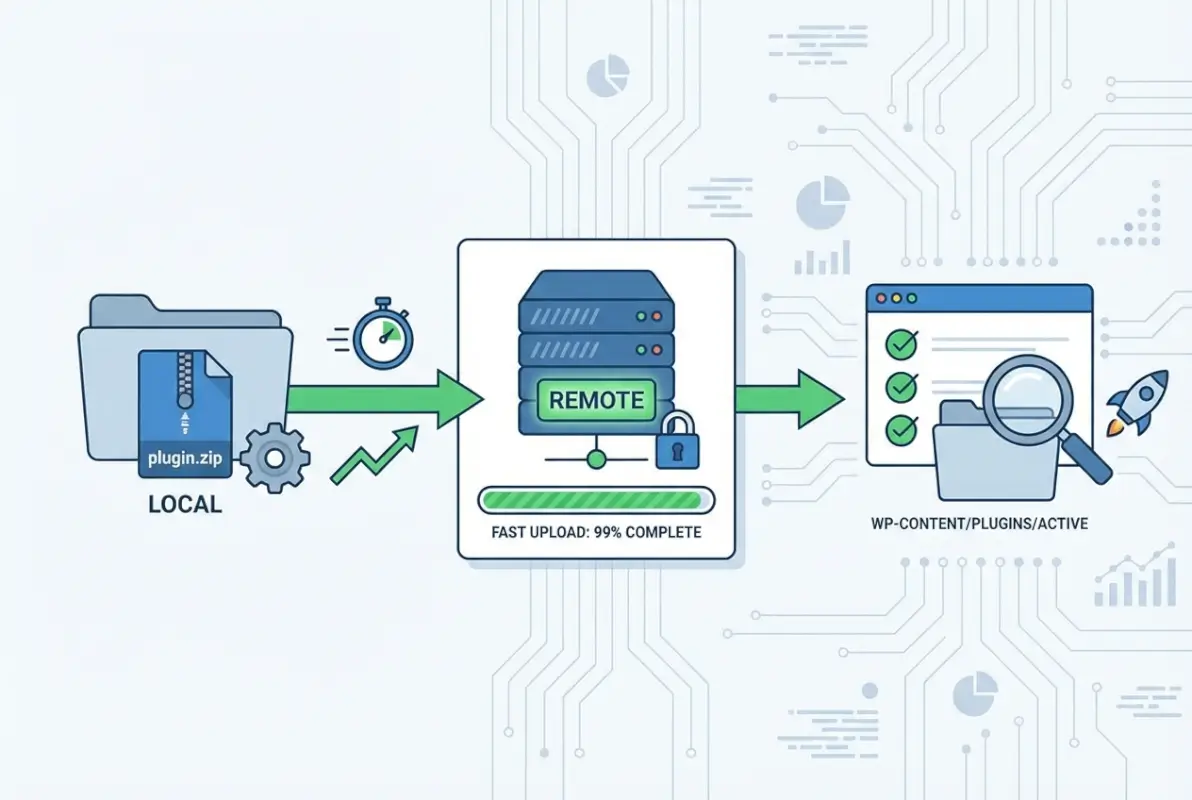
FileZilla will display transfer progress at the bottom of the window, showing each file as it uploads. For large plugins with thousands of files, this can take several minutes—be patient and don’t interrupt the transfer. If your connection drops mid-transfer, FileZilla will usually resume automatically, but it’s worth verifying that all files transferred completely when it finishes.

⚠️ Important: Make sure you’re uploading the folder itself, not the contents. Your plugins directory should show /plugins/your-plugin-name/, not /plugins/ with loose files scattered around.

Step 5 — Verify and Activate

Once the upload completes, open your WordPress admin dashboard in a web browser and navigate to Plugins > Installed Plugins. You should see your newly uploaded plugin in the list, likely marked as “Inactive.” If you don’t see it, don’t panic—refresh the page first. Still not there? Check the plugin folder name in FileZilla; sometimes WordPress doesn’t recognize plugins if the folder name contains unexpected characters or doesn’t match the plugin’s header information.

Assuming the plugin appears correctly, click the “Activate” link below its name. WordPress will load the plugin and run any initialization code. Some plugins will redirect you to a welcome screen or settings page after activation—this is normal behavior. Others will simply activate silently and add new menu items or functionality without fanfare.

Step 6 — Post-Install Checks

After activation, verify that the plugin actually works as expected. Check for any error messages at the top of your WordPress admin pages—red banners or warnings often indicate compatibility issues or missing dependencies. Test the plugin’s core functionality; if it’s a contact form plugin, try submitting a test form. If it’s a caching plugin, check that pages are being cached properly.

Look at your website’s front end too, not just the admin area. Some plugin conflicts only manifest on the public-facing side, causing layout issues, JavaScript errors, or broken functionality. Open your browser’s developer console (F12 in most browsers) and check for JavaScript errors—these can indicate conflicts with your theme or other plugins.

Section Summary: The FTP installation process involves preparing your plugin locally, connecting via FileZilla with proper credentials, navigating to wp-content/plugins, uploading the extracted folder, and activating through WordPress admin—each step builds on the last.

Alternative Methods: When FTP Isn’t Necessary

While we’ve focused heavily on FTP installation because that’s the topic at hand, it’s worth acknowledging that FTP often isn’t the most efficient path for everyday plugin management. Understanding when to use FTP versus simpler methods will save you time and reduce unnecessary complexity in your workflow.

Image for How to Install Plugins Using FileZilla: A Step-by-Step Tutorial

Via WordPress Admin (Upload ZIP)

For most scenarios—especially plugins under your server’s upload limit—the WordPress dashboard provides a much smoother experience. Navigate to Plugins > Add New, click the “Upload Plugin” button at the top, choose your ZIP file, and click “Install Now.” WordPress handles extraction, placement, and initial setup automatically. If the plugin file is small enough and your dashboard is accessible, this method is objectively superior to FTP installation.

The beauty of this approach is that WordPress validates the plugin structure during upload, catching many common packaging errors before they cause problems. You also don’t need to worry about FTP credentials, directory navigation, or file permissions—WordPress manages all of that behind the scenes. I use this method for probably 90% of my plugin installations; FTP is reserved for the edge cases where it fails.

Using a Hosting Provider’s Guidance

Many hosting providers have developed their own plugin installation workflows that blend FTP access with user-friendly interfaces. cPanel’s File Manager, for instance, provides a web-based interface for uploading and extracting files without requiring a separate FTP client. Some managed WordPress hosts like WP Engine or Kinsta provide specialized tools for plugin management that work around traditional limitations.

If you’re uncertain about the best approach for your specific hosting environment, check your provider’s knowledge base or contact their support team. They can often guide you to host-specific shortcuts or recommend the most reliable installation method for their infrastructure. Designing an attractive directory website becomes much easier when you know your hosting provider’s tools inside and out.

When the Plugin Comes as a Non-Repository ZIP

Premium and custom plugins—those not available in the WordPress repository—present unique installation considerations. Many premium plugin vendors provide detailed installation instructions specific to their product, and it’s worth following those precisely. Some include license activation steps that need to happen during or immediately after installation, while others might require additional configuration files or API keys.

These plugins often come with automatic update mechanisms that rely on proper initial installation. If you skip steps or improvise the installation process, you might find that updates don’t work correctly later, forcing you to manually reinstall every time a new version releases—a maintenance nightmare you definitely want to avoid.

75%
of plugin installation issues can be avoided by choosing the right installation method for your specific situation

Common Pitfalls and How to Troubleshoot

Even when you follow every step perfectly, things can still go sideways. WordPress environments are complex ecosystems where server configuration, PHP version, existing plugins, theme code, and hosting quirks all interact in sometimes unpredictable ways. Understanding common failure modes helps you diagnose issues quickly instead of spending hours chasing ghosts.

Image for How to Install Plugins Using FileZilla: A Step-by-Step Tutorial

FTP Transfer Issues

Incomplete uploads are surprisingly common, especially on slower or unstable connections. FileZilla might report a successful transfer even when files are corrupted or truncated during transit. If a plugin fails to appear after upload, or activating it produces fatal errors, the first troubleshooting step is re-uploading the entire plugin folder. Delete the existing folder via FTP first, then upload a fresh copy.

Permissions errors manifest as mysterious “unable to write file” messages or activation failures. WordPress needs specific permissions on plugin files: typically 644 for files and 755 for directories. Most FTP clients let you change permissions by right-clicking a file or folder—if you see files with 600 or 400 permissions, that’s likely your problem. Some hosting environments automatically set permissions correctly, others require manual adjustment.

Incorrect path uploads happen when you accidentally upload the plugin to the wrong directory, or upload the contents instead of the folder. Double-check that your final path looks like /wp-content/plugins/plugin-name/ with all the plugin files inside that folder. If you see loose PHP files directly inside /plugins/ or scattered in subdirectories, you’ve uploaded incorrectly and need to reorganize.

⚠️ Important: If FileZilla shows transfer errors or timeouts, check your internet connection stability before assuming the problem is server-side. I’ve spent embarrassing amounts of time troubleshooting “server issues” that were actually my flaky WiFi.

Activation Hiccups

Some plugins require PHP memory limits or execution times higher than your server’s defaults. The telltale sign is a white screen or timeout error immediately after clicking “Activate.” Check your PHP error logs (usually accessible through your hosting control panel) for memory exhaustion messages. If that’s the culprit, you’ll need to increase PHP memory limits through php.ini, .htaccess, or wp-config.php—the specific method depends on your hosting configuration.

Plugin conflicts are another common activation problem, where the new plugin incompatibly clashes with something already installed. The systematic way to diagnose this: deactivate all other plugins, try activating the new one, then reactivate others one by one to identify the conflict. Time-consuming? Yes. Effective? Absolutely. If you’re working on installing specialized plugins, this debugging skill becomes essential.

Security Considerations

Bundled malware in pirated or nulled plugins is a genuine threat. Some unscrupulous sites offer “free” versions of premium plugins that include hidden backdoors, spam injectors, or cryptocurrency miners. The performance impact might be subtle at first, but the security implications are severe. If a plugin seems too good to be true—especially if you’re getting a premium plugin for free from a sketchy source—it probably is.

Always verify the MD5 or SHA checksum of downloaded plugins when provided by the vendor. Many premium plugin developers include checksums in their download pages or documentation. A mismatch between the published checksum and your downloaded file indicates tampering or corruption. It takes thirty seconds to verify and could save you from a catastrophic security breach.

✅ Key Insight: The cheapest security measure is prevention—spending an extra $50 on a legitimate plugin license is infinitely cheaper than cleaning up a hacked website later.

Best Practices and Tips

Moving beyond just “getting it to work” and into “doing it right” territory requires adopting some fundamental best practices that separate hobbyist site maintenance from professional-grade operations. These aren’t overly burdensome rules, they’re practical guidelines that prevent future headaches.

Backups and Rollback

Before installing any plugin—whether via FTP or dashboard—create a complete backup of your WordPress files and database. Full stop, no exceptions. Plugins can conflict with themes, modify database structures, or introduce bugs that break your site. Without a backup, recovering from these situations ranges from difficult to impossible. Services like UpdraftPlus or BlogVault automate this process beautifully.

Test rollback procedures before you actually need them. Download a backup, restore it to a test environment, and verify everything works. Knowing you can rollback and actually having practiced the rollback process are two very different confidence levels when facing a crisis at 2 AM.

Version Control and Compatibility

Maintain a compatibility matrix if you manage multiple sites or complex configurations. Document which plugins work with which themes, note any known conflicts, and record successful version combinations. This sounds tedious until you’re troubleshooting the same issue across three different client sites and can’t remember which configuration worked on which site.

Staging environments are your friend here—test plugin installations and updates on a staging copy of your site before touching production. Most quality managed hosting providers include staging environments as a standard feature. If yours doesn’t, consider whether the time and stress saved justifies upgrading to a host that does provide this.

💡 Pro Tip: Keep a simple text file or spreadsheet tracking every plugin you install, including version number, installation date, and source. When troubleshooting months later, you’ll thank yourself for this documentation.

Documentation and Sources

Maintain installation records for premium or custom plugins with more detail than free repository plugins. Note where you downloaded it, what license key you used, renewal dates, and any special installation requirements. I’ve seen scenarios where developers couldn’t remember which marketplace they purchased a plugin from, making it impossible to download updates or get support.

Save original ZIP files in an organized archive, especially for plugins that update frequently. Sometimes an update introduces breaking changes, and having immediate access to the previous version means the difference between quick rollback and extended downtime while you hunt for an older version online.

Section Summary: Professional WordPress management relies on consistent backups, compatibility testing in staging environments, and detailed documentation—these practices transform plugin installation from risky guesswork into controlled deployment.

Security and Compliance Considerations

Security isn’t a one-time checkbox you tick during installation—it’s an ongoing practice that starts with choosing the right sources and continues through maintaining proper access controls and update hygiene. FTP-based installation adds specific security dimensions that dashboard installation partially abstracts away.

Only Download Plugins from Trusted Sources

The official WordPress plugin repository undergoes automated and manual security reviews, providing a baseline level of trust. Premium marketplaces like CodeCanyon conduct their own reviews, though standards vary. Direct downloads from plugin developers’ websites are generally safe if the developer is reputable and has an established track record.

Red flags to watch for: websites offering “nulled” or “cracked” premium plugins, downloads that require completing surveys or offers, sites with excessive advertising or suspicious redirect chains, and sources that bundle multiple unrelated plugins together. If your instinct says something feels wrong, trust it and find an alternative source.

Use Secure Transfer When Possible

SFTP encrypts both your credentials and the file transfer itself, preventing interception by anyone monitoring network traffic. Plain FTP sends everything in cleartext—passwords included. The configuration difference in FileZilla is minimal (just changing the protocol and port), but the security improvement is substantial. Every hosting provider worth using supports SFTP, so there’s rarely a legitimate reason to use plain FTP anymore.

Some hosting providers also support FTPS (FTP over SSL/TLS), which provides similar security to SFTP through a different protocol. Either option is vastly superior to unencrypted FTP, especially if you’re managing websites that handle sensitive user data or fall under compliance requirements like GDPR or HIPAA.

60%
of WordPress security breaches involve outdated or compromised plugins according to security research

Frequently Asked Questions

What is FileZilla and why would I use it to install WordPress plugins?

FileZilla is a free, open-source FTP client that transfers files between your computer and web server. You’d use it for plugin installation when dashboard uploads fail due to file size limits, when your WordPress admin is inaccessible, or when working with large premium plugins that exceed PHP upload restrictions. It provides direct server access that bypasses WordPress’s upload handlers.

Can I install a WordPress plugin via FTP if I don’t have admin access to the dashboard?

You need FTP/SFTP credentials from your hosting provider to transfer files, but you still typically need WordPress admin access to activate the plugin after upload. If you completely lack dashboard access, FTP can help you troubleshoot by removing problematic plugins, but full installation requires at least activation capability. Coordinate with your hosting support if you’re locked out of both.

Do I unzip the plugin before uploading via FTP?

Yes, in most cases you extract the ZIP file on your local computer first, then upload the extracted folder to wp-content/plugins via FTP. The folder should contain all plugin files and maintain its original structure. Some hosting file managers let you upload the ZIP and extract server-side, but FTP clients typically require pre-extraction for proper directory structure.

What directory should I upload the plugin to?

Upload to the wp-content/plugins directory within your WordPress installation. The full path typically looks like /public_html/wp-content/plugins/ or /www/wp-content/plugins/ depending on your hosting setup. Each plugin should be its own folder within the plugins directory, maintaining its original folder name and internal structure.

What if the plugin doesn’t appear after FTP upload?

First, refresh your WordPress plugins page. If it still doesn’t appear, check that you uploaded to the correct directory path, verify the folder structure is intact (not loose files), and confirm file permissions are set correctly (typically 644 for files, 755 for directories). Also check that the plugin’s main PHP file contains proper WordPress plugin headers.

Is installing plugins via FTP safe?

FTP installation is safe when you use trusted plugin sources and secure transfer protocols (SFTP rather than plain FTP). The risk comes from downloading compromised or malicious plugins, not from the FTP transfer method itself. Always verify plugin sources, use SFTP when available, and maintain backups before installing anything via any method.

How do I know if my hosting supports SFTP instead of regular FTP?

Check your hosting control panel under FTP or SSH access settings, or contact your hosting support. Most modern hosts support SFTP (typically on port 22), which provides encrypted transfers. In FileZilla, select SFTP protocol when connecting. If your credentials work with SFTP, that’s confirmation of support—always prefer it over plain FTP for security.

Can I delete a plugin via FTP if it’s causing errors?

Yes, if a plugin breaks your site and prevents dashboard access, FTP provides a critical troubleshooting path. Navigate to wp-content/plugins, locate the problematic plugin’s folder, and delete it. This immediately deactivates the plugin and removes its code. This technique is invaluable when dealing with fatal errors that lock you out of WordPress admin.

What’s the difference between uploading via FTP and using WordPress dashboard upload?

Dashboard upload uses WordPress’s built-in PHP upload handlers, which are subject to server upload limits and require a functioning admin interface. FTP bypasses these limitations by writing files directly to the server, allowing larger transfers and working even when the dashboard is inaccessible. FTP requires more technical knowledge but provides greater control and troubleshooting capability.

Should I keep the original plugin ZIP file after installation?

Yes, especially for premium or custom plugins. Maintaining an archive of plugin ZIPs gives you immediate rollback capability if updates cause problems, and serves as documentation of exactly which version you installed. Store them in an organized folder structure with dates and version numbers for easy reference during future troubleshooting.

Taking Control of Your WordPress Installation

Understanding FTP-based plugin installation fundamentally changes your relationship with WordPress maintenance. What once seemed like mysterious backend magic becomes a comprehensible, controllable process. You’re no longer at the mercy of upload limits, dashboard glitches, or hosting provider constraints—you have the knowledge and tools to work around these limitations and maintain your site even when conventional methods fail.

The process itself becomes almost routine once you’ve done it a few times: download and extract your plugin, connect to your server via FileZilla using SFTP, navigate to wp-content/plugins, upload the folder, and activate through WordPress admin. Each step is straightforward, and the potential complications we’ve discussed become recognizable patterns you can diagnose and fix efficiently.

Your Next Steps

Don’t wait for an emergency to learn FTP installation. Set up FileZilla today, connect to a test site or staging environment, and practice the upload process with a simple free plugin. Build that muscle memory now, while the stakes are low. When you eventually face a situation where FTP is your only option—and you will—you’ll be calm and confident instead of stressed and searching for tutorials at 3 AM.

Remember that FTP installation is a tool in your WordPress toolkit, not the default approach for every situation. Use dashboard uploads for routine plugin installations, reserve FTP for scenarios where it provides clear advantages, and always maintain backups regardless of installation method. The goal isn’t to make everything more complicated—it’s to ensure you’re never stuck without options when something goes wrong.

Was this article helpful?

Similar Posts

  • Blog

    How to Download All Files from an Online Directory: 5 Simple Steps

    substring(replace(

    Ever stumbled across a treasure trove of files on a website—maybe a research archive, a music collection, or a software repository—only to realize you’d need to click and save each file individually? That’s where knowing how to download all files from an online directory becomes a genuine superpower. Whether you’re archiving public domain content, backing up your own hosted files, or legally collecting open datasets, the right approach can turn hours of tedious clicking into a five-minute automated task. The trick isn’t just finding one tool that works, it’s understanding the ecosystem of methods (command-line utilities, browser extensions, server-side services, and scripting) so you can pick the best fit for your specific scenario.

    Most guides out there jump straight to “use wget and you’re done,” but that advice falls flat when you hit a password-protected directory, a JavaScript-heavy listing, or a site that throttles aggressive crawlers. I remember spending an entire afternoon trying to mirror a university’s open courseware directory, only to discover halfway through that my wget command had downloaded hundreds of useless HTML wrapper pages instead of the PDFs I actually wanted. That experience taught me the importance of a structured approach: assess first, choose your tool second, validate third. In this guide, we’ll walk through five deliberate steps that cover everything from legal checks to post-download verification, giving you a repeatable framework whether you’re working on Windows, Mac, Linux, or even mobile.

    TL;DR – Quick Takeaways

    • Assess before you automate – Confirm the directory is publicly listed and you have permission to bulk-download (check robots.txt and terms of use)
    • CLI power users love wget – Recursive download with depth and extension filters is ideal for simple open directories
    • GUI tools for everyone else – JDownloader, DownThemAll!, and OpenDirectoryDownloader offer point-and-click batch downloads with filtering
    • Server-side services simplify auth – Tools like FileGrab handle scraping and packaging remotely, perfect for complex or authenticated directories
    • Always verify completeness – Compare file counts and checksums to ensure your download captured everything correctly

    Step 1 — Identify the Directory Structure and Legality

    Before you fire up any download tool, take a moment to understand what you’re actually dealing with. Not all “online directories” are created equal—some are simple Apache or Nginx index pages listing files in a table, others are FTP-style listings, and a few hide behind dynamic server scripts that paginate results or require JavaScript to render links. The first paragraph of your reconnaissance should answer three questions: Can I see a raw list of file URLs? Are there subdirectories I need to recurse into? And most importantly, am I allowed to download this content in bulk?

    [KBIMAGE_1]

    Confirm Directory Listing Availability and File Types

    Open the directory URL in your browser and look at the page source (right-click, “View Page Source” in most browsers). If you see a clean list of anchor tags pointing directly to files—say, <a href="file001.pdf">—you’re in luck, that’s a standard directory index and most tools will handle it beautifully. On the other hand, if the links are generated by JavaScript or hidden behind POST requests, you’ll need a tool that can execute scripts or a custom scraper. Pay attention to file extensions too; if the directory contains a mix of PDFs, images, and text files but you only want PDFs, you’ll want filtering capabilities (we’ll cover those in Step 2 and Step 3).

    Another quick sanity check: note the depth of subdirectories. A flat directory with 500 files in one folder is trivial to download. A nested structure with dozens of subfolders requires recursive logic, and you’ll need to decide how many levels deep to go. Tools like wget let you set a recursion level (e.g., --level=2), while some GUI tools will ask you to specify whether to follow all subdirectories or just the top level. This upfront assessment saves you from downloading gigabytes of unwanted nested content later.

    Legal and Ethical Considerations

    Here’s the part nobody likes to talk about but everyone should: just because a directory is visible doesn’t mean it’s legal to mass-download. Check for a robots.txt file at the root of the domain (e.g., example.com/robots.txt)—if it disallows crawling or specifies rate limits, respect those rules. Many sites also have terms of service that explicitly prohibit automated scraping or redistribution of content. For academic or government data (like NASA’s Earthdata or university repositories), there are often acceptable-use policies that permit bulk downloads for research but forbid commercial resale.

    ⚠️ Important: Bulk downloading can trigger server alarms or even IP bans if you’re too aggressive. Always use polite crawl delays (e.g., --wait=2 in wget) and consider reaching out to the site administrator if you’re planning to download more than a few gigabytes. Some organizations prefer you to contact them first to arrange a proper data transfer, which is both faster and more courteous.

    Beyond legality, there’s the question of data licensing. Public domain or Creative Commons content is usually fair game, but copyrighted material—even if publicly accessible—requires permission for redistribution. If you’re uncertain, default to downloading only what you need for personal use and skip the mirroring or republishing step until you’ve confirmed the license terms.

    Quick Sanity Checks You Can Perform Manually

    Before automating anything, do a manual spot-check: click on one or two files to ensure they actually download (not redirect to a login page or return 404 errors). Note the URL pattern—if files are named sequentially (file001.pdf, file002.pdf, etc.), you might even be able to script a simple loop without a full crawler. Look for any access controls: does the page require a username and password, or cookies from a prior login? If so, you’ll need to factor authentication into your download method (we cover authenticated bulk downloads in Step 4).

    Also, check the total size estimate if the directory listing shows file sizes. Downloading 10 GB over a residential internet connection is very different from downloading 500 GB, you’ll want to plan for bandwidth, storage, and time accordingly. Some directories thoughtfully include a “Total Size” footer; if not, you can use a quick script or browser extension to sum up the listed sizes before committing to a full download.

    Step 2 — Command-Line Recursion: Using Wget (Best for One-Directory Depth, Simple Filtering)

    If you’re comfortable with a terminal and the directory structure is straightforward, wget is the gold standard for bulk downloads. It’s been around since the mid-’90s, it’s pre-installed on most Linux distributions and macOS (or easily added via Homebrew on Mac), and it supports recursive downloads with fine-grained control over depth, file types, and crawl behavior. The beauty of wget is its simplicity: one command can mirror an entire directory tree while respecting your specified filters.

    [KBIMAGE_2]

    Why Choose Wget for This Task

    Wget excels at non-interactive downloads, meaning you can kick off a command, walk away, and come back to a fully downloaded directory. It handles HTTP and HTTPS, follows redirects, retries on connection failures, and can resume interrupted downloads—all features that GUI tools sometimes lack. For a typical open directory with a few hundred files spread across one or two subdirectory levels, wget is often the fastest and most reliable option.

    Another advantage: wget is scriptable. You can embed it in shell scripts, cronjobs, or CI/CD pipelines, making it perfect for automated archival tasks or scheduled backups. Unlike browser extensions that require manual intervention, wget runs headlessly, which is ideal if you’re working on a remote server or need to document your download process for reproducibility (important in research or compliance contexts).

    💡 Pro Tip: If you’re on Windows and don’t have wget natively, you can install it via Chocolatey (choco install wget) or use the Windows Subsystem for Linux (WSL) to get a full Linux environment. Alternatively, curl (which ships with Windows 10+) can do similar tasks, though the syntax differs slightly.

    Basic Recursive Download Commands

    The simplest recursive wget command looks like this:

    wget -r -l 1 -np http://example.com/files/

    Let’s break that down: -r enables recursive mode, -l 1 sets the recursion level to 1 (so it grabs files in the current directory and one level of subdirectories), and -np (no-parent) prevents wget from ascending to parent directories and downloading unrelated content. This is your bread-and-butter command for a straightforward directory listing.

    Now, suppose you only want PDF files. Add the -A (accept) flag:

    wget -r -l 1 -np -A pdf http://example.com/files/

    Conversely, if you want to exclude certain file types (say, skip HTML wrappers and only grab media), use -R (reject):

    wget -r -l 1 -np -R html,htm http://example.com/files/

    For directories with deep nesting, increase the level: -l 3 or even -l inf for unlimited depth (use with caution, you can end up downloading the entire website). A practical middle ground is -l 2 for most directory structures.

    Tips and Caveats

    First, always add a polite delay to avoid hammering the server. Use --wait=2 (wait 2 seconds between requests) or --random-wait to vary the delay. This reduces the risk of triggering rate limits or bans. If the directory is large, consider using --limit-rate to cap your download speed (e.g., --limit-rate=500k for 500 KB/s), especially if you’re on a shared network or the server is known to be slow.

    Second, set a custom user-agent string with --user-agent="YourName/1.0" so server logs show a meaningful identifier instead of the default wget string. Some sysadmins appreciate this transparency, and it can prevent your requests from being mistaken for malicious bot traffic.

    Third, be aware that wget will create a local directory structure mirroring the remote one. If you download from example.com/files/docs/, wget creates example.com/files/docs/ on your local machine. If you’d rather flatten the structure, use -nd (no directories) to dump all files into one folder—but beware of filename collisions if multiple subdirectories contain files with the same name.

    ✅ Key Insight: Wget’s recursive mode follows all links it encounters, not just file links. If the directory page includes navigation links or external references, you might end up downloading unrelated content. The -np flag helps, but for complex pages consider using --accept-regex to whitelist only file URLs matching a specific pattern.

    Lastly, if you encounter authentication (HTTP Basic or Digest), wget supports --user and --password flags. For more complex auth (OAuth, cookies), you’ll need to export cookies from your browser and feed them to wget with --load-cookies=cookies.txt. This is common for university repositories or enterprise data portals, and we’ll dive deeper into authenticated scenarios in Step 4.

    Step 3 — GUI Tools and Extensions for Non-Programmers

    Not everyone loves (or has access to) a command line, and that’s perfectly okay. Graphical download managers and browser extensions have matured significantly over the past decade, offering powerful batch-download capabilities with point-and-click simplicity. These tools are especially popular for users on Windows or macOS who want to quickly grab all files from a directory without memorizing command syntax or troubleshooting terminal errors.

    [KBIMAGE_3]

    JDownloader and Related Browser Extensions

    JDownloader is a free, open-source download manager that’s been a favorite in the file-hoarding community for years. It monitors your clipboard for URLs and can automatically detect link patterns in copied text, making it trivial to grab dozens or hundreds of files from a directory listing. You simply copy the directory URL, paste it into JDownloader’s link grabber, and let the software crawl the page for downloadable links. It supports filtering by file extension, parallel downloads, and automatic retries on failed connections.

    One of JDownloader’s killer features is its ability to handle captchas and premium file-host accounts (useful if you’re downloading from sites like Mega or MediaFire), though for open directories you typically won’t need those extras. The software is cross-platform (Windows, Mac, Linux) and has a surprisingly active development community, so compatibility with modern websites tends to be good. The main downside? The installer bundles optional third-party software, so you’ll want to pay attention during setup and decline any unwanted add-ons (a minor annoyance but worth mentioning).

    Browser extensions like DownThemAll! (available for Firefox) offer similar functionality directly in your browser. You right-click on a page, choose “DownThemAll!”, and it presents a list of all downloadable links with checkboxes to select or filter by type. It’s lightweight, doesn’t require a separate application, and integrates seamlessly with your browser’s download manager. The tradeoff is that extensions are sometimes limited by browser security policies—they can’t always handle complex JavaScript-rendered links or authenticated downloads as robustly as standalone tools.

    OpenDirectoryDownloader / DownThemAll! Variants

    OpenDirectoryDownloader is a specialized tool (available on GitHub and various download portals) designed explicitly for indexing and downloading from open directory listings. It’s a command-line tool with a simple GUI wrapper on Windows, and it’s optimized for the kinds of Apache/Nginx index pages that wget sometimes stumbles on (especially if the HTML formatting is non-standard). You feed it a directory URL, it crawls the structure, and it generates a downloadable file list or starts downloading immediately.

    What makes OpenDirectoryDownloader stand out is its speed and efficiency on large directories—some users report it outperforms wget on directories with thousands of files because it batches requests more intelligently. It also has built-in resume support and can export the file list to a text file if you want to review or share the inventory before committing to a full download. It’s particularly popular in data-hoarding communities and among archivists who regularly work with public FTP mirrors or university repositories.

    For those who prefer staying entirely in the browser, DownThemAll! and its spiritual successor (the Firefox WebExtension version) remain solid choices. They’ve been around since the early 2000s, and while the interface feels a bit dated, the functionality is rock-solid. You get regex filtering, automatic subdirectory detection, and the ability to queue downloads in batches to avoid overwhelming your connection or the server.

    Practical Tips

    When using GUI tools, always start with a small test run—select a handful of files first to make sure the tool correctly interprets the directory structure and doesn’t download HTML wrappers instead of actual files. This is especially important on directories with non-standard formatting or server-side generated links.

    Most of these tools let you set download speed limits and parallel connection counts. For polite crawling, limit parallel connections to 2-4 and throttle your speed if the server seems slow. Remember, the goal is to download efficiently without causing problems for the server or other users. If you’re using JDownloader, disable any “Reconnect” features that attempt to reset your IP address—those are intended for bypassing file-host limits and can be seen as hostile behavior on open directories.

    Section Summary: GUI tools like JDownloader, DownThemAll!, and OpenDirectoryDownloader provide accessible, user-friendly alternatives to command-line wget, with built-in filtering and parallel download support perfect for non-technical users or quick one-off tasks.

    Finally, check that your chosen extension or tool is still actively maintained. Browser APIs change frequently, and an abandoned extension might not work on the latest version of Chrome or Firefox. JDownloader and OpenDirectoryDownloader both have active communities as of recent years, so they’re relatively safe bets. If you encounter bugs or compatibility issues, GitHub issues pages and user forums (like Reddit’s data hoarding community) are great places to find workarounds or alternative tools.

    Step 4 — Server-side and automated bulk-download approaches

    When you need a scalable, centralized solution—or when you want to avoid running downloads locally—server-side and automated bulk-download approaches offer a flexible alternative. These methods range from third-party batch-download services that scan a directory listing and deliver a ZIP archive, to custom scripts that parse file links and queue transfers in a loop. This step is especially valuable for large archives, authenticated content, or workflows where reproducibility and scheduling matter.

    [KBIMAGE_4]

    FileGrab and similar batch-download services

    Server-side bulk-downloaders like FileGrab take a different approach: you provide the URL of a directory listing, the service scans the page to extract all file links, and then delivers a single ZIP bundle containing every file. Because the transfer happens on the service’s infrastructure, you sidestep local bandwidth constraints and can leave the job running in the background. FileGrab’s bulk file downloader, for example, supports filtering by file extension and can handle directories with hundreds of files without requiring you to write a single line of code.

    This approach is ideal when you need a one-click solution for archiving an entire directory and your network connection or local disk isn’t suited for parallel, long-running downloads. Keep in mind that server-side tools must respect rate limits and robots.txt just as much as client-side utilities; reputable services will honor those rules automatically. You’ll typically paste the directory URL into a web form, select any filters (for instance, only PDFs or images), and receive a download link for the bundled archive once the scan completes.

    Repository and script-based solutions (Python, scripting)

    If you prefer full control and repeatability, a Python script that parses directory listings offers maximum flexibility. The general pattern is straightforward: use a library like requests to fetch the index page, parse the HTML with BeautifulSoup to extract all <a href="..."> links that point to files, filter by extension (for example, keep only .pdf or .zip), and then loop through the list to download each file. This approach is especially common in automation workflows where you might schedule nightly syncs or need to log download status for audit trails.

    The Python package ecosystem includes dedicated utilities—directory-downloader on PyPI, for instance—that wrap this logic into a simple command-line interface. You can also embed custom retry logic, parallel workers, or checksum verification in your script. Because the code lives in version control, you can reproduce the exact download weeks or months later, adjust filters, or extend the script to handle pagination or nested subdirectories. This method bridges the gap between quick one-off CLI commands and enterprise-grade data-pipeline tools.

    Pro tip: Start by writing a dry-run script that prints file URLs without downloading. Once you confirm the list looks correct—correct extensions, no extraneous links—switch to actual download mode. This two-phase approach catches pagination issues or broken links before you commit to a long transfer.

    Using wget in combination with authentication and filters

    Many bulk-download tasks involve servers that require login credentials—scientific data portals, government archives, or institutional repositories often sit behind authentication. In these cases, wget supports cookie-based sessions and HTTP authentication, letting you pair recursive downloads with credential handling. The NASA Earthdata bulk-download guide, for example, walks through creating a .netrc file to store credentials securely, then invoking wget with the --auth-no-challenge and --load-cookies flags to authenticate each request.

    Combining authentication with filters like -A "*.hdf,*.nc" ensures you pull only the file types you need, even from a directory with thousands of mixed assets. This technique is common in geospatial and climate-data workflows where datasets are organized in deep directory trees and require token-based or username/password authentication. Always review the target site’s bulk-download documentation; many data portals publish official guides that specify recommended wget flags and rate-limit policies.

    Practical considerations

    Regardless of the tool you choose, server performance and rate-limiting must guide your implementation. A poorly tuned script can issue hundreds of parallel requests in seconds, triggering DDoS protections or getting your IP temporarily banned. Best practice is to add a polite delay between requests (for example, time.sleep(1) in Python or --wait=1 in wget), use a single connection per file, and respect any published rate limits. Some servers expose an API or provide rsync endpoints specifically for bulk transfers; prefer those when available.

    Copyright and compliance remain critical. Just because a directory is indexed doesn’t mean bulk copying is permitted. Check the site’s terms of service, confirm whether an explicit license (Creative Commons, public domain, or institutional data-use agreement) covers the content, and verify that your intended use aligns with that license. Automated tools make it easy to download thousands of files in minutes—the legal responsibility to ensure you have permission rests with you.

    ApproachBest forKey advantage
    FileGrab / server-side serviceOne-click ZIP bundlesNo local setup or bandwidth strain
    Python scripting (requests + BeautifulSoup)Automation & repeatable pipelinesFull control, custom filtering, version-control
    Authenticated wgetProtected scientific/government dataHandles cookies and HTTP auth natively

    Step 5 — Validation, verification, and post-processing

    Once your bulk download completes, you’re not quite finished. The final step—validation and post-processing—ensures that every file arrived intact, that your local directory structure matches the remote listing, and that you can efficiently search or archive the downloaded content. Skipping this step can leave you with incomplete datasets, corrupted archives, or a sprawling mess of files that’s hard to navigate later.

    [KBIMAGE_5]

    Verification of downloaded content

    Start by comparing the number of files you downloaded against the count in the original directory listing. A quick ls | wc -l (Linux/macOS) or dir /b | find /c /v "" (Windows) gives you a local count; if the remote server provided a manifest or file index, diff those numbers. Many tools log skipped or failed downloads—review those logs to catch network timeouts or access-denied errors that left gaps in your archive.

    Where possible, validate checksums. If the directory includes .md5 or .sha256 files alongside each asset, run a batch checksum verification (md5sum -c checksums.md5 on Linux, or a PowerShell script on Windows). FileGrab and similar services often package downloads in ZIP format with built-in integrity checks; extract the archive and confirm no errors are reported. Even a single corrupted file can compromise downstream analysis, so treat checksum validation as non-negotiable for scientific, financial, or legal datasets.

    Post-processing options

    Depending on your workflow, you may want to recreate the remote directory structure on your local machine. Tools like wget with the -x or --force-directories flag automatically mirror the server’s path hierarchy; GUI tools may offer a “preserve structure” checkbox. If your bulk downloader flattened everything into a single folder, consider writing a short script to parse filenames (which often encode subdirectory information) and move files into appropriate subfolders.

    Other common post-processing tasks include filtering by extension after download (moving all PDFs to one folder, images to another), converting archives (unzipping nested .tar.gz files), or generating an inventory spreadsheet with filenames, sizes, and modification dates. Python’s os.walk or PowerShell’s Get-ChildItem -Recurse can quickly produce CSV manifests for large archives. This inventory becomes invaluable when you need to audit what you downloaded or share metadata with colleagues.

    Best practice: Archive the original download logs and any manifests alongside your files. Six months from now, you’ll want proof of when you downloaded the data, which server version you mirrored, and whether checksums passed—especially in regulated or research environments.

    Performance and efficiency tips

    Before committing to a full-scale mirror of a large directory, run a dry run or limited test. Use wget’s --spider mode to crawl links without downloading, or set a depth limit (-l 1) and file-count cap to fetch just a few dozen files. This preview helps you calibrate filters, confirm that your authentication works, and estimate total transfer time and disk space. If the test run reveals unexpected file types or broken links, adjust your accept/reject filters or refine your script before the real download.

    Bandwidth and parallelism tuning can dramatically improve throughput. Wget’s --limit-rate flag prevents saturating your connection (useful if you’re sharing bandwidth), while tools like aria2 support multi-connection downloads that can speed up transfers from fast servers. Python scripts can use thread pools (concurrent.futures.ThreadPoolExecutor) to fetch multiple files simultaneously—but always respect the server’s capacity. A good rule of thumb is to start with 2–4 parallel workers, monitor server response times, and scale up only if latency remains low.

    Finally, schedule and automate recurring downloads when the directory updates regularly. A cron job (Linux) or Task Scheduler task (Windows) can invoke your wget command or Python script nightly, pulling only new or changed files (use wget’s -N timestamp-checking or rsync’s differential sync). Automated downloads ensure your local mirror stays current without manual intervention, and logging each run’s output gives you an audit trail of what changed over time.

    Common design patterns found in top-ranking content

    Across the bulk-download tutorials and tools that rank highly in search results, several design patterns recur—each optimized for a different user profile and use case. Understanding these patterns helps you choose the right method for your environment and ensures you’re following best practices already validated by thousands of users.

    Pattern A: Stepwise CLI approach (wget/wget-like)

    The most widely documented pattern is the command-line recursive download with wget or curl. Tutorials typically start with a single-file example, then layer in recursive flags (-r), depth control (-l), and extension filters (-A/-R). This pattern appeals to power users and sysadmins who value scriptability and minimal dependencies. The GNU Wget manual’s recursive-download chapter is the canonical reference, and countless university IT departments and government data portals publish wget one-liners tailored to their directory structures. Strengths: portability, speed, and fine-grained control. Weakness: steeper learning curve for non-technical users.

    Pattern B: GUI-first tutorials (JDownloader, DownThemAll!)

    A second pattern centers on graphical download managers like JDownloader and browser extensions like DownThemAll! or OpenDirectoryDownloader. These tools emphasize ease of use: you paste a URL, the tool scans for links, you select file types in a checklist, and downloads begin with a click. Tutorials often include screenshots of the interface and troubleshooting tips for browser compatibility. This pattern is popular among students, researchers, and hobbyists who need a quick solution without touching the terminal. Strengths: minimal setup, visual feedback, and broad file-host support. Weakness: less flexibility for advanced filtering or automation.

    Pattern C: Server-side bulk-download services

    Services like FileGrab represent a third pattern: offload the download to a remote server that scans the directory, fetches files, and delivers a ZIP bundle. This pattern suits users with limited local bandwidth or those who want to archive a directory once without installing software. Tutorials for these services are typically short—sign up, paste URL, receive link—but emphasize verifying the service’s terms and ensuring it respects robots.txt. Strengths: zero local configuration and centralized management. Weakness: reliance on a third-party service and potential privacy concerns for sensitive data.

    Pattern D: Scripted automation (Python)

    The Python scripting pattern is favored in data-engineering and research workflows where repeatability and version control matter. Tutorials show how to parse HTML with BeautifulSoup, loop over file links with requests, and add logging or retry logic. Some guides point to PyPI packages like directory-downloader that wrap common tasks. This pattern integrates naturally into CI/CD pipelines, Jupyter notebooks, and scheduled ETL jobs. Strengths: full customization, reproducibility, and integration with larger workflows. Weakness: requires programming knowledge and initial script development time.

    Almost every high-quality guide includes a legal and ethical disclaimer. This pattern manifests as introductory sections on checking robots.txt, confirming directory-listing availability, and respecting copyright. Tutorials often link to examples of permitted bulk downloads (public scientific data, government archives) and warn against scraping e-commerce sites or proprietary content. This pattern reflects the community norm that automation carries responsibility—tools make bulk copying trivial, but users must ensure they have permission. The best guides weave these reminders throughout, not just in a single disclaimer paragraph.

    PatternRepresentative toolTypical userCore strength
    A – CLI recursivewget, curlSysadmin, power userScriptable, fast, portable
    B – GUI batchJDownloader, DownThemAll!Student, researcherEasy setup, visual interface
    C – Server-sideFileGrabOne-time archiverNo local install, ZIP delivery
    D – ScriptedPython (requests + BeautifulSoup)Data engineer, developerReproducible, version-controlled
    E – Legal focusAny (cross-cutting)All usersEnsures compliance and respect

    By recognizing these patterns, you can quickly map your own needs to proven approaches. If you prize ease of use, lean toward Pattern B. If you need automation and audit trails, adopt Pattern D. If you’re mirroring a massive scientific archive with authentication, blend Patterns A and E. The landscape of bulk-download tools is mature; the challenge is simply picking the pattern that fits your skill level, infrastructure, and compliance requirements.


    Frequently Asked Questions

    Common questions about downloading files from online directories

    How do I download all files from a website directory at once?

    Use command-line tools like wget or HTTrack to download entire directories. Run wget with the recursive flag: wget -r -np -nH --cut-dirs=1 [URL]. Alternatively, browser extensions like DownThemAll can batch download files. Always verify you have permission to download before proceeding with bulk operations.

    What is the fastest way to download multiple files from a server?

    Wget and cURL offer the fastest download speeds for multiple files because they support parallel connections and resume capabilities. Use wget’s -P flag to increase parallel downloads, or implement a script with cURL that fetches multiple files simultaneously. Download managers with multi-threading capabilities also significantly improve speed.

    Can I download files from a directory without wget?

    Yes, several alternatives exist including cURL, HTTrack, browser extensions like DownThemAll, and Python scripts using libraries like requests or Beautiful Soup. Windows users can use PowerShell’s Invoke-WebRequest cmdlet. Each method has unique advantages depending on your operating system, technical skill level, and specific requirements.

    Should I use wget or cURL for downloading directories?

    Wget is better suited for downloading entire directories recursively with its built-in options for mirroring websites and directory structures. cURL excels at single file transfers and API interactions with more protocol support. For comprehensive directory downloads, wget is generally the preferred choice due to its recursive capabilities and simpler syntax.

    How can I download only specific file types from a directory?

    Use wget with the accept flag: wget -r -A pdf,jpg,png [URL] to download only specified file types. Alternatively, use the reject flag to exclude certain types. Browser extensions and download managers also offer filtering options. Python scripts with Beautiful Soup can parse directories and selectively download files based on extensions.

    What are the legal considerations when downloading from online directories?

    Always verify you have explicit permission before downloading directory contents. Check the website’s robots.txt file and terms of service. Respect copyright laws and intellectual property rights. Avoid overwhelming servers with aggressive scraping. Commercial or public websites may have specific usage policies that prohibit automated downloading without authorization.

    Can I resume interrupted downloads from a directory?

    Yes, wget supports resume functionality with the -c or --continue flag, which picks up where downloads were interrupted. Download managers like JDownloader also offer automatic resume capabilities. This feature is particularly valuable for large directories or unstable connections, preventing the need to restart entire download operations.

    How do I preserve the directory structure when downloading?

    Wget preserves directory structure by default when using recursive mode. Use flags like -nH to exclude the hostname and --cut-dirs=N to remove specified directory levels. HTTrack also maintains folder hierarchies. Download managers typically have settings to replicate server directory structures or flatten all files into one folder.

    What is the best tool for beginners to download directories?

    Browser extensions like DownThemAll or Bulk Image Downloader offer the most user-friendly experience for beginners with intuitive graphical interfaces. They require no command-line knowledge and integrate directly into your browser. For slightly more control, HTTrack provides a GUI while offering powerful features. These tools balance simplicity with functionality effectively.

    How can I limit download speed to avoid overwhelming a server?

    Use wget’s --limit-rate flag to cap download speed: wget --limit-rate=200k -r [URL]. Add delays between requests with --wait=2 to pause two seconds between downloads. Respecting server resources prevents IP bans and demonstrates ethical scraping practices. Most download managers include built-in bandwidth throttling options.


    Ready to Master Directory Downloads?

    You now have the knowledge and tools to efficiently download files from any online directory. Whether you choose command-line tools for power and flexibility or graphical applications for simplicity, the techniques covered in this guide will save you hours of manual work.

    Start with a small test directory to practice your chosen method. Experiment with different flags and settings to understand how they affect your downloads. Remember to always respect website policies and server resources while automating your workflows.

    The difference between manual clicking and automated downloading is the difference between working hard and working smart. Take action today and reclaim your time.

    Take Your Next Steps

    Don’t let this knowledge sit unused. Open your terminal or download manager right now and try downloading a simple directory. Start with your own website or a test server to build confidence. As you become comfortable with basic commands, gradually incorporate advanced options like filtering, rate limiting, and custom scripts.

    The skills you’ve learned extend far beyond simple file downloads. They form the foundation for web scraping, data collection, backup automation, and countless other productivity-enhancing workflows. The investment you make in mastering these tools will pay dividends throughout your professional life.

    Your challenge: Within the next 24 hours, successfully download an entire directory using at least one method from this guide. Document what works, troubleshoot any errors, and celebrate your progress. You’ve got this.

    ; <[^>]+>; ); 0; 155)

  • Blog

    How to Find a Listing ID on Redfin: 5 Simple Steps

    Finding a Redfin listing ID might seem like a trivial task, but it’s actually one of the most powerful shortcuts in the real estate world that most buyers and sellers completely overlook. While everyone else is fumbling around trying to describe properties through addresses or vague descriptions, savvy real estate professionals use these unique identifiers…

  • Blog

    How to Create a Listing on Facebook Marketplace: A Beginner’s Guide

    Facebook Marketplace has quietly become one of the most powerful selling platforms on the internet, with over 1 billion people using it monthly to buy and sell everything from vintage furniture to electronics. Yet here’s what most beginners don’t realize: the platform’s algorithm heavily favors sellers who understand its unique ecosystem over those who simply…

  • Blog

    Free Local Business Listing Directories: 5 Essential Platforms to Boost Visibility

    Most small businesses are leaving money on the table by ignoring the single most powerful free marketing channel available: local business listing directories. Here’s what nobody tells you—while your competitors obsess over paid ads and social media algorithms, a handful of properly optimized directory listings can quietly funnel high-intent customers straight to your door. The…

  • Blog

    6 Powerful Reasons to Create a Statewide Business Directory in 2025

    Most local businesses face an invisible problem: they’re drowning in a sea of national chains and corporate marketing budgets. I’ve watched countless small business owners pour money into advertising that barely moves the needle, while their potential customers drive past their doors every single day, completely unaware they exist. The frustration is real, and it’s…