
How to Install a Plugin for WordPress: A Beginner’s Guide

Create a striking, professional hero image for a blog article titled: How to Install a Plugin for WordPress: A Beginner's Guide. Style: Modern, clean, eye-catching design that represents the main topic. No text overlays. High quality 1200x800 professional blog header.
Translated to

Installing a WordPress plugin shouldn’t feel like defusing a bomb, but I’ve seen too many beginners approach it that way—hovering nervously over the “Activate” button, worried their entire site might implode. Here’s the thing most tutorials won’t tell you upfront: installing a WordPress plugin is only half the battle. The real skill lies in knowing which plugin to install, when to install it, and how to do it without introducing security holes or performance drags that’ll haunt you months later. Whether you’re adding your first contact form or your fiftieth optimization tool, understanding the full lifecycle—from vetting to activation to ongoing maintenance—will save you countless hours of troubleshooting and keep your site running smoothly.

TL;DR – Quick Takeaways

  • Plugins extend WordPress functionality – they add features without coding, but quality varies wildly
  • Always vet before installing – check last update date, active installations, reviews, and compatibility
  • Two main install methods – directly from WordPress dashboard (easiest) or upload ZIP files (for premium plugins)
  • Backup first, test in staging – especially for established sites; conflicts happen more often than you’d think
  • Fewer plugins usually means better performance – prioritize well-coded, multipurpose tools over dozens of single-function plugins
  • Keep plugins updated – outdated plugins are the #1 entry point for site compromises

Understanding WordPress Plugins

Think of WordPress plugins as apps for your website. Just like your smartphone runs on iOS or Android but needs individual apps for specific tasks, WordPress provides the foundation while plugins add everything from contact forms to entire e-commerce stores. The plugin architecture is what transformed WordPress from a simple blogging platform into the powerhouse running over 40% of all websites on the internet.
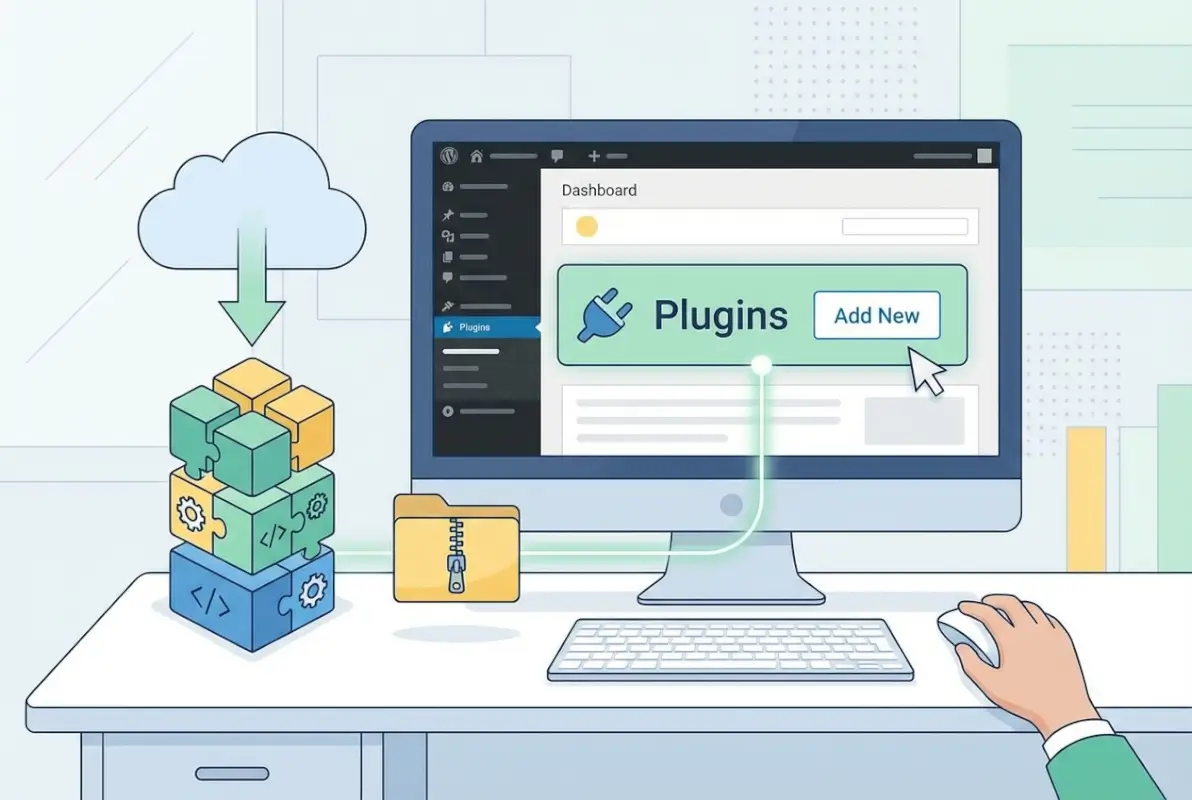
Image for How to Install a Plugin for WordPress: A Beginner's Guide

The beauty of this system is that you don’t need to write a single line of code to add sophisticated features. Want to optimize your images automatically? There’s a plugin. Need to accept payments? Several plugins handle that. Looking to improve your search engine rankings? Dozens of SEO plugins compete for your attention. But here’s where beginners often stumble: not all plugins are created equal, and installing the wrong ones can actually hurt your site more than help it.

How Plugins Extend WordPress

Plugins hook into WordPress’s core functionality through a system of actions and filters. In practical terms, this means they can modify how your site behaves without changing WordPress itself. A caching plugin, for instance, intercepts page requests and serves static versions to visitors, dramatically speeding up load times. A security plugin might scan every file upload for malware or block suspicious login attempts from specific IP addresses.

💡 Pro Tip: Before installing any plugin, write down the specific problem you’re trying to solve. “I need better SEO” is too vague—”I need to automatically generate XML sitemaps and add schema markup” gives you clear criteria for evaluation.

Common plugin categories include:

  • SEO tools – Handle meta descriptions, sitemaps, schema markup, and on-page optimization
  • Form builders – Create contact forms, surveys, payment forms, and registration systems
  • Security solutions – Firewall protection, malware scanning, login security, and backup management
  • Performance optimization – Caching, image compression, database cleanup, and lazy loading
  • E-commerce platforms – Full shopping cart systems with payment gateways and inventory management
  • Page builders – Drag-and-drop interfaces for designing custom layouts without code

Where to Find Plugins

The official WordPress.org Plugin Directory hosts over 60,000 free plugins, all reviewed by the WordPress team before publication. This is your safest starting point. Every listing shows installation counts, user ratings, support forum activity, and most importantly, when it was last updated. A plugin that hasn’t been touched in three years should raise immediate red flags, no matter how good the reviews look.

Commercial marketplaces like CodeCanyon, premium plugin developers, and specialized vendors offer paid alternatives with dedicated support and advanced features. There’s nothing wrong with premium plugins—many are exceptional—but the transaction introduces additional vetting responsibility since they’re not vetted by WordPress.org’s team.

Why Beginners Should Vet Plugins Before Installation

I learned this lesson the hard way years ago when a seemingly innocent “social sharing” plugin turned out to inject hidden affiliate links into every page. My site’s credibility took a hit, and Google’s algorithm noticed the sketchy behavior. The plugin had excellent reviews (likely fake), thousands of active installations (possibly inflated), and a polished landing page. What it didn’t have was clean code or honest intentions.
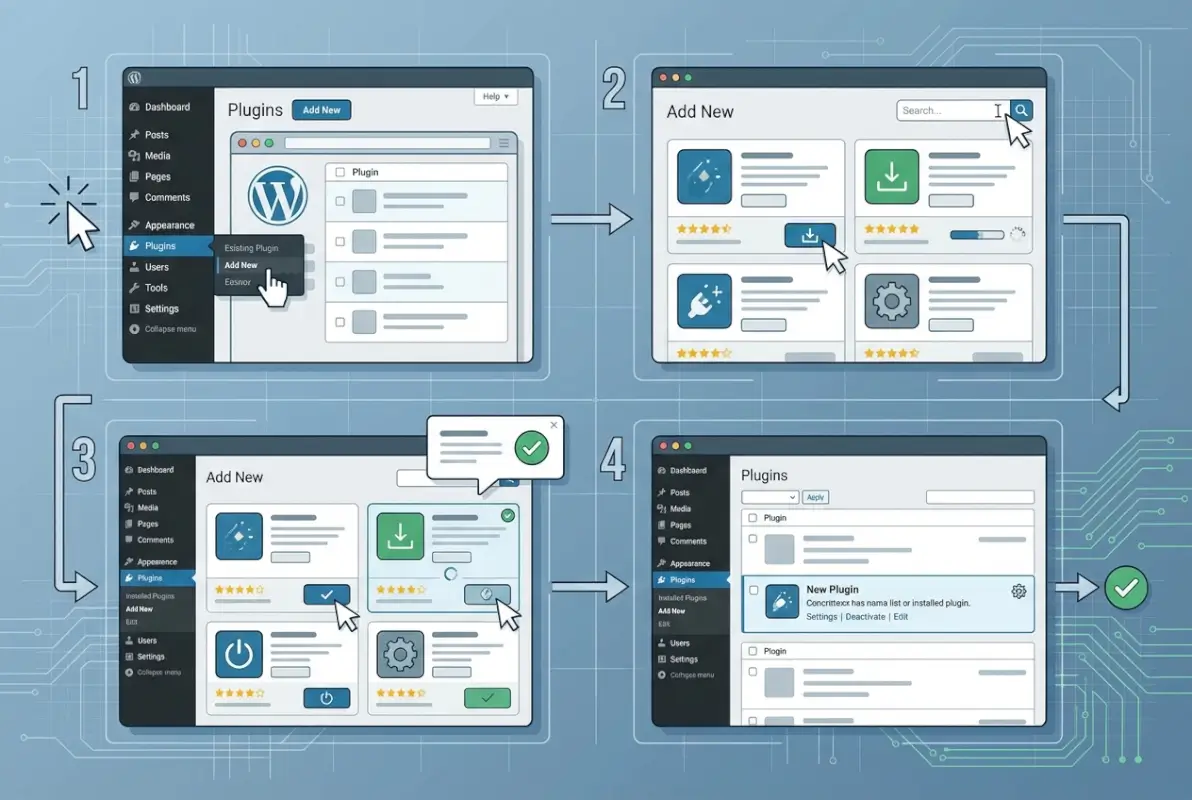
Image for How to Install a Plugin for WordPress: A Beginner's Guide

Since then, I’ve developed a pre-installation checklist that’s saved me countless headaches. Let me walk you through what actually matters when evaluating a plugin.

Check for Compatibility, Last Update Date, Active Installations, User Reviews

Start with the basics that WordPress.org displays prominently. The “Tested up to” field tells you the latest WordPress version the developer has verified compatibility with. If you’re running WordPress 6.4 and the plugin was only tested up to 5.8, proceed with extreme caution or skip it entirely.

IndicatorGreen FlagRed Flag
Last UpdatedWithin 3 monthsOver 1 year ago
Active Installations10,000+ usersUnder 100 users
Support ResponseRecent activity in forumsUnanswered questions piling up
Star Rating4+ stars with 50+ reviewsUnder 3 stars or suspiciously perfect 5-star rating
WordPress VersionTested with your versionTwo+ major versions behind

Read actual reviews, not just the star rating. Look for patterns in complaints—if five different users mention the same bug or conflict, that’s real data. Also check the support forums: does the developer respond promptly and helpfully? A plugin with mediocre features but excellent support often beats a feature-rich plugin with an absent developer.

Security Considerations and the Risk of Abandoned Plugins

Abandoned plugins are security landmines waiting to explode. Hackers actively scan for known vulnerabilities in outdated plugins because they’re easy targets. The developer won’t patch the hole, meaning you’re leaving your front door unlocked with a neon “Rob Me” sign in the yard.

⚠️ Important: If a plugin has been closed by the WordPress.org team (you’ll see a warning banner), do not install it under any circumstances. Closed plugins typically contain serious security flaws or violate guidelines—neither situation ends well for your site.

Even popular plugins aren’t immune to vulnerabilities. The difference is that active developers patch them quickly and release updates, which is why keeping plugins current is non-negotiable. Set up automatic updates for minor releases, but review major version changes manually since they sometimes introduce breaking changes that need configuration adjustments.

How to Install a Plugin – Step by Step

Now for the actual installation process. WordPress makes this remarkably straightforward, though you have two main paths depending on where your plugin comes from. Let’s walk through both methods with the detail you need to avoid rookie mistakes.
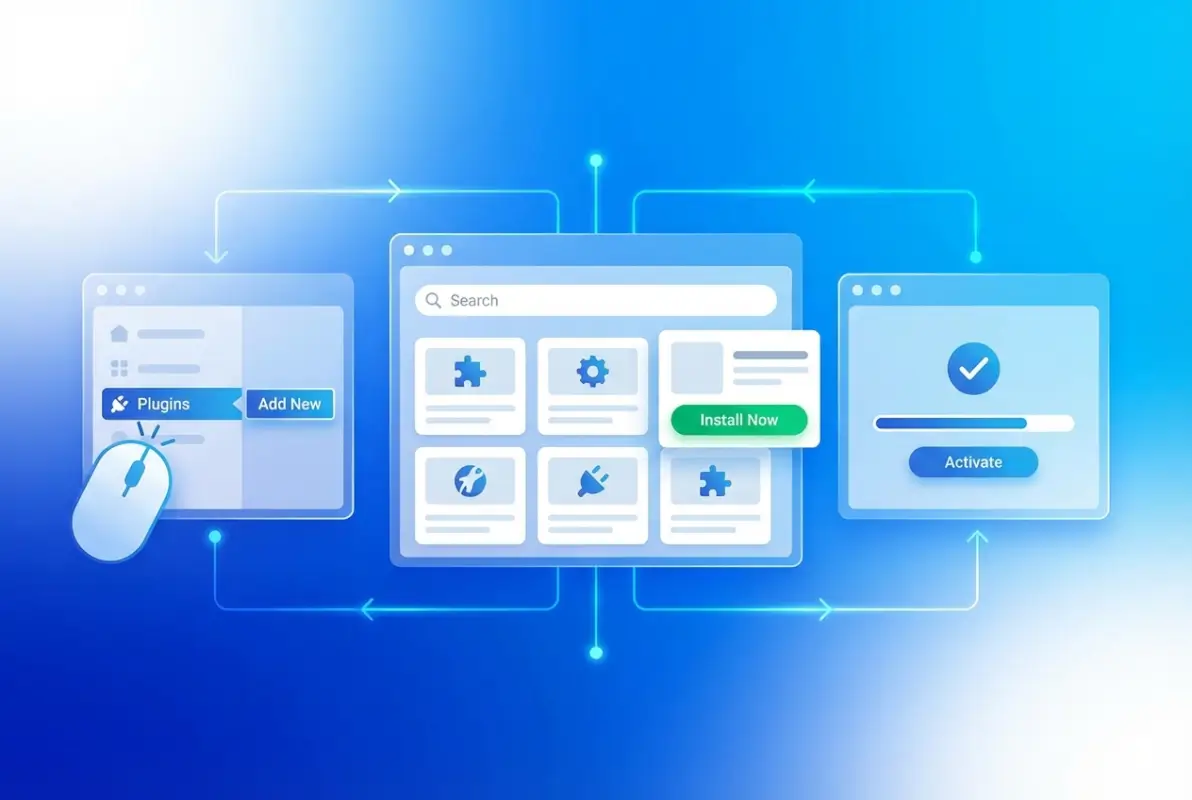
Image for How to Install a Plugin for WordPress: A Beginner's Guide

Install from the WordPress Dashboard (Add New)

This is the method you’ll use 90% of the time for free plugins from the official directory. Start by logging into your WordPress admin panel (typically yoursite.com/wp-admin). From the left sidebar, hover over “Plugins” and click “Add New” in the submenu that appears.

You’ll land on a screen showcasing featured and popular plugins. Ignore the suggestions for now and use the search box in the upper right corner. Type keywords related to your need—for example, “contact form” or “image optimization”—and WordPress will filter the entire directory in real-time.

The search results show each plugin’s name, author, star rating, number of active installations, and a brief description. Click “More Details” on any plugin to open an overlay with comprehensive information: full description, installation instructions, screenshots, reviews, support forum links, and version history. This is where you apply your vetting checklist before committing.

💡 Pro Tip: Open the “Development” tab in plugin details to see the actual changelog. This shows you what features were added recently and, more importantly, what bugs were fixed. A healthy pattern of regular updates with meaningful changes indicates active maintenance.

Once you’ve confirmed the plugin meets your standards, click the “Install Now” button. WordPress downloads the plugin files to your server automatically—you’ll see a progress indicator for a few seconds. When installation completes, the button changes to “Activate.” Don’t rush this step. If you’re working on a live site with significant traffic, consider testing in a staging environment first (more on that later).

Click “Activate” when ready. Most plugins add a new menu item to your WordPress admin sidebar or create a settings page under Settings or Tools. Some will display a welcome message or configuration wizard immediately after activation. Follow any setup prompts to configure basic options, though you can usually skip these and adjust settings later.

Installing via ZIP File Upload

Premium plugins, custom-developed plugins, or plugins from third-party marketplaces come as ZIP files that you’ll upload manually. You might also need this method if you’re installing a specific version of a plugin rather than the latest release (though this is rare and usually only necessary for compatibility troubleshooting).

From Plugins > Add New, look for the “Upload Plugin” button near the top of the page. Click it to reveal a file upload interface. Click “Choose File” and navigate to wherever you saved the plugin’s ZIP file—do not unzip it first; WordPress needs the compressed archive.

Select your ZIP file and click “Install Now.” WordPress uploads the file, extracts it to the plugins directory, and runs the same installation routine as the Add New method. You’ll get a success message if everything works correctly, followed by the same “Activate” button.

⚠️ Important: Only upload ZIP files from sources you absolutely trust. This method bypasses WordPress.org’s security review, meaning infected files could contain anything from adware to full backdoors. Verify the plugin developer’s legitimacy before uploading anything to your server.

If you encounter an “upload size limit exceeded” error, your hosting provider has set a maximum file size for uploads (often around 2MB on shared hosting). You have three solutions: ask your host to increase the limit temporarily, upload the plugin via FTP/SFTP directly to the /wp-content/plugins/ directory, or use a different installation method if available.

When You’d Use a ZIP Upload

Beyond premium plugins, ZIP uploads are useful for installing beta versions during testing, rolling back to previous versions after a problematic update, or deploying custom plugins developed specifically for your site. If you’re working with a developer on custom functionality, they’ll provide a ZIP file that you’ll install this way.

Some organizations use this method for internal plugin distribution when they want to control exactly which version all their sites use, which is common in agency environments or companies managing multiple WordPress installations. You can check out how to install multiple WordPress plugins at once if you’re managing several sites simultaneously.

Post-Installation Best Practices

Activation is just the beginning, not the finish line. What you do in the next few minutes determines whether this plugin becomes a valuable asset or a persistent headache. Let’s talk about configuration, maintenance, and the monitoring that keeps everything running smoothly long-term.
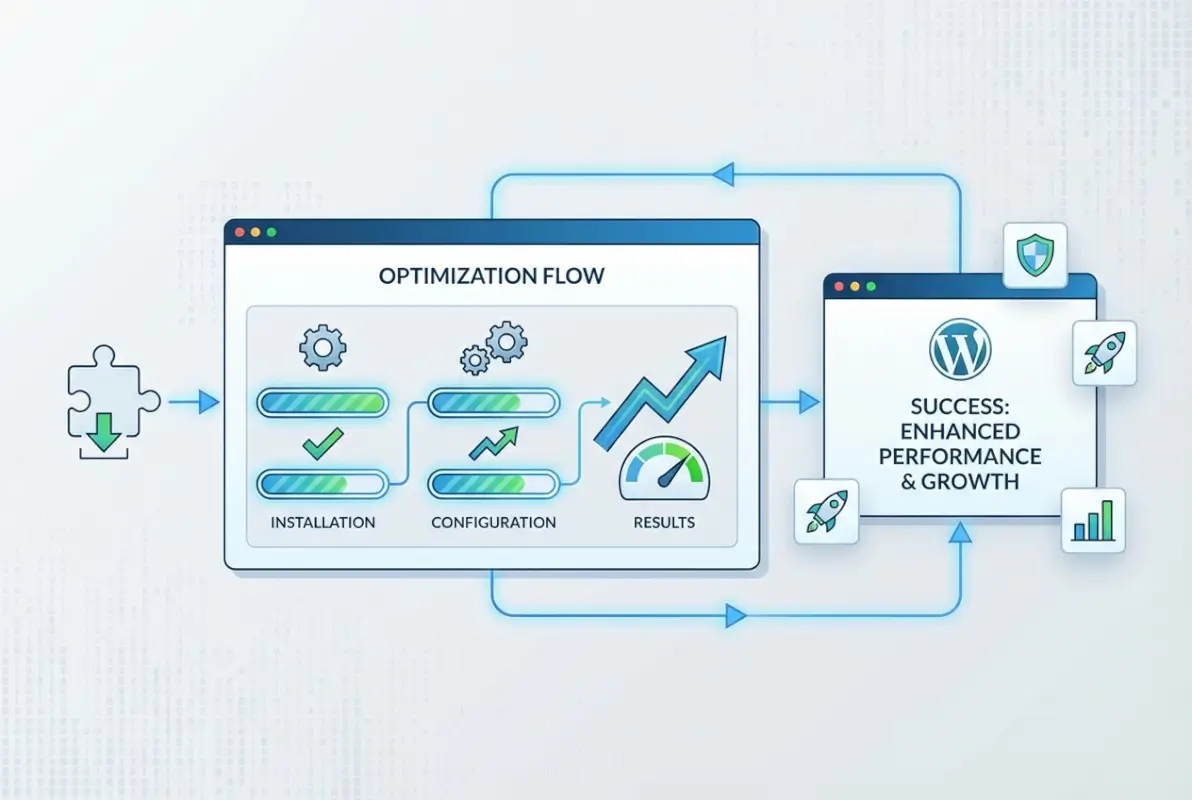
Image for How to Install a Plugin for WordPress: A Beginner's Guide

Configure Settings Safely

Most plugins come with sensible defaults that work fine for typical use cases. Resist the urge to immediately tweak every available setting just because you can. Instead, run your site with default configurations for a day or two while monitoring performance and functionality. This establishes a baseline that helps you identify what changes actually improve things versus what just feels like “optimization.”

When you do adjust settings, change one thing at a time and test the impact. I’ve watched too many beginners enable every performance feature in a caching plugin simultaneously, then wonder why their site broke. Was it the HTML minification? The aggressive JavaScript optimization? The database cleanup? Nobody knows because everything changed at once. If you’re running a business directory site, consider pro tips for designing a user-friendly business directory that align with your plugin choices.

✅ Key Insight: Document your plugin settings in a simple text file or spreadsheet. Include the plugin name, version, and any custom configurations you’ve made. This makes troubleshooting infinitely easier and helps when you’re setting up a new site or migrating hosts.

Be especially careful with plugins that modify your .htaccess file, change permalink structures, or alter database tables. These actions have site-wide implications that aren’t always easy to reverse. Always backup immediately before activating plugins in these categories (security, caching, and SEO plugins are the usual suspects).

Keep a Lightweight Configuration to Avoid Bloat

Plugin bloat is real and it’s sneaky. You install a “simple” contact form, then add social sharing buttons, then a popup builder, then email marketing integration, then analytics tracking, and suddenly you’re loading 15 different JavaScript libraries on every page load. Each plugin adds weight—HTTP requests, database queries, CSS files, scripts—and that accumulates quickly.

47%
average increase in page load time for every 10 plugins added (varies widely by plugin quality)

Audit your plugin list quarterly. Ask yourself: “Am I actually using this?” and “Could another plugin I already have do this job?” Sometimes you’ll discover you installed a plugin to solve a temporary problem that no longer exists. Other times you’ll find feature overlap between plugins that can be consolidated.

Look for multipurpose plugins that handle several related tasks rather than installing five single-purpose tools. A comprehensive SEO plugin like Yoast or Rank Math includes sitemap generation, meta tag management, schema markup, and social media integration—features that would otherwise require separate plugins. Similarly, all-in-one security suites combine firewall protection, malware scanning, and login security instead of requiring three different plugins.

Update Cadence and How to Handle Automatic Updates

WordPress offers automatic updates for plugins, which sounds convenient but requires nuance. For minor version updates (bug fixes and security patches), automatic updates are generally safe and highly recommended. The risk of an outdated vulnerable plugin far exceeds the risk of a minor update causing issues.

Major version updates—those that introduce new features or significant changes—deserve more caution. These can introduce conflicts with other plugins or themes, especially if you’re running custom code. I enable automatic updates for minor patches but manually review major version releases before updating.

Set aside time weekly or biweekly to check for available updates. WordPress shows a count badge on the Plugins menu item when updates are available. Review the changelog for each update before clicking that enticing “Update All” button. Look for mentions of breaking changes, deprecated features, or new requirements (like increased minimum PHP version).

💡 Pro Tip: Subscribe to security mailing lists like WPScan or Wordfence Intelligence to receive immediate alerts when critical vulnerabilities are discovered in popular plugins. This lets you patch urgent security holes within hours rather than waiting for your regular update cycle.

Backups and Rollback Strategies

Before any plugin installation or update on a production site, create a complete backup. This isn’t paranoia, it’s basic risk management. A good backup includes your database (which stores all your content, settings, and plugin configurations) and your files (which contain WordPress core, themes, plugins, and uploads).

Several excellent backup plugins make this automated: UpdraftPlus, BackupBuddy, and BlogVault are popular choices. Configure them to store backups off-site—on cloud storage like Dropbox, Google Drive, or Amazon S3—so you’re protected even if your entire server fails. If you’re operating a local business directory app like Yelp, reliable backups become even more critical since you’re handling user-generated content.

If a plugin update breaks something, WordPress makes rollback fairly simple. From Plugins > Installed Plugins, you can deactivate the problematic plugin immediately. If you need an older version, you can download previous releases from the plugin’s WordPress.org page (look for the “Advanced View” link near the download button) and install via ZIP upload. Some backup plugins include one-click rollback features that restore everything to a previous state in seconds.

Vetting and Selecting Plugins (For Beginners)

Let’s dig deeper into the evaluation process because this is where beginners most often go wrong. The WordPress plugin directory offers immense choice, which paradoxically makes choosing harder. When you search for “contact form,” you’ll find hundreds of options ranging from simple to complex, free to freemium to premium, and everything in between.

Image for How to Install a Plugin for WordPress: A Beginner's Guide

How to Evaluate a Plugin Before Adding It

Beyond the basic metrics we covered earlier, look at the developer’s track record. Click through to their WordPress.org profile to see what other plugins they maintain. A developer with multiple successful plugins that are all actively maintained is a better bet than someone with a dozen abandoned projects and one semi-current plugin.

Check if the plugin has a proper website beyond WordPress.org. Professional developers typically maintain dedicated documentation sites, support portals, and sometimes communities around their plugins. This infrastructure suggests they’re invested in the long-term success of their product rather than releasing it and moving on.

Evaluation FactorWhy It MattersHow to Check
Code QualityAffects performance and securityCheck reviews for speed complaints; look for WordPress coding standards compliance
Support QualityDetermines how quickly issues get resolvedRead support forum threads; note developer response times and tone
Feature ScopeBloated plugins slow your siteDoes it do exactly what you need, or is it packed with unrelated features?
Update FrequencyShows active maintenance and security attentionReview changelog for regular, meaningful updates
CompatibilityPrevents conflicts with your setupCheck tested WordPress version, PHP requirements, and known conflicts

Read the plugin’s requirements carefully. Some require specific PHP versions or WordPress versions that your hosting might not support. Others have dependencies on other plugins or services (like an API key from an external service). Understanding these requirements upfront prevents frustrating installation failures.

Developer Reputation and Plugin Reviews

Not all five-star ratings are trustworthy. Look for detailed reviews that describe specific use cases and experiences. “Great plugin!” tells you nothing; “I used this to migrate 5,000 posts from Drupal and it handled custom fields perfectly, though the import took 3 hours” gives you real information.

Pay attention to how developers respond to negative reviews. Do they defensively dismiss complaints, or do they acknowledge issues and explain what they’re doing to fix them? A developer who engages constructively with criticism is someone you want maintaining code on your site.

Check if the plugin has been featured or recommended by reputable WordPress resources. While not definitive, endorsements from Torque or other established WordPress publications carry more weight than random blog mentions.

Alternatives to Plugins When Possible

Sometimes the best plugin is no plugin at all. WordPress has grown increasingly capable out of the box, and modern themes include functionality that once required separate plugins. Before installing anything, check if your theme already handles the feature you need.

Many themes now include built-in contact forms, social sharing buttons, schema markup, and even page builders. Using these native features is almost always faster and more stable than adding external plugins. For promoting a business on Facebook via your directory, you might find that your theme’s social integration is sufficient without additional plugins.

Some features can be handled with small code snippets added to your theme’s functions.php file (or better yet, a custom plugin you create for site-specific modifications). A few lines of code to add custom post types or modify excerpt length is often more efficient than installing a 50,000-line plugin that happens to include that feature among hundreds of others.

⚠️ Important: If you’re not comfortable writing code, don’t add random snippets from the internet to your functions.php file without understanding what they do. One syntax error can bring down your entire site, and fixing it requires FTP access. Stick with plugins unless you’re confident in your PHP skills or have a developer available.

Security and Maintenance Spotlight

Security deserves its own deep dive because plugin vulnerabilities account for the majority of WordPress site compromises. The statistics are sobering: outdated plugins represent the single largest attack vector for WordPress sites, far exceeding vulnerabilities in WordPress core itself.

Keeping Sites Secure with Plugins

When a security researcher discovers a vulnerability in a popular plugin, there’s typically a responsible disclosure process: the researcher contacts the developer privately, the developer creates a patch, and then the vulnerability is announced publicly after the patch is available. This window between patch release and public disclosure is critical—you need to update immediately when security updates are announced.

Subscribe to security-focused WordPress resources to stay informed. The WordPress News blog announces major security issues, and specialized services like Wordfence provide detailed vulnerability reports. Many security plugins also include features that alert you to known vulnerabilities in your installed plugins.

91%
of WordPress site compromises trace back to plugins, themes, or outdated core installations

Consider implementing a Web Application Firewall (WAF) either at the hosting level or through a plugin like Wordfence or Sucuri. These tools block common attack patterns before they reach your WordPress installation, providing an additional security layer beyond keeping plugins updated.

How to Respond to Zero-Days or Discovered Vulnerabilities

Occasionally, a vulnerability becomes public before a patch exists—the dreaded zero-day. If this happens with one of your installed plugins, you have limited options: deactivate the plugin immediately until a patch is available, implement WAF rules that specifically block exploitation attempts, or temporarily take the affected functionality offline.

This is why choosing plugins with active, responsive developers matters so much. The difference between a patch released within hours versus weeks can mean the difference between a secure site and a compromised one. Track the plugin’s support forums and official communication channels when a vulnerability is announced so you know the moment a fix is available.

Troubleshooting Flowchart for Conflicts

When something goes wrong after installing or updating a plugin, systematic troubleshooting saves time and reduces stress. Here’s the process I follow:

  1. Identify symptoms precisely – What exactly isn’t working? Be specific: “checkout page returns a 500 error” not “site is broken.”
  2. Deactivate the most recently changed plugin – If that resolves the issue, you’ve found your culprit.
  3. If problem persists, deactivate all plugins – This tells you if the issue is plugin-related at all.
  4. If site works with plugins off, reactivate one at a time – Test functionality after each activation until the problem reappears.
  5. If site still broken with all plugins off, switch to a default theme – This isolates whether it’s a theme conflict.
  6. Still broken? Check server error logs – Your hosting control panel usually provides access to error logs that reveal PHP errors, memory exhaustion, or other server-level issues.
✅ Key Insight: Enable WordPress debug mode when troubleshooting by adding define(‘WP_DEBUG’, true); to your wp-config.php file. This displays PHP errors and warnings that WordPress normally suppresses, giving you detailed information about what’s failing and where.

When to Contact Plugin Support or a Developer

If you’ve followed the troubleshooting flowchart and isolated the problem to a specific plugin, it’s time to reach out. Good plugin developers want to know about bugs and conflicts—they improve the product for everyone. When contacting support, provide:

  • WordPress version, plugin version, theme name and version
  • Other active plugins (especially those that might conflict)
  • PHP version and relevant hosting information
  • Specific steps to reproduce the problem
  • Any error messages from logs or debug mode
  • Screenshots if applicable

This context helps developers diagnose issues quickly. “It doesn’t work” leads to days of back-and-forth questions; detailed problem reports often get solved in a single response.

If the plugin is abandoned or the developer is unresponsive, you need to make a decision: find an alternative plugin that’s actively maintained, hire a developer to patch the security issue (and maintain the fork going forward), or remove the functionality entirely. None of these options are ideal, but all are better than running vulnerable code.

Real-World Scenarios and Quick Checks

Let’s ground all this theory in practical application. Here are the plugins I recommend for new sites, organized by priority and function. These represent the minimum viable plugin set for most WordPress installations—you’ll add more based on your specific needs, but this foundation covers essential functionality without bloat.

Quick-Start Checklist for a New Site

When I set up a new WordPress site, I install plugins in this order:

  1. Security first – Wordfence or Sucuri Security to establish baseline protection
  2. Backups immediately – UpdraftPlus with automated daily backups to cloud storage
  3. Performance fundamentals – WP Rocket or W3 Total Cache for basic caching
  4. SEO basics – Yoast SEO or Rank Math for sitemaps and meta management
  5. Essential functionality – Contact Form 7 or WPForms for user communication

After installing each plugin, I test core site functionality: can visitors access pages? Do forms submit correctly? Are images loading? Does the admin panel still work smoothly? This gradual approach catches conflicts immediately rather than wondering which of ten simultaneously installed plugins caused the white screen of death.

Section Summary: Start with security and backups, add performance optimization, then layer in SEO and functionality—testing thoroughly after each addition to catch conflicts early.

Common Beginner Mistakes to Avoid

After helping dozens of beginners with their WordPress sites, I’ve noticed these patterns repeatedly:

  • Installing plugins “just in case” – Every unused plugin is unnecessary attack surface and potential performance drag. Only install what you need right now, not what you might possibly use someday.
  • Ignoring update notifications – Those little update badges aren’t suggestions, they’re security alerts. Outdated plugins get compromised.
  • Using nulled (pirated) premium plugins – Beyond the ethical and legal issues, nulled plugins often contain malware. If you can’t afford a premium plugin, find a quality free alternative.
  • Installing plugins from sketchy sources – Stick to WordPress.org, reputable marketplaces, and official plugin developer sites. Random file-sharing sites and “free premium plugin” offers are traps.
  • Never testing in staging – If your site has real traffic and revenue implications, investing in a staging environment pays for itself the first time it prevents a production disaster. When you’re looking to monetize a business directory, downtime costs real money.
  • Failing to remove deactivated plugins – Deactivating a plugin doesn’t remove its files from your server. Fully delete plugins you’re not using to eliminate unnecessary code.

I’ve seen sites with 80+ installed plugins, of which 30 were deactivated and another 20 were redundant or unused. The site loaded in 8+ seconds and had persistent database errors from conflicting plugins trying to modify the same tables. After a thorough audit and cleanup—reducing to 15 carefully chosen plugins—load times dropped under 2 seconds and errors vanished.


Frequently Asked Questions

How do I install a WordPress plugin?

Log into your WordPress admin panel, navigate to Plugins > Add New, search for your desired plugin, click “Install Now,” then “Activate.” For premium plugins, use the “Upload Plugin” button to install a ZIP file. Always backup before installing on production sites and test functionality after activation.

Can I install plugins on WordPress.com vs WordPress.org?

WordPress.com (the hosted service) only allows plugins on Business and higher plans. WordPress.org (the self-hosted software) allows unlimited plugin installation on any hosting. If you’re on a free or Personal WordPress.com plan, you cannot install plugins. Consider upgrading or switching to self-hosted WordPress for full plugin access.

How do I know if a plugin is safe to install?

Check the last update date (within 3 months is ideal), active installations (10,000+ is reassuring), user ratings and reviews, WordPress version compatibility, and support forum responsiveness. Avoid plugins that haven’t been updated in over a year or have numerous unresolved support complaints. Always download from WordPress.org or official developer sites, never from third-party file hosts.

What should I do if a plugin breaks my site?

Access your site via FTP or hosting control panel file manager. Navigate to /wp-content/plugins/ and rename the problematic plugin’s folder (add “-disabled” to the name). This deactivates it without using the WordPress dashboard. Restore from backup if necessary. Contact plugin support with error details once your site is functional again.

How many plugins should I use on a site?

There’s no magic number—quality matters more than quantity. Some sites run smoothly with 30 well-coded plugins; others struggle with 5 poorly optimized ones. Focus on using lightweight, well-maintained plugins that serve clear purposes. Audit quarterly to remove unused plugins and consolidate overlapping functionality. Monitor page load times and server resources to gauge impact.

How often should I update plugins?

Update security patches immediately when announced. Review and apply other updates weekly or biweekly during scheduled maintenance windows. Enable automatic updates for minor versions but manually review major version changes. Never go more than a month without updating, as vulnerabilities discovered in popular plugins get exploited within days of public disclosure.

Can I use free plugins or do I need premium?

Many excellent free plugins provide professional functionality. WordPress.org hosts over 60,000 free plugins covering almost every imaginable need. Premium plugins often add advanced features, priority support, and regular updates. Start with quality free options and only purchase premium versions when you need specific features that free alternatives don’t provide. Free doesn’t mean inferior.

How do I remove a plugin cleanly?

First deactivate the plugin from the Plugins page, then click “Delete.” WordPress removes the plugin files and typically cleans up database tables it created. Some plugins leave settings or database entries behind—check the plugin documentation for specific uninstall procedures. For complete removal, consider using a plugin like WP-Optimize to clean residual data after deletion.

Do plugins slow down my site?

Poorly coded plugins can significantly impact performance by adding excessive database queries, loading large scripts on every page, or performing inefficient operations. Well-optimized plugins have minimal impact. Use tools like Query Monitor or P3 Plugin Profiler to measure each plugin’s performance cost. Focus on cumulative impact rather than raw plugin count.

How do I test plugins safely with staging and backups?

Create a staging site (duplicate of your production site) through your hosting control panel or using a plugin like WP Staging. Install and test new plugins on staging first, verifying all functionality works correctly. Always create a complete backup before installing plugins on production sites. Use backup plugins like UpdraftPlus or BackupBuddy with automated cloud storage to ensure recovery options.

Taking Your Next Steps with Confidence

Installing WordPress plugins transforms from intimidating to empowering once you understand the complete process—from intelligent selection through installation to ongoing maintenance. The key insight beginners often miss is that choosing the right plugin matters exponentially more than mastering the installation mechanics, which are deliberately simple.

Start conservatively with your new WordPress site. Install only essential plugins initially, getting comfortable with how each one behaves before adding the next layer of functionality. Monitor performance metrics as you build out your plugin set—tools like GTmetrix or Google PageSpeed Insights provide objective data about how your choices affect load times and user experience.

Remember that every plugin represents a tradeoff: you gain functionality but assume responsibility for keeping it updated, monitoring for conflicts, and ensuring it doesn’t introduce security vulnerabilities or performance bottlenecks. Make these tradeoffs intentionally rather than clicking “Install” impulsively whenever you discover a new tool with appealing features.

Your Plugin Installation Action Plan

Identify one specific problem you need to solve this week. Research three plugins that address it. Compare them using the vetting checklist we covered. Install your top choice in a staging environment or on a test site first. Document the settings you configure. Only then promote to production with a fresh backup in place. This methodical approach prevents 90% of plugin-related problems beginners encounter.

The WordPress plugin ecosystem represents one of the platform’s greatest strengths—the ability to extend core functionality without writing code makes sophisticated website features accessible to non-developers. But with great power comes responsibility for careful curation and maintenance.

As you grow more confident, explore the official WordPress Learn resources for deeper dives into specific plugin categories and advanced techniques. The WordPress community actively creates training materials, documentation, and support forums that remain remarkably accessible even to complete beginners. You’re not alone in learning this system.

Your WordPress site is a living project that will evolve with your needs. Plugins you install today might get replaced with better alternatives tomorrow, or become unnecessary as WordPress core adds similar functionality. Stay curious, remain security-conscious, and never stop learning. The investment you make in understanding plugin management pays dividends through more stable, secure, and performant sites that serve your visitors effectively for years to come.

Was this article helpful?

Similar Posts

  • Blog

    How to Create an Online Membership Directory: 6 Key Features to Include

    substring(replace(

    Here’s the thing most organizations get wrong about membership directories: they treat them like glorified phone books when they should be treating them like living, breathing communities. I’ve watched countless associations pour money into expensive platforms only to end up with digital ghost towns because they forgot one crucial detail—a directory isn’t just a list of names, it’s the nervous system of your entire member ecosystem.

    An online membership directory serves as the central hub where members discover each other, forge connections, and extract tangible value from their affiliation. Whether you’re running a professional association, a nonprofit advocacy group, or a member-based business network, your directory is often the first (and sometimes only) place members go to answer the question: “What am I actually getting for my dues?” When designed thoughtfully with the right features, a membership directory transforms from a static database into a dynamic engine for engagement, networking, and yes—revenue generation.

    The stakes are higher than ever. Recent data shows that member engagement directly correlates with retention rates, and organizations that provide robust discovery and networking tools see measurably better renewal outcomes. In fact, research on nonprofit trends and member behavior confirms that usable member data and effective privacy controls are foundational to sustained participation.

    TL;DR – Quick Takeaways

    • Rich member profiles – Detailed metadata and custom fields enable precise search and personalized networking, directly impacting engagement
    • Advanced search capabilities – Multi-criteria filtering with smart components (auto-suggest, saved searches) is the #1 differentiator for modern directories
    • Flexible display structures – Card views, map integration, and tiered visibility support diverse member types and monetization strategies
    • Built-in engagement tools – Direct messaging, matching features, and community content turn static listings into active networking hubs
    • Privacy-first design – GDPR/CCPA compliance, granular consent controls, and audit logs build the trust that sustains membership programs
    • Strategic monetization – Featured listings, sponsorship opportunities, and tier-based access create revenue without compromising user experience

    We’ll walk through six essential features (plus a bonus seventh) that separate exceptional membership directories from mediocre ones. These aren’t theoretical nice-to-haves, they’re battle-tested components drawn from analyzing top-performing directory platforms, current member behavior data, and real-world implementation case studies. Each feature section includes practical implementation guidance you can apply whether you’re building from scratch or upgrading an existing system.

    Robust Member Profiles with Rich Metadata

    Think of member profiles as the atomic unit of your directory—everything else you build depends on the quality and depth of these individual records. A robust profile system goes far beyond name and email address, it captures the multidimensional nature of each member’s professional identity, expertise, and interests in a structured, searchable format.

    [KBIMAGE_1]

    Start with the foundational profile fields that every directory needs: full name, affiliated organization, job title, geographic location (city/region at minimum), and contact preferences. These core data points enable basic searchability and help members quickly assess relevance when browsing results. But here’s where most directories stop, and that’s a mistake.

    Core Profile Fields and Baseline Data

    Your baseline profile architecture should include both required and optional fields. Required fields might be limited to name, email, and organization (to keep signup friction low), while optional fields can be numerous. The key is designing your data model to accommodate growth—you want room for members to add richness over time without overwhelming them at registration.

    Consider including business contact details separately from personal ones, professional headshots or logos, social media links (LinkedIn especially for professional networks), website URLs, and a biographical summary field. Many successful directories also include year joined, membership number, and current membership status as system-generated fields that add credibility and context.

    Custom Fields and Taxonomies for Discoverability

    This is where metadata becomes a strategic asset. Custom fields and tagging systems allow you to capture the unique dimensions that matter to your specific community. Industry classifications, areas of expertise, languages spoken, certifications held, services offered, products sold—the possibilities are endless and should be tailored to your members’ networking needs.

    💡 Pro Tip: Use controlled vocabularies (dropdown selections) rather than free-text fields wherever possible for custom attributes. This ensures consistency, enables precise filtering, and prevents the chaos of synonyms and spelling variations that plague free-text systems.

    Interest tags are particularly powerful for facilitating peer-to-peer connections. Let members self-select tags like “seeking mentees,” “open to speaking opportunities,” “looking for collaborators,” or “available for consulting.” These availability indicators transform your directory from a passive lookup tool into an active marketplace for expertise and partnership.

    Don’t forget temporal metadata either. Fields like “member since,” “last login,” and “last profile update” help both administrators and fellow members gauge activity and engagement levels. Nothing kills trust faster than reaching out to someone whose profile hasn’t been touched in three years.

    Privacy Controls and Consent Management

    Granular privacy controls aren’t just a legal requirement, they’re a member expectation. Every profile field should have associated visibility settings: public to everyone, visible only to logged-in members, visible only to members at certain tiers, or private to the member and administrators only.

    Contact preferences deserve special attention. Allow members to specify how they want to be contacted (email, phone, platform messaging), what types of inquiries they welcome (networking, sales, media, recruitment), and what they absolutely don’t want (cold outreach, promotional messages). Respecting these preferences builds trust and reduces the spam-like behavior that can poison a directory’s culture.

    Consent tracking is non-negotiable. Document when members opted in to directory inclusion, what data they agreed to share, and provide easy mechanisms to modify or revoke consent. This isn’t just GDPR/CCPA compliance theater, it’s fundamental to maintaining an engaged, trusting member base that actually keeps their profiles current.

    Data Import, Export, and Hygiene Best Practices

    You’ll likely launch your directory with existing member data from a CRM, spreadsheets, or legacy systems. Build robust import capabilities that can map various data formats to your profile schema, handle duplicates intelligently, and flag data quality issues for review before going live.

    Equally important: give members and administrators export capabilities. Members should be able to download their own profile data (data portability rights), while administrators need export functions for reporting, backup, and integration with other systems. CSV export is table stakes, JSON or API access is better.

    ⚠️ Important: Implement regular data hygiene campaigns. Send members annual reminders to review and update their profiles, highlight incomplete profiles in admin dashboards, and consider gating certain benefits (like search visibility) to profiles that meet minimum completeness thresholds.

    The richness of your metadata directly determines the value members extract from your directory. Skimpy profiles yield shallow results, which leads to low engagement, which further discourages profile maintenance—a vicious cycle. Break that cycle by making rich profiles rewarding: showcase complete profiles more prominently, recognize “power users” who maintain detailed information, and use analytics to demonstrate how profile completeness correlates with connection activity.

    Advanced Search and Filtering Capabilities

    Search is the front door to your directory, and if that door is hard to open, your members won’t bother knocking. I learned this the hard way working with an association that had thousands of expert members but a search function that could only handle basic name lookups. Members would come to the directory, fail to find what they needed, and leave assuming the expertise didn’t exist—when it absolutely did, just buried under poor discoverability.

    [KBIMAGE_2]

    Modern directory search goes far beyond a single text box. It’s a sophisticated discovery system that helps members find exactly who or what they need through multiple pathways, accommodates various search behaviors, and gets smarter with use.

    Multi-Criteria Search and Faceted Filtering

    Your search interface should support querying across multiple dimensions simultaneously. Location-based search (by city, state, region, or proximity radius), industry or sector filtering, membership level or tier, specialty areas or expertise tags, availability indicators, and language capabilities all represent common search criteria that members expect to combine.

    Faceted search interfaces work beautifully for directories. Show available filter categories in a sidebar with counts next to each option, allow members to stack multiple filters, and dynamically update the available filter options as selections are made. This “progressive disclosure” pattern helps members navigate large directories without feeling overwhelmed.

    Search ApproachBest ForImplementation Complexity
    Simple text searchSmall directories (<200 members)Low
    Faceted filteringMedium directories with diverse member typesMedium
    Full-text + filters + auto-suggestLarge directories (>500 members)High
    AI/semantic searchComplex professional networks with nuanced matchingVery High

    For organizations considering a more sophisticated active directory setup for small business environments, the investment in advanced search pays dividends in member satisfaction and retention.

    Saved Searches and Smart Alerting

    Allow members to save their commonly-used search queries and filter combinations. A consultant who frequently looks for “certified accountants in the Northeast region available for project work” shouldn’t have to reconstruct that query every time. One-click saved searches dramatically improve the user experience for repeat visitors.

    Take it further with search alerts: let members subscribe to saved searches and receive notifications when new profiles match their criteria. This transforms your directory from a pull system (members must remember to check it) to a push system (the directory proactively surfaces relevant connections). It’s the difference between a tool members use occasionally and one that becomes part of their weekly workflow.

    Search Relevance Tuning and Quality Signals

    Not all search results are created equal. Implement relevance ranking that considers multiple quality signals: profile completeness, recency of last update, member tier or status, engagement metrics (profile views, connection requests), and endorsements or ratings from other members.

    Field weighting matters too. A match in someone’s name or organization should probably rank higher than a match in their bio text. Exact matches should outrank partial matches. Administrators should have controls to adjust these weights based on observed search behavior and member feedback.

    ✅ Key Insight: Track search queries that return zero results—these are gold mines for understanding gaps in your taxonomy, synonym handling, or member coverage. If “UX designer” returns no results but you have members tagged as “user experience consultant,” you have a synonym problem to fix.

    Smart Search Components for Better UX

    Auto-suggest as members type dramatically improves the search experience. Suggest profile names, organizations, locations, and tag values that match the partial query. This helps members discover the controlled vocabulary you’re using and reduces typos and failed searches.

    Error tolerance through fuzzy matching catches misspellings and variations. “Pittsburg” should still find members in Pittsburgh, “busines analyst” should match “business analyst.” Phonetic matching can help too, especially for names.

    Query expansion and synonyms address the vocabulary problem. If someone searches “lawyer,” also match profiles tagged as “attorney” or “legal counsel.” Build a synonym dictionary specific to your domain and continuously expand it based on search log analysis.

    Accessibility Considerations for Search Interfaces

    Search components must be keyboard-navigable without a mouse. Filter checkboxes and dropdowns need proper ARIA labels, auto-suggest results must be announced to screen readers, and focus states must be clearly visible. Test your search interface with actual assistive technology, don’t just assume it works.

    Mobile responsiveness is equally critical. Over half your members will search from phones or tablets, so your filter panels need to work in constrained spaces, touch targets must be appropriately sized, and complex multi-criteria searches should gracefully degrade or adapt to smaller screens.

    According to comprehensive guides on creating directory websites, effective search consistently ranks as the top feature that differentiates successful directories from abandoned ones. It’s worth the investment to get it right.

    Flexible Directory Structure and Display Options

    One-size-fits-all rarely fits anyone well. Your members have different browsing preferences, different use cases, and different contexts for accessing your directory—so why force them all through the same narrow viewing experience? The best directories offer multiple ways to explore the same underlying member data, adapting to how people actually search for connections and information.

    [KBIMAGE_3]

    Directory structure encompasses both how information is organized (taxonomy, categories, hierarchies) and how it’s presented visually (list views, cards, maps, grids). Getting this right requires understanding your members’ mental models and primary use cases.

    Multiple Directory View Options

    Card-based layouts work beautifully for browsing and visual scanning. Each member gets a compact card showing their photo, name, title, organization, location, and perhaps a few key tags. Cards can be arranged in responsive grids that adapt to screen size and make good use of white space. This view is ideal for exploratory browsing—”I’m not sure exactly who I’m looking for, but I’ll know it when I see it.”

    List views maximize information density for members who know what they want and need to scan quickly. Think of a table with sortable columns: name, organization, location, specialty, member since. List views work well for bulk operations (export these 50 members, send a message to this filtered set) and for desktop users who value efficiency over aesthetics.

    Map-based views leverage geographic data to visualize member distribution spatially. For associations with strong regional components or businesses seeking local connections, an interactive map with clickable pins provides intuitive discovery. Cluster nearby members at higher zoom levels, then expand to individual pins as users zoom in.

    Taxonomy-driven category pages organize members into predefined groupings: by industry vertical, by service type, by expertise area, by chapter or region. This “drill-down” navigation style works well for new visitors who need structure to understand what’s available. Think of it like browsing a store by department versus using search.

    💡 Pro Tip: Let members toggle between view types with persistent preferences. If someone always prefers list view, remember that choice across sessions. Small touches like this signal that you respect their time and preferences.

    Hierarchical Listings and Promoted Profiles

    Not all members need equal visibility—and in fact, differential visibility is often a valuable benefit you can tie to membership tiers or sponsorship packages. Featured or promoted listings appear at the top of search results or category pages, visually distinguished with badges, highlighted backgrounds, or priority positioning.

    Administrator-curated sections like “Members of the Month,” “New Members,” or “Expert Spotlights” add editorial flavor and help surface members who might otherwise get lost in large directories. These curated collections also give you content for newsletters and social media, extending the value of your directory data.

    Trending or most-viewed profiles can be surfaced algorithmically based on engagement metrics. This creates a virtuous cycle where active, valuable members gain visibility, which drives more connections, which reinforces their value. Just ensure your algorithms don’t create permanent winners and losers, periodically reset or decay metrics to give everyone chances at visibility.

    Feature 4: Engagement Tools for Networking and Collaboration

    A membership directory is more than a static listing—it’s a gateway to meaningful connections. The most successful directories integrate engagement tools that transform member discovery into ongoing collaboration. By embedding networking, messaging, and community features directly into your directory, you empower members to find each other and work together, which drives retention and satisfaction.

    [KBIMAGE_4]

    According to the Urban Institute’s National Survey of Nonprofit Trends and Impacts, organizations that facilitate peer-to-peer connection see measurably higher member engagement and renewal rates. Modern directories should move beyond passive browsing to active collaboration, giving members reasons to return and interact.

    Direct Messaging and In-App Communication

    Allow members to initiate conversations without leaving your platform. In-directory messaging reduces friction and keeps engagement within your ecosystem, rather than pushing members to external email or social networks.

    • One-to-one messaging: Enable private conversations between members who want to connect, collaborate, or refer business.
    • Opt-in visibility: Respect member preferences by letting them choose whether to accept unsolicited messages or require a connection request first.
    • Notification controls: Provide granular email and in-app alerts so members stay informed without feeling overwhelmed.
    • Spam and abuse prevention: Implement rate limits, moderation flags, and reporting tools to maintain a safe, trusted environment.

    💡 Pro tip: Introduce “icebreaker” prompts or profile badges (e.g., “Open to mentoring,” “Seeking collaborators”) to signal approachability and reduce the awkwardness of first contact.

    Connect and Match Features for Networking

    Manual browsing can be time-consuming. Smart matching algorithms and curated connection suggestions help members find the right people faster, especially in large directories with hundreds or thousands of profiles.

    • Interest-based matching: Use tags, industries, or expertise fields to suggest profiles similar to what a member is seeking.
    • Skill and need pairing: Let members indicate what they’re offering (mentorship, partnerships) and what they’re looking for (advice, referrals), then surface complementary matches.
    • Event or group-based connections: Recommend members who attended the same conference, joined a similar interest group, or are in the same geographic area.
    • Alumni or cohort matching: For associations with graduating classes, certification cohorts, or training programs, automate connections between participants.

    Platforms like Glue Up highlight connection features as central to member value, noting that directories with smart matching see higher login frequency and longer session times.

    Events, Groups, and Circles Tied to Directory Entries

    Deepen directory utility by linking member profiles to events, special interest groups, and communities. When members see who else is attending an event or participating in a group, they’re more likely to engage.

    • Event attendee directories: Display a mini-directory on event pages, so registrants can see who’s coming and initiate pre-event networking.
    • Group and chapter rosters: Automatically populate group pages with member listings from your directory, filtered by membership in that group.
    • Circles and committees: For leadership boards, working groups, or volunteer committees, create invite-only directory views that surface only relevant members.
    • Activity feeds: Show recent member updates, new listings, or profile changes to keep the directory feeling alive and current.

    Community-Driven Content: Endorsements and Recommendations

    Social proof builds trust. Letting members endorse skills, leave testimonials, or recommend peers adds a layer of validation that static bios cannot provide.

    • Skill endorsements: Allow members to publicly affirm each other’s expertise (similar to LinkedIn endorsements).
    • Peer recommendations: Provide space for written testimonials or project references that appear on a member’s profile.
    • Ratings or badges: For service providers or consultants in your directory, consider optional star ratings or “verified expert” badges based on community input.
    • Moderation controls: Ensure all community-generated content is subject to review or flagging to prevent abuse or spam.

    ⚠️ Privacy note: Always make endorsements and recommendations opt-in. Some members may prefer a low-profile presence and should be able to hide community-driven content from their profiles.

    Privacy-Respecting Contact Pathways

    Not all members want to be easily reachable by anyone. Offer flexible contact pathways that respect privacy and consent:

    • Contact forms instead of exposed emails: Route inquiries through an in-platform form that members can review before sharing direct contact details.
    • Connection requests: Require approval before enabling direct messaging, similar to LinkedIn’s connection model.
    • Visibility toggles: Let members choose whether their profile is visible to all members, logged-in users only, or specific membership tiers.
    • Do-not-contact flags: Provide a simple checkbox for members who wish to appear in search but do not want to receive unsolicited messages.

    These features build trust and compliance, especially under GDPR and CCPA, which we’ll explore further in the next section.

    Feature 5: Privacy, Compliance, and Trust Controls

    In an era of heightened data sensitivity and regulatory scrutiny, your membership directory must be built on a foundation of trust. Members are sharing professional and personal information—job titles, contact details, expertise, even photos—and they need confidence that your organization will handle that data responsibly.

    [KBIMAGE_5]

    Privacy and compliance features aren’t just legal checkboxes; they’re strategic assets. The 2024 Trust in Nonprofits and Philanthropy Report found that trust in mission-driven organizations is rising, but transparency around data practices is a major driver of that trust. A directory that respects privacy and makes consent management easy will outperform one that treats member data carelessly.

    GDPR and CCPA-Style Consent Management

    Even if your organization isn’t formally subject to the EU’s General Data Protection Regulation (GDPR) or California’s Consumer Privacy Act (CCPA), adopting their principles demonstrates best practice and prepares you for a patchwork of emerging privacy laws worldwide.

    • Explicit opt-ins: Require members to actively consent to directory inclusion, rather than defaulting everyone to “public.”
    • Granular choices: Let members choose which profile fields are visible (e.g., show name and job title, but hide email and phone).
    • Purpose-based consent: Clearly state how directory data will be used—networking, sponsor access, analytics—and let members opt in or out of each use case.
    • Easy withdrawal: Provide a one-click option to hide or delete a profile, and honor requests promptly (GDPR mandates response within 30 days).
    Consent ElementImplementation Example
    Directory inclusionCheckbox during onboarding: “Include my profile in the member directory”
    Contact visibilityDrop-down per field: Public / Members only / Private
    Messaging opt-inToggle: “Allow other members to send me messages”
    Sponsor/partner accessSeparate opt-in: “Share my profile with event sponsors and partners”

    Role-Based Access and Data Minimization

    Not everyone in your organization needs access to all member data. Role-based permissions ensure that administrators, event coordinators, and sponsors see only what they need—and nothing more.

    • Admin roles: Full access to all profiles, including private fields, for legitimate business purposes (support, compliance, reporting).
    • Member roles: See public and member-only fields, but no access to admin-only notes or consent records.
    • Sponsor or partner roles: Restricted to explicitly consented data (e.g., attendee lists for sponsored events), with clear expiration or scope limits.
    • Guest or public roles: If you offer a public-facing directory, show only fields marked “public” and hide all contact details unless the member explicitly allows it.

    Data minimization—collecting and displaying only what’s necessary—reduces risk and builds trust. Avoid the temptation to collect every possible field “just in case.” Ask yourself: will this field improve member experience or search relevance? If not, leave it out.

    Data Portability and Export Controls

    Members should be able to take their data with them if they leave your organization. GDPR’s “right to data portability” is a model worth following globally.

    • Self-service exports: Provide a “Download my data” button in member account settings, delivering a machine-readable file (JSON or CSV) of all profile data.
    • Deletion requests: Honor “right to be forgotten” requests by permanently removing profile data (or anonymizing it if required for legal or financial records).
    • Audit of third-party access: If your directory integrates with CRMs, marketing platforms, or event tools, log every data export and make those logs available to members on request.

    Audit Logs and Change History

    Transparency breeds accountability. Maintain detailed logs of who accessed or changed member data, and make summaries available to members.

    • Profile change history: Record when a member updated their bio, contact info, or visibility settings, with timestamps and user IDs.
    • Admin access logs: Track when staff viewed or exported member data, including the reason (e.g., “support ticket #1234”).
    • Consent snapshots: Store a versioned history of consent states, so you can prove compliance if a member later disputes what they agreed to.
    • Retention and purging: Define how long logs are kept (typically 1–3 years) and automate secure deletion of expired records.

    🔒 Security tip: Encrypt audit logs and restrict access to senior administrators only. Logs themselves can be sensitive if they contain member identifiers or admin notes.

    Clear Policy Documentation

    Even the best technical controls mean nothing if members don’t understand them. Write plain-language privacy policies and terms of service that explain:

    • What data you collect and why (profile fields, search logs, engagement metrics).
    • Who can see it (other members, sponsors, the public).
    • How long you keep it (active membership plus X years, or until deletion request).
    • How members can control it (visibility settings, opt-outs, deletion).
    • Your security measures (encryption, access controls, regular audits).

    Link to your privacy policy prominently from the directory homepage, profile settings, and any data-collection forms. Use summaries and FAQs for complex topics, and avoid legalese wherever possible.

    For nonprofit and association contexts, the Urban Institute’s Nonprofit Trends survey emphasizes that clear communication around data practices is strongly correlated with member trust and long-term engagement.

    Feature 6: Monetization and Alignment with Mission

    A well-designed directory isn’t just a member benefit—it’s a revenue opportunity. Whether you’re a nonprofit, association, or member-based business, thoughtful monetization can fund directory development, support operations, and even generate surplus for mission-critical programs. The key is balancing revenue goals with member experience and mission alignment.

    According to the NonProfit Times, associations are increasingly looking to non-dues revenue streams—including directory advertising and premium listings—to diversify income and reduce reliance on membership fees alone. Modern directories offer multiple monetization levers, from tiered visibility to integrated cross-sell opportunities.

    Membership Tiers with Directory Access Levels

    One of the simplest and most common monetization strategies is to tie directory features to membership tiers. Higher-paying members receive enhanced visibility, richer profiles, or exclusive search placement.

    • Basic tier: Standard profile with name, title, and organization; appears in general search results.
    • Premium tier: Larger profile photo, extended bio, custom fields (website, social links, services offered), and priority placement in search results.
    • Elite or sponsor tier: Featured profile badges, homepage carousel placement, and inclusion in curated “recommended member” lists.
    • Public vs. member-only access: Offer a free public directory with limited fields, but reserve detailed profiles and contact info for paying members.

    This tiering model aligns incentives: members who derive more value from visibility (consultants, service providers, thought leaders) pay more, while those seeking a basic listing pay less. It’s a win-win that also drives membership upgrades.

    Featured Listings and Promoted Profiles

    Beyond membership tiers, allow members to pay for temporary or recurring promotion within the directory—similar to sponsored search results or boosted social posts.

    • Homepage featured slots: Rotate a handful of “featured members” on the directory landing page, sold on a monthly or quarterly basis.
    • Category sponsorships: Let a member sponsor an entire category (e.g., “Legal Services” or “Technology Consultants”), placing their profile at the top of that category’s listing.
    • Search result boosts: Offer members the option to pay for higher placement in search results for specific keywords or industries.
    • Event or newsletter integration: Bundle directory promotion with event sponsorships or email newsletter placements for a comprehensive visibility package.
    Monetization OptionMember BenefitTypical Pricing Model
    Premium membership tierEnhanced profile, priority search placement$200–$500/year upgrade
    Featured homepage listingFront-page visibility for 30–90 days$100–$300/month
    Category sponsorshipTop placement in a specific category$500–$1,500/quarter
    Directory banner adBrand visibility across all directory pages$1,000–$3,000/quarter

    Directory-Based Paid Features: Advertising and Sponsorships

    If your directory attracts significant traffic—especially from non-members or the public—consider traditional advertising placements.

    • Banner ads: Sell display ad space on directory pages, category views, or search result pages.
    • Native sponsored content: Feature a member’s thought leadership article, case study, or video alongside their profile as a sponsored post.
    • Directory guides or reports: Publish curated lists (e.g., “Top 50 Consultants in Healthcare”) and sell featured inclusion to members.
    • Third-party sponsors: Allow non-member vendors or partners to advertise in the directory, provided it’s clearly disclosed and relevant to your audience.

    Be transparent: label all paid placements as “Featured,” “Sponsored,” or “Promoted” to maintain trust. The 2024 Trust in Nonprofits report underscores that transparency is critical to sustaining donor and member confidence.

    Integration with Events, Courses, and Products for Cross-Sell

    Your directory is a hub of member data and engagement—use it to drive revenue in other areas of your organization.

    • Event promotion: Surface upcoming events on member profiles, especially those aligned with a member’s industry or interests, and encourage registration.
    • Course and certification upsells: If you offer training or professional development, recommend courses based on profile tags or stated career goals.
    • Product and publication cross-sell: Promote books, reports, toolkits, or software products to directory users based on their profile metadata.
    • Referral incentives: Reward members who refer new directory users or paying members with discounts on events, dues, or directory upgrades.

    Platforms like Glue Up and Join It emphasize tight integration between directories and other membership offerings, noting that bundled experiences increase lifetime value and reduce churn.

    Analytics for Renewal Forecasting and Retention Strategies

    Monetization isn’t just about new revenue—it’s about keeping the members you have. Use directory engagement data to predict renewal likelihood and intervene before a member lapses.

    • Login frequency: Members who haven’t logged in or updated their profile in 90+ days are higher churn risks.
    • Search and messaging activity: Active directory users—those searching for peers, sending messages, or attending events—are more likely to renew.
    • Profile completeness: Members with incomplete profiles often feel disconnected; prompt them to finish their profile and see a spike in engagement.
    • Feature adoption: Track which paid features (premium listings, featured placements) correlate with longer membership tenure, and promote those features to at-risk members.

    📊 Data-driven insight: The Urban Institute’s nonprofit trends research shows that organizations using engagement analytics to inform retention strategies see 15–20% higher renewal rates than those relying on intuition alone.

    Build renewal forecasting dashboards that combine directory activity with dues payment history, event attendance, and email engagement. Use these insights to design targeted retention campaigns—personalized outreach, special offers, or invitations to exclusive directory networking events.

    Feature 7 (Optional Expansion): Data Insights, Analytics, and Reporting

    A truly strategic membership directory doesn’t just facilitate connections—it generates actionable intelligence. By tracking how members search, browse, and interact with the directory, you gain insights that inform product development, content strategy, member services, and leadership decisions.

    While analytics may feel like a “nice-to-have,” organizations that treat their directory as a data asset consistently outperform those that don’t. The ability to measure what’s working, identify gaps, and iterate rapidly is the difference between a stagnant member list and a thriving, self-improving community platform.

    Search Analytics: Popular Queries, Top Profiles, and Engagement Metrics

    What are members looking for? Which profiles get the most views? Search analytics reveal member intent and help you prioritize features, categories, and content.

    • Top search terms: Track the most common keywords and filters (location, industry, expertise) to understand what matters most to your audience.
    • Zero-result searches: Identify queries that return no results—these are opportunities to recruit new members, add new categories, or improve tagging.
    • Click-through rates: Measure how often search results lead to profile views, messages, or connection requests. Low CTR may indicate poor result relevance or confusing UI.
    • Time-of-day and seasonality: Understand when directory usage peaks, and schedule new member onboarding, featured placements, or campaigns accordingly.

    Platforms like Glue Up provide built-in search analytics dashboards, surfacing trends that help associations refine taxonomy, improve search ranking algorithms, and identify emerging member interests.

    Member Discovery Metrics: Profile Views, Saves, and Messages

    Beyond aggregate search data, track individual profile performance to understand which members are getting value—and which may need help.

    • Profile view counts: Show members how many times their profile has been viewed (gamification incentive) and give admins insight into who’s visible and who’s invisible.
    • Save and bookmark rates: If your directory allows members to save or favorite profiles, track which profiles are most often bookmarked—a strong signal of interest and fit.
    • Message initiation rates: Measure how often profile views convert to messages or connection requests, and identify high-performing profiles to feature or promote.
    • Referral and share activity: Track when members share profiles externally (social media, email) as a measure of perceived value.

    Use these metrics to identify “power users” (highly visible, frequently contacted) and “underutilized members” (low visibility, incomplete profiles). Reach out to the latter with personalized tips, profile optimization workshops, or one-on-one support.

    Admin Dashboards with Export-Ready Reports

    Your team needs real-time, visual access to directory performance. Build dashboards that consolidate key metrics and allow export for board reports, grant applications, or strategic planning.

    • Overview dashboard: Total members, active profiles, search volume, message activity, and featured listing revenue—all on one screen.
    • Engagement trends: Line charts showing weekly or monthly directory logins, profile updates, and search sessions.
    • Revenue reporting: Track income from premium memberships, featured listings, and directory ads; compare to forecast and prior periods.
    • Member segmentation: Break down activity by membership tier, industry, geography, or tenure to identify high-value cohorts.
    • Export options: One-click CSV or PDF exports for every report, with filters for date range, member segment, or metric type.
    MetricWhat It Tells YouAction Insight
    Active profiles (% of total members)Member adoption and profile completionLow %? Launch profile completion campaign
    Average profile views per memberDirectory stickiness and discoverabilityLow views? Improve search UX or promote directory
    Message-to-view conversion rateQuality of matches and profile appealLow conversion? Improve profile prompts or filters
    Revenue per premium memberMonetization effectivenessLow revenue? Test new tiers or upsell campaigns

    Benchmarking and Trend Visualization for Leadership

    Raw numbers are useful, but context is critical. Compare your directory performance to industry benchmarks and historical trends to inform strategic decisions.

  • Blog

    How to Install WordPress with HostGator: Complete Plugin Setup & Configuration Guide

    Unlock the Power of Your WordPress Site with the HostGator Plugin If you’ve ever struggled with managing your WordPress site efficiently while hosting with HostGator, you’re not alone. Between juggling plugin compatibility issues and trying to optimize performance, WordPress administration can sometimes feel overwhelming. That’s where the HostGator Plugin comes in—a powerful tool designed specifically…

  • Blog

    Local Business Directory Guide: Boost Your Online Visibility in 2026

    Here’s something most business owners get wrong: they think being online means having a website. But what happens when potential customers search for “plumber near me” or “best coffee shop in [city]”? If your business isn’t showing up in local directories, you might as well be invisible. Local business directories are the unsung heroes of…

  • Blog

    5 Essential Design Tips for an Attractive Business Directory Website

    Creating a business directory website that actually converts isn’t about cramming every feature into a cluttered interface – it’s about strategic design choices that guide users effortlessly to what they need. I’ve watched countless directory owners struggle with low engagement, only to see their traffic skyrocket after implementing a few critical design improvements. The difference…

  • Blog

    How to Get Listed in Neighborhood Directories Online: 5 Simple Steps

    In today’s digital landscape, neighborhood directories have become the unsung heroes of local search visibility. While most business owners chase after Google My Business optimization (and rightfully so), they’re missing out on a goldmine of hyper-local exposure that’s hiding in plain sight. These community-focused platforms don’t just offer another backlink—they connect you directly with customers…