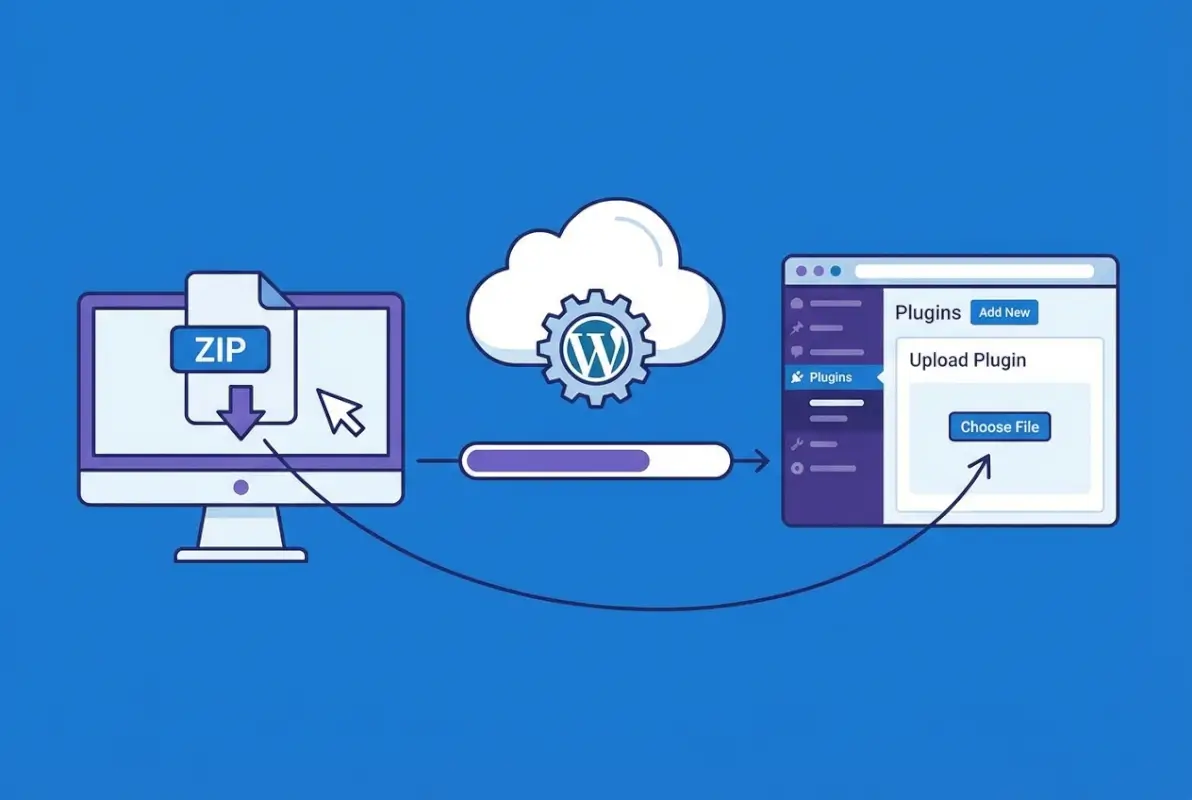
How to Install a WordPress Plugin with a ZIP File: 6 Easy Steps

Installing a WordPress plugin from a ZIP file might seem like a technical task reserved for developers, but here’s the truth: it’s one of the most straightforward ways to add powerful functionality to your site—especially when you’re working with premium plugins, custom-built tools, or beta versions that aren’t yet available in the official WordPress repository. Unlike the standard dashboard installation, ZIP uploads give you control over exactly which version you’re installing and open doors to thousands of non-repo plugins that can transform your site.

What most guides won’t tell you upfront is that ZIP installation isn’t just a workaround—it’s often the preferred method for professional developers and agencies who need version control, testing environments, or access to proprietary plugins. While WordPress powers roughly 43% of all websites globally, a significant portion of site owners still don’t realize they can bypass repository limitations entirely through this method. Whether you’re installing a $200 premium SEO tool or a custom plugin your developer just handed you, mastering the ZIP upload process puts you in the driver’s seat.
TL;DR – Quick Takeaways
- ZIP installation unlocks premium & custom plugins – Access thousands of tools not available in the WordPress repository
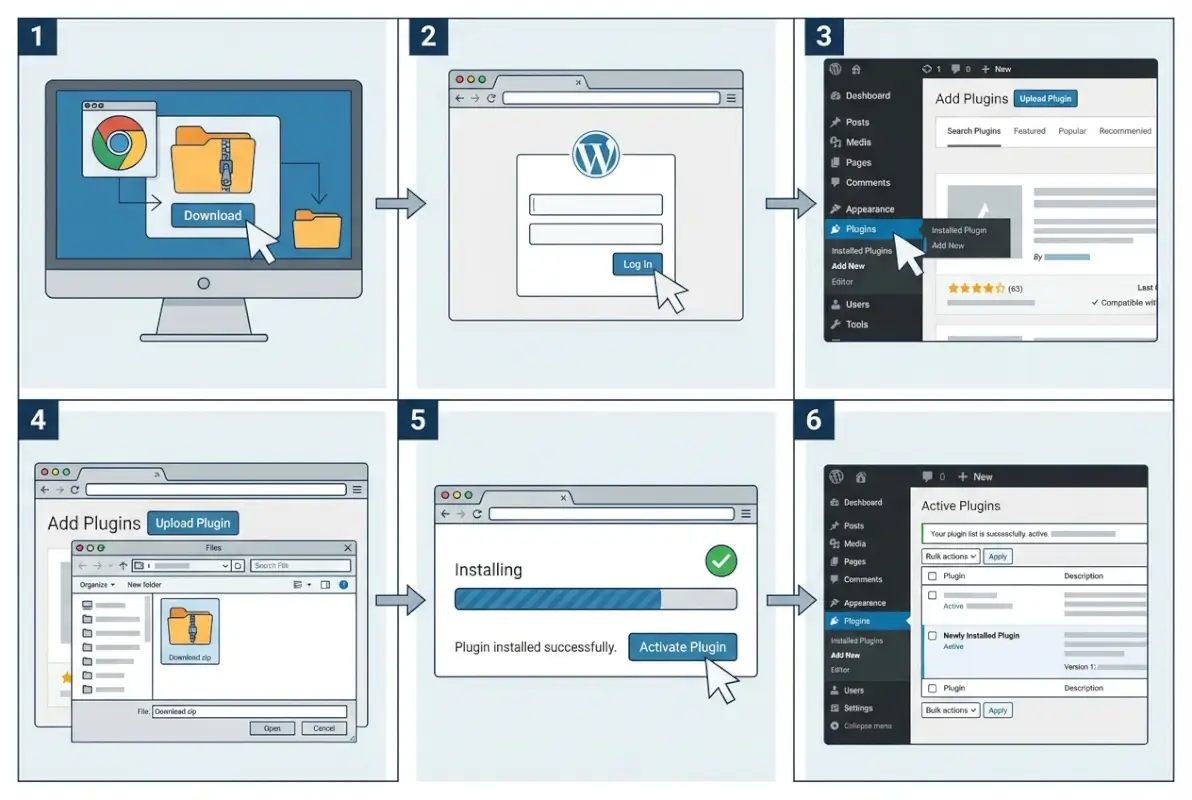
- 6 simple steps – Download, navigate to Plugins > Add New, upload ZIP, install, activate, configure
- Watch for hosting limits – File size restrictions and security settings can block uploads; FTP is your backup plan
- Always verify your source – Only download ZIPs from trusted vendors to avoid security risks
- Backup first – A quick snapshot before installation can save hours of headache if something goes wrong
Prerequisites and What You’ll Need
Before you dive into uploading that ZIP file, let’s make sure you’ve got your ducks in a row. Think of this as your pre-flight checklist—skipping these steps is like trying to install software on a computer that doesn’t meet the minimum requirements. You might get lucky, or you might waste an afternoon troubleshooting cryptic error messages.
Know Your Source and Verify the ZIP
This is where things get real. Not all plugin ZIPs are created equal, and installing from an untrusted source is like inviting a stranger into your house and handing them your Wi-Fi password. Always download from the official vendor website, a reputable marketplace like CodeCanyon, or directly from the developer. If someone emails you a “cracked” premium plugin ZIP, run the other way—these often contain malware or backdoors that can compromise your entire site.
Here’s a pro move: check the ZIP file size and compare it to what the vendor lists. If it’s suspiciously small or large, that’s a red flag. You can also use tools like VirusTotal to scan the ZIP before uploading, though this isn’t foolproof for WordPress-specific threats.
Check Hosting and Server Limits
Your hosting environment has opinions about file uploads, whether you like it or not. Most shared hosting plans limit upload_max_filesize to somewhere between 2MB and 64MB. If your plugin ZIP is larger—say, a chunky page builder with bundled templates—you’ll hit a wall during upload.
To check your limits, navigate to Tools > Site Health > Info > Server in your WordPress dashboard, then look for the PHP values. If your ZIP exceeds these limits, you have two options: contact your host to temporarily increase the limit, or use FTP to upload the extracted plugin files directly (more on that later). Some hosting providers like GoDaddy make it easy to adjust these settings in cPanel; others require a support ticket.
post_max_size and memory_limit alongside upload limits. All three need to accommodate your ZIP file, or the installation will fail silently—no error message, just a spinning icon forever.WordPress Version Compatibility
This one trips up more people than you’d think. Plugin developers specify the minimum and maximum WordPress versions their code supports. Installing a plugin built for WordPress 6.0 on a site still running 5.8 can cause anything from minor glitches to full-blown white screens of death.
Before uploading, check the plugin’s documentation or the readme.txt file inside the ZIP (you can extract it temporarily to peek). Look for lines like “Requires at least: 6.0” and “Tested up to: 6.4”. If your WordPress version falls outside this range, update WordPress first—or reconsider whether you really need that plugin.
Backup Basics
I learned this lesson the hard way when a seemingly innocent membership plugin overwrote my entire user database structure. Always—and I mean always—take a full backup before installing new plugins. Use a tool like UpdraftPlus, BackupBuddy, or your host’s built-in backup system. At minimum, you want a copy of your files and your database.
If you’re working on a live site (which you probably shouldn’t be, but I understand deadlines exist), consider creating a staging environment first. Most managed WordPress hosts like WP Engine and Kinsta offer one-click staging sites where you can test the plugin installation without risking your production environment.
Step 1 – Download the ZIP Plugin from a Trusted Source
This step seems obvious until you realize just how many sketchy download buttons exist on the internet. The plugin ZIP you need might be sitting on a vendor’s download portal, in your email inbox after purchase, or on a developer’s GitHub repository. Each source has its own quirks.
From Reputable Repositories or Vendors
If you’re downloading a premium plugin, log into your account on the vendor’s official website. CodeCanyon purchases, for example, are available under your Downloads section after purchase. Theme shops like Elegant Themes or StudioPress provide download links in your account dashboard. Keep a record of where you downloaded it—you’ll thank yourself later when you need to re-download an updated version.
For free plugins that aren’t in the WordPress repository, GitHub is often the source. Look for the “Releases” section rather than downloading the entire repository as a ZIP. Repository downloads include development files and incorrect folder structures that WordPress won’t recognize as valid plugins.
One thing I’ve noticed over the years: legitimate vendors always provide version numbers and changelogs with their ZIPs. If your download is just “plugin.zip” with no version info, that’s a warning sign.
Best Practices for ZIP File Handling
Once downloaded, extract the ZIP on your computer and inspect the contents. You should see a single top-level folder named after the plugin (like “my-awesome-plugin”), and inside that folder, you’ll find files like plugin-name.php, readme.txt, and various subdirectories for assets and includes.
What you don’t want to see is extra nesting—like a folder inside a folder inside a folder. WordPress expects a specific structure: wp-content/plugins/plugin-folder-name/. If your ZIP has an extra layer, WordPress will throw an “Incompatible Archive” error. To fix this, create a new ZIP from the correct folder level, not from a parent directory.
Step 2 – Access Your WordPress Admin Dashboard
Now we’re getting somewhere. Log into your WordPress admin panel (usually at yoursite.com/wp-admin) with credentials that have administrator-level permissions. Lower user roles like Editor or Author won’t see the Plugins menu, so make sure you’re logged in with the right account.

Navigate to Plugins
In your left sidebar, hover over Plugins and click Add New. This takes you to the plugin installation screen where you’ll see a sea of repository plugins you can install directly. We’re skipping those today.
At the top of the page, right next to the “Add Plugins” heading, you’ll spot an Upload Plugin button. That’s your gateway. Click it, and the interface changes to show a simple file upload form—this is where your ZIP file enters the picture.
Why You Might Choose FTP/SFTP as an Alternative
Sometimes the dashboard upload just won’t cooperate. Maybe your hosting provider blocks file uploads for security reasons, or your PHP timeout settings are too restrictive for larger files. In these cases, FTP (File Transfer Protocol) or its secure cousin SFTP becomes your best friend.
Using an FTP client like FileZilla or Cyberduck, connect to your server and navigate to wp-content/plugins/. Extract your plugin ZIP on your local computer first, then upload the entire unzipped folder to the plugins directory. Once it’s there, head back to your WordPress dashboard, go to Plugins > Installed Plugins, and you’ll see your newly uploaded plugin waiting to be activated.
I remember one hosting provider that had such aggressive security rules that dashboard uploads failed 9 times out of 10. Switching to SFTP for plugin installations saved countless support tickets and frustrated clients. For details on this approach, check out our guide on how to install WordPress plugins using FTP.
| Method | Best For | Pros | Cons |
|---|---|---|---|
| Dashboard ZIP Upload | Small to medium plugins, standard hosting | Quick, no technical knowledge needed | File size limits, hosting restrictions |
| FTP/SFTP Upload | Large plugins, restrictive hosting | Bypasses upload limits, works when dashboard fails | Requires FTP credentials, manual extraction |
| WP-CLI | Developers, bulk installations | Scriptable, fast for multiple sites | Command line knowledge required |
Step 3 – Upload the ZIP File
This is the moment of truth. You’ve prepared your ZIP, verified your source, checked your hosting limits, and navigated to the upload screen. Now it’s time to actually install the thing.

Use the Upload Plugin Option
Click the Choose File button (it might say “Browse” depending on your browser). A file picker window opens—navigate to where you saved your plugin ZIP and select it. The filename should appear next to the button, confirming your selection.
Now hit Install Now. WordPress uploads the ZIP to your server, extracts it into the wp-content/plugins/ directory, and validates the plugin structure. If everything checks out, you’ll see a success message saying “Plugin installed successfully.” The whole process typically takes 5-30 seconds depending on file size and server speed.
During the upload, don’t navigate away from the page or close your browser. I’ve seen people do this and wonder why their plugin never showed up—the upload got interrupted mid-stream, leaving behind partial files that cause weird errors later.
Common Issues and Fixes
The dreaded “Incompatible Archive” error usually means one of three things: extra folder nesting (as mentioned earlier), a corrupted ZIP file, or a ZIP that doesn’t contain a valid WordPress plugin structure. To troubleshoot, extract the ZIP on your computer and verify you see a plugin header comment in the main PHP file (something like “Plugin Name: My Plugin”).
If the upload times out before completing, your server’s PHP max_execution_time setting is too low. Most hosts set this to 30 or 60 seconds, which isn’t enough for larger plugins on slower connections. You can ask your host to temporarily increase it, or switch to FTP upload as a workaround.
Another oddball error I’ve encountered: some security plugins like Wordfence or Sucuri actively block ZIP uploads as a precaution. Temporarily disable your security plugin, attempt the upload again, then re-enable it. Just don’t forget that last step—I’ve seen sites left wide open because someone forgot to turn security back on.
Step 4 – Activate the Plugin
Installation and activation are two separate steps in WordPress, which confuses newcomers but actually makes sense from a safety perspective. You might install a plugin to test it later, or you might want to configure settings before turning it on. Either way, a newly installed plugin sits dormant until you explicitly activate it.

After Successful Installation
On the success screen, you’ll see two buttons: Activate Plugin and Return to Plugin Installer. Unless you have a specific reason to wait (like needing to install multiple plugins first), go ahead and click Activate Plugin. WordPress immediately enables the plugin and redirects you to the Plugins page where you’ll see your newly activated plugin listed with a blue “Deactivate” link.
At this point, the plugin’s code is now running on your site. Depending on what the plugin does, you might see new menu items in your sidebar, additional options under Settings, or even a whole new admin panel section. Some plugins display a welcome screen or setup wizard upon first activation—don’t skip these, they often contain critical configuration steps.
Verify Plugin Status
Head over to Plugins > Installed Plugins and scan the list for your plugin name. It should show “Active” in blue text beneath it. If you see any error messages or warnings (like “This plugin requires WordPress 6.0 or higher”), address those immediately. Ignoring compatibility warnings is asking for trouble.
Sometimes a plugin will activate successfully but throw a PHP warning or notice at the top of the screen. Minor notices (like deprecated function warnings) can usually be ignored in the short term, though you should report them to the developer. Fatal errors that produce a blank screen or error messages mean the plugin isn’t compatible with your setup—deactivate it immediately by accessing your site via FTP and renaming the plugin folder to something like “plugin-name-disabled”.
Step 5 – Configure Plugin Settings
Activation is just the beginning. Most plugins require at least some configuration before they actually do anything useful. Premium plugins especially tend to ship with dozens of options, many of which need your attention before the plugin functions as intended.
Basic Setup vs. Advanced Options
Look for a new menu item in your WordPress sidebar—many plugins add their own top-level menu, while others nest under existing menus like Settings, Tools, or even Pages. Click into the plugin’s settings area and you’ll typically find a dashboard or welcome screen that outlines the basics.
Start with the essentials: API keys (if the plugin connects to external services), license activation (for premium plugins), and core functionality toggles. For example, an SEO plugin needs your site title and description configured, while a caching plugin requires you to enable caching and choose compression levels.
Advanced options—like custom CSS, JavaScript injection, or complex conditional logic—can wait until you’ve confirmed the plugin works as expected with default settings. I’ve watched people spend hours tweaking advanced settings before even verifying the basic functionality works, only to discover the plugin was incompatible all along.
Security and Permissions
Some plugins introduce new user roles or capabilities. Membership plugins, LMS systems, and directory plugins (like those for creating business directory listings) often create roles like “Subscriber+”, “Vendor”, or “Listing Manager”. Review these under Users > All Users and understand what permissions they grant.
Also check if the plugin exposes any public-facing forms or submission areas. Contact forms, user registration, and file upload features are common attack vectors. Enable CAPTCHA, limit file types, and scan uploaded content if the plugin supports it. For directory sites, consider implementing must-have elements for your business directory homepage to ensure both functionality and security.
Step 6 – Test and Troubleshoot
Configuration complete? Great. Now comes the part where you actually use the plugin and make sure it works as advertised. This is where staging environments shine—test everything there before pushing to production.
Functional Testing
Click through every major feature the plugin offers. If it’s a form builder, create a test form and submit it. If it’s a caching plugin, clear the cache and verify your pages still load correctly. For eCommerce plugins, run a test transaction with a sandbox payment gateway.
Check both the front-end and back-end. Does the plugin’s output display correctly on your site’s pages? Are there any JavaScript errors in the browser console (right-click > Inspect > Console tab)? Does it work on mobile devices and different browsers?
Pay special attention to plugin interactions. If you’re running a page builder, a caching plugin, and a membership plugin simultaneously, they might conflict in unexpected ways. Test common user workflows end-to-end to catch these issues early.
Troubleshooting Tips
When things go wrong (and they will at some point), start with the basics: deactivate all other plugins and switch to a default WordPress theme like Twenty Twenty-Four. If the problem disappears, you’ve got a conflict. Reactivate plugins one by one to identify the culprit.
Check the plugin’s official documentation and support forums. Chances are someone else hit the same snag and posted a solution. For premium plugins, don’t hesitate to contact the developer’s support—you paid for that.
If the plugin simply doesn’t appear after activation, verify the PHP version matches the plugin’s requirements. Run php -v via SSH if you have access, or check Tools > Site Health > Info in WordPress. Outdated PHP versions (anything below 7.4 at this point) cause all sorts of weird behavior with modern plugins.
Optional Methods and Considerations for Advanced Users
If you manage multiple WordPress sites or regularly deploy plugins across development pipelines, manual ZIP uploads get tedious fast. Let’s explore some power-user alternatives that streamline the process.
Using WP-CLI to Install a ZIP
WP-CLI (WordPress Command Line Interface) is a developer’s best friend for WordPress management. If your hosting supports SSH access, you can install plugins from ZIP files with a single command:
wp plugin install /path/to/plugin.zip --activate
You can also install directly from URLs, which is incredibly useful for automated deployments:
wp plugin install https://example.com/downloads/my-plugin.zip --activate
This approach shines when you’re provisioning new sites or synchronizing plugins across staging and production. Combine it with bash scripts, and you can install dozens of plugins in seconds. The official WP-CLI plugin install documentation covers all the flags and options available.
Installing from the WordPress Repository vs. ZIP
Here’s a rule of thumb: if a plugin exists in the official WordPress.org repository, install it from there via the dashboard search function. Repository plugins auto-update, show user reviews, and undergo at least basic security vetting. ZIP installation should be reserved for premium plugins, custom development, or beta versions you’re testing.
That said, even repository plugins can be installed via ZIP if you need a specific older version. Download the desired version from the plugin’s WordPress.org page (scroll down to “Advanced View” and check “Previous Versions”), then upload via ZIP to override the current version. Just be aware you’re opting out of automatic updates when you do this.
Common Hosting Caveats
Managed WordPress hosts like WP Engine, Kinsta, and Flywheel sometimes impose additional restrictions beyond standard upload limits. Some disable certain plugins entirely (like caching plugins, since they provide their own caching), while others block file modifications in production environments.
Shared hosting providers, particularly budget ones, often use aggressive security configurations that flag legitimate plugin ZIPs as malware. If you’re consistently hitting walls with ZIP uploads, consider upgrading to VPS or managed hosting where you have more control. The peace of mind is worth the extra cost, especially if you’re managing client sites. For budget-conscious options, explore our list of best low-cost business directories for startups that balance cost and functionality.
Best Practices and Quick Tips
Let’s consolidate some hard-earned wisdom from years of installing (and occasionally breaking) WordPress sites with plugin installations.
- Use trusted ZIP sources exclusively. Never install from nulled/pirated plugin sites—they’re malware distribution networks disguised as free premium plugins.
- Keep WordPress core, themes, and plugins updated. Outdated software is the #1 attack vector for WordPress hacks.
- Maintain regular backups. Automated daily backups to offsite storage should be non-negotiable, especially before any plugin changes.
- Test in staging before production. If your host doesn’t offer staging, create a local development environment using Local by Flywheel or Docker.
- Read plugin changelogs. Before updating (even via ZIP), skim the changelog for breaking changes or deprecated features that might affect your setup.
- Monitor plugin performance. Tools like Query Monitor help identify plugins that slow down your site or generate excessive database queries.
- Keep plugin ZIP archives organized. Version-controlled folders save you when you need to roll back an update gone wrong.
For directory site owners specifically, understanding which plugins integrate well is crucial. Platforms like Hotfrog business directories demonstrate how well-chosen plugins can enhance functionality without compromising performance.
Competitive Landscape: Quick Take
How does ZIP installation stack up against other plugin installation methods? Here’s the honest comparison most guides won’t give you:
| Aspect | Dashboard ZIP Upload | FTP Extraction | Repository Install |
|---|---|---|---|
| Speed | Fast (30 seconds) | Moderate (2-5 minutes) | Fastest (15 seconds) |
| Technical Skill | Beginner-friendly | Intermediate | Beginner-friendly |
| File Size Limits | Yes (hosting-dependent) | No | No |
| Premium Plugin Support | Yes | Yes | No |
| Version Control | Full control | Full control | Limited |
| Common Errors | Incompatible Archive, timeout | File permissions | Rare |
The “Incompatible Archive” error deserves special mention since it’s the most common ZIP upload failure. This happens when WordPress can’t recognize the ZIP structure—usually because of extra folder nesting or missing plugin headers. The fix is almost always to repackage the ZIP correctly or use FTP instead.
Frequently Asked Questions
Can I install a WordPress plugin from a ZIP file if the plugin is already in the WordPress repository?
Yes, you can upload a repository plugin via ZIP if you need a specific version. However, installing directly from the repository (via Plugins > Add New > Search) is simpler and enables automatic updates. ZIP uploads are best reserved for premium plugins or when you need version control.
What should I do if I get the “Incompatible Archive” error?
This error indicates WordPress can’t recognize your ZIP’s structure. Extract the ZIP on your computer and verify the top-level folder contains the plugin files directly (not nested in multiple folders). Re-create the ZIP from the correct folder level, ensuring the plugin’s main PHP file is in the root of that folder, then re-upload.
Is ZIP upload supported on all hosting environments?
Most hosting providers support ZIP uploads, but some impose file size limits (commonly 2-64MB) or security restrictions that block uploads. If your host blocks dashboard uploads, use FTP/SFTP to upload the extracted plugin folder directly to wp-content/plugins/. Contact your host to request limit increases if needed.
Should I always activate a plugin after installation?
Not necessarily. Installation and activation are separate steps for good reason. You might install multiple plugins to configure them all before activation, or test compatibility in a staging environment first. However, a plugin must be activated to function—installation alone does nothing except place files on your server.
Do I need to back up before installing a ZIP plugin?
Absolutely. While most plugin installations go smoothly, conflicts can occur that break your site. A full backup (files and database) before installing or updating any plugin gives you an instant rollback option if something goes wrong. Automated backup plugins make this process painless.
Can I install a plugin from ZIP via the WordPress CLI?
Yes, WP-CLI supports ZIP installation with the command: wp plugin install /path/to/plugin.zip --activate. This is extremely useful for developers managing multiple sites or automating deployments. You can also install from URLs, making it easy to script plugin installations across environments.
Where can I find legitimate ZIP plugins?
Download from the official WordPress.org repository (for free plugins), reputable marketplaces like CodeCanyon, or directly from trusted plugin vendors’ websites. Always verify the source’s authenticity—avoid third-party download sites offering “cracked” premium plugins, as these often contain malware.
What file size limits should I watch for when uploading plugin ZIPs?
Check your hosting’s upload_max_filesize and post_max_size settings (visible under Tools > Site Health > Info in WordPress). Shared hosting typically allows 2-64MB uploads. If your plugin ZIP exceeds this, either request a temporary increase from your host or use FTP to upload the extracted plugin folder.
Why won’t my uploaded plugin appear in the Plugins list?
Common causes include: improper ZIP structure (missing plugin header in the main PHP file), PHP version incompatibility, or file permission issues. Verify the plugin’s minimum WordPress and PHP requirements match your environment. Check error logs (wp-content/debug.log) for specific error messages that point to the root cause.
Can I update a plugin by uploading a new ZIP version?
Yes, uploading a newer version via ZIP overwrites the existing plugin files. However, you should deactivate the current version first, upload and install the new ZIP, then reactivate. Better yet, if the plugin supports it, use the built-in update mechanism to preserve your settings and ensure proper database migrations.
Conclusion: Your Plugin Installation Mastery Starts Now
Installing WordPress plugins from ZIP files isn’t just a workaround for repository limitations—it’s a fundamental skill that unlocks the full potential of WordPress customization. Whether you’re deploying a premium theme bundle, testing a beta release, or managing a client site with proprietary plugins, understanding this process inside and out gives you control and flexibility that point-and-click installations can’t match.
The six steps we’ve covered—from vetting your ZIP source to thorough post-installation testing—form a repeatable workflow that minimizes risk while maximizing efficiency. Pair this knowledge with best practices like staging environment testing, regular backups, and smart troubleshooting, and you’re equipped to handle virtually any plugin installation scenario WordPress throws at you.
Remember, every expert WordPress developer started exactly where you are now—uploading their first ZIP file, hitting their first error message, and learning through trial and error (hopefully more trial than error with this guide in hand). The difference between a novice and a pro isn’t avoiding mistakes; it’s knowing how to recover from them quickly and prevent them next time.
Now go install that plugin you’ve been eyeing. Your WordPress site’s next level of functionality is just six steps away.