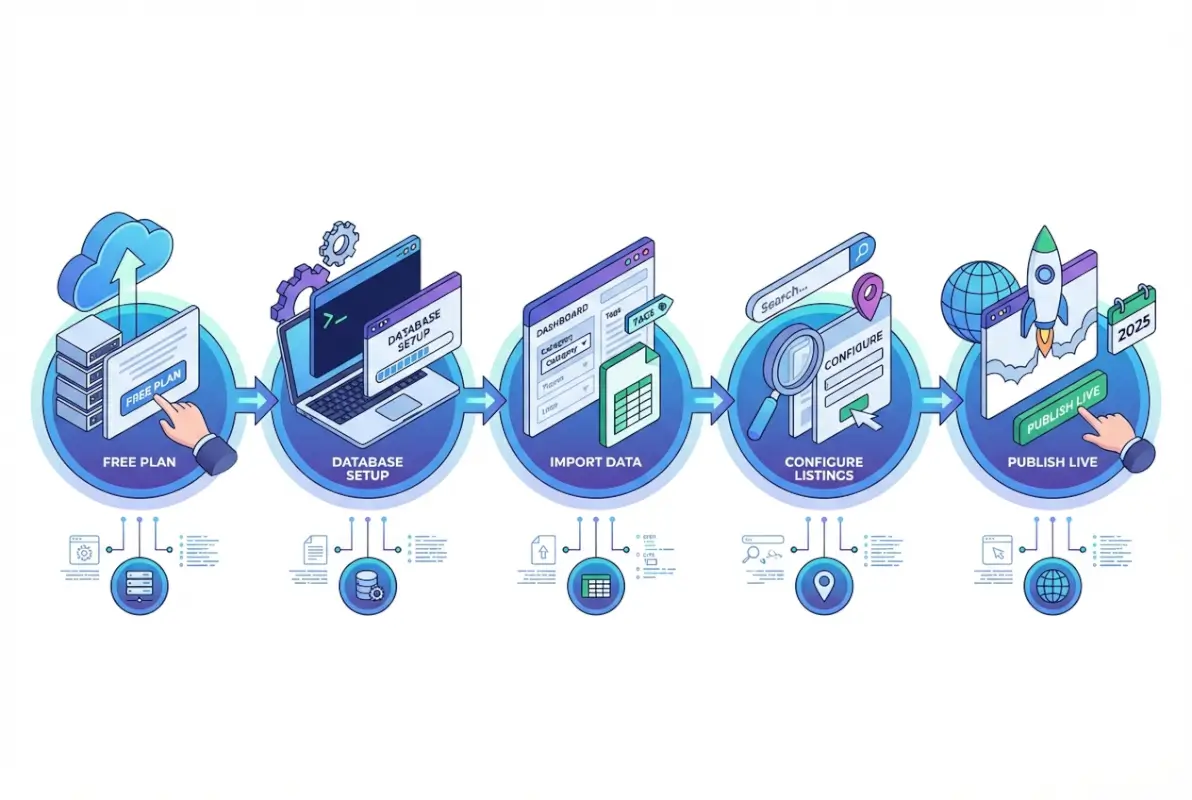
5 Simple Steps to Start a Free Directory Website in 2025

Generating summary...
You’ve probably heard it a hundred times: the internet is saturated, directories are dead, and there’s no way to compete with established players. Yet here’s the surprising truth—niche online directories are quietly thriving, especially when built around tight communities, local markets, or underserved professional groups. In fact, with about 6 billion people online globally and small businesses scrambling for visibility, a well-executed directory can become a go-to resource faster than you think. And the best part? You can start one without spending a dime upfront.
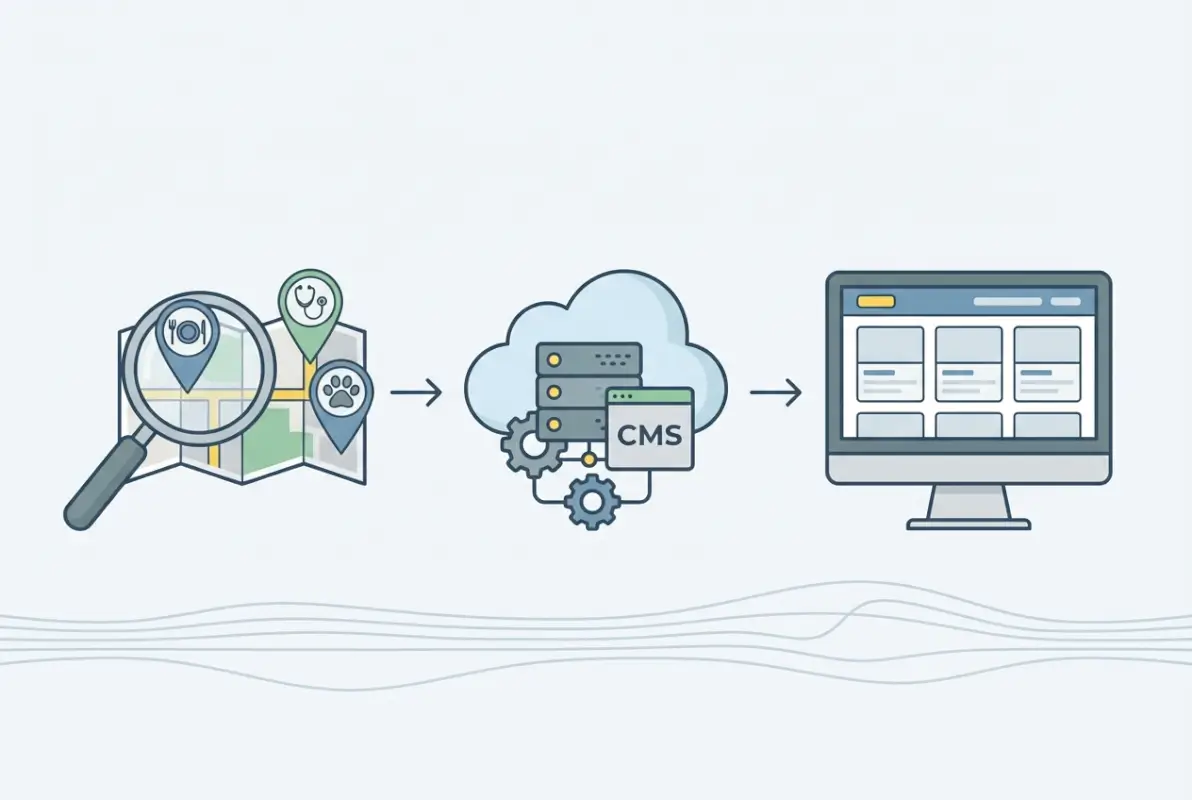
The free-to-start directory model isn’t about cutting corners, it’s about validating your concept, building traction, and proving your niche before committing to paid infrastructure. Whether you’re aiming to connect local service providers, curate a professional network, or spotlight a hobby community, the framework is the same: focused niche, smart platform choice, quality listings, strategic SEO, and community-driven growth. Let’s break down exactly how to do it in five straightforward steps.
TL;DR – Quick Takeaways
- Pick a defensible niche – Broad directories are dominated by incumbents; focus on a tight vertical or local market where you can own the conversation
- Start free with WordPress or directory builders – Free tiers and open-source plugins let you validate without upfront costs
- Quality over quantity – A dozen well-vetted listings beat a hundred spam entries; moderation builds trust
- Local SEO is your friend – Structured data, location signals, and category content drive discovery faster than generic tactics
- Monetize later – Prove traction first, then layer in premium listings, featured placements, or lead-gen revenue
Step 1 — Define Your Niche and Value Proposition
Every successful directory starts with a clear answer to one question: “Why would anyone use this list instead of Google or an existing directory?” If you can’t articulate a compelling reason in ten seconds, you don’t have a niche—you have a wish. The most common mistake is going too broad: “a directory for businesses” or “a listing site for professionals” won’t cut it when Yelp, LinkedIn, and a dozen vertical platforms already exist.
Instead, think small and specific. A directory for independent coffee roasters in the Pacific Northwest. A curated list of freelance data scientists who specialize in healthcare. A local guide to family-owned restaurants in your city. These niches have three things in common: a defined audience, clear listing criteria, and gaps that existing platforms ignore. Your job is to find a slice of the market where your unique perspective, local knowledge, or domain expertise creates instant credibility.
Identifying a Defensible Niche with Clear Listing Criteria
A defensible niche is one where you can set the standard for what belongs and what doesn’t. This isn’t about being exclusive for the sake of it—it’s about creating trust. If your directory claims to list “the best web designers,” you need a transparent methodology: years in business, portfolio quality, client reviews, or verified credentials. Without criteria, you’re just a yellow pages clone.
Start by listing 5–10 attributes that define a quality listing in your niche. For a local service directory, that might be: licensed and insured, responsive customer service, minimum two years in business, verified address, and real client testimonials. For a professional network, it could be: advanced certification, published work, peer endorsements, active portfolio, and conference speaking. Write these down—they’ll become your submission guidelines and quality filter. For additional inspiration on structuring business-focused directories, check out insights from best free business directories for maximum visibility.
Drafting Mission and Vision for Your Directory
This sounds corporate, but it’s actually practical. Your mission is the “what”: “We curate a vetted list of independent bookstores in the Midwest.” Your vision is the “why”: “We believe local bookstores build stronger communities and deserve discoverability in an Amazon-dominated world.” These two sentences guide every decision you make—what listings to accept, what content to publish, and how to talk about your directory on social media.
Write a one-paragraph mission statement and post it prominently on your About page. It’s a filter for your audience and a north star for your own decision-making. I’ve seen directory founders lose focus and start accepting off-topic listings just to inflate numbers; a clear mission prevents that drift.
Defining Primary Listing Attributes
Before you touch any technology, map out your listing data model. What fields will every listing have? At minimum, you need: business/entity name, category, location (city, state, or coordinates), contact info, and a description. From there, add attributes that matter to your niche: hours of operation, pricing tier, service area, credentials, portfolio links, review score, or certifications.
Think through user search behavior—if someone is looking for “dog groomers near me open on Sundays,” your data model needs to support location, hours, and category filters. If your niche is professional consultants, you might need skill tags, industry focus, and rate ranges. Sketch this out in a spreadsheet with sample rows—it’ll save you headaches when you start building forms and search filters.
Step 2 — Choose a Free-Friendly Platform and Core Tooling
Platform choice feels overwhelming at first—WordPress with plugins, dedicated directory builders, no-code tools, or custom code? The good news is that in the free-to-start world, your options boil down to two main paths: WordPress with a free directory theme and plugins, or an all-in-one directory builder with a free tier. Each has trade-offs, but both can get you live in a weekend if you stay focused.
WordPress is the workhorse option. With a directory-focused theme like OneListing or a free plugin like Directorist (which has a generous free version), you get listing submission forms, search filters, category management, and basic maps out of the box. You’ll need your own hosting—free hosting exists but comes with ads and performance limits—so consider a low-cost shared host if you’re serious (typically under $5/month to start). The upside is flexibility: thousands of plugins, full SEO control, and no platform lock-in. The downside is a steeper learning curve and manual setup.
All-in-one directory builders like Brilliant Directories or Directify offer drag-and-drop interfaces, built-in payment systems, and managed hosting. Many have free trials or limited free plans. The upside is speed and support; the downside is less customization and potential migration hassle if you outgrow the platform. For a quick proof of concept or if you’re non-technical, these can be ideal. Just read the fine print—free tiers often cap listings, remove premium features, or plaster their branding on your site. Explore more about setting up directories from scratch in building a business directory app from scratch.
Quick-Start Tech Stack Comparisons
Let’s compare the two most popular free-start approaches side by side:
| Feature | WordPress + Free Plugin | All-in-One Builder (Free Tier) |
|---|---|---|
| Setup Time | 2–4 hours (manual) | 30–60 minutes (guided) |
| Customization | High (themes, CSS, plugins) | Limited (pre-built templates) |
| SEO Control | Full (Yoast, schema plugins) | Partial (platform-dependent) |
| Listing Limits | Unlimited (free plugin) | Often capped (10–50 listings) |
| Monetization | Add payment plugins manually | Built-in (often paid plans only) |
| Data Portability | Full export/backup control | Export may be restricted |
If you’re comfortable with WordPress (or willing to learn), it’s the more future-proof choice. If you need to validate fast and aren’t technical, a free-tier builder gets you moving. Either way, the key is to pick one path and stick with it through launch—switching mid-build wastes time and momentum.
Essential Free Plugins and Modules for Listings, Search, Maps, and SEO
Assuming you go the WordPress route, here’s a minimal plugin stack to get functional:
- Directorist (free version) or Business Directory Plugin – handles listing submission, categories, and basic search
- Yoast SEO (free) or Rank Math (free) – on-page SEO, sitemaps, and breadcrumb support
- WP Google Maps (free tier) or native Directorist maps – location pins and map embeds for listings
- Contact Form 7 (free) – simple forms for inquiries or claims
- WP Super Cache (free) – basic caching to keep your site fast on shared hosting
You don’t need two dozen plugins on day one. Start lean, test your workflow, and add functionality as you identify gaps. Each plugin is another potential conflict or security surface, so keep it minimal until you have real user feedback driving feature requests.
Considerations for Scalability When You Move Beyond Free Tiers
Even if you start free, think one step ahead. Can you export your data if you outgrow the platform? Does the upgrade path to premium features make sense financially? For WordPress, you own your data and can migrate to better hosting or premium plugins seamlessly. For proprietary builders, check if you can export listings in CSV or migrate to self-hosting—some lock you in by design.
Also consider traffic scaling: free hosting and free-tier plans often throttle at a few hundred visitors per day. If your directory takes off, you’ll need to upgrade hosting or move to a managed solution. Budget for that mentally even if you’re not spending now, it helps you pick platforms that won’t box you in later.
Step 3 — Structure Listings, Search, and User-Driven Submissions
A directory is only as good as its data structure and search experience. You can have a beautiful design and killer content, but if users can’t find relevant listings in three clicks or less, they’ll bounce. This step is all about taxonomy, submission workflows, and quality control—the unsexy but critical backbone of any directory site.

Start with your taxonomy: the categories, subcategories, and tags that organize listings. For a local service directory, top-level categories might be “Home Services,” “Professional Services,” “Food & Dining,” and “Health & Wellness,” with subcategories like “Plumbing,” “HVAC,” “Legal,” “Accountants,” etc. For a niche professional network, you might organize by industry, skill, or certification type. The goal is intuitive navigation—users should be able to drill down to their target without guessing.
Keep your category tree shallow and broad at first. Three levels deep is usually plenty (Category > Subcategory > Specialty). Deeper hierarchies sound comprehensive but confuse users and dilute search results. You can always split categories later as your listing volume grows; starting too granular leaves you with dozens of empty categories that make the site look abandoned.
Data Model Basics: Listing Fields
In Step 1, you sketched out your listing attributes. Now it’s time to implement them as form fields. Core fields for most directories include:
- Name – business, professional, or entity name
- Category/Subcategory – dropdown or multi-select for taxonomy
- Location – address fields, city, state, zip, or lat/long coordinates
- Contact Info – phone, email, website URL, social profiles
- Description – rich text area for an overview (200–500 words recommended)
- Hours of Operation – structured or free-text, depending on your niche
- Images/Logo – upload fields for visual identity
- Reviews/Ratings – enable if you plan community feedback
Use required fields sparingly—only name, category, and location should be mandatory. The more fields you require, the higher the abandonment rate on submissions. Optional fields let users provide detail without friction, and you can always ask for more info later via email follow-up.
Search UX Essentials: Faceted Search, Filters, and Location-Based Results
Search is the heart of user experience. Your directory should support at least three search modes: keyword search (by name or description), category filtering, and location-based search (proximity or city/state dropdown). Advanced directories add faceted filters—checkboxes or sliders for attributes like price range, rating, hours, certifications, or amenities.
Most free directory plugins include basic keyword and category search out of the box. Location-based search typically requires either a maps plugin with geocoding or a structured dropdown of cities. If your niche is hyper-local (one city or region), a simple dropdown works fine. For broader directories, invest time in a geocoding solution—users expect “near me” functionality, and with billions online globally, mobile location-based queries are the norm.
Test your search with real-world scenarios: “dentist open Saturdays,” “vegan restaurants downtown,” “freelance graphic designer with Shopify experience.” If your search returns zero results or buries the best match on page three, refine your indexing, tags, and result ranking. A fast, accurate search is more valuable than a dozen bells-and-whistles features.
Submission Workflow: Clear Forms, Validation, and Moderation Guidelines
User-generated content is a double-edged sword—it scales your directory without manual data entry, but it opens the door to spam, low-quality listings, and duplicate entries. Your submission workflow needs to balance ease of use with quality control.
Start with a clean submission form that mirrors your data model. Include inline help text for any field that might confuse users (e.g., “Website URL: must start with https://”). Use CAPTCHA or honeypot fields to block bots. Set expectations clearly: “Your listing will be reviewed within 48 hours” or “All listings are manually approved to ensure quality.”
On the backend, establish moderation criteria. What makes a listing acceptable? Common rejection reasons include: incomplete information, off-topic niche, duplicate of existing listing, spammy description (keyword stuffing, ALL CAPS), or suspicious contact details. Document these in a simple checklist and apply them consistently—inconsistency erodes trust and invites appeals.
Taxonomy Design: Categories, Subcategories, and Tags
Think of categories as the primary filter (broad buckets), subcategories as the secondary drill-down (specific services or specialties), and tags as flexible metadata (attributes, features, or keywords). A plumber might be in Category: Home Services, Subcategory: Plumbing, Tags: emergency, licensed, eco-friendly.
Avoid tag chaos by pre-defining a controlled vocabulary. If you let users enter free-text tags, you’ll end up with “eco friendly,” “eco-friendly,” “green,” and “environmentally friendly” all meaning the same thing. Either use a dropdown of approved tags or curate tags during moderation. Consistent taxonomy improves search precision and makes your directory look professional.
Moderation Policies to Balance Quality and Growth
In the early days, approve generously—a directory with five listings looks dead. But once you hit critical mass (50–100 listings), tighten standards. Reject obvious spam, incomplete entries, and listings that don’t match your niche criteria. Communicate rejections politely and offer a resubmission path: “Thanks for your interest—please update your listing to include a valid website and business address, then resubmit.”
Consider tiered moderation: instant approval for verified accounts (email-confirmed, paid members), manual review for first-time submissions, and auto-reject for known spam patterns (generic Gmail addresses with no website, descriptions under 50 characters, etc.). Tools like Akismet (free for non-commercial use) can help filter form spam.
Step 4 — Launch with Foundational Content and SEO on a Free Strategy
A directory without content is a ghost town. Even if you have 100 listings, you need editorial content to drive organic traffic, establish authority, and give search engines something to index beyond raw data. This is where most directory founders stumble—they focus on listings and ignore the content layer that brings people in the door.

Your content plan should include three pillars: category guides, how-to resources, and local/niche-specific articles. Category guides are evergreen pages that explain each major category (“What to Look for in a Plumber,” “How to Choose a Freelance Designer,” “Top Questions to Ask Before Hiring a Lawyer”). These pages rank for informational queries and funnel users to your listings. How-to resources answer common user problems (“How to Winterize Your Home,” “5 Red Flags When Vetting a Contractor”), positioning your directory as a helpful resource, not just a list.
Local or niche-specific content ties your directory to a community or vertical. If you’re a local directory, write neighborhood guides, event roundups, or interviews with featured businesses. If you’re a professional network, publish career advice, certification guides, or industry trend analysis. This content builds backlinks, social shares, and repeat visits—SEO gold for a new site. Learn more about optimizing directory presence in Facebook business directory optimization.
Content Plan to Seed Relevance: Category Guides and How-To Resources
Start with one guide per major category—so if you have six top-level categories, plan six foundational guides of 1,000–1,500 words each. Use the following structure:
- Introduction – why this category matters, common pain points
- Key Considerations – what users should look for (credentials, pricing, red flags)
- How to Use This Directory – guide users to your search/filter tools
- Related Resources – link to how-to articles and relevant listings
These guides become your internal linking hubs—every new listing in that category should link to the guide, and the guide should link to top-rated or featured listings. This structure passes link equity throughout your site and gives users a starting point beyond raw search.
SEO Basics for Free Platforms: On-Page Optimization and Structured Data
Even on a free platform, you control on-page SEO fundamentals. Every listing and content page should have a unique, descriptive title tag (60 characters max), a compelling meta description (155 characters), and at least one H1 heading. Use your primary keyword naturally in the first 100 words, H2 headings, and image alt text—but don’t keyword-stuff, that hurts readability and rankings.
Structured data (schema markup) is non-negotiable for directories. At minimum, implement LocalBusiness schema for each listing (or Organization schema for non-local entities). This tells search engines what your listing pages represent and can trigger rich results—star ratings, hours, address, and phone number directly in search. Most WordPress directory plugins include schema options; if not, use a plugin like Schema Pro (free tier available) or add JSON-LD manually.
Local SEO Tactics for Directory Sites
If your directory has a local or regional focus, local SEO is your fastest path to visibility. Start by:
- Claiming your Google Business Profile – even if you’re an online-only directory, list your business location (or service area) and link to your site
- Embedding maps – display a map on every listing page and a sitewide directory map if feasible
- City/region landing pages – create dedicated pages for each city or neighborhood you cover, with listings filtered by location
- Local backlinks – reach out to local chambers of commerce, bloggers, or news sites for mentions and directory links
- NAP consistency – ensure Name, Address, Phone for your directory (and each listing) match exactly across all citations
Local SEO compounds—each city page, each local backlink, and each location-specific guide reinforces your authority in that geography. Over time, you’ll rank for “[service] near me” and “[category] in [city]” queries, which convert at high rates.
Basic Schema Markup for Listings
Here’s a minimal JSON-LD snippet you can adapt for each listing page (assuming a local business):
If your directory plugin doesn’t auto-generate schema, add this to the page footer or use a schema plugin to inject it dynamically. Google’s Rich Results Test tool (search for it) lets you validate your markup and preview how it appears in search.
Importance of Clean URL Structure and Internal Linking
URLs should be short, descriptive, and keyword-rich: /category/plumbers/, /listing/joes-plumbing/, /guides/how-to-choose-a-plumber/. Avoid default WordPress parameters like ?p=123 or auto-generated slugs with dates. Clean URLs improve click-through rates and make your site architecture obvious to search crawlers.
Internal linking ties everything together. Link from category guides to top listings, from blog posts to relevant categories, and from individual listings back to their category hub. Use descriptive anchor text (“licensed plumbers in Seattle” instead of “click here”). Strong internal linking distributes link equity, keeps users on-site longer, and helps search engines understand your content hierarchy. For design inspiration, explore Divi business directory layouts for structuring your site effectively.
Quick Monetization Caveat on Free Setups
Let’s be honest: you’re not going to make serious money on a completely free setup. Free-tier platforms often restrict premium listing features, payment integrations, or even the number of listings. But you can plant the seeds for future revenue: offer a “featured listing” tier (manual upgrade via email), add affiliate links to relevant services in your guides, or integrate simple display ads (Google AdSense) once you have traffic.
The goal in the free phase is validation and traction, not profit. Once you prove demand—say, 50+ active listings and 1,000+ monthly visitors—upgrade to a paid plan or hosting tier and layer in monetization systematically. Rushing to monetize a tiny directory turns off early users and kills word-of-mouth growth.
Step 5 — Grow Traffic and Listings with Community and Partnerships
You’ve built the infrastructure, seeded content, and launched your directory. Now comes the hardest part: getting people to use it. Growth for a directory is a two-sided problem—you need listings to attract users, and users to attract more listings. This chicken-and-egg dynamic breaks only when you actively drive both sides through outreach, partnerships, and community engagement.

Start by targeting the supply side: listings. Identify 20–30 high-quality businesses or professionals in your niche and personally invite them to claim a free listing. Explain the value (“we’re building the go-to directory for [niche], and your business is a perfect fit”), make it dead simple (send a direct submission link), and follow up once. Don’t spam—this is relationship-building, not cold sales. A personal touch at this stage builds loyalty and word-of-mouth referrals.
For the demand side (users), lean into content marketing and community channels. Publish your category guides and how-to articles, then share them in niche Facebook groups, Reddit communities, local forums, or LinkedIn groups where your audience hangs out. Don’t drop bare links—add value first, then mention your directory as a resource. Engage in discussions, answer questions, and build credibility before asking for attention.
Growth Accelerants: Partnerships with Local Businesses and User-Generated Content
Partnerships multiply your reach without ad spend. Approach complementary businesses or organizations—a local chamber of commerce, a professional association, a popular local blog—and propose a win-win: you’ll feature their members or promote their content in exchange for a link or shoutout. For example, if you’re running a local service directory, partner with a real estate agent to refer clients to your listings; in return, feature the agent prominently.
User-generated content accelerates growth and improves SEO. Encourage listing owners to add photos, update hours, respond to reviews, and share their profile on social media. Gamify it: “Top 10 Most-Viewed Listings This Month” or “Listing of the Week” badges. The more active your community, the fresher your content and the higher your search rankings. For step-by-step guidance on creating niche directories, visit simple steps to make a free online directory in your niche.
Traffic Channels: Content Marketing, Social Media, and Basic Outreach
Your primary traffic channels in the free phase are organic search, social media, and direct outreach. Organic search takes time (3–6 months for new sites to gain traction), so frontload social and outreach. Create social profiles on platforms where your audience lives—Facebook, Instagram, LinkedIn, or niche forums—and post consistently: new listings, featured stories, how-to tips, and community highlights.
Direct outreach means emailing local bloggers, journalists, or influencers in your niche with a story angle: “We just launched the first directory dedicated to [niche], and here’s why it matters.” Offer to write a guest post, provide expert commentary, or share exclusive data from your directory (e.g., “Top 10 Most Popular Services in [City]”). Every backlink and mention drives referral traffic and boosts domain authority.
KPIs to Watch: List Growth, Quality Score, and Submission Conversion
Track these metrics weekly to gauge progress:
- Listing growth rate – new submissions per week/month
- Listing quality score – percentage of listings with complete profiles (all fields filled, images uploaded)
- User signups – new accounts or email subscribers
- Submission conversion rate – visitors who land on your submission form vs. those who complete it
- Traffic sources – organic, social, referral, direct (use Google Analytics free tier)
- Top-performing content – which guides or articles drive the most traffic and listing views
If listing growth stalls, revisit your outreach or simplify your submission form. If traffic is high but submission conversion is low, test different calls-to-action, reduce required fields, or add trust signals (testimonials, security badges). Data-driven iteration beats guesswork every time.
Outreach Templates for Local Businesses
Use this simple email template to invite quality listings:
Subject: Invitation to Join [Your Directory Name]
Hi [Name],
I’m launching [Your Directory Name], a curated directory for [niche/local area]. I came across your business and think you’d be a great fit for our community.
We’re offering free listings during our launch phase, and I’d love to feature [Business Name]. It takes about 5 minutes to set up: [Submission Link]
Let me know if you have any questions—happy to help!
Best,
[Your Name]
Personalize the greeting and mention something specific about their business to avoid sounding like a mass email. Follow up once if you don’t hear back within a week, then move on—persistence is good, badgering is not.
Incentives to Attract Early Listings
Everyone loves “founding member” status. Offer early adopters perks like:
- Free featured placement for 90 days
- Priority support and profile optimization
- A “founding member” badge on their listing
- Guaranteed inclusion in your launch announcement or press release
These cost you nothing but create urgency and exclusivity. Once you hit 100 listings, phase out the incentives and introduce tiered pricing for premium features.
Basic Analytics: What to Measure on a Free Site
Google Analytics (free tier) and Google Search Console (also free) are your best friends. Set up both on day one. In Analytics, watch:
- Users and Sessions – overall traffic trends
- Top Landing Pages – which content or listings drive visits
- Bounce Rate – high bounce (>70%) on key pages signals usability issues
- Conversion Goals – set up a goal for listing submissions to track conversion rate
In Search Console, monitor:
- Impressions and Clicks – how often your site appears in search and gets clicked
- Average Position – track ranking improvements for target keywords
- Top Queries – which searches bring users to your site (informs content strategy)
- Coverage Errors – fix indexing issues and broken pages promptly
Free tools give you 80% of the insights you need. Save advanced analytics platforms for when you’re generating revenue.
Optional Step 6 — Upgrade Paths and Monetization at Scale
You’ve proven the concept: your directory has traction, listings are growing, and users are engaging. Now it’s time to think about sustainability and revenue. The free-to-start model was about validation—scaling requires investment in hosting, features, and marketing. But the good news is you’re upgrading from a position of strength: real data, real users, and a clear value proposition.
Quick Upgrade Path: When and How to Switch from Free to Paid Hosting or Premium Platforms
Upgrade when you hit resource limits on your free plan: slow page loads, maxed-out listings, or missing features you need (payment processing, advanced search, custom design). For WordPress users, this usually means moving from free/shared hosting to managed WordPress hosting (WP Engine, Kinsta, or SiteGround) and upgrading directory plugins to premium versions (Directorist Pro, Business Directory Plugin Premium).
For all-in-one builders, check your plan’s upgrade tiers. Most offer monthly subscriptions starting at $30–$100/month for unlimited listings, custom domains, and monetization tools. Compare the cost against your growth trajectory—if you’re adding 20+ listings per month and traffic is climbing, the investment pays for itself quickly.
Monetization Strategies at Scale
Common directory revenue models include:
- Paid listings – charge businesses a monthly or annual fee to be listed (typical: $10–$50/month)
- Featured placements – premium spots at the top of category pages or search results ($50–$200/month)
- Lead generation – sell qualified leads (contact form submissions, phone calls) to listed businesses
- Display advertising – Google AdSense, direct ad sales, or sponsored content ($5–$50 CPM depending on niche)
- Affiliate commissions – recommend tools, services, or products in your guides and earn referral fees
- API access – license your directory data to third-party apps or aggregators
Start with one revenue stream and optimize it before adding more. Paid/featured listings are the most straightforward for directories with established traffic. Lead generation works best if you have a CRM or automation in place to track and deliver leads promptly.
Pricing Models for Directories
Most directories use a freemium model: free basic listings with optional paid upgrades. Typical upgrade benefits include:
- Featured placement in category or search results
- Priority ranking in listings
- Additional photos, videos, or portfolio items
- Custom profile URL
- Link to social media, booking systems, or e-commerce
- Analytics dashboard showing listing views and clicks
Price tiers might look like: Free (basic listing), Premium ($20/month – featured placement), Pro ($50/month – top placement + analytics). Test pricing with early adopters and adjust based on willingness to pay—niche directories serving high-value professionals can charge more than hyper-local service directories.
Migration Considerations and Data Portability
If you’re migrating from a free platform to paid hosting or a new directory platform, plan for downtime and data cleanup. Export all listings as CSV, back up images and files, and document your category structure. Test the new setup on a staging site before switching DNS or redirecting URLs. Set up 301 redirects for any URL changes to preserve SEO equity.
Data portability is why I recommend WordPress or platforms with clear export tools from day one. Proprietary builders that lock your data behind export paywalls or require manual copy-paste are headaches you don’t need when scaling.
Compliance and Security Basics for Larger Directories
As your directory grows, so does your responsibility. Implement these basics:
- SSL certificate – essential for user trust and SEO (Let’s Encrypt is free)
- Privacy policy and Terms of Service – outline data handling, user rights, and liability limits
- GDPR/CCPA compliance – if you serve EU or California users, respect data rights and cookie consent
- Regular backups – daily automated backups to a remote location (many managed hosts include this)
- Security plugins – Wordfence (WordPress) or equivalent to block brute-force attacks and malware
- User data protection – hash passwords, limit admin access, and use two-factor authentication
Neglecting security or privacy invites breaches, lawsuits, and reputational damage. Budget a few hours to set these up properly—it’s far cheaper than recovery costs.
Common Pitfalls and Quick Fixes
Even with a solid plan, most directory founders hit predictable stumbling blocks. Here are the top five and how to avoid them:
- Pitfall: Launching with too few listings. Fix: Seed 30–50 high-quality listings yourself before public launch. An empty directory looks abandoned and kills credibility.
- Pitfall: Accepting low-quality or spam listings to inflate numbers. Fix: Quality beats quantity every time. Reject spam aggressively and communicate standards clearly.
- Pitfall: Ignoring SEO until months after launch. Fix: Implement basic on-page SEO, schema markup, and sitemaps from day one. Retroactive SEO is painful and slow.
- Pitfall: Building in isolation without user feedback. Fix: Launch a beta, ask for feedback, and iterate quickly. Early users tell you what’s broken or missing.
- Pitfall: Over-engineering features before validating demand. Fix: Start with core functionality (search, submit, browse) and add features only when users request them consistently.
The best directories are built iteratively—launch lean, gather data, and improve based on real user behavior, not assumptions.
Frequently Asked Questions
How do I start a directory website for free in 2025?
Start by choosing a niche, then use a free platform like WordPress with a directory plugin (Directorist or Business Directory Plugin) or an all-in-one builder with a free tier. Seed initial listings manually, set up basic SEO, and publish category guides to drive traffic. Focus on quality and community engagement before monetizing.
What are the best free platforms to create a directory website?
WordPress paired with free directory plugins (Directorist, Business Directory Plugin) is the most flexible option. All-in-one builders like Brilliant Directories or Directify offer free trials or limited free plans. Choose based on your technical comfort—WordPress for control, builders for speed and simplicity.
How do I get listings on a new directory site without paying?
Personally invite high-quality businesses or professionals via email, offering free listings during your launch phase. Leverage partnerships with local organizations, promote in niche communities, and create valuable content that attracts listing owners organically. Offer founding-member incentives like featured placement or badges to drive early adoption.
How can I monetize a free directory website without heavy upfront costs?
Start with freemium models—offer free basic listings and charge for premium placement or enhanced profiles. Add affiliate links in content guides or integrate simple display ads once traffic grows. Avoid complex payment systems until you prove demand; begin with manual invoicing or PayPal links if needed.
What are essential SEO steps for a directory site on a free plan?
Implement unique title tags and meta descriptions for every page, use structured data (LocalBusiness schema) on listing pages, create category guide content, optimize for local search with city pages and maps, build internal links between guides and listings, and submit an XML sitemap to Google Search Console.
How do I accept listings and manage quality on a free directory?
Use submission forms with required fields (name, category, location) and optional details. Enable moderation—manually approve all listings initially to filter spam and low-quality entries. Define clear listing criteria and rejection reasons. Use CAPTCHA and email verification to reduce bot submissions.
What is the typical upgrade path from a free directory to a paid model?
Upgrade when you hit free-plan limits (traffic, storage, listings) or need features like payment processing, advanced search, or custom design. For WordPress, move to managed hosting and premium plugins. For builders, switch to a paid tier. Introduce freemium monetization once you have 500+ monthly visitors and 50+ active listings.
How long does it take for a new directory site to gain traction?
Expect 3–6 months for meaningful organic traffic if you publish consistent content and build quality backlinks. Social media and outreach can drive early visits, but sustained growth requires SEO momentum. Focus on listing quality and user engagement—growth accelerates once word-of-mouth kicks in.
Should I allow user reviews on my directory from day one?
Yes, if you can moderate them. Reviews build trust and user engagement, but unmoderated reviews attract spam. Start with manual approval and clear review guidelines. Enable reviews early to encourage user-generated content, which improves SEO and listing quality signals over time.
Can I run a directory site without coding skills?
Absolutely. WordPress with free directory plugins requires minimal technical skills—most tasks are point-and-click. All-in-one builders like Brilliant Directories are designed for non-coders with drag-and-drop interfaces. You’ll need to learn basic WordPress or platform navigation, but no coding is required to launch and manage a functional directory.
Take Action: Your 30-Day Directory Launch Plan
You’ve got the roadmap—now it’s time to execute. Here’s a realistic 30-day sprint to go from concept to live directory:
Week 1: Niche and Platform
Define your niche, draft your mission statement, and choose a platform (WordPress or builder). Register a domain, set up hosting or a free-tier account, and install your directory plugin or template. Document your listing criteria and category structure.
Week 2: Build and Seed
Configure your submission form, search filters, and basic design. Manually add 20–30 seed listings from your network or niche. Write one category guide and one how-to article. Set up Google Analytics and Search Console.
Week 3: SEO and Content
Implement schema markup on listing pages, optimize meta tags, and submit your sitemap. Publish two more content pieces and create city or niche landing pages. Set up social profiles and draft your first outreach email template.
Week 4: Launch and Promote
Go live publicly and announce on social media, niche forums, and via email to your network. Send personalized invites to 50 target listings. Set up moderation workflows and monitor submissions daily. Track your KPIs and gather user feedback for iteration.
Thirty days isn’t enough to “finish” a directory—it’s a living project that grows and evolves. But it’s plenty of time to prove viability, attract early users, and lay the foundation for scale. The key is starting with clarity, building with intention, and iterating based on real data. Your niche needs a trusted directory—go build it.
Was this article helpful?