How to Install MLS Plugin in WordPress: A Step-by-Step Guide
Generating summary...
Setting up an MLS plugin on your WordPress site isn’t just about clicking “install” and hoping for the best. There’s a fundamental shift happening in the real estate tech ecosystem that most agents and brokers don’t fully understand, and it directly impacts how you’ll display listings on your site. The industry has largely moved away from legacy RETS systems toward RESO Web API standards, which means faster data, cleaner integrations, and far fewer headaches when troubleshooting connection issues. But here’s what nobody tells you: even with the right plugin, you can still end up with stale listings, broken images, or—worse—legal compliance problems if you skip the planning stage. This guide walks you through the entire process, from securing MLS credentials to optimizing performance, so your listings stay current and your site stays fast.
TL;DR – Quick Takeaways
- MLS access requires authorization – You need active MLS membership and approved feed credentials (RESO Web API or RETS) before installing any plugin.
- RESO Web API is the current standard – Legacy RETS systems are being phased out; modern plugins increasingly rely on RESO for real-time, standardized data.
- Installation is multi-step – Prepare credentials, install plugin, connect feed, map fields, configure display, and test thoroughly across devices.
- Performance matters – Without proper caching and CDN for images, MLS listings can slow your site significantly.
- Compliance isn’t optional – MLS rules around data display, attribution, and update frequency are legally binding; violations can result in suspended access.
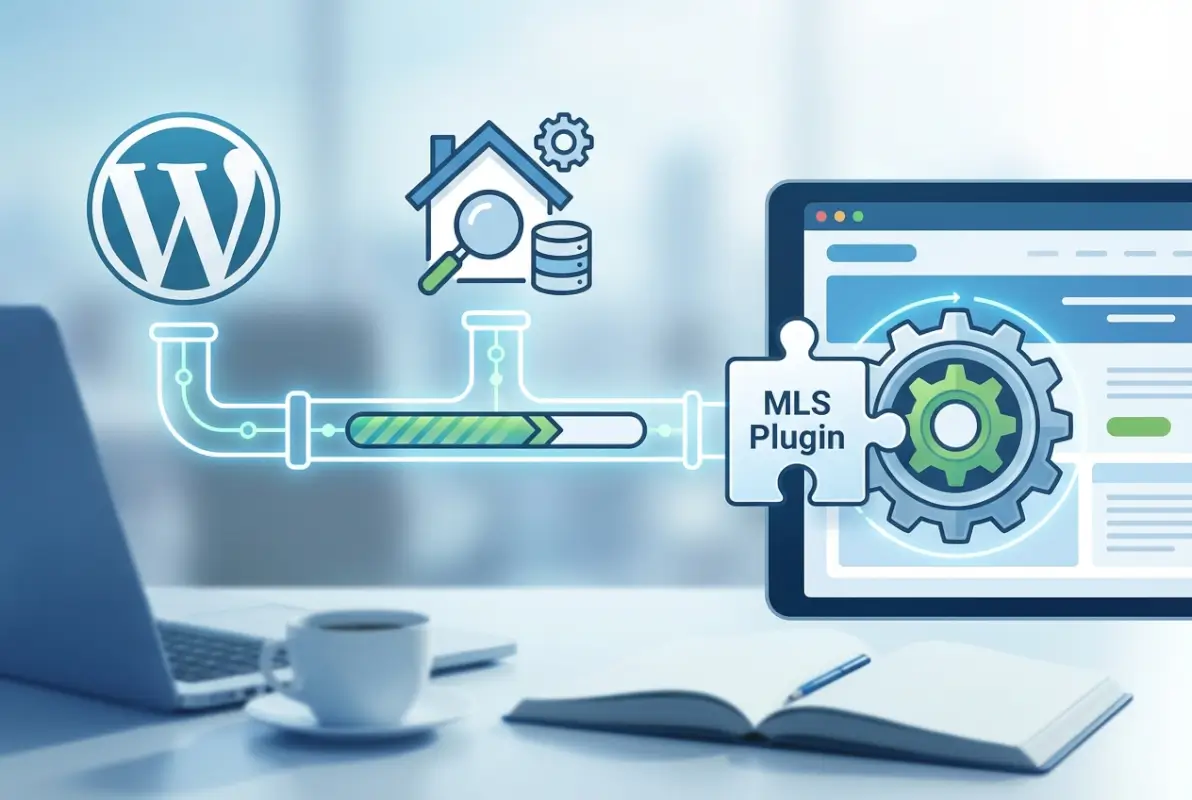
Understanding MLS Plugins for WordPress
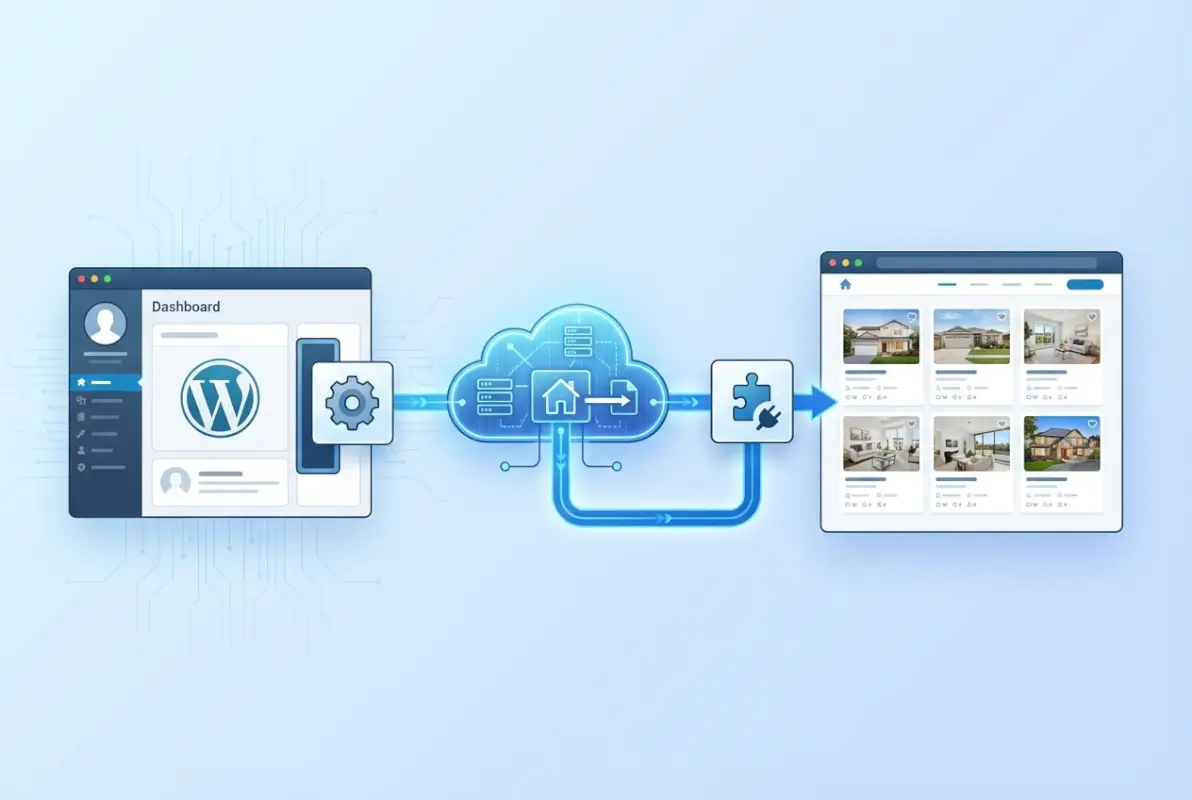
An MLS plugin does far more than just embed a few property cards on your homepage. It establishes a live connection between your website and a centralized Multiple Listing Service database, pulling in listing data—price, status, photos, descriptions, location coordinates—and rendering it dynamically on your pages. Unlike static content you’d manually enter into WordPress, MLS integrations update automatically as listings go active, pending, or sold, which is critical for maintaining accuracy and staying compliant with MLS rules.
Many newer site owners assume an MLS plugin is just a shortcode generator, but that’s only the front-end display layer. Behind the scenes, the plugin authenticates with the MLS server, makes scheduled API calls, parses incoming data according to a standardized schema, and maps those fields to WordPress custom post types or meta fields. This architecture means your site becomes a real-time reflection of the MLS data feed, not a static snapshot that quickly goes stale.
What an MLS Plugin Does (Feed Integration, Not Just a Shortcode)
Think of an MLS plugin as middleware. It sits between the MLS database and your WordPress front end, handling authentication, data synchronization, field mapping, and display rendering. When a new listing enters the MLS, the plugin’s scheduled sync (often every 15–60 minutes) fetches that record, creates or updates a WordPress post, and makes it searchable through your site’s search and filter widgets. This happens automatically, without manual CSV uploads or copy-pasting from MLS portals.
Good plugins also handle media imports—downloading property photos to your WordPress media library or linking to MLS-hosted images via CDN—and geocoding addresses for map integrations. Some even manage virtual tour embeds, open house schedules, and agent contact forms tied directly to each listing. The shortcode you drop into a page is just the visible tip of a much larger integration iceberg.
IDX vs. RESO Web API vs. RETS: Current Landscape and Implications
If you’re researching MLS plugins, you’ll encounter three acronyms: IDX, RETS, and RESO Web API. IDX (Internet Data Exchange) is a policy framework that governs which listings brokers can display on their public websites; it’s not a technical protocol, it’s a set of rules enforced by your local MLS. RETS (Real Estate Transaction Standard) is the older technical protocol used to transmit listing data—it’s XML-based, clunky, and increasingly deprecated. RESO Web API is the modern successor: a RESTful, JSON-based standard that’s faster, more secure, and easier for developers to implement.
From a practical standpoint, RESO Web API integrations tend to be more reliable, with fewer field mapping errors and faster sync times. They also support OAuth 2.0 authentication, which is more secure than the username/password credentials used by many RETS systems. If your MLS offers both, always choose RESO Web API—it’s the direction the entire real estate industry is moving, and plugin developers are increasingly dropping RETS support.
Typical Data Flows (MLS → Plugin → WordPress Pages)
Here’s what happens when a listing updates in the MLS: The MLS server receives the change (price drop, status update, new photos). Your plugin’s scheduled task runs—typically a WordPress cron job—and queries the MLS API for records modified since the last sync. The API returns a JSON payload containing all updated listings. The plugin loops through each record, checks if it already exists in WordPress (by MLS number), and either creates a new post or updates the existing one. Field values (bedrooms, bathrooms, square footage, listing price) are stored as WordPress post meta, and images are either downloaded or linked. Finally, the listing appears on your site’s search results, map widgets, and detail pages.
This flow happens invisibly, but understanding it helps when troubleshooting. If a listing isn’t showing up, you might have a sync frequency issue, a field mapping mismatch, or an API authentication error. Knowing the data path makes debugging far less mysterious.
Pre-Installation Considerations (Planning)
Before you install anything, you need to verify you’re eligible for MLS data access and that your hosting environment can handle it. Skipping this planning phase is the single biggest cause of failed MLS integrations. I’ve seen agents spend hours trying to connect a plugin, only to discover they never requested data access from their MLS in the first place, that’s a painful way to learn the importance of upfront preparation.
Verify MLS Access Eligibility and Provider Options
MLS data isn’t public. To integrate listings into your WordPress site, you need to be an active member of an MLS (or work for a brokerage that is) and submit a formal request for data access. This typically involves filling out an IDX application, signing a data license agreement, and paying any applicable fees. Your MLS will then provide you with API credentials—either RETS login details or a RESO Web API client ID and secret.
Not all MLSs offer direct data access; some require you to go through a third-party vendor like SimplyRETS or Bridge Interactive. These vendors act as intermediaries, normalizing data from multiple MLSs and providing a single API endpoint for your plugin. If your MLS uses a vendor, you’ll register with that vendor, not directly with the MLS, and your plugin will connect to the vendor’s API instead.
Security and Compliance Basics (OAuth, API Keys, Data Privacy)
Your MLS credentials are sensitive. If they leak, someone could scrape your entire MLS database or use your account to violate data usage rules, potentially getting your access revoked. Store API keys in your plugin’s settings (never hardcode them in theme files), and use environment variables or WordPress constants if your plugin supports it. RESO Web API integrations use OAuth 2.0 tokens, which expire and refresh automatically, adding an extra layer of security compared to static RETS passwords.
Compliance extends beyond technical security. MLS rules dictate how you display data—required attribution text, update frequency minimums (often no more than 24 hours of staleness), and restrictions on which fields you can show publicly. Read your MLS’s IDX policy document carefully; violations can result in fines or suspended access, and that will take your entire listings display offline.
Website Prerequisites (PHP Version, SSL, Hosting Suitability)
MLS plugins make frequent API calls and process large data sets, which means your hosting environment matters. Shared hosting with strict resource limits can struggle, especially if you’re syncing thousands of listings. Look for a host that allows sufficient PHP memory (at least 256MB), supports modern PHP versions (7.4 or higher), and doesn’t throttle outbound HTTP requests. SSL is non-negotiable—most MLS APIs require HTTPS for authentication, and Google penalizes non-secure sites in search rankings.
Check your hosting control panel for PHP version and memory limits. If you’re on a budget host and planning to sync more than a few hundred listings, consider upgrading to managed WordPress hosting or a VPS. The performance difference is significant, and you’ll avoid timeout errors during large syncs. If you’re serious about building a business directory website or real estate portal, investing in solid hosting upfront saves countless troubleshooting hours later.
Choosing the Right Plugin (Free vs. Premium, Supported MLS Markets)
WordPress.org hosts a few free MLS plugins, but they often support limited MLSs or lack advanced features like custom templates and lead capture. Premium plugins cost $100–$500+ per year but offer broader MLS coverage, priority support, and frequent updates. Evaluate plugins based on: (1) explicit support for your MLS or data vendor, (2) active development and recent updates, (3) documentation quality, and (4) user reviews mentioning your specific MLS.
| Feature | Free Plugins | Premium Plugins |
|---|---|---|
| MLS Coverage | Limited (often 1-3 MLSs) | Broad (dozens to hundreds) |
| Customization | Basic templates only | Custom CSS, template overrides |
| Support | Community forums | Priority tickets, phone/chat |
| Update Frequency | Variable (can be infrequent) | Regular (monthly or better) |
| Lead Capture | Rarely included | Integrated forms, CRM hooks |
Popular options include Easy MLS Listings Import (free, limited MLS support), SimplyRETS (premium, broad coverage, RESO-native), and MLSImport (premium, flexible but complex setup). Test the free version first if available, but be prepared to upgrade if you need reliable support or advanced features.
Step-by-Step: Installing an MLS Plugin in WordPress
Now that you’ve secured MLS access and verified your hosting environment, you’re ready to install. This section walks through the actual installation and configuration process, step by step. The exact screens will vary by plugin, but the workflow remains consistent across most modern MLS tools.
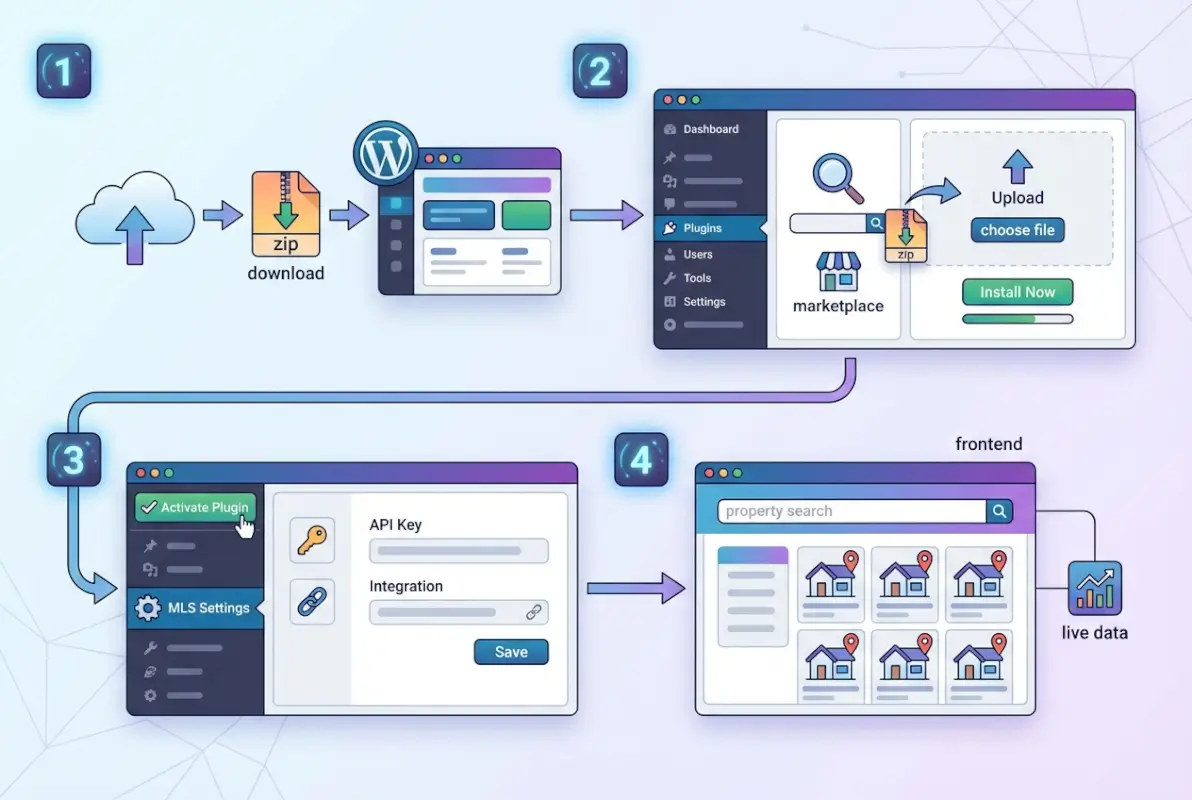
Step 1 – Prepare MLS Credentials and API Access
Gather all the credentials provided by your MLS or data vendor: RETS login URL, username, and password (for legacy systems), or RESO Web API endpoint, client ID, and client secret (for modern systems). Have your MLS number or board ID handy, as some plugins require it during setup. If you’re using a third-party vendor, log into their dashboard first to confirm your account is active and your API quota is sufficient for your expected listing count.
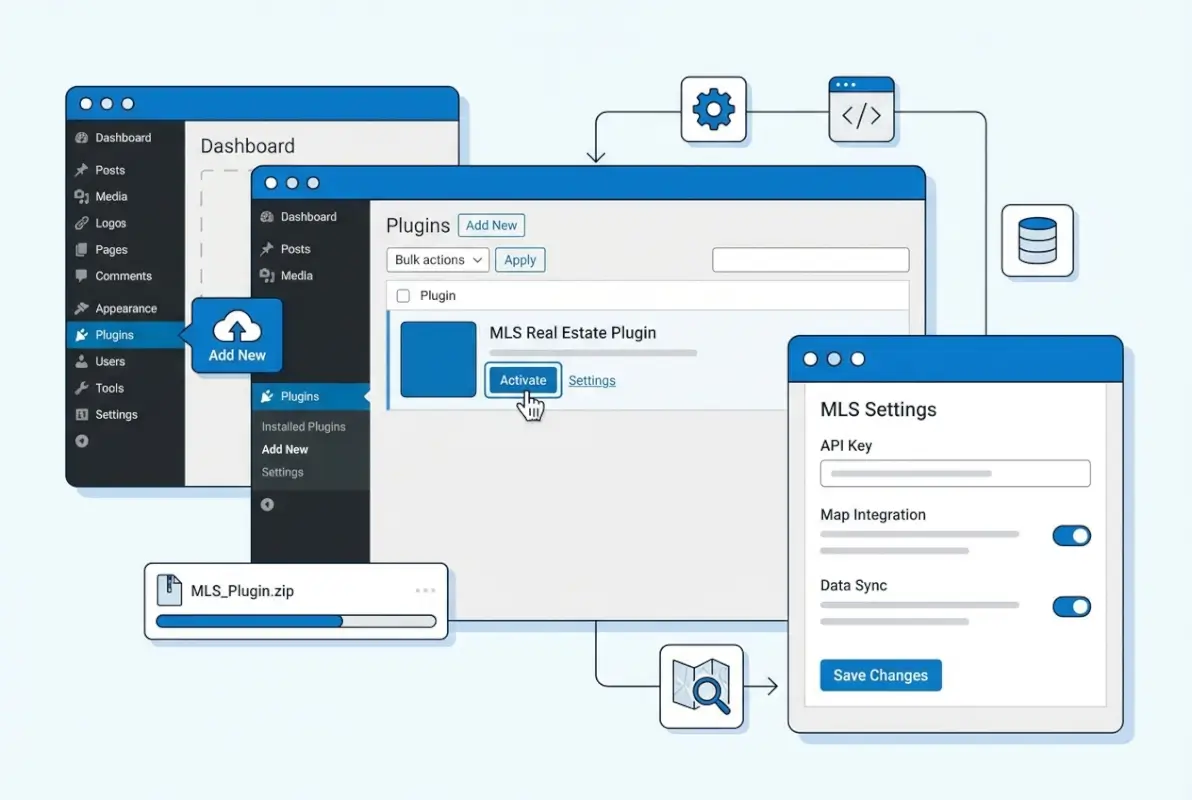
Step 2 – Install the Plugin (From WordPress Repository or Vendor Downloadable Zip)
Navigate to Plugins > Add New in your WordPress admin dashboard. If your plugin is in the WordPress.org repository, search for it by name, click Install Now, then Activate. For premium plugins, you’ll download a .zip file from the vendor’s website, then go to Plugins > Add New > Upload Plugin, choose the .zip, and click Install Now followed by Activate.
Some premium plugins require a license key activation step immediately after installation. You’ll see a notice prompting you to enter the key; do this before proceeding, as certain features (like MLS connections) won’t work until the license is validated.
Step 3 – Activate and Connect the MLS Feed
Once activated, the plugin will add a new menu item in your WordPress admin sidebar (often labeled “MLS Settings” or similar). Navigate there and look for a connection or setup wizard. You’ll be asked to select your MLS from a dropdown (if the plugin supports multiple MLSs) and enter your credentials. For RESO Web API, you’ll paste in your client ID, client secret, and sometimes a token endpoint URL. For RETS, you’ll enter the login URL, username, and password.
Step 4 – Configure Feed Settings (MLS Selection, Fields Mapping, Update Cadence)
With the connection established, configure which data you want to sync. Many plugins let you filter by property type (residential, commercial, land), listing status (active only, or include pending and sold), and geographic area (city, ZIP code, or custom polygon). Be selective—syncing tens of thousands of listings you don’t need wastes server resources and slows your site.
Set your sync cadence (how often the plugin checks for updates). Most MLSs require updates at least every 24 hours, but syncing every 15–60 minutes keeps your site more current. Balance freshness against server load; if you’re on shared hosting, hourly may be the practical limit. Field mapping comes next: the plugin will show a list of MLS data fields (ListPrice, BedroomsTotal, BathroomsFull, etc.) and let you map them to WordPress post fields (title, content, custom meta). Decent plugins auto-map standard fields, but always review to ensure accuracy.
Step 5 – Create a Listing Display (Shortcodes, Blocks, or Widgets)
Now you’ll add listings to a page. Most plugins provide shortcodes like [mls_listings] that you paste into any page or post. Gutenberg-enabled plugins offer custom blocks you can drag into the block editor. Configure display options—grid vs. list layout, number of listings per page, which fields to show (photo, price, beds/baths, address)—and preview the page to ensure it renders correctly.
If you’re launching a community business directory alongside real estate listings, you might create separate pages for each: one for properties, one for local services. Use the same shortcode/block approach, just with different filtering parameters.
Step 6 – Set Up Search and Filtering Options
Visitors expect to filter listings by price, bedrooms, location, and property type. Most MLS plugins include a search widget or shortcode for this. Add it to your sidebar or at the top of your listings page. Configure which fields appear in the search form—common choices are min/max price, bedrooms, bathrooms, square footage, and city. Test the filters to confirm they return correct results and that the result count updates dynamically.
Step 7 – Test Listings Rendering and Responsive Behavior
Open your listings page on desktop, tablet, and mobile. Check that images load, text doesn’t overflow containers, and search forms remain usable on small screens. Click through to individual listing detail pages and verify all fields display correctly (description, photo gallery, map, contact form). If anything looks broken, check your theme’s CSS for conflicts or switch to a default WordPress theme temporarily to isolate the issue.
Step 8 – Troubleshooting Common Install Issues
If listings don’t appear after the first sync, check the plugin’s log or status page (most have one under their settings). Common errors include invalid credentials (double-check for typos), API rate limiting (your MLS or vendor may throttle requests), and field mismatches (the plugin expects a field name that your MLS doesn’t provide). If you see “403 Forbidden” or “Unauthorized,” your credentials are wrong or your account isn’t approved yet. “500 Internal Server Error” usually means a server resource limit was hit—increase PHP memory or contact your host.
For persistent issues, enable WordPress debug logging (add define('WP_DEBUG_LOG', true); to wp-config.php) and reproduce the error. The log file (wp-content/debug.log) will show detailed error messages you can share with plugin support.
Data Mapping, Customization, and Performance
Once the plugin is pulling data, you’ll want to refine how it’s displayed and ensure your site stays fast. This is where many installations stumble—listings appear but look generic, or the site slows to a crawl under the weight of thousands of images. Proper mapping and performance tuning make the difference between a sluggish, amateur-looking site and a polished, professional portal.

Mapping MLS Fields to WordPress Meta Fields
Every MLS uses slightly different field names. One might call it “ListPrice,” another “CurrentPrice,” and a third “AskingPrice.” Your plugin’s field mapper translates these into consistent WordPress meta keys. During initial setup, the plugin attempts automatic mapping, but you should review every field. If “bedrooms” isn’t showing up, check that the MLS field “BedroomsTotal” is mapped to your plugin’s “bedrooms” meta key.
Advanced users can add custom fields if the plugin supports it. For example, if your MLS tracks “WalkScore” but your plugin doesn’t have a built-in field for it, you can create a custom meta field and map it manually. This requires some understanding of WordPress custom fields, but it’s powerful for niche data points your competitors aren’t displaying.
Custom Templates and Styling (CSS Overrides, Theme Compatibility)
Out-of-the-box plugin templates are functional but rarely beautiful. Most plugins let you override templates by copying a template file to your theme’s directory (similar to WooCommerce template overrides). This allows you to rearrange elements, add custom HTML, or integrate your brand’s design language without editing plugin core files (which would break on updates).
For CSS tweaks, use your theme’s custom CSS panel or a child theme stylesheet. Target the plugin’s unique class names (inspect the page HTML to find them) and add rules for spacing, colors, typography, and responsive breakpoints. If your theme uses a page builder like Elementor, look for plugin-specific widgets or shortcode blocks that integrate more cleanly than raw shortcodes pasted into text areas. When installing the Listing Pro theme for WordPress, many real estate pros find its built-in listing post types integrate seamlessly with MLS plugins that support custom post type mapping.
Handling Media and Maps (Photos, Virtual Tours, Google Maps)
Property photos are bandwidth-heavy. Decide whether to download images to your WordPress media library or hotlink them from the MLS server. Downloading gives you control and faster local delivery via CDN, but consumes storage. Hotlinking saves storage but depends on MLS server uptime and can be slower. Most modern plugins default to hotlinking for performance reasons.
For maps, many plugins integrate Google Maps or Mapbox. You’ll need an API key from the map provider (Google Maps requires billing enabled, though the free tier covers most small sites). Ensure the plugin geocodes addresses accurately; if pins appear in the wrong location, you may need to enable address normalization or manually correct coordinates for problem listings.
Virtual tours (Matterport, video embeds) typically come through as URLs in the MLS data. Good plugins auto-detect these and render them as embedded iframes on the listing detail page. If yours doesn’t, you can manually add an iframe in a custom template or use a plugin like “Advanced iFrame” to handle embeds more gracefully.
Caching and Performance Considerations
MLS listings are dynamic, but that doesn’t mean you can’t cache them. Use a caching plugin like WP Rocket or W3 Total Cache, and set a short cache expiration (1–6 hours) so pages stay fast but don’t show stale data for too long. Object caching (Redis or Memcached) is even better if your host supports it—it speeds up database queries without serving outdated HTML.
Enable lazy loading for images (most caching plugins do this automatically) so listing grids load the first few images immediately and defer off-screen images until the user scrolls. If you’re serving images from your own domain, use a CDN like Cloudflare or BunnyCDN to distribute them globally and reduce server load. I’ve seen sites with 5,000+ listings go from 8-second page loads to under 2 seconds just by implementing proper caching and a CDN, that’s the kind of performance win that directly impacts your search rankings and user experience.
Automated Updates Cadence and Configuration
Your plugin’s sync schedule is controlled by WordPress cron jobs. By default, WordPress cron runs when someone visits your site, which can be unreliable for low-traffic sites. For mission-critical syncs, use a real server cron job (set up via cPanel or SSH) that triggers wp-cron.php every 15 minutes. This ensures listings update on schedule even if no one is browsing your site.
Monitor your cron logs to confirm syncs are completing successfully. If a sync times out or fails repeatedly, you may need to increase PHP max_execution_time or break the sync into smaller batches (some plugins support this). Consistent, reliable syncs are what separate professional MLS sites from amateur ones that show sold listings as active days later.
Advanced Features and Best Practices
Once your basic integration is stable, you can layer on advanced features that improve user experience and generate more leads. These aren’t strictly necessary, but they’re what make a good MLS site great, and they’re often the difference between a visitor bouncing immediately and a visitor filling out a contact form.

Advanced Search Filters and Faceted Navigation
Beyond basic dropdowns, consider faceted search—a sidebar with checkboxes for property features (pool, fireplace, waterfront) that dynamically filter results as users click. Plugins like FacetWP or SearchWP integrate with MLS custom post types to enable this. Faceted search reduces friction; users can explore listings intuitively without wrestling with multi-field forms.
Add a keyword search that scans listing descriptions, addresses, and MLS remarks. This catches users who search “lake view” or “downtown loft” rather than filtering by structured fields. Combine keyword and faceted search for maximum usability.
Lead Capture and Contact Forms Integrated with MLS Listings
Every listing detail page should have a contact form that emails the listing agent or your brokerage. Better still, integrate with a CRM (Salesforce, HubSpot, Follow Up Boss) so leads flow directly into your pipeline. Some plugins support this natively; others require a form plugin like Gravity Forms or WPForms plus a Zapier/Integromat automation to bridge the gap.
Require minimal fields (name, email, phone) to reduce friction. Pre-fill the listing address and MLS number in a hidden field so you know which property the lead is interested in. A/B test form placement—below the description vs. sticky sidebar—to find what converts best. If you’re also creating a paid business directory website, you can use the same lead capture strategy for directory listings and real estate properties, maximizing the value of every site visitor.
Data Hygiene and De-Duplication Strategies
MLS data isn’t always clean. You’ll encounter duplicate listings (same property listed by multiple agents), expired listings that linger, and fields with inconsistent formatting. Set up rules to auto-hide expired listings after a certain period, and use the plugin’s duplicate detection settings if available. For manual cleanup, periodically audit your listings in WordPress admin and delete or trash any obvious duplicates or test entries.
Some MLSs send the same listing with minor variations (e.g., different MLS numbers but identical addresses). If your plugin doesn’t auto-detect this, you’ll need to write custom logic or contact plugin support for help. Clean data improves user trust and prevents SEO issues from duplicate content.
SEO Considerations for MLS-Powered Listing Pages
Each listing should be a unique post with its own URL, title tag, and meta description. Use the listing address and a key feature in the title: “3BR Waterfront Home in Charleston – $450K.” Write or auto-generate meta descriptions that include price, bedrooms, bathrooms, and location. Avoid thin content—if the MLS provides a short description, supplement it with neighborhood info or market context (some plugins support custom content injection per listing).
Enable schema markup (Real Estate Listing structured data) so Google can display rich snippets. Many MLS plugins output schema automatically; verify it with Google’s Rich Results Test. Internal link from blog posts or city landing pages to relevant listings to distribute link equity and improve crawl depth. For broader context on optimizing directory-style websites, explore how to create a business directory from Excel and similar methods, which share principles with MLS listing management.
Compliance and Licensing Reminders
Your MLS agreement requires specific attribution text on every page displaying listings, usually something like “Data provided by [MLS Name].” Place this in your site footer or listing template footer, and ensure it appears on every listing page. Failure to include it can result in fines or access suspension. Also respect rules about how quickly you must remove sold listings (often within 24 hours of status change) and which fields are public vs. members-only.
Keep your membership active and renew on time. If your MLS access lapses, your plugin will lose authentication and your listings will disappear overnight. Set calendar reminders for renewal dates to avoid surprises.
Troubleshooting, Maintenance, and Resources
Even well-configured plugins occasionally hiccup. Knowing how to diagnose issues quickly minimizes downtime and keeps your listings visible. This section covers the most common error scenarios and how to resolve them, plus ongoing maintenance tasks to keep your integration healthy.
Common Error Scenarios (Invalid Credentials, API Throttling, Field Mismatches)
Invalid credentials usually surface immediately during the connection test. If listings were working and suddenly stop, your credentials may have expired or your MLS password changed. Re-enter credentials and test. API throttling occurs when you exceed your vendor’s rate limits—if you’re syncing every 5 minutes but your plan allows hourly syncs, the API will reject requests. Check your vendor’s dashboard for usage stats and adjust your sync frequency accordingly.
Field mismatches happen when the MLS renames a field or your plugin updates its schema. Listings may appear but certain fields (price, bedrooms) will be blank. Review the field mapping settings and compare them to your MLS’s current data dictionary (often available on your MLS’s developer portal or from your vendor). Re-map any broken fields and re-sync.
How to Read MLS Import Logs and Debugging Tips
Most plugins log every sync run, showing how many listings were added, updated, or deleted. Access logs via the plugin’s dashboard or a log file in wp-content/uploads/. Look for error messages like “Failed to parse XML,” “Timeout connecting to MLS server,” or “Invalid listing status.” These pinpoint the failure mode.
Enable verbose logging if available (often a checkbox in plugin settings) to capture detailed API responses. If the log shows successful API calls but listings still don’t appear, the issue is likely in field mapping or post status (listings might be saving as drafts instead of published). Cross-reference the log timestamps with WordPress post dates to confirm posts are being created.
When to Contact MLS/Plugin Support and What Information to Provide
If you’ve exhausted basic troubleshooting, reach out to support with: your WordPress version, PHP version, plugin version, MLS or vendor name, a copy of the error log, and a description of what you expected vs. what actually happened. Screenshots of your plugin settings (with credentials redacted) help immensely. “It doesn’t work” emails get slow responses; detailed, data-rich reports get priority attention.
For MLS/vendor support, provide your account ID and the specific API endpoint or RETS URL you’re trying to connect to. They can check server-side logs to see if your requests are even reaching their system.
Keeping the Plugin and WordPress Core Up to Date
Update your plugin whenever a new version is released, especially for security patches. Most updates are backward-compatible, but always back up your site first (use a plugin like UpdraftPlus). Test updates on a staging site if possible. Also keep WordPress core and your theme updated—plugin developers assume you’re running recent software, and compatibility issues often stem from outdated environments.
Subscribe to the plugin’s changelog or newsletter so you’re notified of critical updates. Some vendors offer auto-update options; enable this if you trust the developer’s QA process.
Alternatives and Ecosystem Overview
Not all MLS integrations are created equal. Understanding the landscape helps you choose the right tool for your needs and budget, and knowing when to pivot if your current solution isn’t working.
Compare Popular MLS Plugin Options
Free plugins like Easy MLS Listings Import work for single-MLS setups with low listing volumes but lack advanced features and support. Premium options like SimplyRETS, Diverse Solutions IDX, and IMPress for IDX Broker offer broader coverage, better customization, and reliable support. SimplyRETS is particularly strong for RESO Web API integrations and offers sandbox environments for testing. IMPress pairs with IDX Broker’s hosted platform, offloading sync and search to their servers, which can improve performance on smaller hosting plans.
| Plugin | Pricing | MLS Support | Best For |
|---|---|---|---|
| Easy MLS Listings | Free | Limited | Single-MLS, low volume |
| SimplyRETS | ~$50-150/mo | 800+ MLSs | RESO Web API, broad coverage |
| MLSImport | ~$50/mo | Multiple | Flexible, dev-friendly |
| IMPress (IDX Broker) | ~$40-100/mo | 500+ MLSs | Hosted solution, less server load |
Evaluate trial periods or demos before committing. Some vendors offer money-back guarantees within the first 30 days, giving you time to test integration with your specific MLS.
Other Approaches (Iframe-Based Listings vs. REST/RESO Web API-Driven)
Iframe-based solutions (like IDX Broker’s default setup) embed a third-party listing page in your site via iframe. This is simpler—no plugin install, no sync management—but you sacrifice control over design and SEO. Search engines can’t index iframe content as your own, and customization is limited to whatever the vendor’s dashboard allows. REST/RESO Web API-driven plugins pull data into WordPress natively, giving you full control over styling, SEO, and user experience, but require more technical setup.
Choose iframe if you want turnkey simplicity and don’t care about listing SEO. Choose native plugin integration if you want listings to rank in Google and need deep customization.
Future-Proofing: RESO Web API Adoption Trends
The real estate industry is consolidating around RESO Web API as the standard for data exchange. According to RESO.org, over 70% of major MLSs now support RESO Web API, and the remainder are actively migrating. Legacy RETS systems will eventually be deprecated, so if you’re choosing a plugin now, prioritize those with native RESO support. This ensures your integration won’t require a painful migration in 2-3 years when your MLS shuts off RETS.
Security, Privacy, and Compliance
MLS integrations handle sensitive data—not just property details, but also contact information from lead forms. Protecting this data is both a legal obligation (GDPR, CCPA) and a trust issue with your users. A single data breach can destroy your reputation and result in fines.
Handling User Data Responsibly (Contacts, Inquiries)
Any lead form on your site must comply with privacy laws. Include a clear privacy policy link near the form, and only collect data you genuinely need. Store form submissions in WordPress (plugins like WPForms save to the database) or forward them to a CRM, but ensure your CRM is also compliant. Never sell or share lead data without explicit consent.
If you operate in the EU or serve EU visitors, GDPR requires you to offer data export and deletion on request. Use a plugin like “GDPR Data Request Form” to automate this, or handle requests manually if your volume is low.
Access Control and API Key Management
Restrict WordPress admin access to trusted users only. Use strong passwords and two-factor authentication (plugins like Wordfence or iThemes Security handle this). Store API keys in wp-config.php as constants (outside the web root if possible) rather than in the database, which is more vulnerable to SQL injection attacks.
Rotate API credentials periodically—every 6-12 months is reasonable. If an employee with access leaves, rotate immediately. Monitor your MLS vendor’s access logs to detect unauthorized usage.
Regular Auditing of Feeds and Permissions
Quarterly, review which users have access to your MLS plugin settings and your MLS/vendor account. Remove inactive users and confirm no one has shared credentials with third parties. Check that your data usage remains within MLS policy—if you’re scraping listings for a secondary purpose (like market analytics), ensure that’s allowed under your license.
Audit your site’s listing display to confirm attribution text is still present and that no listings are violating rules (e.g., showing sold listings beyond the allowed window). Regular compliance checks prevent small violations from snowballing into access suspension.
Frequently Asked Questions
What is the difference between IDX, RETS, and RESO Web API in WordPress MLS plugins?
IDX is a policy framework that allows brokers to display other brokers’ listings; it’s not a technical protocol. RETS is the older technical standard for data transmission, using XML and complex authentication. RESO Web API is the modern replacement, using RESTful JSON and OAuth, offering faster, more reliable data exchange. Most new plugins support RESO Web API, and it’s the future-proof choice.
Do I need an active MLS membership to use an MLS plugin?
Yes. MLS data isn’t public; you must be an active MLS member (or employed by a member brokerage) and submit an IDX data application to your MLS or vendor. Without approved access and credentials, the plugin cannot connect to the MLS feed.
How often do MLS listings update when using a plugin, and can I adjust the cadence?
Update frequency depends on your plugin settings and MLS rules. Most plugins default to hourly or every 15 minutes. You can adjust this in the plugin’s sync settings, but MLS agreements typically require updates at least once per 24 hours to remain compliant.
Can I customize how listings look on my WordPress site without coding?
Many premium plugins offer visual customizers or template builder integrations (Elementor, Beaver Builder) that let you adjust layouts without code. Free plugins often require CSS or template file edits for significant customization, which involves at least basic HTML/CSS knowledge.
Are there free MLS plugins, and what are their limitations?
Yes, plugins like Easy MLS Listings Import are free but usually support only a few MLSs, lack advanced features (lead capture, custom templates), and offer limited or community-only support. They’re suitable for low-volume, single-MLS sites but not for professional brokerages needing broad coverage and reliability.
How do I troubleshoot a failed MLS connection in WordPress?
First, verify your credentials are correct and your MLS account is active. Check the plugin’s import log for specific error messages (invalid credentials, timeout, API throttling). Enable WordPress debug logging to capture detailed errors. If the issue persists, contact plugin or MLS support with your log file and account details.
Is there any SEO impact from embedding MLS listings on my site?
Native plugin integrations (where listings become WordPress posts) are SEO-positive: each listing is a unique, indexable page with its own URL, title, and meta tags. Iframe-based solutions provide minimal SEO benefit because search engines can’t index iframe content. Use native integration for best SEO results.
What data fields are typically available from MLS feeds, and how do I map them to WordPress?
Common fields include ListPrice, BedroomsTotal, BathroomsFull, LivingArea, PropertyType, ListingStatus, Address, City, StateOrProvince, PostalCode, ListingDescription, and photo URLs. Plugins provide a field mapping interface where you match MLS field names to WordPress post meta keys. Review your MLS’s data dictionary for complete field lists.
How do I handle images and maps for MLS listings in WordPress?
Plugins can download images to your media library or hotlink them from the MLS server. Downloading offers control and CDN delivery but uses storage; hotlinking saves storage but depends on MLS uptime. For maps, integrate Google Maps or Mapbox with an API key, and ensure the plugin geocodes addresses accurately for correct pin placement.
What security considerations should I keep in mind when connecting to MLS feeds?
Store API credentials in wp-config.php or environment variables, not in the database. Use HTTPS for all connections. Restrict WordPress admin access with strong passwords and two-factor authentication. Rotate credentials periodically and immediately if a user with access leaves. Comply with privacy laws (GDPR, CCPA) when handling lead data.
Conclusion
Installing an MLS plugin on WordPress is more than a technical task—it’s the foundation of a successful real estate website that keeps listings current, compliant, and easy for visitors to search. You’ve learned the full process: securing MLS access, choosing the right plugin, configuring feeds, optimizing performance, and troubleshooting common issues. The key is to approach it methodically, starting with proper credentials and a solid hosting environment, then layering on customization and advanced features once the basics are stable.
Now it’s time to implement. Start with a single test page displaying a handful of listings, verify everything renders correctly on mobile, then scale up. Monitor your sync logs weekly, keep your plugin and WordPress core updated, and periodically audit your site for compliance with MLS rules. The effort you put into a well-configured MLS integration pays dividends in search rankings, user trust, and lead generation—far more than any generic template or static listing page ever could.
Was this article helpful?