How to Install a Plugin for WordPress: A Beginner’s Guide
Generating summary...
Installing a WordPress plugin shouldn’t feel like defusing a bomb, but I’ve seen too many beginners approach it that way—hovering nervously over the “Activate” button, worried their entire site might implode. Here’s the thing most tutorials won’t tell you upfront: installing a WordPress plugin is only half the battle. The real skill lies in knowing which plugin to install, when to install it, and how to do it without introducing security holes or performance drags that’ll haunt you months later. Whether you’re adding your first contact form or your fiftieth optimization tool, understanding the full lifecycle—from vetting to activation to ongoing maintenance—will save you countless hours of troubleshooting and keep your site running smoothly.
TL;DR – Quick Takeaways
- Plugins extend WordPress functionality – they add features without coding, but quality varies wildly
- Always vet before installing – check last update date, active installations, reviews, and compatibility
- Two main install methods – directly from WordPress dashboard (easiest) or upload ZIP files (for premium plugins)
- Backup first, test in staging – especially for established sites; conflicts happen more often than you’d think
- Fewer plugins usually means better performance – prioritize well-coded, multipurpose tools over dozens of single-function plugins
- Keep plugins updated – outdated plugins are the #1 entry point for site compromises
Understanding WordPress Plugins
Think of WordPress plugins as apps for your website. Just like your smartphone runs on iOS or Android but needs individual apps for specific tasks, WordPress provides the foundation while plugins add everything from contact forms to entire e-commerce stores. The plugin architecture is what transformed WordPress from a simple blogging platform into the powerhouse running over 40% of all websites on the internet.
The beauty of this system is that you don’t need to write a single line of code to add sophisticated features. Want to optimize your images automatically? There’s a plugin. Need to accept payments? Several plugins handle that. Looking to improve your search engine rankings? Dozens of SEO plugins compete for your attention. But here’s where beginners often stumble: not all plugins are created equal, and installing the wrong ones can actually hurt your site more than help it.
How Plugins Extend WordPress
Plugins hook into WordPress’s core functionality through a system of actions and filters. In practical terms, this means they can modify how your site behaves without changing WordPress itself. A caching plugin, for instance, intercepts page requests and serves static versions to visitors, dramatically speeding up load times. A security plugin might scan every file upload for malware or block suspicious login attempts from specific IP addresses.
Common plugin categories include:
- SEO tools – Handle meta descriptions, sitemaps, schema markup, and on-page optimization
- Form builders – Create contact forms, surveys, payment forms, and registration systems
- Security solutions – Firewall protection, malware scanning, login security, and backup management
- Performance optimization – Caching, image compression, database cleanup, and lazy loading
- E-commerce platforms – Full shopping cart systems with payment gateways and inventory management
- Page builders – Drag-and-drop interfaces for designing custom layouts without code
Where to Find Plugins
The official WordPress.org Plugin Directory hosts over 60,000 free plugins, all reviewed by the WordPress team before publication. This is your safest starting point. Every listing shows installation counts, user ratings, support forum activity, and most importantly, when it was last updated. A plugin that hasn’t been touched in three years should raise immediate red flags, no matter how good the reviews look.
Commercial marketplaces like CodeCanyon, premium plugin developers, and specialized vendors offer paid alternatives with dedicated support and advanced features. There’s nothing wrong with premium plugins—many are exceptional—but the transaction introduces additional vetting responsibility since they’re not vetted by WordPress.org’s team.
Why Beginners Should Vet Plugins Before Installation
I learned this lesson the hard way years ago when a seemingly innocent “social sharing” plugin turned out to inject hidden affiliate links into every page. My site’s credibility took a hit, and Google’s algorithm noticed the sketchy behavior. The plugin had excellent reviews (likely fake), thousands of active installations (possibly inflated), and a polished landing page. What it didn’t have was clean code or honest intentions.
Since then, I’ve developed a pre-installation checklist that’s saved me countless headaches. Let me walk you through what actually matters when evaluating a plugin.
Check for Compatibility, Last Update Date, Active Installations, User Reviews
Start with the basics that WordPress.org displays prominently. The “Tested up to” field tells you the latest WordPress version the developer has verified compatibility with. If you’re running WordPress 6.4 and the plugin was only tested up to 5.8, proceed with extreme caution or skip it entirely.
| Indicator | Green Flag | Red Flag |
|---|---|---|
| Last Updated | Within 3 months | Over 1 year ago |
| Active Installations | 10,000+ users | Under 100 users |
| Support Response | Recent activity in forums | Unanswered questions piling up |
| Star Rating | 4+ stars with 50+ reviews | Under 3 stars or suspiciously perfect 5-star rating |
| WordPress Version | Tested with your version | Two+ major versions behind |
Read actual reviews, not just the star rating. Look for patterns in complaints—if five different users mention the same bug or conflict, that’s real data. Also check the support forums: does the developer respond promptly and helpfully? A plugin with mediocre features but excellent support often beats a feature-rich plugin with an absent developer.
Security Considerations and the Risk of Abandoned Plugins
Abandoned plugins are security landmines waiting to explode. Hackers actively scan for known vulnerabilities in outdated plugins because they’re easy targets. The developer won’t patch the hole, meaning you’re leaving your front door unlocked with a neon “Rob Me” sign in the yard.
Even popular plugins aren’t immune to vulnerabilities. The difference is that active developers patch them quickly and release updates, which is why keeping plugins current is non-negotiable. Set up automatic updates for minor releases, but review major version changes manually since they sometimes introduce breaking changes that need configuration adjustments.
How to Install a Plugin – Step by Step
Now for the actual installation process. WordPress makes this remarkably straightforward, though you have two main paths depending on where your plugin comes from. Let’s walk through both methods with the detail you need to avoid rookie mistakes.

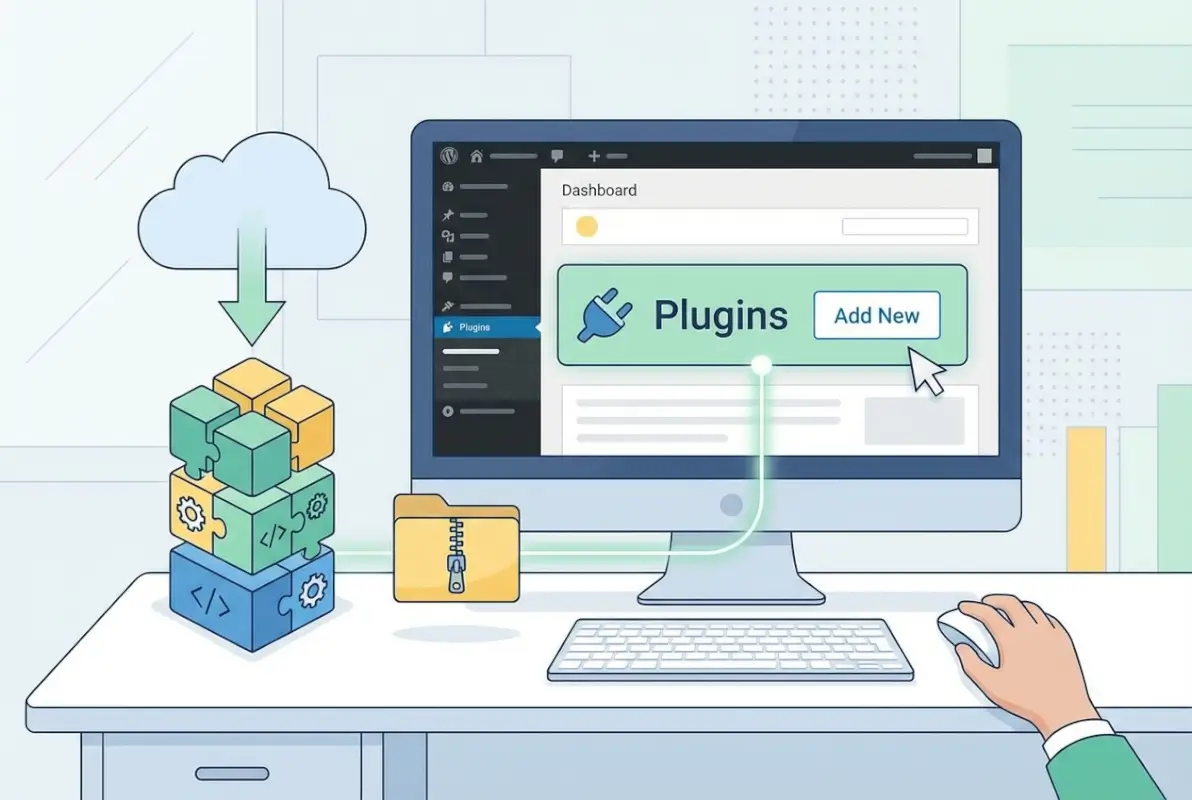
Install from the WordPress Dashboard (Add New)
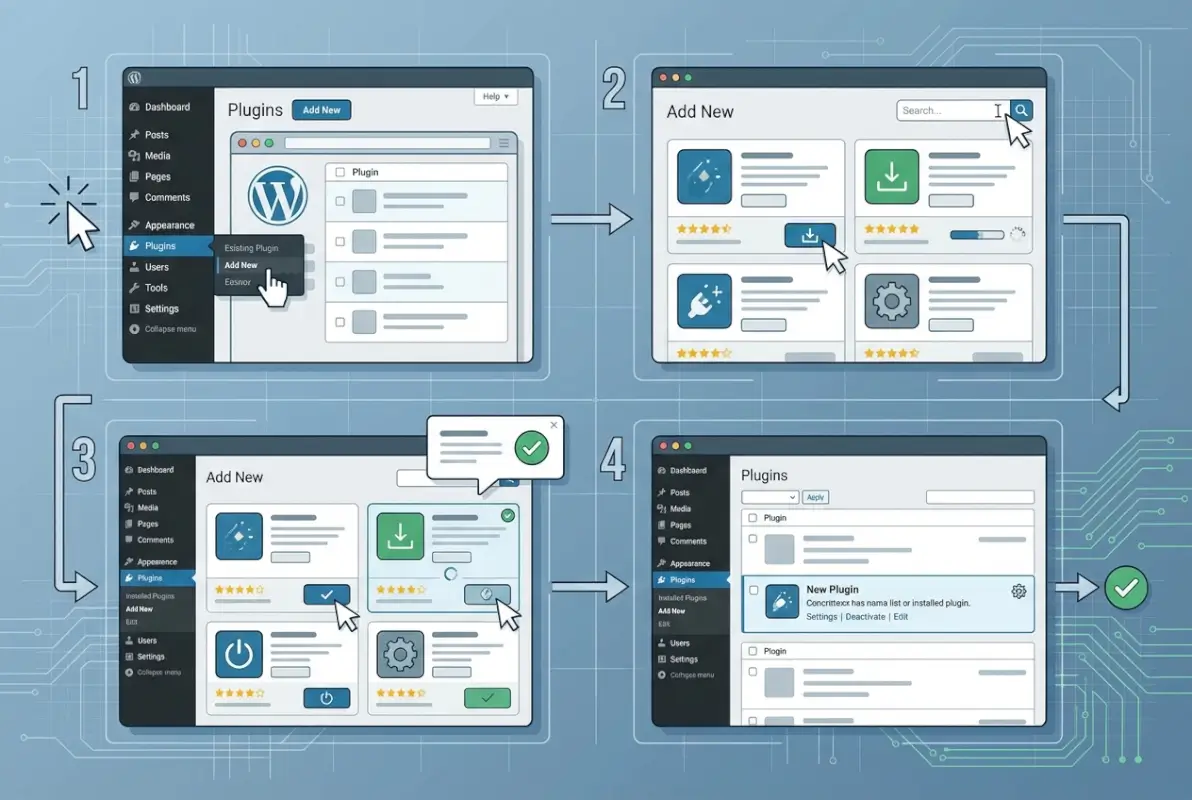
This is the method you’ll use 90% of the time for free plugins from the official directory. Start by logging into your WordPress admin panel (typically yoursite.com/wp-admin). From the left sidebar, hover over “Plugins” and click “Add New” in the submenu that appears.
You’ll land on a screen showcasing featured and popular plugins. Ignore the suggestions for now and use the search box in the upper right corner. Type keywords related to your need—for example, “contact form” or “image optimization”—and WordPress will filter the entire directory in real-time.
The search results show each plugin’s name, author, star rating, number of active installations, and a brief description. Click “More Details” on any plugin to open an overlay with comprehensive information: full description, installation instructions, screenshots, reviews, support forum links, and version history. This is where you apply your vetting checklist before committing.
Once you’ve confirmed the plugin meets your standards, click the “Install Now” button. WordPress downloads the plugin files to your server automatically—you’ll see a progress indicator for a few seconds. When installation completes, the button changes to “Activate.” Don’t rush this step. If you’re working on a live site with significant traffic, consider testing in a staging environment first (more on that later).
Click “Activate” when ready. Most plugins add a new menu item to your WordPress admin sidebar or create a settings page under Settings or Tools. Some will display a welcome message or configuration wizard immediately after activation. Follow any setup prompts to configure basic options, though you can usually skip these and adjust settings later.
Installing via ZIP File Upload
Premium plugins, custom-developed plugins, or plugins from third-party marketplaces come as ZIP files that you’ll upload manually. You might also need this method if you’re installing a specific version of a plugin rather than the latest release (though this is rare and usually only necessary for compatibility troubleshooting).
From Plugins > Add New, look for the “Upload Plugin” button near the top of the page. Click it to reveal a file upload interface. Click “Choose File” and navigate to wherever you saved the plugin’s ZIP file—do not unzip it first; WordPress needs the compressed archive.
Select your ZIP file and click “Install Now.” WordPress uploads the file, extracts it to the plugins directory, and runs the same installation routine as the Add New method. You’ll get a success message if everything works correctly, followed by the same “Activate” button.
If you encounter an “upload size limit exceeded” error, your hosting provider has set a maximum file size for uploads (often around 2MB on shared hosting). You have three solutions: ask your host to increase the limit temporarily, upload the plugin via FTP/SFTP directly to the /wp-content/plugins/ directory, or use a different installation method if available.
When You’d Use a ZIP Upload
Beyond premium plugins, ZIP uploads are useful for installing beta versions during testing, rolling back to previous versions after a problematic update, or deploying custom plugins developed specifically for your site. If you’re working with a developer on custom functionality, they’ll provide a ZIP file that you’ll install this way.
Some organizations use this method for internal plugin distribution when they want to control exactly which version all their sites use, which is common in agency environments or companies managing multiple WordPress installations. You can check out how to install multiple WordPress plugins at once if you’re managing several sites simultaneously.
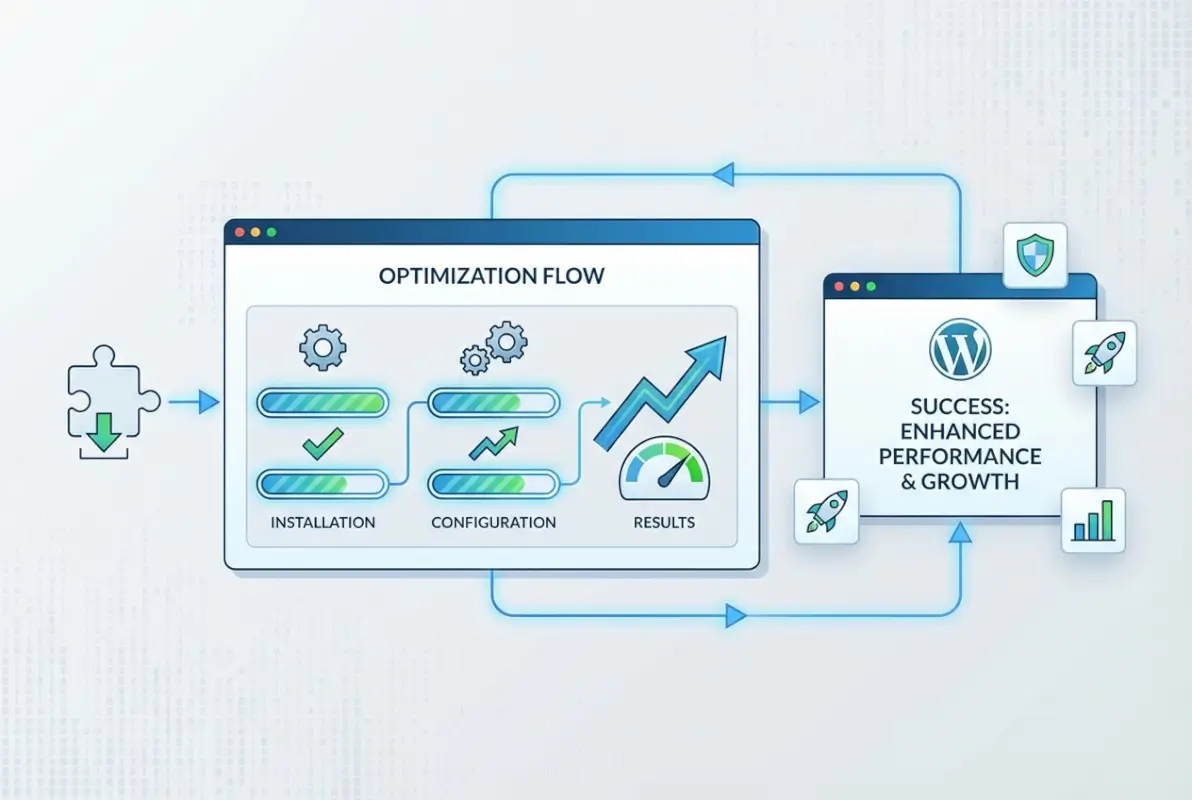
Post-Installation Best Practices
Activation is just the beginning, not the finish line. What you do in the next few minutes determines whether this plugin becomes a valuable asset or a persistent headache. Let’s talk about configuration, maintenance, and the monitoring that keeps everything running smoothly long-term.
Configure Settings Safely
Most plugins come with sensible defaults that work fine for typical use cases. Resist the urge to immediately tweak every available setting just because you can. Instead, run your site with default configurations for a day or two while monitoring performance and functionality. This establishes a baseline that helps you identify what changes actually improve things versus what just feels like “optimization.”
When you do adjust settings, change one thing at a time and test the impact. I’ve watched too many beginners enable every performance feature in a caching plugin simultaneously, then wonder why their site broke. Was it the HTML minification? The aggressive JavaScript optimization? The database cleanup? Nobody knows because everything changed at once. If you’re running a business directory site, consider pro tips for designing a user-friendly business directory that align with your plugin choices.
Be especially careful with plugins that modify your .htaccess file, change permalink structures, or alter database tables. These actions have site-wide implications that aren’t always easy to reverse. Always backup immediately before activating plugins in these categories (security, caching, and SEO plugins are the usual suspects).
Keep a Lightweight Configuration to Avoid Bloat
Plugin bloat is real and it’s sneaky. You install a “simple” contact form, then add social sharing buttons, then a popup builder, then email marketing integration, then analytics tracking, and suddenly you’re loading 15 different JavaScript libraries on every page load. Each plugin adds weight—HTTP requests, database queries, CSS files, scripts—and that accumulates quickly.
Audit your plugin list quarterly. Ask yourself: “Am I actually using this?” and “Could another plugin I already have do this job?” Sometimes you’ll discover you installed a plugin to solve a temporary problem that no longer exists. Other times you’ll find feature overlap between plugins that can be consolidated.
Look for multipurpose plugins that handle several related tasks rather than installing five single-purpose tools. A comprehensive SEO plugin like Yoast or Rank Math includes sitemap generation, meta tag management, schema markup, and social media integration—features that would otherwise require separate plugins. Similarly, all-in-one security suites combine firewall protection, malware scanning, and login security instead of requiring three different plugins.
Update Cadence and How to Handle Automatic Updates
WordPress offers automatic updates for plugins, which sounds convenient but requires nuance. For minor version updates (bug fixes and security patches), automatic updates are generally safe and highly recommended. The risk of an outdated vulnerable plugin far exceeds the risk of a minor update causing issues.
Major version updates—those that introduce new features or significant changes—deserve more caution. These can introduce conflicts with other plugins or themes, especially if you’re running custom code. I enable automatic updates for minor patches but manually review major version releases before updating.
Set aside time weekly or biweekly to check for available updates. WordPress shows a count badge on the Plugins menu item when updates are available. Review the changelog for each update before clicking that enticing “Update All” button. Look for mentions of breaking changes, deprecated features, or new requirements (like increased minimum PHP version).
Backups and Rollback Strategies
Before any plugin installation or update on a production site, create a complete backup. This isn’t paranoia, it’s basic risk management. A good backup includes your database (which stores all your content, settings, and plugin configurations) and your files (which contain WordPress core, themes, plugins, and uploads).
Several excellent backup plugins make this automated: UpdraftPlus, BackupBuddy, and BlogVault are popular choices. Configure them to store backups off-site—on cloud storage like Dropbox, Google Drive, or Amazon S3—so you’re protected even if your entire server fails. If you’re operating a local business directory app like Yelp, reliable backups become even more critical since you’re handling user-generated content.
If a plugin update breaks something, WordPress makes rollback fairly simple. From Plugins > Installed Plugins, you can deactivate the problematic plugin immediately. If you need an older version, you can download previous releases from the plugin’s WordPress.org page (look for the “Advanced View” link near the download button) and install via ZIP upload. Some backup plugins include one-click rollback features that restore everything to a previous state in seconds.
Vetting and Selecting Plugins (For Beginners)
Let’s dig deeper into the evaluation process because this is where beginners most often go wrong. The WordPress plugin directory offers immense choice, which paradoxically makes choosing harder. When you search for “contact form,” you’ll find hundreds of options ranging from simple to complex, free to freemium to premium, and everything in between.

How to Evaluate a Plugin Before Adding It
Beyond the basic metrics we covered earlier, look at the developer’s track record. Click through to their WordPress.org profile to see what other plugins they maintain. A developer with multiple successful plugins that are all actively maintained is a better bet than someone with a dozen abandoned projects and one semi-current plugin.
Check if the plugin has a proper website beyond WordPress.org. Professional developers typically maintain dedicated documentation sites, support portals, and sometimes communities around their plugins. This infrastructure suggests they’re invested in the long-term success of their product rather than releasing it and moving on.
| Evaluation Factor | Why It Matters | How to Check |
|---|---|---|
| Code Quality | Affects performance and security | Check reviews for speed complaints; look for WordPress coding standards compliance |
| Support Quality | Determines how quickly issues get resolved | Read support forum threads; note developer response times and tone |
| Feature Scope | Bloated plugins slow your site | Does it do exactly what you need, or is it packed with unrelated features? |
| Update Frequency | Shows active maintenance and security attention | Review changelog for regular, meaningful updates |
| Compatibility | Prevents conflicts with your setup | Check tested WordPress version, PHP requirements, and known conflicts |
Read the plugin’s requirements carefully. Some require specific PHP versions or WordPress versions that your hosting might not support. Others have dependencies on other plugins or services (like an API key from an external service). Understanding these requirements upfront prevents frustrating installation failures.
Developer Reputation and Plugin Reviews
Not all five-star ratings are trustworthy. Look for detailed reviews that describe specific use cases and experiences. “Great plugin!” tells you nothing; “I used this to migrate 5,000 posts from Drupal and it handled custom fields perfectly, though the import took 3 hours” gives you real information.
Pay attention to how developers respond to negative reviews. Do they defensively dismiss complaints, or do they acknowledge issues and explain what they’re doing to fix them? A developer who engages constructively with criticism is someone you want maintaining code on your site.
Check if the plugin has been featured or recommended by reputable WordPress resources. While not definitive, endorsements from Torque or other established WordPress publications carry more weight than random blog mentions.
Alternatives to Plugins When Possible
Sometimes the best plugin is no plugin at all. WordPress has grown increasingly capable out of the box, and modern themes include functionality that once required separate plugins. Before installing anything, check if your theme already handles the feature you need.
Many themes now include built-in contact forms, social sharing buttons, schema markup, and even page builders. Using these native features is almost always faster and more stable than adding external plugins. For promoting a business on Facebook via your directory, you might find that your theme’s social integration is sufficient without additional plugins.
Some features can be handled with small code snippets added to your theme’s functions.php file (or better yet, a custom plugin you create for site-specific modifications). A few lines of code to add custom post types or modify excerpt length is often more efficient than installing a 50,000-line plugin that happens to include that feature among hundreds of others.
Security and Maintenance Spotlight
Security deserves its own deep dive because plugin vulnerabilities account for the majority of WordPress site compromises. The statistics are sobering: outdated plugins represent the single largest attack vector for WordPress sites, far exceeding vulnerabilities in WordPress core itself.
Keeping Sites Secure with Plugins
When a security researcher discovers a vulnerability in a popular plugin, there’s typically a responsible disclosure process: the researcher contacts the developer privately, the developer creates a patch, and then the vulnerability is announced publicly after the patch is available. This window between patch release and public disclosure is critical—you need to update immediately when security updates are announced.
Subscribe to security-focused WordPress resources to stay informed. The WordPress News blog announces major security issues, and specialized services like Wordfence provide detailed vulnerability reports. Many security plugins also include features that alert you to known vulnerabilities in your installed plugins.
Consider implementing a Web Application Firewall (WAF) either at the hosting level or through a plugin like Wordfence or Sucuri. These tools block common attack patterns before they reach your WordPress installation, providing an additional security layer beyond keeping plugins updated.
How to Respond to Zero-Days or Discovered Vulnerabilities
Occasionally, a vulnerability becomes public before a patch exists—the dreaded zero-day. If this happens with one of your installed plugins, you have limited options: deactivate the plugin immediately until a patch is available, implement WAF rules that specifically block exploitation attempts, or temporarily take the affected functionality offline.
This is why choosing plugins with active, responsive developers matters so much. The difference between a patch released within hours versus weeks can mean the difference between a secure site and a compromised one. Track the plugin’s support forums and official communication channels when a vulnerability is announced so you know the moment a fix is available.
Troubleshooting Flowchart for Conflicts
When something goes wrong after installing or updating a plugin, systematic troubleshooting saves time and reduces stress. Here’s the process I follow:
- Identify symptoms precisely – What exactly isn’t working? Be specific: “checkout page returns a 500 error” not “site is broken.”
- Deactivate the most recently changed plugin – If that resolves the issue, you’ve found your culprit.
- If problem persists, deactivate all plugins – This tells you if the issue is plugin-related at all.
- If site works with plugins off, reactivate one at a time – Test functionality after each activation until the problem reappears.
- If site still broken with all plugins off, switch to a default theme – This isolates whether it’s a theme conflict.
- Still broken? Check server error logs – Your hosting control panel usually provides access to error logs that reveal PHP errors, memory exhaustion, or other server-level issues.
When to Contact Plugin Support or a Developer
If you’ve followed the troubleshooting flowchart and isolated the problem to a specific plugin, it’s time to reach out. Good plugin developers want to know about bugs and conflicts—they improve the product for everyone. When contacting support, provide:
- WordPress version, plugin version, theme name and version
- Other active plugins (especially those that might conflict)
- PHP version and relevant hosting information
- Specific steps to reproduce the problem
- Any error messages from logs or debug mode
- Screenshots if applicable
This context helps developers diagnose issues quickly. “It doesn’t work” leads to days of back-and-forth questions; detailed problem reports often get solved in a single response.
If the plugin is abandoned or the developer is unresponsive, you need to make a decision: find an alternative plugin that’s actively maintained, hire a developer to patch the security issue (and maintain the fork going forward), or remove the functionality entirely. None of these options are ideal, but all are better than running vulnerable code.
Real-World Scenarios and Quick Checks
Let’s ground all this theory in practical application. Here are the plugins I recommend for new sites, organized by priority and function. These represent the minimum viable plugin set for most WordPress installations—you’ll add more based on your specific needs, but this foundation covers essential functionality without bloat.
Quick-Start Checklist for a New Site
When I set up a new WordPress site, I install plugins in this order:
- Security first – Wordfence or Sucuri Security to establish baseline protection
- Backups immediately – UpdraftPlus with automated daily backups to cloud storage
- Performance fundamentals – WP Rocket or W3 Total Cache for basic caching
- SEO basics – Yoast SEO or Rank Math for sitemaps and meta management
- Essential functionality – Contact Form 7 or WPForms for user communication
After installing each plugin, I test core site functionality: can visitors access pages? Do forms submit correctly? Are images loading? Does the admin panel still work smoothly? This gradual approach catches conflicts immediately rather than wondering which of ten simultaneously installed plugins caused the white screen of death.
Common Beginner Mistakes to Avoid
After helping dozens of beginners with their WordPress sites, I’ve noticed these patterns repeatedly:
- Installing plugins “just in case” – Every unused plugin is unnecessary attack surface and potential performance drag. Only install what you need right now, not what you might possibly use someday.
- Ignoring update notifications – Those little update badges aren’t suggestions, they’re security alerts. Outdated plugins get compromised.
- Using nulled (pirated) premium plugins – Beyond the ethical and legal issues, nulled plugins often contain malware. If you can’t afford a premium plugin, find a quality free alternative.
- Installing plugins from sketchy sources – Stick to WordPress.org, reputable marketplaces, and official plugin developer sites. Random file-sharing sites and “free premium plugin” offers are traps.
- Never testing in staging – If your site has real traffic and revenue implications, investing in a staging environment pays for itself the first time it prevents a production disaster. When you’re looking to monetize a business directory, downtime costs real money.
- Failing to remove deactivated plugins – Deactivating a plugin doesn’t remove its files from your server. Fully delete plugins you’re not using to eliminate unnecessary code.
I’ve seen sites with 80+ installed plugins, of which 30 were deactivated and another 20 were redundant or unused. The site loaded in 8+ seconds and had persistent database errors from conflicting plugins trying to modify the same tables. After a thorough audit and cleanup—reducing to 15 carefully chosen plugins—load times dropped under 2 seconds and errors vanished.
Frequently Asked Questions
How do I install a WordPress plugin?
Log into your WordPress admin panel, navigate to Plugins > Add New, search for your desired plugin, click “Install Now,” then “Activate.” For premium plugins, use the “Upload Plugin” button to install a ZIP file. Always backup before installing on production sites and test functionality after activation.
Can I install plugins on WordPress.com vs WordPress.org?
WordPress.com (the hosted service) only allows plugins on Business and higher plans. WordPress.org (the self-hosted software) allows unlimited plugin installation on any hosting. If you’re on a free or Personal WordPress.com plan, you cannot install plugins. Consider upgrading or switching to self-hosted WordPress for full plugin access.
How do I know if a plugin is safe to install?
Check the last update date (within 3 months is ideal), active installations (10,000+ is reassuring), user ratings and reviews, WordPress version compatibility, and support forum responsiveness. Avoid plugins that haven’t been updated in over a year or have numerous unresolved support complaints. Always download from WordPress.org or official developer sites, never from third-party file hosts.
What should I do if a plugin breaks my site?
Access your site via FTP or hosting control panel file manager. Navigate to /wp-content/plugins/ and rename the problematic plugin’s folder (add “-disabled” to the name). This deactivates it without using the WordPress dashboard. Restore from backup if necessary. Contact plugin support with error details once your site is functional again.
How many plugins should I use on a site?
There’s no magic number—quality matters more than quantity. Some sites run smoothly with 30 well-coded plugins; others struggle with 5 poorly optimized ones. Focus on using lightweight, well-maintained plugins that serve clear purposes. Audit quarterly to remove unused plugins and consolidate overlapping functionality. Monitor page load times and server resources to gauge impact.
How often should I update plugins?
Update security patches immediately when announced. Review and apply other updates weekly or biweekly during scheduled maintenance windows. Enable automatic updates for minor versions but manually review major version changes. Never go more than a month without updating, as vulnerabilities discovered in popular plugins get exploited within days of public disclosure.
Can I use free plugins or do I need premium?
Many excellent free plugins provide professional functionality. WordPress.org hosts over 60,000 free plugins covering almost every imaginable need. Premium plugins often add advanced features, priority support, and regular updates. Start with quality free options and only purchase premium versions when you need specific features that free alternatives don’t provide. Free doesn’t mean inferior.
How do I remove a plugin cleanly?
First deactivate the plugin from the Plugins page, then click “Delete.” WordPress removes the plugin files and typically cleans up database tables it created. Some plugins leave settings or database entries behind—check the plugin documentation for specific uninstall procedures. For complete removal, consider using a plugin like WP-Optimize to clean residual data after deletion.
Do plugins slow down my site?
Poorly coded plugins can significantly impact performance by adding excessive database queries, loading large scripts on every page, or performing inefficient operations. Well-optimized plugins have minimal impact. Use tools like Query Monitor or P3 Plugin Profiler to measure each plugin’s performance cost. Focus on cumulative impact rather than raw plugin count.
How do I test plugins safely with staging and backups?
Create a staging site (duplicate of your production site) through your hosting control panel or using a plugin like WP Staging. Install and test new plugins on staging first, verifying all functionality works correctly. Always create a complete backup before installing plugins on production sites. Use backup plugins like UpdraftPlus or BackupBuddy with automated cloud storage to ensure recovery options.
Taking Your Next Steps with Confidence
Installing WordPress plugins transforms from intimidating to empowering once you understand the complete process—from intelligent selection through installation to ongoing maintenance. The key insight beginners often miss is that choosing the right plugin matters exponentially more than mastering the installation mechanics, which are deliberately simple.
Start conservatively with your new WordPress site. Install only essential plugins initially, getting comfortable with how each one behaves before adding the next layer of functionality. Monitor performance metrics as you build out your plugin set—tools like GTmetrix or Google PageSpeed Insights provide objective data about how your choices affect load times and user experience.
Remember that every plugin represents a tradeoff: you gain functionality but assume responsibility for keeping it updated, monitoring for conflicts, and ensuring it doesn’t introduce security vulnerabilities or performance bottlenecks. Make these tradeoffs intentionally rather than clicking “Install” impulsively whenever you discover a new tool with appealing features.
Your Plugin Installation Action Plan
Identify one specific problem you need to solve this week. Research three plugins that address it. Compare them using the vetting checklist we covered. Install your top choice in a staging environment or on a test site first. Document the settings you configure. Only then promote to production with a fresh backup in place. This methodical approach prevents 90% of plugin-related problems beginners encounter.
The WordPress plugin ecosystem represents one of the platform’s greatest strengths—the ability to extend core functionality without writing code makes sophisticated website features accessible to non-developers. But with great power comes responsibility for careful curation and maintenance.
As you grow more confident, explore the official WordPress Learn resources for deeper dives into specific plugin categories and advanced techniques. The WordPress community actively creates training materials, documentation, and support forums that remain remarkably accessible even to complete beginners. You’re not alone in learning this system.
Your WordPress site is a living project that will evolve with your needs. Plugins you install today might get replaced with better alternatives tomorrow, or become unnecessary as WordPress core adds similar functionality. Stay curious, remain security-conscious, and never stop learning. The investment you make in understanding plugin management pays dividends through more stable, secure, and performant sites that serve your visitors effectively for years to come.
Was this article helpful?