How to Install Plugins in Vim: A Beginner’s Guide

Generating summary...
If you’ve ever opened Vim for the first time, you know the feeling—pure power at your fingertips, but also a learning curve steeper than a mountain trail. Here’s what most guides won’t tell you upfront: the real magic of Vim isn’t in its default configuration, it’s in how you extend it. Plugins transform Vim from a capable text editor into a personalized development environment that adapts to your workflow, not the other way around.
What’s genuinely surprising is how simple plugin management has become. Gone are the days when installing a Vim plugin meant wrestling with complex directory structures and manual file placement. Modern tools like vim-plug have streamlined the entire process to just a few lines in your configuration file. Yet many beginners still avoid plugins entirely, thinking they’ll “learn vanilla Vim first”—a noble goal that often leads to frustration when they see experienced developers flying through their editors with features that seem like magic.
TL;DR – Quick Takeaways
- Plugin managers are your friend – vim-plug offers the easiest entry point with parallel installs and lazy-loading capabilities
- Vim 8+ has built-in package support – no external tools needed if you prefer a minimalist approach
- Start small – begin with 2-4 essential plugins (file explorer, color scheme, fuzzy finder) before expanding
- Update regularly – plugins need maintenance just like any other software dependency
- Git is required – most modern plugin workflows rely on cloning repositories directly
Understanding the Plugin Installation Landscape
The first decision you’ll face is choosing between manual installation, using a plugin manager, or leveraging Vim’s built-in package system. Each approach has its place, and understanding the trade-offs helps you make an informed choice rather than blindly following tutorials.

Manual installation involves placing plugin files in specific directories within your Vim runtime path. While this gives you complete control, it quickly becomes unwieldy as your plugin count grows. You’re responsible for tracking updates, managing dependencies, and ensuring proper file placement—tasks that automation handles much better.
The Manual Approach: Pack Directories
Vim 8 introduced a native package system that uses ~/.vim/pack/ directories. Inside this structure, you create vendor directories (the name doesn’t matter functionally) and within those, either start or opt subdirectories. Plugins in start load automatically on Vim startup, while opt plugins load on-demand using the :packadd command.
This approach works well if you’re managing just a handful of plugins and prefer not to install additional tools. The downside? Updating plugins means manually pulling changes from repositories, and there’s no built-in way to track which plugins need updates.
Plugin Managers: Automation for Sanity
Plugin managers automate the entire lifecycle—installation, updates, and removal. They handle dependency resolution, generate help tags, and many support advanced features like lazy-loading to keep your Vim startup fast even with dozens of plugins installed.
| Manager | Key Strength | Best For |
|---|---|---|
| vim-plug | Parallel installation, minimal config | Beginners & speed-focused users |
| Pathogen | Simple runtime path management | Minimalists who want basic automation |
| Vundle | Inspired by Ruby’s Bundler | Users from Ruby backgrounds |
| dein.vim | Advanced caching, fastest load times | Power users with many plugins |
| Volt | Plugin locking, reproducible builds | Teams needing consistent environments |
The plugin manager you choose largely depends on your comfort level and specific needs. For most beginners, vim-plug strikes the perfect balance between simplicity and power. It’s actively maintained, well-documented, and handles the common cases beautifully without requiring you to learn complex configuration syntax.
Choosing Your Plugin Manager
When you’re staring at comparison charts and GitHub stars trying to make the “perfect” choice, remember this: the best plugin manager is the one you’ll actually use consistently. That said, let’s break down the practical differences that matter in day-to-day editing.
vim-plug: The Modern Standard
vim-plug has become the de facto recommendation for good reason. Its single-file architecture means installation is literally just downloading one file to your autoload directory. The configuration syntax is clean and intuitive—just list your plugins between call plug#begin() and call plug#end() blocks in your vimrc.
What sets vim-plug apart is its parallel installation capability. When you run :PlugInstall, it fetches multiple plugins simultaneously, dramatically reducing setup time compared to sequential managers. I remember switching from Vundle and being genuinely surprised when my 20-plugin setup installed in under 10 seconds instead of the minute-plus I was used to.
Lazy-loading is another killer feature. You can configure plugins to load only when needed—for example, loading your Markdown preview plugin only when editing .md files. This keeps startup time fast even as your plugin count grows. Many developers maintain 50+ plugins with sub-second startup times thanks to thoughtful lazy-loading configuration.
Historical Options: Still Relevant?
Pathogen was revolutionary when it launched, introducing the concept of keeping each plugin in its own isolated directory. While its approach is now standard, newer managers have built on that foundation with additional automation. Pathogen still works perfectly fine if you prefer its simplicity, but you’ll handle more tasks manually.
Vundle brought the declarative plugin list concept from Ruby’s Bundler to Vim. It’s mature and stable, though development has slowed. If you’re already using Vundle and it works for your workflow, there’s no urgent need to migrate—but new users will find vim-plug’s parallel installation noticeably faster.
dein.vim targets power users who want absolute maximum performance. It implements sophisticated caching mechanisms and async loading that can shave precious milliseconds off startup time. The configuration is more complex, making it less ideal for beginners, but if you’re managing 100+ plugins and every millisecond counts, dein.vim deserves consideration.
Environment Considerations
Your operating system and Vim variant influence some practical details. On Unix-like systems (Linux, macOS), most plugin managers work identically. Windows users need to ensure Git is in their PATH and may need to adjust directory separators in some configurations. For those who want to install plugins efficiently, the process is similar across different tools.
Neovim users can use any Vim plugin manager, but some Neovim-specific managers like packer.nvim take advantage of Neovim’s Lua integration for even better performance. However, vim-plug works excellently with both Vim and Neovim, making it a safe choice if you switch between them or aren’t sure which you’ll stick with long-term.
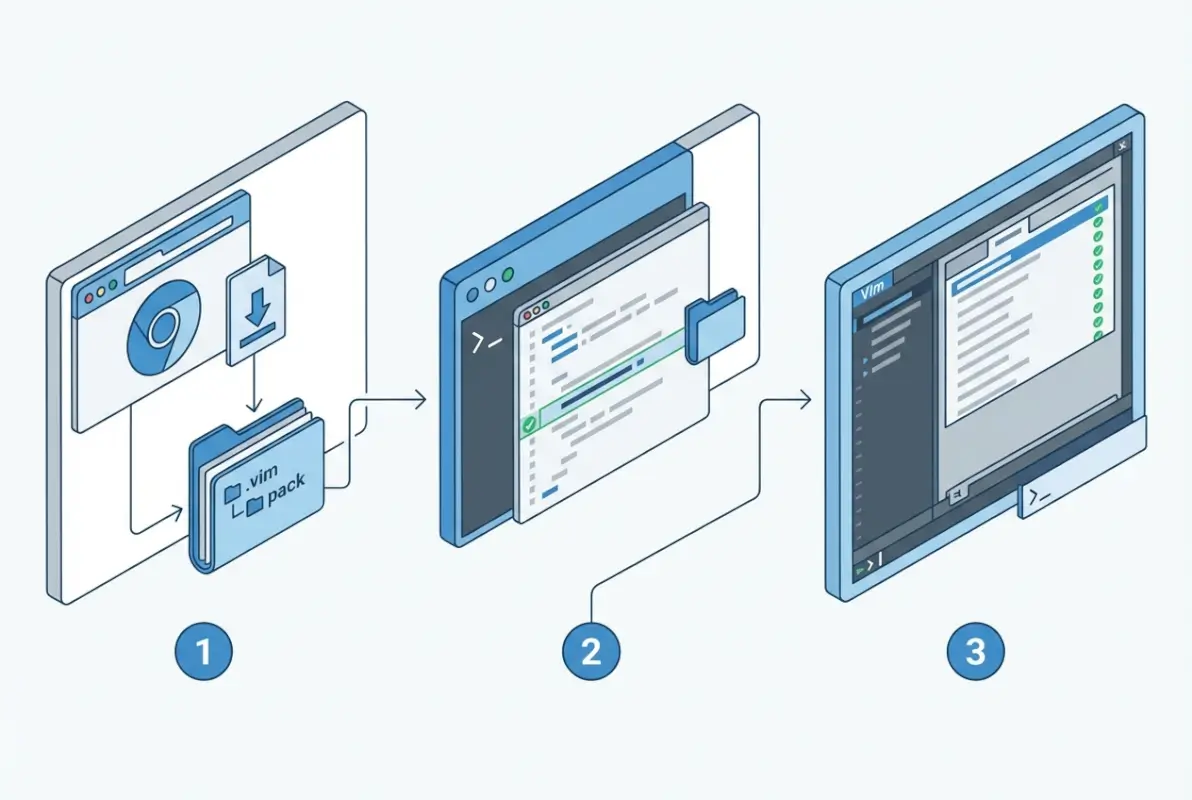
Installing Plugins with vim-plug: Step-by-Step
Let’s get practical. Here’s exactly how to go from zero plugins to a working setup using vim-plug. This section assumes you’re comfortable opening a terminal but doesn’t require advanced technical knowledge.

Prerequisites Check
Before diving in, verify Git is installed by running git --version in your terminal. If you see a version number, you’re good. If not, install Git using your system’s package manager (apt install git on Ubuntu, brew install git on macOS, or download from Git’s official site for Windows).
Next, locate your vimrc file. On Unix systems, it’s ~/.vimrc. For Neovim, look for ~/.config/nvim/init.vim. If the file doesn’t exist, create it—Vim will automatically load it on startup. Windows users typically find their vimrc at C:\Users\YourUsername\_vimrc.
Installing vim-plug Itself
For Unix/Linux/macOS, run this single command in your terminal:
curl -fLo ~/.vim/autoload/plug.vim --create-dirs \

https://raw.githubusercontent.com/junegunn/vim-plug/master/plug.vim
Neovim users should use this path instead:
sh -c 'curl -fLo "${XDG_DATA_HOME:-$HOME/.local/share}"/nvim/site/autoload/plug.vim --create-dirs \

https://raw.githubusercontent.com/junegunn/vim-plug/master/plug.vim'
Windows users can use PowerShell (run as administrator):
iwr -useb https://raw.githubusercontent.com/junegunn/vim-plug/master/plug.vim |`

ni $HOME/vimfiles/autoload/plug.vim -Force
That’s it. You now have vim-plug installed. No compilation, no complex dependencies, just one file in the right location.
Configuring Your First Plugins
Open your vimrc in any text editor (ironically, you might use nano or VS Code for this if Vim still feels intimidating). Add this basic structure:
call plug#begin('~/.vim/plugged')

" File explorer

Plug 'preservim/nerdtree'

" Fuzzy file finder

Plug 'junegunn/fzf', { 'do': { -> fzf#install() } }

Plug 'junegunn/fzf.vim'

" Color scheme

Plug 'morhetz/gruvbox'

" Git integration

Plug 'tpope/vim-fugitive'

call plug#end()
The structure is straightforward: each Plug line specifies a GitHub repository in the format ‘username/repository’. vim-plug handles cloning, updating, and loading these automatically. When you’re ready to create simple steps for others, this structure serves as a clean template.
Installing and Managing Your Plugins
Save your vimrc and open Vim. Run :PlugInstall and watch as vim-plug opens a split window showing installation progress. Within seconds, all specified plugins download and install. It’s satisfying to watch, honestly.
After installation completes, restart Vim. Your plugins are now active. Try opening NERDTree with :NERDTree or searching files with :Files (from fzf.vim). To activate your new color scheme, add colorscheme gruvbox after the call plug#end() line in your vimrc.
| Command | Purpose | When to Use |
|---|---|---|
:PlugInstall | Install new plugins | After adding Plug lines to vimrc |
:PlugUpdate | Update all plugins to latest versions | Weekly/monthly maintenance |
:PlugClean | Remove unlisted plugins | After deleting Plug lines from vimrc |
:PlugUpgrade | Upgrade vim-plug itself | Occasionally, when vim-plug updates |
:PlugStatus | Check plugin status | Troubleshooting or verification |
Post-Installation Housekeeping
Most plugins generate help documentation that integrates with Vim’s built-in help system. Run :helptags ALL to ensure all help tags are generated. After that, you can read plugin documentation with :help plugin-name—for example, :help NERDTree.
Some plugins require additional configuration to unlock their full potential. For instance, you might want to map NERDTree to a keyboard shortcut for quick access. Add this to your vimrc after the plug#end() call:
nnoremap <C-n> :NERDTreeToggle<CR>Now pressing Ctrl+n toggles the file explorer instantly. Learning to customize keybindings transforms plugins from nice-to-have additions into integral parts of your workflow.
:source ~/.vimrc.Using Vim’s Built-in Package System
If you prefer avoiding external tools entirely, Vim 8 and later include native package management. This approach requires a bit more manual work but gives you complete control without dependencies beyond Git itself.

Directory Structure Explained
Vim’s package system uses ~/.vim/pack/ as the root directory. Inside, you create vendor directories—these can have any name, think of them as organizational categories. Common names include “plugins”, “vendor”, or even specific groupings like “git” or “editing”.
Within each vendor directory, create either start or opt subdirectories. Plugins in start load automatically when Vim launches. Plugins in opt remain dormant until you explicitly load them with :packadd plugin-name.
A typical structure looks like this:
~/.vim/pack/

└── plugins/

├── start/

│   ├── nerdtree/

│   └── gruvbox/

└── opt/

└── vim-markdown/
Installing Your First Manual Package
Let’s install NERDTree using the built-in system. Open your terminal and run:
mkdir -p ~/.vim/pack/plugins/start

cd ~/.vim/pack/plugins/start

git clone https://github.com/preservim/nerdtree.git
That’s all. Restart Vim and NERDTree is available—run :NERDTree to verify. No configuration files to edit, no manager-specific commands to learn. The simplicity is appealing, especially if you’re managing just a few carefully-chosen plugins.
The start vs. opt Decision
Use start for plugins you want available immediately—file explorers, color schemes, basic editing enhancements. These load on every Vim session and add to your startup time (usually negligibly for well-written plugins).
Use opt for language-specific tools or plugins you need occasionally. For example, if you rarely edit Markdown, place vim-markdown in opt and load it on-demand:
:packadd vim-markdownYou can add this command to filetype-specific autocommands, loading plugins automatically when opening relevant files without impacting startup for unrelated work. This manual lazy-loading achieves the same goal as plugin manager features but requires more configuration on your part.
Updating and Maintaining Manual Packages
The downside of manual management surfaces during updates. You must cd into each plugin directory and run git pull individually. With two or three plugins this is manageable, with twenty it becomes tedious. Some users write shell scripts to automate this:
#!/bin/bash

for dir in ~/.vim/pack/plugins/start/*/; do

echo "Updating $(basename "$dir")"

cd "$dir" && git pull

done
Save this as update-vim-plugins.sh, make it executable with chmod +x, and run it monthly to keep plugins current. It’s not as elegant as :PlugUpdate, but it works without external dependencies. This approach helps you organize business directory maximum usability by keeping your tools maintained.
Discovering and Curating Your Plugin Collection
With installation mechanics covered, the real question becomes: which plugins should you actually install? The Vim plugin ecosystem contains thousands of options, ranging from essential utilities to obscure one-trick tools. Starting with a curated shortlist prevents both decision paralysis and configuration bloat.

Essential Starter Plugins
Every beginner benefits from a file explorer. NERDTree remains popular despite newer alternatives like vim-dirvish or netrw enhancements. It provides a familiar tree-view sidebar that makes navigation intuitive for those transitioning from GUI editors. The command :NERDTreeToggle becomes muscle memory within days.
Fuzzy finders dramatically improve large project navigation. fzf.vim integrates the blazing-fast fzf command-line tool with Vim, letting you find files, buffers, or text patterns by typing partial matches. It’s the difference between scrolling through directory trees and jumping directly to UserAuthCo by typing “userau”.
Visual themes might seem superficial, but spending hours staring at text makes aesthetics matter. gruvbox offers a warm, retro palette that’s easy on the eyes. Solarized provides scientifically-designed contrast ratios. Nord brings modern, cool-toned minimalism. Pick one that feels comfortable—you’ll be more motivated to use Vim when it looks inviting.
Git integration via vim-fugitive transforms Vim into a Git powerhouse. Run :Git blame to see who wrote each line, :Git diff for split-view comparisons, or :Git commit without leaving your editor. Once you experience inline Git workflows, switching to a separate terminal feels clunky.
Vetting Plugins Before Installation
Not all plugins are created equal. Before adding one to your vimrc, check its GitHub repository. Look for recent commits—a plugin untouched for three years might work fine, or it might break with recent Vim versions. Active maintenance suggests bugs get fixed and features improve over time.
Read the README thoroughly. Well-maintained plugins document installation quirks, dependencies, and configuration examples. If the documentation is sparse or confusing, that’s a red flag—you’ll struggle to troubleshoot issues later.
Check issue counts and response times. A few dozen open issues isn’t necessarily bad if the maintainer actively responds and closes resolved issues. Hundreds of ignored issues suggest abandonment or an overwhelmed maintainer unable to keep up with bug reports.
Star count provides a rough quality signal but isn’t definitive. A plugin with 500 stars might perfectly solve a niche problem, while a 5,000-star plugin might be overly complex for your needs. Balance popularity with your specific requirements when learning how to market business directory website effectively—the same principles of focused, quality tools apply.
Maintaining Plugin Health
Set a monthly reminder to run :PlugUpdate (or your manual update script). Plugin authors fix security issues, squash bugs, and add helpful features—staying current ensures you benefit from these improvements. Most updates apply seamlessly, though occasionally you’ll need to adjust configuration if a plugin changes its API.
When removing plugins, use :PlugClean to delete their directories completely. Orphaned plugin files accumulate over time, cluttering your setup and potentially causing conflicts. A clean removal prevents ghost configurations from haunting your vimrc.
Periodically audit your plugin list. If you haven’t used a plugin in three months, consider removing it. Each plugin adds cognitive overhead when troubleshooting issues or reading your vimrc. A lean configuration is easier to maintain and faster to load.
Troubleshooting Common Plugin Issues
Even with careful setup, plugins occasionally misbehave. Understanding common failure modes saves hours of frustration when things don’t work as expected.
Plugins Not Loading
If a plugin installs without errors but doesn’t seem to work, first verify it actually loaded. Run :scriptnames to list all loaded scripts—search for your plugin’s name. If it’s absent, Vim isn’t finding it in your runtime path.
For vim-plug users, ensure your call plug#begin() and call plug#end() lines are present and properly matched. A missing end() call prevents all plugins from loading. Also verify plugin declarations use the correct GitHub path format: Plug 'username/repository'.
Manual package users should double-check directory structure. Plugins must be inside ~/.vim/pack/vendor-name/start/plugin-name/ with the exact structure the plugin repository uses. Accidentally placing plugin files one directory level too high or too low breaks loading silently.
Missing or Broken Help Tags
When :help plugin-name returns “Sorry, no help for plugin-name”, help tags weren’t generated. Run :helptags ALL to generate them for all installed plugins. This indexes documentation files, making them searchable through Vim’s help system.
Some plugins don’t include help files at all, relying instead on their GitHub README. This isn’t a bug—it’s a documentation choice. Bookmark the README or check :PlugStatus for quick access to the repository URL when you need reference material.
Lazy-Loading Mysteries
vim-plug’s lazy-loading is powerful but requires careful configuration. A plugin marked with { 'on': 'CommandName' } won’t load until you run that specific command. If you expect autoloading on file types, use { 'for': 'filetype' } instead.
Debugging lazy-loading issues often means temporarily removing the lazy-load configuration to verify the plugin works normally. Once confirmed functional, reintroduce lazy-loading incrementally while testing after each change. It’s tedious but more reliable than guessing at complex conditional logic. When configuring systems this way, the same methodical approach helps you monetize business directory strategies through careful testing.
Platform-Specific Challenges
Windows users occasionally hit path separator issues. Vim expects forward slashes even on Windows, so ~/.vim/ works but ~\.vim\ might not. Some plugins assume Unix-style command availability—they might shell out to grep or find which don’t exist by default on Windows without additional tools.
macOS users rarely face platform issues but should ensure their system Vim is reasonably current. macOS ships with an older Vim version by default—installing via Homebrew with brew install vim provides a modern version with all features enabled.
Linux users generally have the smoothest experience, though distribution package managers sometimes provide outdated Vim versions. If you’re running Vim 7.x, many modern plugins won’t work. Upgrading to Vim 8+ or Neovim solves most compatibility headaches.
vim --noplugin to load without plugins. If the problem disappears, you’ve confirmed a plugin conflict. Binary search through your plugin list to isolate the culprit.Advanced Techniques Worth Learning Early
While technically advanced, a few techniques benefit beginners who invest time learning them upfront. These optimizations prevent future headaches as your plugin collection grows.
Lazy-Loading Strategy
Lazy-loading defers plugin loading until actually needed. A Markdown preview plugin sitting idle while you edit Python wastes resources. Configure it to load only for Markdown files:
Plug 'iamcco/markdown-preview.nvim', { 'do': 'cd app && yarn install', 'for': 'markdown' }The 'for' option tells vim-plug to load this plugin only when opening .md files. Your Python editing sessions start faster because unnecessary plugins stay dormant.
Command-based lazy-loading works similarly. If you rarely use a plugin’s commands, load it on-demand:
Plug 'preservim/vim-pencil', { 'on': 'PencilToggle' }Now vim-pencil only loads when you run :PencilToggle, not on every Vim startup. For occasionally-used tools, this approach significantly reduces startup time.
Managing Multiple Configurations
Some users maintain separate Vim and Neovim configurations, or different setups for work versus personal projects. Vim doesn’t support multiple configuration files natively, but you can use conditional logic:
if has('nvim')

" Neovim-specific plugins

Plug 'nvim-treesitter/nvim-treesitter'

else

" Vim-specific alternatives

Plug 'sheerun/vim-polyglot'

endif
This lets one vimrc file work across different environments. You can also check for feature availability rather than specific Vim flavors, making configurations more portable and future-proof.
Quick Reference: Configuration Snippets
Here are copy-paste-ready configurations for common scenarios. These serve as starting templates you can modify for your specific needs.
Minimal vim-plug Setup
call plug#begin('~/.vim/plugged')

Plug 'preservim/nerdtree'

Plug 'morhetz/gruvbox'

Plug 'tpope/vim-fugitive'

call plug#end()

colorscheme gruvbox

set background=dark

nnoremap <C-n> :NERDTreeToggle<CR>
Built-in Package Commands
" Install a plugin

!mkdir -p ~/.vim/pack/plugins/start

!git clone https://github.com/user/plugin ~/.vim/pack/plugins/start/plugin

" Update plugins (run in shell)

cd ~/.vim/pack/plugins/start/

for dir in */; do cd "$dir" && git pull && cd ..; done

" Load optional plugin

:packadd plugin-name
Essential Plugin Management Commands
" vim-plug commands (run in Vim)

:PlugInstall     " Install plugins listed in vimrc

:PlugUpdate      " Update all plugins

:PlugClean       " Remove unlisted plugins

:PlugUpgrade     " Upgrade vim-plug itself

:PlugStatus      " Check plugin status

" General Vim commands

:helptags ALL    " Generate help tags

:scriptnames     " List loaded scripts

:version         " Check Vim version and features
Resources for Continued Learning
The official vim-plug repository contains comprehensive documentation including advanced configuration examples and troubleshooting guides. The README is exceptionally well-written and covers edge cases most tutorials skip.
For built-in package system guidance, the Vim documentation on packages provides authoritative information straight from the source. It’s dense but accurate, making it invaluable when you need definitive answers rather than opinions.
VimAwesome aggregates popular plugins with installation instructions, screenshots, and configuration examples. It’s useful for discovery when you need functionality but don’t know which plugin provides it. The search and filtering options help you narrow thousands of plugins to relevant candidates.
Reddit’s r/vim community offers helpful advice and troubleshooting assistance. Experienced users frequently share configuration tips and plugin recommendations. The weekly question threads welcome beginner inquiries without judgment.
Frequently Asked Questions
What is the simplest way to install plugins in Vim as a beginner?
Use vim-plug as your plugin manager. Install it with a single curl command, add plugin declarations to your vimrc between plug#begin() and plug#end() calls, then run :PlugInstall in Vim. This approach handles all complexity automatically, letting you focus on using plugins rather than managing installation mechanics.
Should I use vim-plug or Vim’s built-in packages?
vim-plug is better for beginners due to automatic updates, parallel installation, and easy plugin removal. Built-in packages work well if you manage only a few plugins and prefer avoiding external tools. For most users, vim-plug’s convenience outweighs the built-in system’s simplicity, especially as your plugin count grows beyond three or four.
How do I install a plugin and keep it updated?
With vim-plug, add a Plug line to your vimrc specifying the GitHub repository, run :PlugInstall to install, and periodically run :PlugUpdate to fetch the latest versions. For manual packages, clone the plugin repository into ~/.vim/pack/vendor/start/, then cd into that directory and run git pull when you want updates. Automate updates with a monthly reminder.
What is the difference between “start” and “opt” in Vim packaging?
Plugins in the start directory load automatically when Vim launches, becoming immediately available. Plugins in opt remain dormant until you explicitly load them with :packadd plugin-name. Use start for frequently-needed plugins and opt for specialized tools you only need occasionally, reducing startup time and memory usage for typical sessions.
How do I generate help tags for a new plugin?
Run :helptags ALL from within Vim to generate help tags for all installed plugins at once. This command processes documentation files and creates searchable indexes, making plugin help accessible through Vim’s :help command. Plugin managers usually generate help tags automatically during installation, but manual generation solves cases where help seems missing.
Can I install plugins in Neovim and Vim the same way?
Yes, vim-plug and most plugin managers work identically in both. The main difference is configuration file location: Vim uses ~/.vimrc while Neovim uses ~/.config/nvim/init.vim. Some Neovim-specific plugins leverage Lua and won’t work in Vim, but the vast majority of Vim plugins work perfectly in Neovim without modification.
How do I remove a plugin completely?
For vim-plug, delete or comment out the plugin’s Plug line in your vimrc, then run :PlugClean—vim-plug will remove the plugin directory automatically. For manual packages, delete the plugin’s directory from ~/.vim/pack/vendor/start/ or ~/.vim/pack/vendor/opt/. Restart Vim to ensure the plugin is fully unloaded from your runtime environment.
Do I need internet access every time I start Vim to use plugins?
No. Once installed, plugins load from local files on your disk. Internet access is only required during initial installation and when updating plugins. Your Vim setup works fully offline after plugins are installed, making it reliable for work in environments with restricted or unreliable connectivity.
How many plugins should a beginner install initially?
Start with 3-5 essential plugins: a file explorer, color scheme, and one or two quality-of-life tools like a fuzzy finder or Git integration. This provides meaningful enhancement without overwhelming your configuration. Add more plugins gradually as you identify specific needs, letting your setup grow organically with your workflow rather than copying someone else’s 50-plugin configuration.
Can plugins slow down Vim significantly?
Poorly-written plugins or loading too many on startup can impact performance, but well-maintained plugins have minimal overhead. Modern plugin managers support lazy-loading, which defers loading until plugins are actually needed. Most users comfortably run 20-30 plugins with imperceptible startup delay by loading language-specific tools only when editing relevant file types.
Taking Your Vim Setup Forward
You now have everything needed to build a personalized Vim environment that enhances rather than hinders your productivity. The plugin ecosystem transforms Vim from a capable editor into a tailored development environment that grows with your skills and adapts to your workflow.
Start small—seriously. Install three plugins, use them daily until they become second nature, then add one or two more. This incremental approach prevents the overwhelm that comes from configuring twenty plugins simultaneously while still learning Vim’s core functionality. Your muscle memory needs time to absorb new commands and workflows; rushing leads to configuration churn where you constantly add and remove plugins without giving any a fair chance.
Document your choices. Add brief comments in your vimrc explaining why you installed each plugin and what problem it solves. Three months from now when you’re troubleshooting an issue, you’ll appreciate knowing which plugins are essential versus experimental. This practice also makes it easier to help others, potentially helping you create simple steps for colleagues starting their Vim journey.
The beauty of Vim’s plugin ecosystem is its flexibility—there’s no single “correct” configuration. Your setup will differ from every other Vim user’s because your needs are unique. Embrace that diversity rather than chasing someone else’s perfect configuration. The best Vim setup is the one you understand, maintain, and actually use daily.
As you gain confidence, explore advanced topics like custom keybindings, autocommands that trigger on specific events, and even writing simple plugins yourself. But that comes later—for now, focus on mastering installation mechanics and discovering which plugins genuinely improve your editing experience. Happy Vimming!
Was this article helpful?