How to Install Elementor Pro on Localhost: A Developer’s Guide
Setting up Elementor Pro on localhost isn’t just about following installation steps—it’s about building a robust development workflow that mirrors production environments while avoiding licensing headaches. I remember spending hours wrestling with activation errors on my first local Elementor Pro setup, only to discover the issue was something as simple as my domain pattern not matching Elementor’s staging detection logic. That frustrating experience taught me that successful local development hinges on understanding the relationship between your environment configuration, licensing architecture, and deployment strategy from the start.

Most developers approach localhost installation as a technical hurkaround, but the real value lies in creating a repeatable system that accelerates your entire workflow. When you properly configure Elementor Pro locally, you gain the ability to experiment with complex page builders, test third-party integrations safely, and validate client designs before touching production—all without consuming unnecessary license activations or risking live site stability.
TL;DR – Quick Takeaways
- Local development accelerates iteration – Test Elementor Pro features, widgets, and templates safely before deploying to production environments
- Licensing requires strategic planning – Elementor recognizes certain domain patterns (.local, .test, .dev) as staging, but localhost:8080 may trigger activation limits
- Environment parity prevents deployment issues – Match PHP versions, MySQL configurations, and server requirements between local and live setups
- Multiple installation methods exist – Download manually from your account dashboard or activate directly through WordPress admin with proper license connection
- Troubleshooting is predictable – Most local activation problems stem from domain pattern mismatches or exhausted license slots
Local WordPress Development Environments: Options and Tradeoffs
Choosing your local development stack shapes everything downstream—from how easily you can spin up test sites to whether your licensing setup will cooperate. The landscape has evolved significantly, with solutions ranging from all-in-one GUI applications to containerized Docker environments that mirror production infrastructure precisely. Your choice depends on whether you prioritize speed of setup, control over configuration, or team collaboration requirements.
Local by Flywheel (now simply “Local”) has become the de facto standard for WordPress developers who want simplicity without sacrificing functionality. It handles virtual hosts automatically, provides one-click SSL certificates, and integrates seamlessly with staging platforms. The interface abstracts away Apache/Nginx configuration while still giving you access to logs and database management tools. For developers working on client projects with business directory websites, Local’s ability to quickly clone sites and test different PHP versions makes it particularly valuable.
XAMPP, WAMP, and MAMP represent the traditional approach—full-stack servers running on your machine with manual configuration. These solutions give you granular control over every aspect of your environment, which matters when you’re debugging server-specific issues or need to replicate an unusual hosting configuration. The tradeoff is steeper learning curves and more manual management of virtual hosts, SSL certificates, and database permissions.
Docker-based workflows offer maximum flexibility and environment portability, allowing you to define your entire stack in code (docker-compose.yml files). This approach shines in team environments where multiple developers need identical configurations, but requires familiarity with containerization concepts. Tools like DevKinsta and Lando provide WordPress-specific Docker abstractions that balance control with usability.
When evaluating these options, consider three critical factors: how closely you need to mirror production server configurations, whether you’re working solo or in teams, and how frequently you create new development sites. A freelancer building custom Elementor templates might thrive with Local’s simplicity, while an agency managing dozens of client sites might invest in Docker infrastructure for consistency.
Prerequisites and Preconditions
Before you even download Elementor Pro, establishing proper prerequisites prevents 90% of installation frustrations. These foundational requirements aren’t suggestions—they’re hard dependencies that determine whether your local environment will function reliably. Skipping this validation phase typically results in cryptic error messages and wasted troubleshooting time.
Your local WordPress installation must meet specific server requirements that mirror Elementor’s production expectations. PHP 7.4 or higher is mandatory, with 8.0+ recommended for performance and security. Memory limits matter more than developers realize—Elementor’s visual builder with complex layouts can easily consume 128MB, so setting memory_limit to 256MB or 512MB in php.ini prevents timeout errors during editing sessions. The max_execution_time should be at least 300 seconds to accommodate template imports and large page saves.
MySQL 5.6 or MariaDB 10.0 represent minimum database requirements, but version consistency between local and production environments prevents subtle bugs. I’ve seen cases where date field handling differences between MySQL 5.7 and 8.0 caused imported templates to display incorrectly—minor version mismatches create disproportionate headaches during deployment. Most local development tools let you select specific database versions, so align yours with your hosting provider’s configuration from the start.
| Requirement | Minimum | Recommended |
|---|---|---|
| PHP Version | 7.4 | 8.0+ |
| Memory Limit | 128MB | 256MB – 512MB |
| Max Execution Time | 180 seconds | 300 seconds |
| MySQL/MariaDB | 5.6 / 10.0 | 5.7+ / 10.3+ |
Elementor Pro builds on top of the free Elementor plugin—you cannot install Pro without the base plugin active. This architecture means you need both plugins working in tandem, with version compatibility between them. Always update both simultaneously to avoid conflicts, since Pro features often depend on specific Core plugin capabilities. Check your Plugins page to confirm Elementor (free) is installed and activated before proceeding with Pro installation.
Licensing considerations for development sites require upfront planning. Elementor’s licensing system recognizes staging and development environments differently than live sites, with specific domain patterns triggering automatic staging detection. Understanding these patterns before you create your local site URL prevents license activation complications. Your Pro subscription allows activations on both live and staging sites, but the system needs to correctly identify your localhost as a development environment rather than consuming a production activation slot.
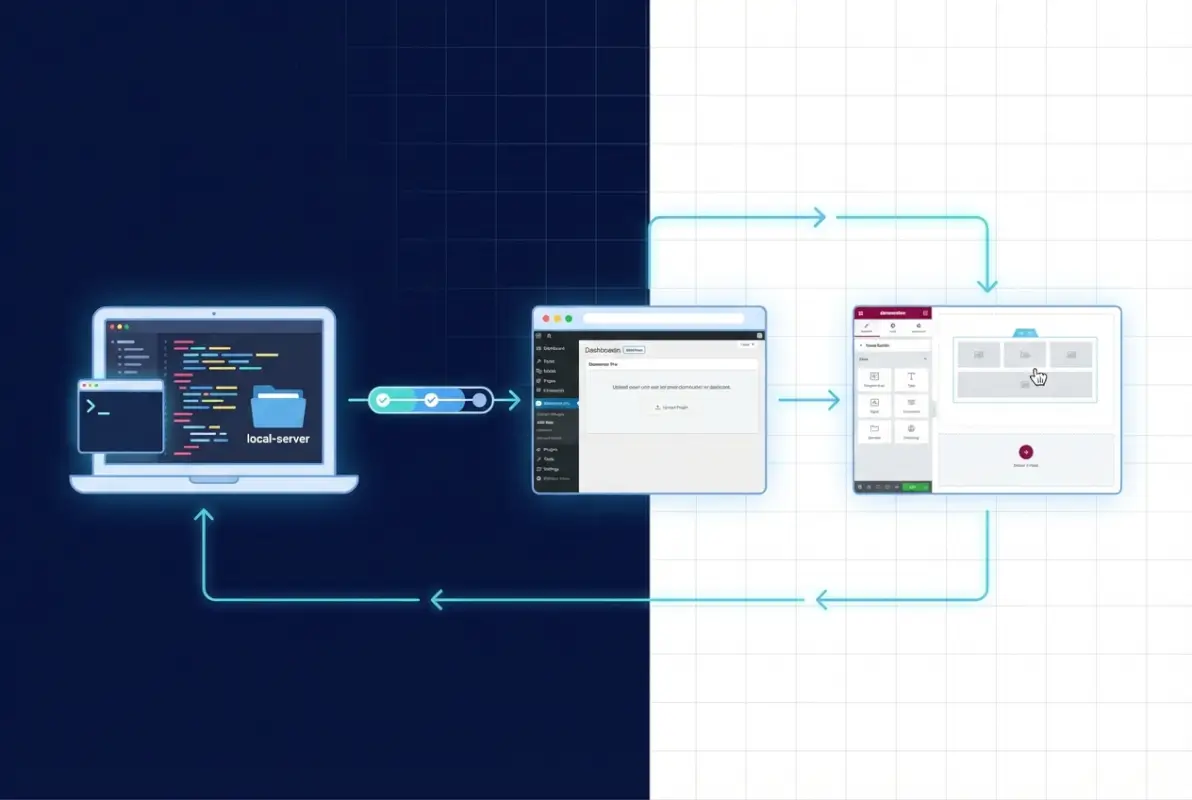
Installing Elementor Pro on Localhost: Methods
Two primary installation methods exist, each suited to different workflows and licensing scenarios. The choice between activating through your WordPress admin versus manually uploading the plugin file depends on whether you’ve already connected your Elementor account to the local site and whether you’re working online or offline during development.
Method A involves activating Elementor Pro directly from your WordPress dashboard when you have an active internet connection and proper account credentials. Navigate to Elementor > Home in your admin panel, then look for the “Connect & Activate” button in the Pro section. This triggers an OAuth-style connection to your Elementor account where you’ll authenticate and select which of your Pro subscriptions to apply to this site. The system automatically downloads the latest Pro version and activates it, handling the entire process through Elementor’s infrastructure.
This approach works elegantly when your local environment uses a domain pattern that Elementor recognizes as staging (mysite.local, mysite.test, staging.mysite.com). The activation system detects these patterns and appropriately categorizes the installation without consuming a production license slot. However, if you’re using localhost:8080 or a non-standard local URL, you might encounter activation restrictions that require manual intervention or license reallocation.
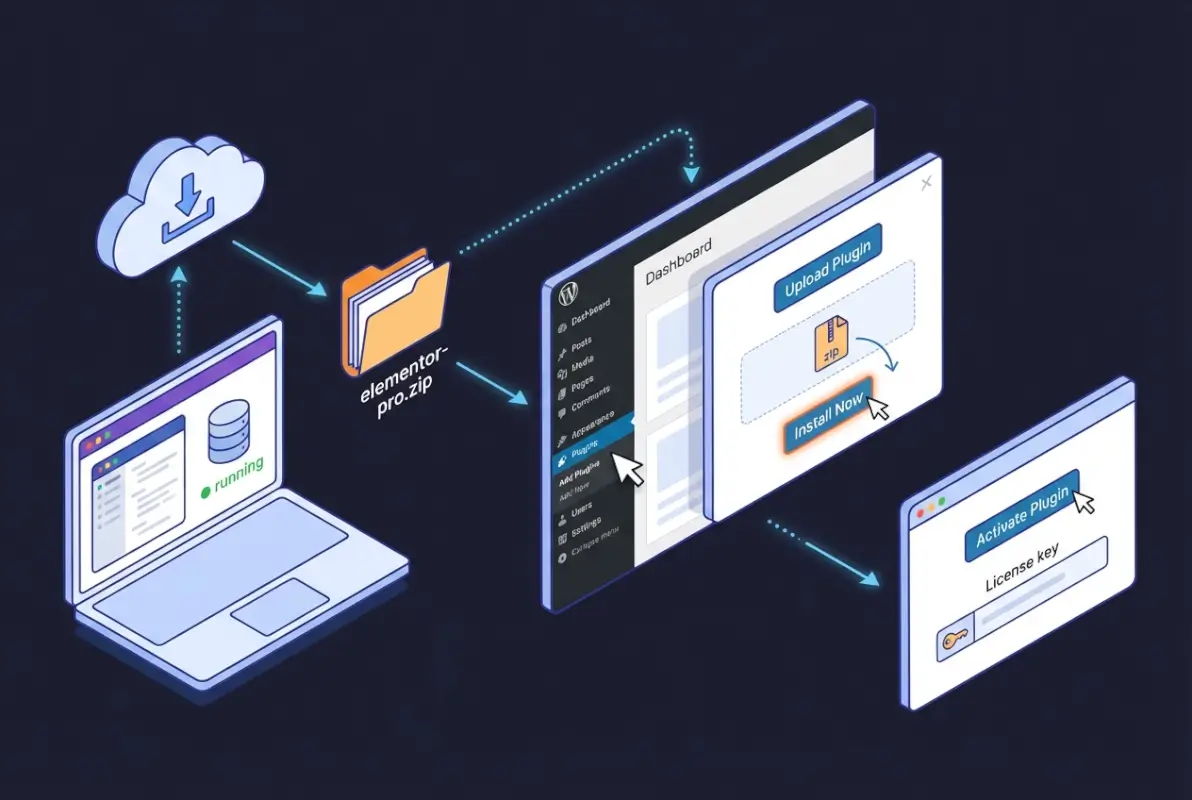
Method B gives you more control through manual plugin installation, which is particularly useful when working offline or managing multiple local sites with the same license. Log into your Elementor account dashboard at elementor.com, navigate to My Account > Subscriptions, and locate your Pro subscription. The download button provides the latest plugin ZIP file that you can save locally and reuse across different development environments.
Upload this ZIP through WordPress admin at Plugins > Add New > Upload Plugin, select the file, click Install Now, and activate once installation completes. Then navigate to Elementor > License and enter your license key to complete activation. This method separates the download from the activation process, giving you flexibility to install the plugin even without internet access (though you’ll still need connectivity for license activation).
The licensing nuances for local installations center around domain pattern recognition. Elementor’s activation servers use pattern matching to determine whether a site qualifies as staging (unlimited activations) or production (limited by your subscription tier). Domains containing keywords like “local,” “staging,” “dev,” or “test” in specific positions typically trigger staging recognition. For example, projectname.local, local.projectname.com, dev.projectname.com, and projectname.test all usually qualify.
Plain localhost URLs with ports (localhost:8080, localhost:3000) sometimes fail to trigger staging detection, potentially consuming a production activation. If you’re managing complex installations like an Elementor Pro directory setup, configure your local development tool to use a .local or .test domain rather than the default localhost address. Most modern local development environments let you customize site URLs during initial setup.
Licensing, Activation, and Domain Patterns for Local Work
Understanding Elementor’s licensing architecture for development environments separates smooth workflows from constant activation frustrations. The system employs pattern-based domain recognition to distinguish between production sites (which count against license limits) and staging/development sites (which receive separate activation allowances). This architecture means your localhost domain structure directly impacts whether you can activate Pro without complications.
Domain patterns that consistently trigger staging recognition include specific keywords and structural formats. Top-level domains .local, .test, and .dev signal development environments, so projectname.local works reliably. Subdomain patterns with staging keywords also register correctly: staging.domain.com, dev.domain.com, test.domain.com all qualify. Path-based staging indicators like domain.com/staging theoretically work but are less reliable in practice because the activation system primarily examines the hostname portion.
Port-based localhost addresses present the most common licensing friction point. URLs like localhost:8080 or 127.0.0.1:3000 don’t inherently communicate staging status to Elementor’s servers, which sometimes treats them as standard production domains. When this happens, activating Pro on such URLs consumes one of your limited production activation slots. If you’ve already maxed out your allowed activations on live client sites, the local activation will fail with an error message about reaching your site limit.
The solution involves either restructuring your local domain or managing activation slots strategically. Most local development tools (Local, XAMPP, Docker) allow custom domain configuration. In Local, you set this during site creation by changing the domain field to projectname.local instead of accepting the default. For XAMPP or MAMP, edit your hosts file and virtual host configuration to map a .local domain to 127.0.0.1. This upfront configuration prevents licensing complications entirely.
If you’ve already activated Pro on a non-recognized localhost domain and exhausted your production slots, you’ll need to deactivate the license from another site to free an activation. Log into your Elementor account dashboard, navigate to My License > Active Sites, and deactivate Pro on one of your production sites or previous local installations. This immediately frees that activation slot, allowing you to activate on your current localhost. Remember to reactivate on the production site once your local development work concludes.
Community discussions on WordPress.org forums reveal edge cases where even properly formatted staging domains occasionally fail recognition. When this happens, the activation system’s pattern matching may have encountered an unexpected URL structure or subdomain combination. The workaround involves contacting Elementor support to manually flag your localhost domain as staging, though this shouldn’t be necessary for standard .local or .test domains. Most developers never encounter this issue when following conventional domain naming practices.
For Docker-based local setups with custom domain configurations, ensure your docker-compose.yml maps your container’s port 80 to a localhost domain that includes staging keywords. Instead of mapping to localhost:8888, configure your hosts file to point projectname.local to 127.0.0.1 and access your site via that domain. The extra configuration step during initial Docker setup prevents all downstream licensing headaches and maintains clear separation between development and production environments.
Step-by-Step: Quick Start Workflow (Consolidated)
A streamlined installation workflow eliminates guesswork and creates a repeatable process for future projects. This consolidated approach integrates server validation, plugin installation, license activation, and feature verification into a single end-to-end checklist. Following these steps in sequence ensures you catch configuration issues early rather than discovering them mid-development.

Step 1: Validate your local WordPress installation and environment. Open your site in a browser to confirm WordPress loads correctly. Navigate to Tools > Site Health to check for critical issues flagged by WordPress itself. Verify PHP version meets requirements (7.4 minimum, 8.0+ preferred) by checking the Site Health info tab or creating a phpinfo() file. Confirm database connectivity works by accessing wp-admin and loading the dashboard without errors. This baseline validation confirms your foundation is solid before adding Elementor complexity.
Step 2: Install and activate Elementor Core (free version). Go to Plugins > Add New, search for “Elementor,” and install the free plugin published by Elementor.com. Activate it immediately after installation. You should see a new Elementor menu item in your admin sidebar. Don’t skip this—Elementor Pro cannot function without the Core plugin as its foundation. The two work as a unified system with Pro extending Core’s capabilities rather than replacing it.
Step 3: Obtain Elementor Pro plugin file and install it. Choose your installation method based on connectivity and preference. For Method A (direct activation), navigate to Elementor > Home and click “Connect & Activate” in the Pro section. Authenticate with your Elementor account when prompted and select your Pro subscription. The system downloads and activates Pro automatically. For Method B (manual upload), download the Pro ZIP from your Elementor account dashboard, then upload via Plugins > Add New > Upload Plugin. Install and activate from the WordPress plugins page.
Step 4: Activate your license and verify Pro features. If you used Method A, activation happens automatically during the connection process. For Method B, navigate to Elementor > License, paste your license key into the input field, and click “Activate.” Watch for a success message confirming activation. If you encounter an error about maximum activations reached, your localhost domain may not have triggered staging detection—revisit the domain pattern guidance in the previous section or deactivate Pro from an unused site to free an activation slot.
Step 5: Validate Pro functionality in your local environment. Create a new page and edit with Elementor. The Template Library button should now show Pro templates when you click it (look for templates marked with a Pro badge). Check that Pro widgets appear in the widgets panel—search for “Posts” or “Forms” to confirm Pro-exclusive widgets are available. Try importing a Pro template to verify your license activation allows full feature access. This validation confirms everything works before you invest time building pages or customizing designs.
This workflow applies consistently regardless of your local development tool choice. Whether you’re using Local, XAMPP, Docker, or another solution, these five steps remain the same because they operate at the WordPress and Elementor level rather than the server stack level. Document any customizations you make (custom domain patterns, php.ini modifications, memory limit increases) so you can replicate the environment quickly for future projects or when assisting team members with their local setups.
Common Pitfalls and Troubleshooting (Local)
Even with careful preparation, local Elementor Pro installations encounter predictable problems that stem from licensing detection, plugin conflicts, or environment misconfigurations. Recognizing these patterns lets you troubleshoot systematically rather than randomly trying solutions until something works. Most issues resolve quickly once you identify which category they fall into.
License activation failures represent the most frequent category of issues, with error messages ranging from “Maximum activations reached” to “Connection failed” to generic HTTP 403 Forbidden errors. The root cause is usually domain pattern misrecognition or exhausted activation slots. Start troubleshooting by examining your site URL structure—does it contain .local, .test, or staging keywords that should trigger automatic staging detection? If you’re using localhost:8080 or a numeric IP with port, that’s likely your culprit.
HTTP 403 Forbidden errors during activation specifically indicate the licensing server is blocking the activation request, often because it detected unusual request patterns or misidentified the domain as suspicious. This happens more frequently on Docker-based local setups or when using reverse proxies that obscure the actual domain. The solution involves ensuring your local environment’s hostname resolution is clean—check that your hosts file correctly maps your chosen domain and that no proxy configurations interfere with outbound HTTPS requests to Elementor’s activation servers.
Plugin conflicts occasionally prevent Elementor Pro from activating or functioning correctly, particularly when other page builders or aggressive caching plugins are installed. If Pro activates successfully but Pro widgets don’t appear or templates fail to import, deactivate all other plugins except Elementor and Elementor Pro. Recheck functionality—if Pro features now work, reactivate other plugins one at a time to identify the conflicting plugin. Common conflicts involve other page builders (Beaver Builder, Divi), certain security plugins with overzealous script blocking, and outdated caching plugins.
For Docker users or those with non-standard local URL configurations, licensing patterns become more complex. If your docker-compose setup uses a custom port mapping like 8080:80 and you access the site via localhost:8080, Elementor’s licensing sees this as a non-staging domain. The workaround requires adding a custom domain to your hosts file (127.0.0.1 projectname.local) and configuring your Docker container’s web server to respond to that domain. In your browser, access projectname.local instead of localhost:8080—this triggers proper staging recognition during activation.
Memory exhaustion during page editing sessions manifests as white screens, incomplete page saves, or “session expired” errors in the Elementor editor. These aren’t licensing issues but environment configuration problems. Increase PHP’s memory_limit to 256MB or 512MB in your php.ini file, and raise max_execution_time to at least 300 seconds. After changing these values, restart your web server (in Local, use the Stop and Start buttons; in XAMPP/MAMP, restart Apache). Test by editing a complex page with many widgets—if the editor remains responsive and saves complete, your memory increase worked.
| Error Type | Most Common Cause | Quick Fix |
|---|---|---|
| Max activations reached | Localhost domain not recognized as staging | Change URL to .local or .test domain |
| HTTP 403 Forbidden | Security software blocking activation | Check firewall rules and proxy settings |
| Pro widgets missing | Plugin conflict or incomplete activation | Deactivate other plugins, recheck license |
| Editor white screen | PHP memory limit too low | Increase memory_limit to 256MB+ |
Template import failures—where templates partially load or fail with nondescript errors—often trace back to PHP settings or missing dependencies. Check that your PHP configuration allows file uploads large enough for template JSON files (upload_max_filesize should be at least 64MB). Verify that PHP’s json extension is enabled, as Elementor’s template system relies heavily on JSON parsing. Most modern PHP installations include json by default, but some minimal Docker images or custom PHP builds might omit it.
Security and Best Practices for Local Development
Local development environments create security considerations that differ from production hosting but still require attention. While localhost isn’t exposed to the internet by default, poor security practices during development create risks when you eventually migrate to live servers or when multiple developers share database dumps that contain sensitive credentials. Establishing security habits early prevents accidentally pushing development credentials or vulnerable configurations to production.
Use strong, unique passwords for your local WordPress admin accounts even though “no one can access localhost.” This habit prevents credentials from leaking into database exports, Git repositories, or documentation that you might share with team members or version control systems. Local by Flywheel makes this easy by auto-generating strong passwords during site creation, but XAMPP users often default to “admin/admin” combinations that create problems downstream. Take thirty seconds to set a proper password using a password manager—your future self will thank you when reviewing database dumps before production deployment.
Keep local WordPress core, themes, and plugins updated to match production versions. Outdated local environments create a false sense of functionality when code that works locally breaks in production due to version differences. This is particularly critical for Elementor Pro because the plugin frequently updates with new features and bug fixes. Running version 3.5 locally while production runs 3.10 means templates you build locally might use deprecated widgets or styling approaches that no longer work correctly when deployed.
Isolate local development databases from production data. Never import a complete production database into localhost without first sanitizing it to remove real customer information, email addresses, or other sensitive data. Tools like WP-CLI’s search-replace command help with this, but manually reviewing tables that store user data provides additional safety. When building features like pricing systems for business directory listings, use dummy data that represents realistic scenarios without containing actual business information.
Back up your local database regularly, especially before major plugin updates or experimental work. Local development tools like Local provide one-click backup functionality, but even XAMPP users can quickly export via phpMyAdmin. These backups save hours when an update breaks something or when you want to revert complex database changes that affected multiple tables. Store backups outside your web root directory to prevent accidental public exposure if you later migrate your local environment to a network-accessible staging server.
Disable error display in production-like scenarios even on localhost. While debugging requires seeing PHP errors, testing final functionality should happen with error display turned off to catch issues that only appear when errors are hidden. This reveals problems like incomplete error handling that might cause white screens in production. Toggle between display_errors = On during development and display_errors = Off during pre-deployment testing via php.ini or wp-config.php configuration.
Testing, QA, and Performance in Localhost
Local development environments serve as your quality assurance laboratory where you validate functionality before exposing it to users or clients. Systematic testing on localhost catches bugs, performance bottlenecks, and design inconsistencies when they’re cheapest to fix. The key is creating a testing methodology that mirrors production usage patterns while leveraging localhost’s advantages of easy reset and rapid iteration.
Test Elementor Pro widgets across different context scenarios—homepage hero sections, sidebar locations, post content areas, and WooCommerce product pages if applicable. Each context can expose different CSS conflicts or JavaScript errors that only appear in specific page builder configurations. Create sample pages representing each major template type your site will use, populate them with realistic content volume, and interact with every widget to verify expected behavior. This might seem tedious initially, but discovering a broken contact form locally beats discovering it after launch.
Performance testing on localhost requires understanding the dramatic speed differences between local SSDs and shared hosting. Pages that load in 200ms locally might take 2-3 seconds on production servers. Use browser developer tools to identify heavy assets, excessive database queries, or render-blocking resources even on fast localhost. The Elementor Pro forms builder can generate particularly heavy pages when multiple conditional logic rules interact—test form pages with all conditions triggered to measure worst-case performance.
Environment version consistency prevents the classic “works on my machine” scenario. Document exact PHP versions, MySQL versions, and enabled PHP extensions in a README file stored with your project. When team members or future you set up a new local environment, this documentation ensures perfect replication. Version drift causes subtle bugs like different date formatting, varying JSON parsing behavior, or missing image processing libraries that only manifest after deployment.
Test your Elementor Pro templates with various content lengths and edge cases. How does that carefully designed three-column layout behave when one column has 10x more content than the others? What happens when someone uploads a 5000px wide image that should display at 300px? These real-world scenarios expose design assumptions that break under actual usage. Testing with dummy content that varies wildly in length catches responsive design issues before they affect live users.
Browser compatibility testing happens most efficiently on localhost where you can quickly reload after CSS adjustments. Test major layouts in Chrome, Firefox, Safari (if available), and at minimum one mobile browser view. Elementor’s responsive editing mode helps, but actual browser testing catches rendering quirks that the editor preview doesn’t show. Pay particular attention to custom CSS you’ve added—it’s the most common source of cross-browser inconsistencies.
Deployment Considerations: Moving from Local to Live
Transitioning from localhost to production represents a critical phase where careful planning prevents broken features and data loss. The challenge lies in preserving your Elementor Pro configurations, templates, and page designs while adapting environment-specific settings like URLs, file paths, and license activations. A systematic deployment workflow turns this potentially risky process into a repeatable procedure.
Export your Elementor templates before initiating database migration to create a safety backup. Navigate to Elementor > Templates, select templates you want to preserve, and export them as JSON files. Store these locally separate from your database—if something goes wrong during deployment, you can reimport templates individually rather than rolling back the entire database. This approach is especially valuable when working on featured listing systems that involve complex custom templates.
Database migration requires careful URL replacement to convert localhost references to production domains. Tools like Better Search Replace plugin or WP-CLI’s search-replace command handle this systematically. Search for your localhost URL (projectname.local) and replace with your production domain (productionsite.com). Don’t forget to search serialized data—Elementor stores widget configurations in serialized arrays where simple find-replace can corrupt data. Proper tools handle serialization automatically, preventing the broken templates that result from manual database editing.
License activation transitions from localhost to production usually happen automatically—deactivate Pro on your local site before deployment, then activate on production using the same license key. If your localhost used proper staging domain patterns (.local, .test), deactivation happens seamlessly. For non-standard localhost URLs that consumed a production activation, deactivate manually through your Elementor account dashboard if deactivation from localhost fails. This frees the activation slot for your production site without complications.
File migrations need attention to paths and permissions. Upload your wp-content/uploads directory with all Elementor-generated content, but verify file permissions match your hosting environment’s requirements (typically 644 for files, 755 for directories). Incorrect permissions cause image loading failures or prevent Elementor from generating new template thumbnails. Most FTP clients let you set permissions during upload—configure this once rather than fixing permissions file-by-file after deployment.
Post-deployment validation should systematically verify every custom Elementor component. Load each template, click through interactive elements (popups, tabs, accordions), submit forms, and check dynamic content widgets. Compare rendered output against localhost screenshots to catch subtle CSS differences caused by server-level caching or CDN optimization. This validation phase catches issues while you’re in “deployment mode” mentally rather than discovering them days later through user reports.
Environment-specific configurations need updating—SMTP settings for form submissions, API keys for dynamic content widgets, and any hardcoded references to localhost file paths. Create a deployment checklist that includes these often-forgotten items. Some developers maintain a wp-config-production.php file with production-specific constants, swapping it in during deployment to prevent accidentally using localhost database credentials or debug settings on live servers.
Frequently Asked Questions
Can I use Elementor Pro on localhost or a local development site?
Yes, Elementor Pro fully supports local development environments including Local by Flywheel, XAMPP, MAMP, Docker, and other localhost setups. The licensing system recognizes staging domain patterns like .local, .test, and .dev as development environments, allowing activation without consuming production license slots. Ensure your localhost uses a recognized staging domain pattern for seamless activation.
How do I activate Elementor Pro license on a local site?
Install Elementor Pro, navigate to Elementor > License in your WordPress admin, and enter your license key. Click Activate to connect with Elementor’s licensing servers. If activation fails, verify your localhost domain uses a staging pattern (.local, .test) or deactivate the license from another site to free an activation slot. Your Elementor account dashboard shows all active installations and allows manual deactivation.
What local environments do Elementor developers recommend?
Local by Flywheel is the most popular choice for WordPress developers due to its one-click setup, automatic SSL certificates, and seamless environment management. XAMPP, WAMP, and MAMP provide more granular control for developers who need specific server configurations. Docker-based solutions offer maximum flexibility and environment replication for team workflows. All work well with Elementor Pro when properly configured.
Are there known licensing caveats for localhost domains like localhost:3000?
Yes, port-based localhost URLs (localhost:8080, 127.0.0.1:3000) may not trigger automatic staging recognition, potentially consuming a production activation slot. Configure your local environment to use a .local, .test, or .dev domain instead of numeric localhost addresses. Most local development tools allow custom domain configuration during initial site creation, preventing licensing complications entirely.
What are best practices when moving from local to live?
Export Elementor templates as JSON backups, use proper database migration tools to replace localhost URLs with production domains, flush permalinks and regenerate Elementor CSS after migration, verify file permissions on uploaded media, and systematically test all custom templates and widgets post-deployment. Deactivate Pro license on localhost before activating on production to avoid activation conflicts.
Do I need different licenses for localhost and production sites?
No, a single Elementor Pro license covers both production and staging/development sites. The licensing system automatically recognizes staging domains, allowing separate activations for development without additional license purchases. Most subscription tiers allow one production site plus unlimited properly formatted staging/development installations using recognized domain patterns.
Why won’t Elementor Pro activate on my XAMPP localhost?
XAMPP typically uses localhost or 127.0.0.1 as the default domain, which may not trigger staging recognition. Configure XAMPP to use a custom .local domain by editing your Windows hosts file and Apache virtual host configuration. Alternatively, deactivate Pro from an unused site to free an activation slot if your localhost domain isn’t recognized as staging.
Can I develop Elementor Pro sites offline without license activation?
You can install Elementor Pro offline using a manually downloaded ZIP file, but license activation requires internet connectivity to verify with Elementor’s servers. Most Pro features are locked until activation completes. For completely offline development, work with Elementor’s free version or plan brief online sessions specifically for license activation before returning to offline work.
How do I prevent localhost URLs from appearing in my production database?
Use proper database migration tools that handle serialized data (Better Search Replace plugin or WP-CLI search-replace) to replace localhost URLs with production domains. Never manually edit the database—serialized Elementor widget configurations break with improper replacements. Test migrations on a staging server before applying to production to catch any missed URL references.
What PHP version should my localhost match for Elementor Pro?
Your localhost PHP version should exactly match your production hosting environment to prevent compatibility issues. Elementor Pro requires PHP 7.4 minimum, with 8.0 or higher recommended for performance and security. Check your hosting provider’s PHP version and configure your local environment to match it precisely, including minor version numbers when possible.
Build Your Development Workflow with Confidence
Installing Elementor Pro on localhost represents more than a technical setup task—it’s establishing a professional development workflow that accelerates your entire WordPress process. When you properly configure licensing, validate environment prerequisites, and understand domain pattern recognition, localhost becomes a powerful laboratory for testing designs, experimenting with page builder configurations, and refining client presentations before deployment ever enters the picture.
The investment in setting up a proper local environment with Elementor Pro pays dividends across every project. You’ll iterate faster without waiting for shared hosting uploads, test more confidently without risking live site stability, and present polished designs to clients knowing every element has been validated in a controlled environment. Your future projects will benefit from the documented workflow and troubleshooting knowledge you build during initial setup.
Ready to apply this knowledge? Start by auditing your current local environment against the requirements outlined here. Update PHP versions, configure a proper .local domain, and validate that Elementor Core is current before adding Pro. Document your successful configuration so you can replicate it across future projects or share with team members who need identical setups.
Remember that the official Elementor documentation remains your authoritative reference for the latest installation procedures and licensing policies as the platform evolves. Bookmark the official Pro installation guide and developer requirements page for quick access when setting up new environments or troubleshooting edge cases. Community forums provide valuable real-world experiences, but always verify against official docs before implementing workarounds that might affect licensing or future updates.
Local development with Elementor Pro transforms how you approach WordPress projects—take the time to establish this foundation properly, and you’ll work more efficiently on every site you build from here forward.