How to Install a WordPress Plugin Manually: A Step-by-Step Guide
Installing WordPress plugins manually might sound intimidating at first, but it’s actually one of the most empowering skills you can develop as a site owner. While the one-click install from the WordPress directory works beautifully for most needs, there are moments when you absolutely need to go manual—whether you’re working with a premium plugin from a third-party developer, testing a beta version from GitHub, or dealing with server restrictions that won’t let you install through the dashboard. I remember the first time I had to manually install a plugin via FTP; my palms were sweaty and I was convinced I’d break something. Turns out, once you understand the process, it’s surprisingly straightforward and opens up possibilities you didn’t even know existed.

The ability to manually install WordPress plugins gives you control over your site in ways that dashboard-only users simply don’t have. You can deploy custom solutions, work around hosting limitations, and even troubleshoot installations that have gone sideways. More importantly, understanding manual installation helps you grasp how WordPress actually works under the hood—knowledge that proves invaluable when things go wrong. With WordPress powering over 43% of all websites on the internet, mastering these fundamental skills puts you ahead of the curve.
TL;DR – Quick Takeaways
- Three main methods exist – WordPress admin upload (easiest), FTP/SFTP transfer (most control), and hosting panel tools (varies by provider)
- Always backup first – No matter which method you choose, create a complete site backup before installing any plugin
- Security is paramount – Only download plugins from trusted sources and verify compatibility with your WordPress version
- ZIP uploads don’t require unzipping – When uploading through the dashboard, keep the file zipped; WordPress handles extraction automatically
- FTP gives ultimate control – Manual file transfer lets you bypass upload limits and work around dashboard restrictions
1) Preparatory Steps and Prerequisites
Before you dive into any installation process, taking time to prepare properly saves hours of frustration later. Think of this phase as laying the foundation for a house—skip it, and everything built on top becomes unstable. The preparation phase isn’t just about technical readiness; it’s about risk management and ensuring you have a clear rollback path if something goes wrong.
Verify Plugin Source and Compatibility
The first rule of manual plugin installation is trusting your source completely. Unlike the official WordPress directory where plugins undergo review processes, manually installed plugins come with no such safety net. Download only from the official plugin developer’s website, reputable marketplaces like CodeCanyon, or directly from developers you know and trust. Before downloading anything, check the plugin’s last update date—if it hasn’t been updated in over two years, that’s a red flag suggesting the developer has abandoned it.
Compatibility checking goes beyond just looking at version numbers. Your WordPress version matters, yes, but so does your PHP version, your theme, and your existing plugin ecosystem. A business directory plugin that worked perfectly on PHP 7.4 might break spectacularly on PHP 8.0. Check the plugin documentation for minimum requirements, and if you’re working with a premium plugin, reach out to support before installing to confirm compatibility with your specific setup.
Back Up Your Site
I cannot stress this enough—backup before you install anything. Period. Even if you’re installing what seems like a simple, harmless plugin, create a full backup. Most quality hosting providers offer automated backup solutions, but don’t rely solely on those. Take a manual backup that includes both your database and your files. Store it somewhere safe, ideally off your server entirely.
The backup process doesn’t have to be complicated. If you already have a backup plugin installed (and you should), run a manual backup before proceeding. No backup solution yet? This is the time to install one—before you install anything else. Many site owners have learned this lesson the hard way when a plugin installation corrupted their database and they had no recent backup to restore from. Don’t be that person.
Assess Hosting Method (Dashboard vs FTP vs SSH)
Different situations call for different installation methods. The dashboard upload method works beautifully when you have a plugin ZIP file under your hosting provider’s upload limit (typically 2-8MB) and you have full admin access to your WordPress installation. This method is clean, simple, and requires no additional software or technical knowledge beyond basic WordPress familiarity.
FTP or SFTP becomes necessary when you’re dealing with larger plugins that exceed upload limits, when your hosting restricts the WordPress admin upload functionality, or when you need to install multiple plugins simultaneously. Some managed WordPress hosts actually prefer FTP installations for certain types of plugins. If you’re building a business directory solution, you might find yourself working with larger plugin packages that simply won’t upload through the standard interface.
SSH access with WP-CLI represents the most advanced option, giving you command-line control over plugin management. While overkill for most users, it’s incredibly powerful for developers managing multiple sites or automating deployment processes. Your hosting provider determines whether you have SSH access—budget shared hosting typically doesn’t offer it, while VPS and dedicated servers usually do.
Security Posture Before Install
Security doesn’t begin after installation; it starts before you even download a plugin. Keep your WordPress core updated to the latest version—outdated WordPress installations are the number one target for automated attacks. Review the plugin’s security track record by searching for any CVE (Common Vulnerabilities and Exposures) disclosures associated with it. Major vulnerabilities affecting millions of users often make technology news, and a quick search can reveal whether your chosen plugin has a troubled security history.
Consider your site’s existing security measures too. If you’re running security-focused plugins, make sure the new plugin won’t conflict with them. Some security plugins are notoriously territorial and may block functionality from newly installed plugins, interpreting legitimate activity as threats. Understanding your security stack before adding to it prevents the frustrating debugging sessions that come from security plugins fighting each other.
2) Install Methods: Overview and When to Use Each
WordPress offers remarkable flexibility in how you can install plugins, each method serving specific scenarios and skill levels. Understanding when to use which method prevents unnecessary complications and helps you work more efficiently. The right installation method depends on your technical comfort level, hosting environment constraints, and the specific plugin you’re working with.
Method A — Install from the WordPress Admin (Official Repository)
The simplest approach remains searching the official WordPress plugin directory directly from your admin panel. Navigate to Plugins → Add New, type your search term, and WordPress shows you relevant results from their repository of over 60,000 plugins. Click “Install Now” on your chosen plugin, wait a few seconds for installation to complete, then click “Activate.” This method works exclusively for plugins hosted in the official directory, which means premium plugins or custom-developed solutions aren’t accessible this way.
This approach offers the best security for beginners since WordPress.org reviews all directory-listed plugins. The automatic update system also works seamlessly with this method—WordPress can notify you of updates and apply them with a single click. For most users installing popular, free plugins, this method should be your default choice. It’s fast, secure, and requires no technical knowledge beyond basic WordPress navigation.
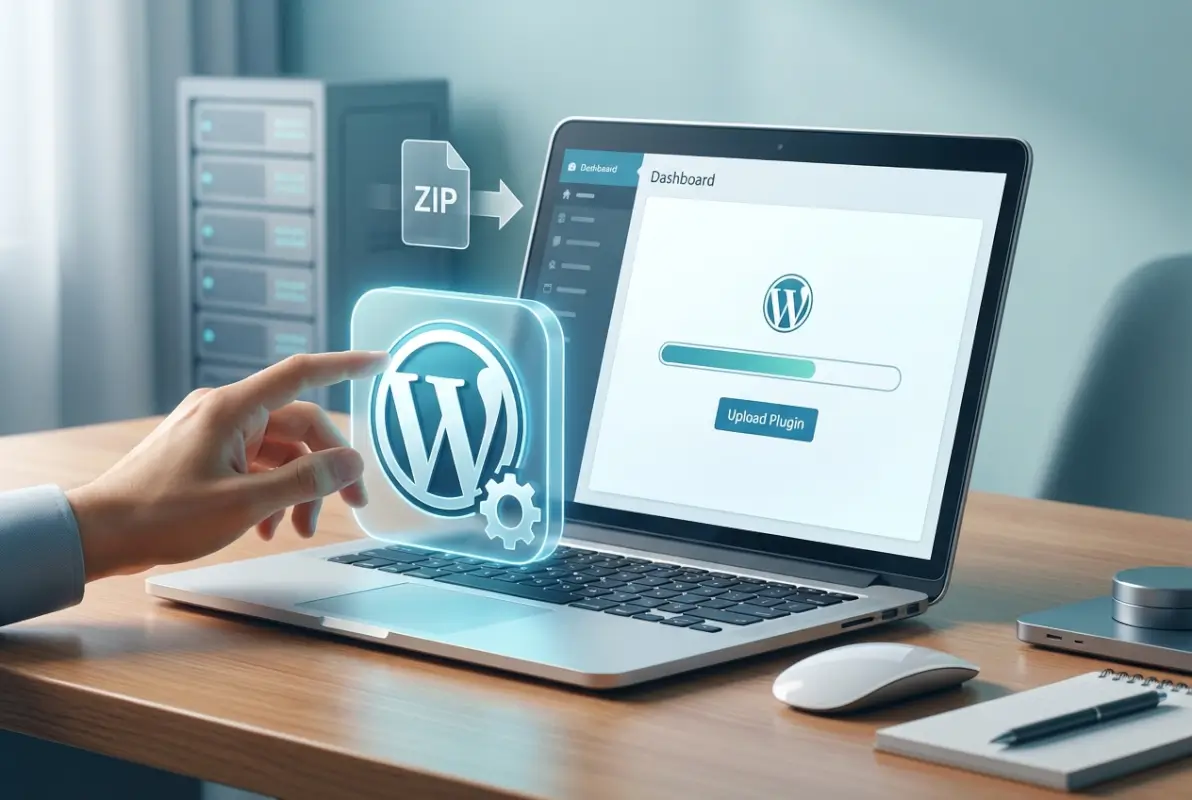
Method B — Upload a ZIP File via the WordPress Admin
When you have a plugin ZIP file from outside the official directory—whether it’s a premium plugin you purchased, a custom plugin developed specifically for your site, or a beta version from a developer’s website—the ZIP upload method bridges the gap between convenience and flexibility. From Plugins → Add New, click the “Upload Plugin” button at the top, choose your ZIP file, click “Install Now,” and WordPress handles the extraction and placement automatically.
This method is particularly useful for business directory solutions that aren’t available in the official repository. Most premium plugin marketplaces provide downloadable ZIP files specifically formatted for this installation method. The key advantage here is simplicity—you get the convenience of dashboard-based installation without being limited to the official directory. Just remember that your plugin ZIP must contain a properly structured plugin folder; WordPress won’t fix structural problems in poorly packaged plugins.
| Installation Method | Best For | Technical Level | Time Required |
|---|---|---|---|
| WordPress Directory Search | Free, official plugins | Beginner | 1-2 minutes |
| ZIP Upload (Dashboard) | Premium plugins, small files | Beginner | 2-3 minutes |
| FTP/SFTP Transfer | Large plugins, upload limits | Intermediate | 5-10 minutes |
| WP-CLI/SSH | Bulk installs, automation | Advanced | 1-2 minutes per plugin |
Method C — Install via FTP/SFTP (Manual File Transfer)
FTP installation gives you complete control and bypasses all dashboard limitations. This method requires an FTP client (FileZilla is the most popular free option) and your hosting account’s FTP credentials. You’ll extract the plugin ZIP on your local computer, connect to your server via FTP, navigate to the wp-content/plugins directory, and upload the entire plugin folder. Once uploaded, the plugin appears in your WordPress dashboard under Installed Plugins, ready for activation.
This approach shines when dealing with large plugins that exceed your hosting provider’s upload limits. Some comprehensive plugins or plugin bundles can reach 50-100MB, far beyond the typical 2-8MB upload cap most shared hosts impose. FTP also proves invaluable when your WordPress admin is inaccessible due to a previous plugin conflict—you can install a fresh plugin or remove a problematic one without ever touching the dashboard.
Method D — Install via Hosting/CLI Options (Where Applicable)
Some hosting providers offer one-click plugin installation through their control panels, particularly those running managed WordPress platforms. These interfaces typically connect to the official WordPress directory and provide installation similar to the dashboard method but through the hosting panel instead. It’s a nice convenience feature, though it doesn’t offer any real advantages over using WordPress itself.
WP-CLI (WordPress Command Line Interface) represents the power user’s choice for plugin management. With a single command like `wp plugin install plugin-name –activate`, you can search for, download, install, and activate plugins without touching a browser. WP-CLI particularly excels when managing multiple WordPress installations or when you’re installing plugins from GitHub as part of a development workflow. However, this method requires SSH access and comfort with command-line interfaces, putting it beyond most typical WordPress users.
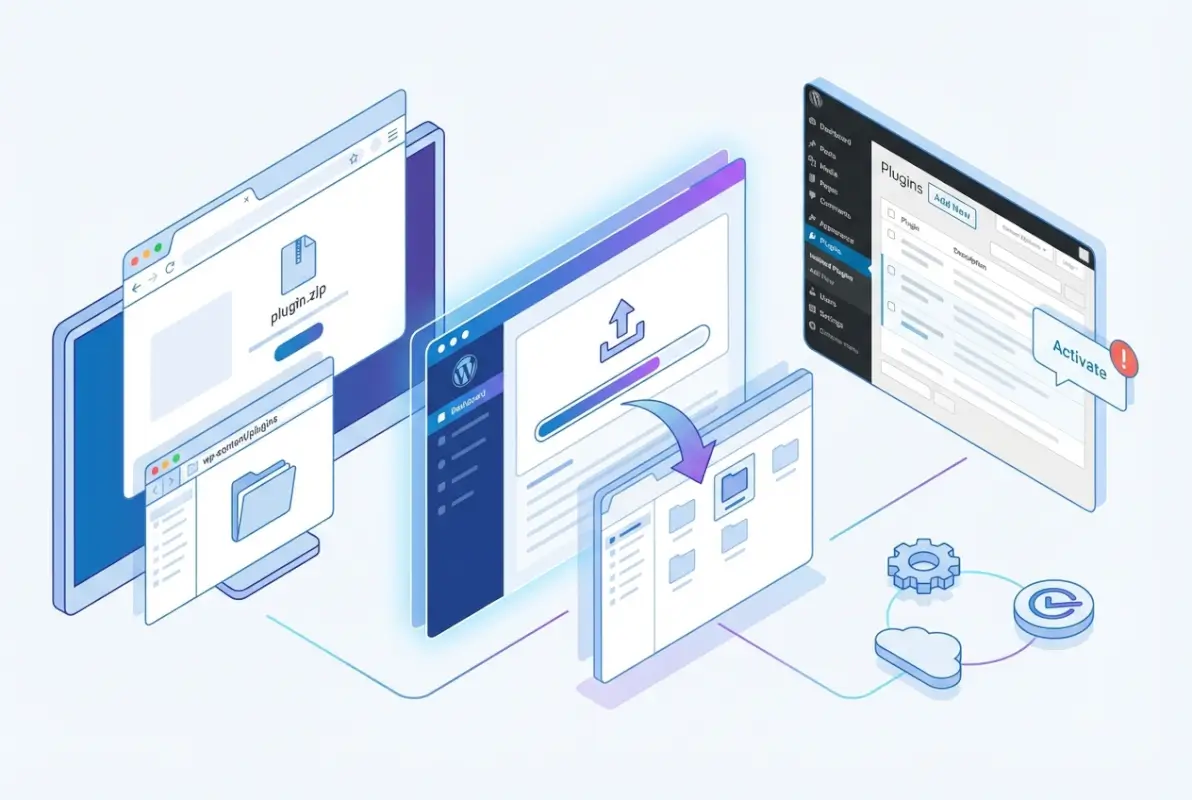
3) Step-by-Step: Manual ZIP Upload via WordPress Admin (Detailed Example)
Let’s walk through the ZIP upload method in detail since it’s the most common manual installation approach. This method strikes the perfect balance between ease of use and flexibility, working for the vast majority of manual installation scenarios you’ll encounter. Whether you’ve purchased a premium plugin or received a custom plugin from a developer, this process handles it cleanly without requiring FTP knowledge.
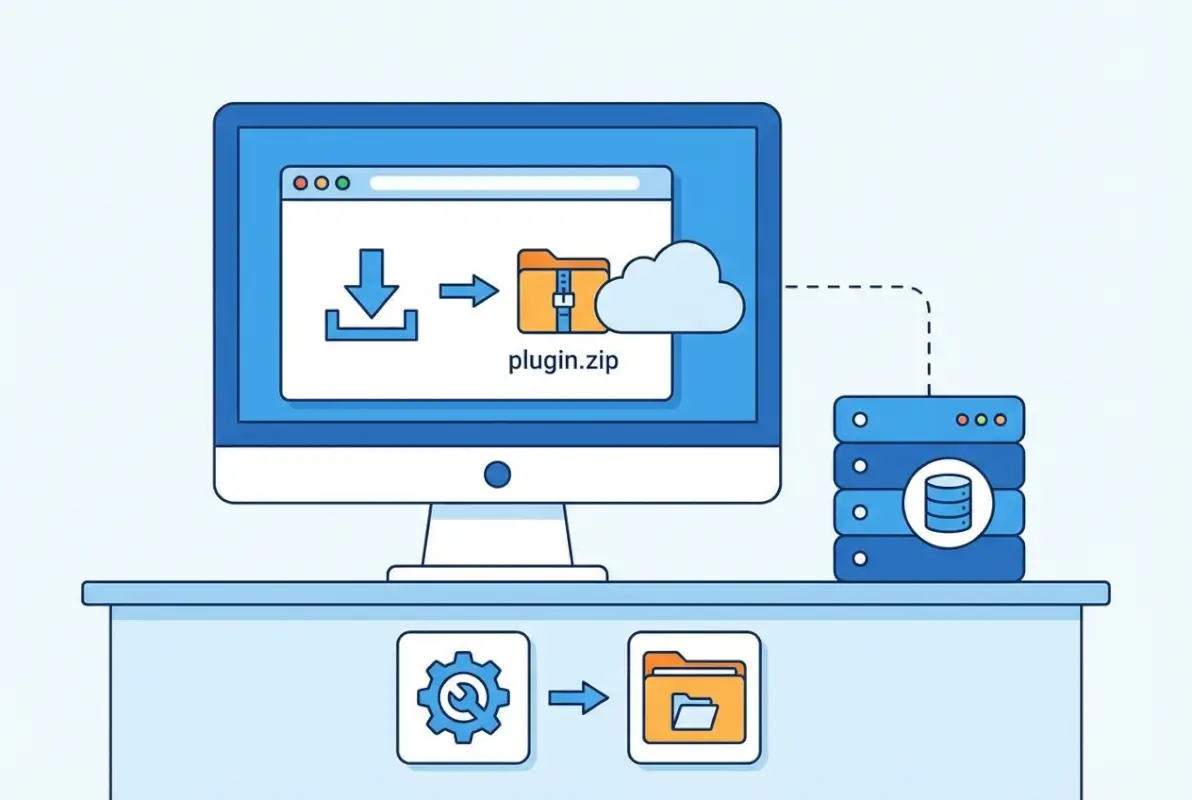
Step 1 — Acquire the ZIP File
Start by downloading your plugin ZIP file from its legitimate source. If you purchased a premium plugin, log into your account on the marketplace or developer’s site and locate the download section. Most vendors provide clearly labeled download buttons that give you the latest compatible version. Save this ZIP file somewhere easy to find on your computer—your Downloads folder works fine, but creating a dedicated folder for WordPress plugins helps with organization if you manage multiple sites.
Verify that what you downloaded is actually a ZIP file and not an executable or other file type. Some browsers automatically unzip downloads, which defeats the purpose for WordPress installation. If your browser unzipped the file automatically, you’ll need to re-zip it before proceeding. The ZIP file should typically be named something descriptive like “plugin-name-v2.5.zip” and should be reasonably sized—most plugins range from under 1MB to about 10MB, though some specialized plugins can be larger.
Step 2 — Upload and Install
Log into your WordPress dashboard and navigate to Plugins in the left sidebar menu. Click “Add New” at the top, which takes you to the plugin directory search page. Look for the “Upload Plugin” button near the top of the page—it sits right next to the page title. Clicking this reveals a simple file upload interface with a “Choose File” button and an “Install Now” button.
Click “Choose File” and browse to where you saved your plugin ZIP file. Select it and click “Open” in the file browser. The filename now appears next to the Choose File button, confirming WordPress knows what you’re uploading. Click “Install Now” and WordPress begins processing the upload. You’ll see a progress indicator as the file uploads and extracts. Installation typically takes 5-30 seconds depending on plugin size and your connection speed. Don’t navigate away from this page until you see the success message.
When installation completes successfully, WordPress displays a confirmation message stating “Plugin installed successfully.” Below this message, you’ll find an “Activate Plugin” link. Don’t click it just yet if you need to configure server settings or if the plugin documentation recommends specific configuration before activation. For most plugins though, you can safely activate immediately.
Step 3 — Activate and Configure
Click the “Activate Plugin” link to bring the plugin to life. WordPress refreshes and displays your Installed Plugins list with a notification that your new plugin was activated. Many plugins add new menu items to your WordPress sidebar immediately upon activation—look for a new entry corresponding to your plugin’s name. Some plugins integrate into existing menus, adding submenus under Settings, Tools, or other existing menu items.
Navigate to the plugin’s settings page if one exists. Premium plugins particularly often require license key activation before full functionality unlocks. Enter any required information like API keys, license codes, or basic configuration options. Read through the initial setup wizard if the plugin provides one—these wizards typically walk you through essential settings that prevent common configuration mistakes.
Test the plugin’s core functionality before considering the installation complete. If you installed a contact form plugin, create a test form and submit it. If it’s a caching plugin, clear any existing cache and browse your site to verify it works correctly. This immediate testing catches problems while you’re still in “installation mode” rather than discovering issues days later when you’ve forgotten the details of what you changed.
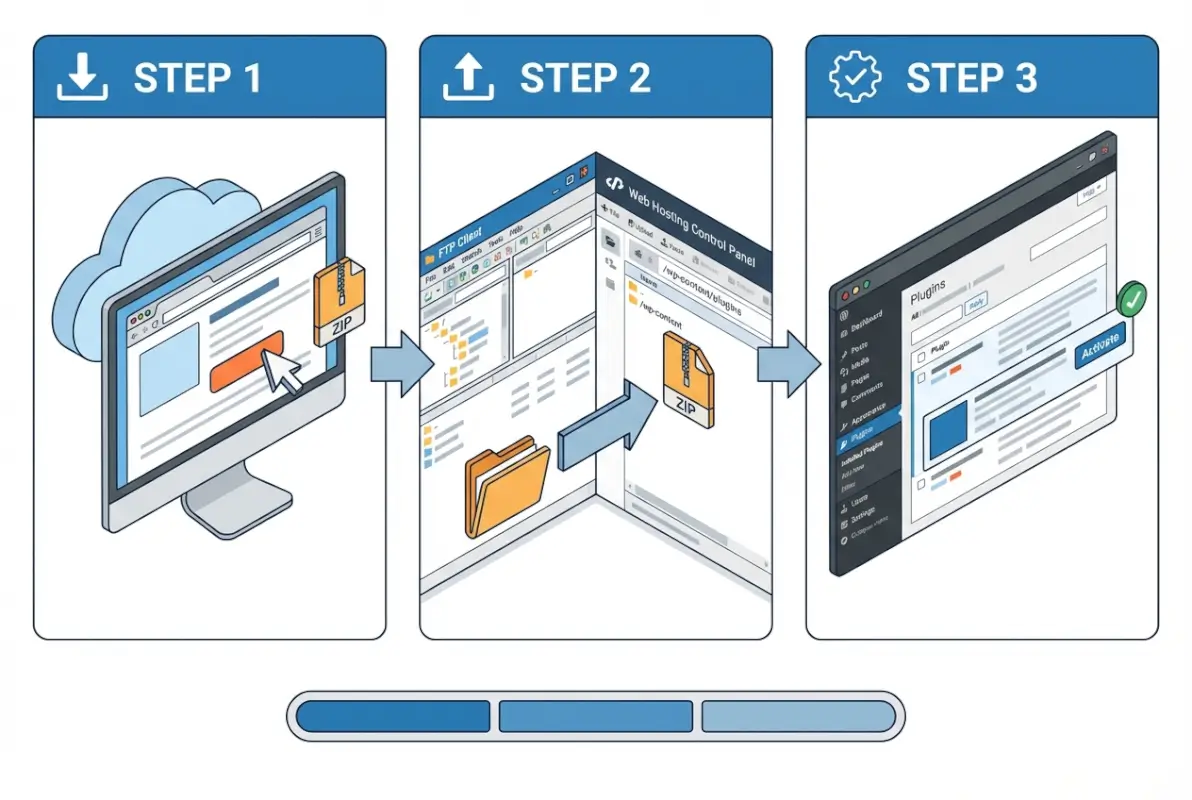
4) Step-by-Step: Manual FTP/SFTP Installation (Alternative Method)
FTP installation represents your nuclear option when dashboard methods fail or aren’t suitable for your situation. While slightly more involved than ZIP uploads, FTP installation provides ultimate control and works around virtually any limitation your hosting provider might impose. This method also becomes essential when troubleshooting broken sites where the WordPress dashboard itself is inaccessible.
Step 1 — Prepare Plugin Folder
Unlike dashboard uploads where WordPress handles extraction, FTP installation requires you to unzip the plugin on your local computer first. Right-click the plugin ZIP file and select “Extract” or “Unzip” depending on your operating system. This creates a folder containing the plugin files. Open this folder to verify its structure—you should see PHP files, possibly CSS and JavaScript files, and typically a readme.txt or similar documentation file.
The folder name matters because it becomes the plugin’s directory name on your server. WordPress uses this directory name for identification purposes, so don’t rename the folder unless you absolutely know what you’re doing. The folder should be named something descriptive and contain no spaces—typically using hyphens like “my-awesome-plugin” rather than “My Awesome Plugin.” If the unzipped content is wrapped in an extra parent folder, navigate into it to ensure you’re uploading the actual plugin folder, not a folder containing the plugin folder.
Step 2 — Connect to the Server
Launch your FTP client—FileZilla works excellently and is free for Windows, Mac, and Linux. You’ll need your FTP credentials from your hosting provider, which typically include a hostname (often ftp.yourdomain.com), username, password, and port (usually 21 for FTP or 22 for SFTP). Most quality hosts provide these credentials in your hosting control panel under an FTP or File Manager section. If you can’t find them, your hosting provider’s support team can provide them quickly.
Enter your credentials in FileZilla’s Quick Connect bar at the top and click Connect. SFTP (port 22) is preferable to standard FTP (port 21) because it encrypts your connection, but either works for plugin installation. After a few seconds, FileZilla establishes a connection and displays your server’s file structure in the right panel. The left panel shows your local computer’s files, making it easy to drag and drop between the two.
Navigate to your WordPress installation’s root directory on the server. This directory contains folders named wp-admin, wp-content, and wp-includes, along with files like wp-config.php. If your site lives in a subdirectory rather than your domain’s root, navigate to that subdirectory first. Once you’ve found the WordPress root, double-click the wp-content folder, then double-click the plugins folder inside it. You’re now looking at all your currently installed plugins as folders on the server.
Step 3 — Upload and Activate
In FileZilla’s left panel (your local computer), navigate to where you unzipped the plugin folder. In the right panel (your server), make sure you’re in the wp-content/plugins directory. Drag the unzipped plugin folder from the left panel to the right panel. FileZilla displays a transfer queue at the bottom and begins uploading all files. Depending on plugin size and your connection speed, this can take anywhere from a few seconds to several minutes.
Watch the transfer queue until it completes entirely. Don’t disconnect or close FileZilla until every file shows “Successful” status. Large plugins with thousands of files take longer, and interrupted transfers leave your plugin incomplete and non-functional. Once the transfer completes, you can close FileZilla or leave it open in case you need to troubleshoot—having FTP access open while activating plugins can be handy if something goes wrong.
Switch to your WordPress dashboard and navigate to Plugins → Installed Plugins. Your newly uploaded plugin now appears in the list but shows as inactive. Hover over it and click the “Activate” link just as you would with any other plugin. WordPress loads the plugin files and integrates it into your site. If activation succeeds, you’ll see a confirmation message. If it fails, WordPress typically displays an error message indicating what went wrong—usually a PHP compatibility issue or missing dependencies.
Step 4 — Post-Install Checks
Immediately after activation, browse your site’s front end to verify it still loads correctly. Check several pages including your homepage, a post or page, and any custom post types you use. Look for visual breaks, missing elements, or error messages. If you run an ecommerce site or use complex functionality like forms or membership areas, test those specifically since plugins sometimes conflict in unexpected ways.
Check your PHP error logs if your hosting provider makes them accessible. Many hosting control panels include error log viewers that show PHP warnings, notices, and fatal errors. Newly activated plugins sometimes generate warnings that don’t break your site but indicate potential problems. Addressing these warnings early prevents headaches down the road when they potentially escalate into actual errors.
If everything works correctly, document what you installed and when. Keep a simple text file or spreadsheet noting plugin names, versions, where you got them, and installation dates. This documentation proves invaluable six months later when you’re troubleshooting an issue and need to remember which plugins came from the directory versus manual installation. If you’re managing business directory resources or other complex setups, this documentation becomes essential for maintenance planning.
5) Post-Install: Activation, Configuration, and Compatibility
Getting a plugin installed is only half the battle; proper configuration and compatibility testing ensure it actually delivers value without creating problems. This phase separates successful plugin deployments from disasters waiting to happen. Many site issues that appear to be plugin bugs are actually misconfiguration or compatibility problems that could have been caught during proper post-install procedures.

Activation and Initial Configuration
After clicking that Activate button, resist the temptation to immediately dive into advanced settings. Start with the plugin’s quick start guide or setup wizard if it offers one. These guided setups configure the most critical settings and prevent common misconfigurations. Premium plugins especially tend to include comprehensive setup wizards that walk you through API integrations, basic preferences, and essential features.
Work through settings methodically, section by section. Don’t enable every feature simultaneously—introduce them gradually so you can identify which specific setting causes problems if issues arise. For caching plugins, start with conservative settings and progressively increase optimization levels while testing between changes. For security plugins, begin with monitoring mode rather than active blocking to ensure you understand what gets flagged before the plugin starts automatically blocking things.
Many plugins require external integrations or API keys to function fully. Don’t skip these even if they seem optional—a contact form plugin that doesn’t integrate with your email service provider creates a poor user experience when form submissions go nowhere. An SEO plugin that can’t connect to Google Search Console misses valuable data that informs its recommendations. Take the time to complete all recommended integrations during initial configuration rather than treating them as “maybe later” tasks.
Compatibility Checks and Testing
Systematic testing catches conflicts before your visitors do. Start by logging out of WordPress and viewing your site as a visitor would. Logged-in administrators often see different versions of pages due to caching plugins treating them differently, so always test logged out. Browse several different page types—posts, pages, archives, search results—to ensure the plugin doesn’t break layouts or functionality in specific contexts.
Test on multiple devices if possible. What works perfectly on desktop might break mobile layouts, particularly if the plugin adds floating elements or popups. Mobile compatibility issues frustrate visitors quickly, and with mobile traffic dominating most sites, mobile testing can’t be optional. You don’t need an actual device library—browser developer tools provide mobile emulation that catches most issues.
Performance testing reveals whether your new plugin significantly impacts load times. Tools like GTmetrix or Google PageSpeed Insights provide before-and-after comparisons. Some plugins, particularly those adding animations or real-time features, can substantially slow page loads. Knowing the performance impact lets you make informed decisions about whether the plugin’s functionality justifies its speed cost, or whether you need to add caching or optimization to compensate.
Update Strategy and Maintenance
Manually installed plugins don’t automatically appear in your WordPress update notifications unless the developer has implemented update checking in their code. This creates a maintenance burden you must actively manage. Subscribe to the plugin developer’s newsletter or announcement list to receive notifications about new versions. Check the developer’s website monthly for updates even if you haven’t received notifications—some developers are inconsistent about announcements.
When updates become available, don’t blindly apply them on production sites. If you run a staging environment (and you should), update the plugin there first and test thoroughly before updating production. No staging site? Create a full backup before updating and be prepared to roll back if the update causes problems. Read the update’s changelog to understand what changed—major version updates (1.x to 2.x) often include breaking changes that require configuration adjustments.
Consider whether automatic updates make sense for each plugin. WordPress can auto-update plugins if configured to do so, but automatically updating manually-installed plugins carries risk since you’re bypassing the testing phase. For stable, maintenance-mode plugins that receive only security patches, auto-updates work fine. For actively developed plugins receiving frequent feature additions, manual updates with testing provide better control and reduce the risk of surprise breakage.
6) Security, Maintenance, and Best Practices
Security isn’t a one-time checkbox; it’s an ongoing commitment that begins before installation and continues throughout a plugin’s lifecycle. WordPress sites face constant automated attack attempts, and plugins represent one of the most common attack vectors. The good news? Following basic security hygiene prevents the vast majority of plugin-related security issues.
Keep WordPress and Plugins Up to Date
Running outdated software is like leaving your front door unlocked with a sign saying “On vacation.” Security researchers constantly discover vulnerabilities in WordPress plugins, and when those vulnerabilities become public, attackers immediately start scanning for sites running affected versions. WordPress security teams emphasize that updates should be applied within hours of release for critical security patches, not days or weeks.
Create an update schedule and stick to it religiously. Check for WordPress core and plugin updates at least weekly, more frequently for high-value sites like ecommerce stores. Set aside time for the update process rather than trying to squeeze it in between other tasks—rushing updates leads to mistakes and incomplete testing. Remember that keeping your hosting environment updated matters too; PHP version updates often include security patches that protect your site at the server level.
The update process itself should follow a consistent pattern: backup, update on staging (if available), test, update production, verify. This pattern might seem excessive for minor updates, but it becomes automatic with practice and prevents the heartbreak of update-induced downtime. Some hosting providers offer automated staging environments specifically for this workflow, making the process much easier than manual staging setups.
Use Reputable Sources and Monitor Vulnerabilities
Not all plugin sources carry equal risk levels. The official WordPress directory provides the highest baseline security because plugins undergo review before listing and WordPress.org removes plugins when security issues are discovered. Premium marketplaces like CodeCanyon operate similar review processes, though with varying rigor. Individual developer sites vary wildly—some maintain excellent security practices while others prioritize features over security.
Subscribe to security notification services that track WordPress vulnerabilities. WPScan and Patchstack maintain comprehensive vulnerability databases and can alert you when plugins you use have disclosed security issues. These services often discover vulnerabilities before general announcements, giving you advance warning to prepare patches or mitigation strategies. For critical sites, consider subscribing to premium security monitoring that includes professional incident response support.
Research major security incidents affecting plugins you’re considering. A plugin with a history of security problems suggests the developer doesn’t prioritize security properly. One vulnerability can happen to anyone, but repeated security issues indicate systemic problems with the development process. When evaluating plugins, particularly for sensitive applications, this security history weighing should factor as heavily as features and reviews.
Backups and Recovery Planning
Backups represent your insurance policy against disasters, and like insurance, you need them before problems occur. Implement automated backup solutions that run at least daily for active sites, with backups stored off-site from your hosting server. Cloud backup services like Google Drive or Amazon S3 provide affordable, reliable storage that survives even catastrophic hosting failures.
Test your backups regularly by actually restoring them. A backup you’ve never tested is just optimistic data storage—you don’t know if it works until you try it. Set up a test environment where you can practice the restore process quarterly. This testing serves double duty by ensuring your backups work and by keeping your restore skills sharp so you don’t panic if you need to perform an emergency recovery.
Document your recovery process step by step, including where backups are stored, how to access them, what tools are needed for restoration, and approximately how long the process takes. During an actual emergency when your site is down and customers are complaining, you’ll be thankful for clear documentation that walks you through recovery without requiring you to remember details while stressed. Include relevant passwords and access credentials in your documentation, stored securely in a password manager.
7) Troubleshooting and Common Pitfalls
Even with careful preparation and proper procedures, plugin installations sometimes go sideways. Knowing how to recognize and resolve common problems quickly minimizes downtime and frustration. Most plugin issues fall into a few predictable categories with well-established troubleshooting approaches.
Plugin Conflicts with Themes or Other Plugins
Plugin conflicts manifest in countless ways—broken layouts, missing functionality, error messages, or subtle malfunctions that only appear in specific scenarios. The systematic approach to identifying conflicts involves isolation: disable all other plugins except the new one, switch to a default WordPress theme like Twenty Twenty-Four, and test whether the problem persists. If it disappears, you’ve confirmed a conflict exists.
Re-enable other plugins one at a time, testing after each activation until the problem returns. When you identify the conflicting plugin, you have several options: find an alternative to either the new plugin or the conflicting one, contact both developers to report the incompatibility (they may offer workarounds), or determine which plugin is more essential and choose accordingly. Some conflicts can be resolved through careful configuration tweaking, particularly with caching plugins that sometimes overly aggressive settings break functionality.
Theme conflicts follow similar debugging logic but prove trickier to resolve since switching themes permanently isn’t usually practical. Child themes can sometimes work around conflicts by selectively overriding problematic template files or adding CSS that corrects layout issues. For complex theme conflicts that resist simple solutions, professional developer help becomes worthwhile—a few hours of expert troubleshooting costs less than switching to an entirely new theme and rebuilding your design.
Failed Installation or White Screen of Death
The dreaded white screen of death (WSOD) means PHP encountered a fatal error and couldn’t recover gracefully. This often happens when a plugin requires a PHP version or extension your server doesn’t have, when it conflicts with another plugin at a fundamental level, or when it contains actual bugs. The WSOD prevents access to your dashboard, requiring FTP-based recovery.
Connect via FTP and navigate to wp-content/plugins. Rename the problem plugin’s folder—adding “-disabled” to the folder name works perfectly. WordPress can’t find the plugin anymore and stops trying to load it, which should restore your site immediately. Once you regain access to your dashboard, you can investigate the root cause through error logs or by consulting the plugin’s support resources for known compatibility issues.
Memory exhaustion causes similar symptoms and often affects larger plugins or those performing complex operations. Check your WordPress debug log (you may need to enable debugging in wp-config.php first) for memory limit errors. If memory exhaustion is the culprit, you can often increase the PHP memory limit through wp-config.php, php.ini, or .htaccess depending on your hosting configuration. Most modern WordPress sites need at least 256MB of memory, with 512MB providing comfortable headroom for complex plugin ecosystems.
Security Considerations After Install
Newly installed security plugins sometimes create false-positive scenarios where legitimate functionality gets blocked. If your site suddenly prevents form submissions, blocks admin access, or refuses to load certain pages immediately after installing a security plugin, the plugin’s aggressive settings are likely responsible. Access the security plugin’s settings (you may need to use FTP to temporarily disable it first) and review blocked items or firewall logs.
Layered security from multiple plugins can conflict in counterproductive ways. Two firewall plugins might block each other’s traffic, or multiple security scanners running simultaneously could impact performance without improving security. Evaluate your security stack holistically—you need backups, firewall protection, malware scanning, and login protection, but you don’t necessarily need three plugins providing overlapping coverage of the same threats. Consolidate where possible, choosing well-rounded security solutions over multiple specialized ones.
Some security measures implemented by plugins conflict with functionality required by other plugins or themes. Security plugins that disable XML-RPC, for example, break mobile apps and some third-party integrations that depend on it. Security settings that restrict file permissions can prevent other plugins from uploading media or creating necessary directories. When security settings break functionality, look for middle-ground configurations that maintain security while allowing necessary operations rather than disabling security entirely.
Frequently Asked Questions
How do I manually install a WordPress plugin?
Download the plugin ZIP file from a trusted source, then either upload it via Plugins → Add New → Upload Plugin in WordPress dashboard, or extract it and transfer the folder to wp-content/plugins via FTP. After uploading, activate the plugin from the Plugins page in your admin dashboard to complete installation.
Can I install plugins on WordPress.com or only on self-hosted WordPress?
WordPress.com allows plugin installation only on Business and eCommerce plans; free and Personal plans don’t support custom plugins. Self-hosted WordPress installations (WordPress.org) allow unlimited plugin installations regardless of hosting tier. The installation process is identical on both platforms for plans that support plugins.
What should I check before installing a plugin?
Verify the plugin’s compatibility with your WordPress version, check when it was last updated (recently updated plugins indicate active maintenance), review ratings and recent reviews for reported issues, confirm the source is trustworthy, and ensure your hosting environment meets any specified requirements like PHP version or extensions.
Is it safer to install plugins from the WordPress directory?
Yes, the official WordPress directory provides baseline security through their review process and actively removes plugins when security issues are discovered. Directory plugins also benefit from automatic update notifications. For non-directory plugins, thoroughly research the developer’s reputation and security track record before installing.
How often should I update plugins for security?
Apply security updates immediately upon release, ideally within 24 hours for critical vulnerabilities. Check for general updates weekly for most sites, or daily for high-value targets like ecommerce stores. Enable WordPress’s automatic background updates for minor releases while manually testing major version updates before deployment.
What if a plugin breaks my site after install?
Immediately deactivate the plugin via Plugins → Installed Plugins if you can access your dashboard. If your dashboard is inaccessible, use FTP to rename the plugin’s folder in wp-content/plugins, which forces WordPress to deactivate it. Then restore from your pre-installation backup or troubleshoot the specific conflict causing the issue.
Do manually uploaded plugins receive automatic updates?
Manually uploaded plugins receive automatic updates only if the developer has implemented update checking functionality within their plugin code. Many premium plugins include this feature while others require manual updates. Always check the developer’s documentation to understand their update delivery method for manually installed plugins.
How do I know if a manually installed plugin is safe?
Research the developer’s reputation through independent reviews and community discussions, check for security vulnerability disclosures in databases like WPScan, verify the plugin uses current WordPress coding standards, and scan the plugin with security tools before installation. Avoid nulled plugins entirely as they frequently contain malware.
Can I install multiple plugins at once manually?
Yes, via FTP you can upload multiple plugin folders simultaneously to wp-content/plugins. However, activate them one at a time through your WordPress dashboard to identify which specific plugin causes problems if issues arise. Bulk activation makes troubleshooting conflicts significantly more difficult.
Why does my plugin upload fail in WordPress dashboard?
Upload failures typically result from file size exceeding your hosting provider’s upload limit (check PHP settings for upload_max_filesize and post_max_size), insufficient server permissions, or corrupted ZIP files. Solutions include using FTP installation instead, requesting hosting limit increases, or re-downloading the plugin ZIP if corruption is suspected.
Take Control of Your WordPress Site
Mastering manual plugin installation empowers you to work beyond the constraints of the official directory and take full advantage of the WordPress ecosystem’s remarkable depth. Whether you’re deploying premium solutions, testing development versions, or working around hosting limitations, these skills give you options that dashboard-only users simply don’t have. The techniques you’ve learned here—from proper preparation and security practices through systematic troubleshooting—apply far beyond just plugin installation and help you understand how WordPress actually functions beneath its friendly interface.
Remember that flexibility comes with responsibility. The convenience of one-click installs from the WordPress directory includes safety rails that manual installation bypasses. Every manually installed plugin requires extra diligence in verification, compatibility testing, and ongoing maintenance. Treat your site’s plugin ecosystem as infrastructure that needs regular attention rather than something you install and forget. Document your installations, maintain consistent backup habits, and stay current with security updates regardless of how busy you get.
Start small if you’re new to manual installation. Don’t make your first manual install a critical plugin on a production ecommerce site—practice on development installations or less critical projects first. Build confidence with the process, develop your troubleshooting skills, and learn your hosting environment’s quirks in low-stakes situations. The investment in learning pays dividends throughout your WordPress journey, giving you the confidence to implement solutions precisely tailored to your needs rather than making do with what’s readily available.
Your next step: Review your current plugin installation and identify any plugins that aren’t receiving regular updates. Create a maintenance schedule to check for updates weekly, test one manual installation technique on a staging site, and document your process for future reference. These small actions transform plugin management from reactive firefighting to proactive maintenance.