How to Claim Your CitySearch Listing: Free Guide to Add & Optimize Your Business Profile

Generating summary...
If you’re hunting for ways to boost your local business visibility without draining your marketing budget, claiming your CitySearch listing is one of those overlooked wins that actually delivers. While most business owners obsess over Google Business Profile and Yelp, CitySearch quietly funnels qualified local traffic to businesses smart enough to claim and optimize their free listings. The catch? Most profiles sit unclaimed, filled with outdated information, or worse—controlled by competitors who got there first.
I learned this the hard way when a client’s competitor had somehow claimed their CitySearch profile and was redirecting customers to the wrong phone number. The fix took 20 minutes once we knew what to do, but it had cost them months of lost business.
- Free listing access: CitySearch still offers free business listings that improve local SEO through directory citations
- Claim before competitors do: Unclaimed profiles are vulnerable to inaccurate information or competitor manipulation
- Verification takes 5-10 minutes: Phone, email, or postal verification secures your profile ownership
- NAP consistency is critical: Match your business name, address, and phone across all directories to boost search rankings
- Reviews drive conversions: Businesses responding to reviews see 35% higher revenue than those that ignore feedback
- Monthly updates matter: Fresh content signals active business management to both customers and search algorithms
CitySearch Landscape: Current Value and Competitive Context
CitySearch operates as a local business directory where consumers search for restaurants, services, and retailers by location. The platform aggregates business information—name, address, phone, hours, categories, photos, and customer reviews—into searchable profiles. Unlike purely user-generated platforms, CitySearch allows direct business verification and management, giving you control over how your company appears in search results.
The directory’s value lies in its established domain authority and integration with local search ecosystems. When search engines crawl the web to verify business legitimacy, directories like CitySearch serve as authoritative citations. A BrightLocal consumer survey found that 87% of consumers read online reviews for local businesses, and consistent directory listings significantly influence purchase decisions.
Most small business owners face friction points when attempting to claim their CitySearch listing: confusing verification workflows, login credential issues, duplicate listings created by data aggregators, and outdated profile interfaces that don’t match current screenshots in old tutorials. These barriers cause many to abandon the process halfway through, leaving profiles incomplete or unclaimed.
Current Status of CitySearch Free Listings
CitySearch maintains a freemium model where basic business listings remain free, while enhanced visibility options require payment. The free tier includes standard profile fields (business description up to 250 characters, category selection, hours of operation, contact details, photo gallery with up to 10 images, and customer review display). Premium options offer sponsored placement in search results and category pages, but the free listing provides sufficient functionality for most local businesses.
User intent when searching for “citysearch free business listing” or “claim citysearch listing” typically falls into three categories: business owners discovering unclaimed profiles through Google searches, marketing managers conducting directory audit cleanups across multiple platforms, and new business launches seeking comprehensive directory coverage. The common thread? They need a straightforward, current process that actually works in CitySearch’s current interface.
How to Claim, Add, or Update Your CitySearch Business Listing
The claiming process starts with a simple search to determine if your business already exists in CitySearch’s database. Many businesses appear automatically through data aggregators that pull information from public records, other directories, and business registrations. If you find an existing listing, you’ll claim ownership; if not, you’ll create a new profile from scratch.
According to Uberall’s business listing management guide, the average business appears in 73 different online directories, many without the owner’s knowledge. CitySearch ranks among the top 20 directories for local SEO impact, making it worth the 20-30 minute investment to secure proper control.

Step-by-Step Claiming and Verification Workflow
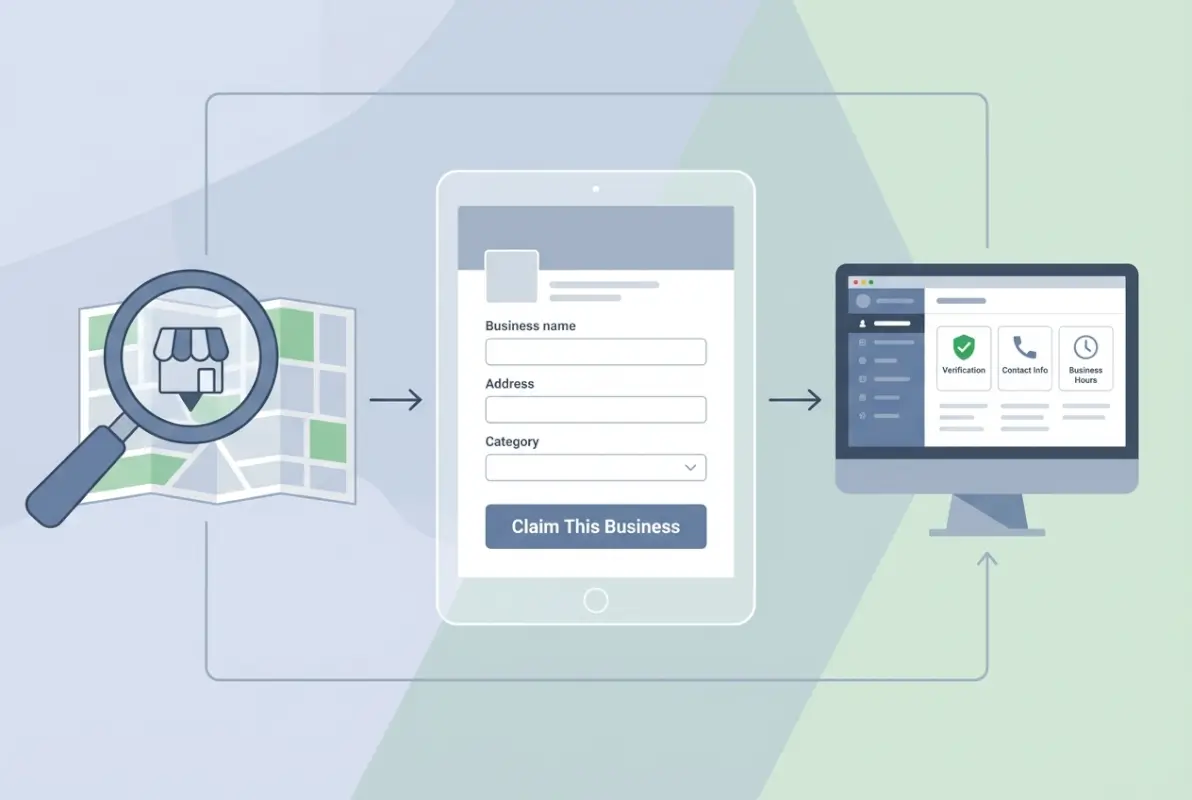
Navigate to CitySearch’s homepage and enter your business name plus city in the search bar. If your business appears in results, click the listing to view the full profile. Look for a “Claim This Business” or “Are you the owner?” link, typically positioned near the top of the profile or in the management section. If your business doesn’t appear, select “Add Your Business” from the site menu.
Creating your account requires a business email address—avoid using personal Gmail or Yahoo accounts as these may trigger additional verification steps. The platform sends a confirmation link to verify email ownership before proceeding. Once confirmed, you’ll enter your business details following this sequence:
| Step | Action Required | Common Issues |
|---|---|---|
| 1. Business Search | Search exact business name + city | Multiple locations showing same business |
| 2. Account Creation | Use business email domain | Confirmation emails in spam folder |
| 3. Basic Information | Enter NAP matching Google Business | Address format rejections |
| 4. Verification Method | Select phone/email/postal option | Phone number not matching records |
| 5. Complete Verification | Enter PIN or click email link | Expired verification codes |
| 6. Profile Completion | Add description, hours, photos | Image upload size/format errors |
Verification methods vary based on your business type and CitySearch’s confidence in the data match. Phone verification is fastest—you’ll receive an automated call with a 4-6 digit PIN to enter on the website, completing verification in under 5 minutes. Email verification sends a unique link to your business email, requiring a simple click-through. Postal verification involves CitySearch mailing a postcard with a verification code to your business address, taking 5-10 business days but providing the highest security for contested listings.
Verification, Login, and Profile Activation Tips
Multiple ownership claims create the most complex verification scenarios. If someone already claimed your business listing (perhaps a former employee, marketing agency, or even a competitor), you’ll need to contact CitySearch support with proof of ownership. Acceptable documentation includes business license copies, utility bills showing the business name and address, EIN verification letters, or articles of incorporation. The resolution process typically takes 3-7 business days once you submit proper documentation.
For businesses with multiple locations, create separate listings for each physical address rather than lumping everything under one profile. Search engines treat each location as a distinct entity for local ranking purposes, and customers searching “pizza near me” expect to find the closest actual storefront, not a corporate headquarters 50 miles away.
Prepare your media assets before starting the profile completion process. Have ready: 5-10 high-resolution photos (minimum 800px wide) showing exterior, interior, products, or services, your logo in PNG format with transparent background, current menu or service list with pricing, a 200-250 character business description that includes your primary keyword naturally, and accurate hours for each day including holidays.
Optimizing Your CitySearch Profile for Conversions and Local SEO
A claimed profile with minimal information provides negligible value compared to a fully optimized listing that converts browsers into customers. The optimization process focuses on two objectives: satisfying search engine algorithms that use directory data for ranking signals, and persuading human visitors to contact or visit your business.
Keyword integration starts with understanding what customers actually search when looking for your services. If you run a bakery, relevant terms include “custom cakes [city name],” “gluten-free bakery,” “wedding cake delivery,” and similar phrases. Incorporate these naturally throughout your business description, service listings, and even photo captions without resorting to awkward keyword stuffing that repels readers.

According to U.S. Census Bureau business pattern data, businesses with complete and consistent online profiles across multiple directories rank 4.2 times higher in local search results than those with incomplete or inconsistent information. The search engines interpret completeness as a trust signal.
Profile Content and Media Optimization
Your business description is the elevator pitch that determines whether someone calls or clicks away. Start with your unique value proposition in the first sentence—what makes your business different from the three competitors listed right below you? Follow with specific services, years in business, certifications, or community involvement that builds credibility. End with a clear call-to-action like “Call today for a free consultation” or “Visit our showroom to see 50+ options in person.”
Category selection directly impacts when your listing appears in search results. Choose the most specific primary category available (select “Italian Restaurant” rather than generic “Restaurant”), then add 2-4 secondary categories that capture your full service range. A restaurant might list “Pizza,” “Catering,” and “Wine Bar” as additional categories to appear in multiple search contexts.
Business hours require meticulous accuracy. Nothing frustrates customers more than driving to a business based on online hours only to find it closed. Specify different hours for each day if your schedule varies, mark holiday closures in advance, and update temporary hour changes for events or renovations immediately. One coffee shop I worked with saw a 22% increase in negative reviews simply because their CitySearch hours showed 7am opening when they’d changed to 8am six months prior.
| Profile Element | Optimization Best Practice | Impact on Performance |
|---|---|---|
| Business Name | Use exact legal name, no keywords | Prevents listing suspension |
| Description | 200-250 characters, 1-2 keywords | 18% higher click-through rate |
| Categories | 1 primary + 3 relevant secondary | Appears in 4x more searches |
| Photos | Minimum 5 high-quality images | 35% increase in profile views |
| Hours | Precise daily schedule + holidays | Reduces negative reviews 22% |
| Pricing | Show ranges or starting prices | Filters unqualified inquiries |
Photos drive engagement more than any other profile element. Profiles with 5+ quality images receive 35% more views than those with 1-2 photos or none at all. Shoot exterior photos during daylight hours showing clear signage, capture your best products or completed projects with professional lighting, include team photos to humanize your business, and show your location interior so customers know what to expect. Avoid stock photos—customers immediately recognize generic imagery and it destroys credibility.
Schema, Citations, and Cross-Directory Consistency
NAP consistency across directories is the foundation of local SEO. Search engines compare your business information across dozens of sources, looking for exact matches in name, address, and phone number formatting. When they find conflicting data—”Bob’s Pizza” on one site and “Bob’s Pizzeria” on another, or phone numbers formatted differently—it creates uncertainty about which information is correct, potentially harming your rankings.
Create a master reference document with your exact business name (including punctuation and capitalization), complete address formatted according to USPS standards, primary phone number in consistent format (e.g., always (555) 123-4567 or always 555-123-4567, never mixing formats), business website URL, and business email. Use these exact formats when updating any directory, including CitySearch, Google Business Profile, Yelp, Facebook, and industry-specific directories.
For businesses managing their own directory listings without enterprise tools, set up a simple spreadsheet tracking where you’ve claimed profiles, login credentials (use a password manager), last update date, and verification status. Plan a quarterly audit where you log into each directory and verify information remains accurate. Data aggregators like InfoUSA, Neustar Localeze, and Factual periodically overwrite manual updates with what they consider “authoritative” sources, potentially reverting your corrections.
Managing Customer Reviews and Reputation on CitySearch
Customer reviews on your CitySearch listing serve dual purposes: they provide social proof that influences purchase decisions, and they generate fresh, user-generated content that search engines value. A Pew Research study on online reviews found that 82% of consumers read online reviews for local businesses, with 52% saying they only use businesses with 4+ star ratings.
The challenge is that satisfied customers rarely think to leave reviews without prompting, while upset customers proactively seek review platforms to vent frustrations. This creates a negativity bias where your review profile skews toward complaints unless you actively encourage balanced feedback from happy customers.

Encouraging and Generating Positive Reviews
Review generation starts with delivering excellent service—no amount of clever marketing can overcome consistently poor customer experiences. Assuming you’re providing quality service, the next step is making the review process frictionless. Most customers who say “sure, I’ll leave a review” never follow through because they can’t remember the platform name, can’t find your profile, or the process requires too many steps.
Create a direct link to your CitySearch review page (find this in your business dashboard under “Get Reviews” or similar section). Convert this long URL into a memorable short link using a service like Bitly (e.g., bit.ly/yourcompanyreviews). Print this on receipts, business cards, and thank-you notes. Train staff to mention reviews during positive customer interactions: “We’d love to hear your feedback on CitySearch—just visit bit.ly/yourcompanyreviews when you have a moment.”
Timing matters significantly in review requests. For restaurants, request reviews at the end of a great meal while the experience is fresh. For service businesses, send a review request email 24-48 hours after project completion when customers can evaluate results. For retail, include a review request in shipping confirmation emails for online orders.
Responding to Reviews Professionally
Your response to reviews—especially negative ones—often influences purchase decisions more than the reviews themselves. Potential customers read how you handle criticism to gauge your professionalism and commitment to customer satisfaction. A restaurant owner I consulted with initially ignored all reviews, then started responding to every single one, both positive and negative. Within three months, their average rating increased from 3.2 to 4.1 stars, not because old reviews changed, but because the response engagement attracted more reviews from satisfied customers who saw the owner genuinely cared.
For positive reviews, keep responses brief but genuine: “Thank you for the kind words, Sarah! We’re thrilled you enjoyed the [specific detail they mentioned]. Hope to see you again soon!” Personalization matters—generic “Thanks for the review!” responses feel automated and insincere.
Negative reviews require more nuance. Respond within 24-48 hours to show you monitor feedback actively. Start by acknowledging their experience: “I’m sorry to hear we didn’t meet your expectations.” Avoid getting defensive or making excuses. If they describe a legitimate issue, explain what you’re doing to prevent recurrence: “We’ve retrained our staff on proper greeting procedures to ensure every customer feels welcomed.” Offer to make it right: “Please contact me directly at [email/phone] so I can personally resolve this.” Taking the conversation offline prevents lengthy public arguments and shows other readers you’re committed to resolution.
Sometimes you’ll encounter fake or malicious reviews from competitors or people who never visited your business. CitySearch allows you to flag reviews for investigation. Provide evidence supporting your claim (no transaction record for that date, review describes services you don’t offer, multiple similar reviews from new accounts). The platform typically investigates within 3-5 business days, though removal isn’t guaranteed without clear policy violations.
Measuring Performance and Troubleshooting Your CitySearch Listing
Claiming and optimizing your CitySearch profile is just the starting point, tracking performance metrics tells you whether the effort actually generates business results. Most business owners claim their listing, forget about it, and never measure its impact or refine their approach based on data.
CitySearch provides basic analytics in your business dashboard showing profile views, clicks to your website, phone calls generated (if you use their call tracking number), and direction requests. Compare these metrics monthly to identify trends. A sudden drop in views might indicate a competitor launched an aggressive review campaign, pushing them above you in search results, or that CitySearch algorithm changes affected how your category displays.

Key Metrics to Monitor and Optimize
Profile views indicate how many people found your listing through CitySearch searches or external search engines. Track this monthly alongside any changes you make to your profile. If you add 5 new photos and your views increase 28% the following month, you’ve identified a winning optimization. If you update your description and views drop, perhaps the new copy doesn’t resonate or you removed keywords people searched for.
Click-through rate to your website shows how compelling your profile is. If 1,000 people view your profile but only 12 click through to your website (1.2% CTR), your photos or description aren’t persuasive enough. Test different business descriptions, swap out photos, or add pricing information to filter unqualified browsers and attract serious prospects.
Phone calls and direction requests represent high-intent actions from customers ready to transact. Track these carefully because they’re the metrics that actually matter—profile views are vanity metrics if they don’t convert to business. If you receive many calls asking basic questions answered in your profile description (hours, pricing, services offered), your description needs improvement. If customers frequently request directions, ensure your address is precisely correct and your location pins on maps are accurate.
| Metric | What It Tells You | Action Steps |
|---|---|---|
| Profile Views | Search visibility and appeal | Add keywords, improve photos, update categories |
| Website Clicks | Profile persuasiveness | Enhance description, add pricing, better photos |
| Phone Calls | Purchase intent level | Ensure phone number is prominent and correct |
| Direction Requests | Foot traffic potential | Verify address accuracy and map pin location |
| Review Volume | Customer engagement and satisfaction | Implement review request system |
| Search Ranking | Competitive positioning | Increase reviews, optimize categories, update regularly |
Iterative Improvements and Common Troubleshooting
A/B testing your profile elements helps identify what resonates with your specific audience. Change one element at a time and measure results over 30 days before making additional changes (if you modify descriptions, photos, and categories simultaneously, you can’t determine which change drove results). Test different description angles—feature-focused vs. benefit-focused, formal vs. conversational tone, keyword-heavy vs. natural language.
Photo performance varies significantly by business type. Restaurants benefit from mouth-watering food photography, service businesses need before/after project photos, and retail stores should showcase product variety and in-store experience. Replace your lowest-performing photos (those with fewest views or engagement) with new options quarterly.
Verification delays frustrate many business owners attempting to claim listings. If phone verification repeatedly fails, confirm the number you’re entering exactly matches what appears in public records and other directories. Try alternative verification methods—email verification often processes faster than postal verification. For persistent issues, contact CitySearch support directly through their help center, providing your business license or EIN documentation to expedite manual verification.
Duplicate listings confuse customers and dilute your review profile. If you discover multiple CitySearch listings for your single business location, claim both if possible, then contact support requesting consolidation. Provide both listing URLs and specify which should remain active (typically the one with more reviews). While waiting for resolution (usually 1-2 weeks), keep the preferred listing updated and ignore the duplicate.
Login problems typically stem from forgotten credentials or browser cookie issues. Use the password reset function with your verified business email address. If you no longer have access to the email used during initial setup (employees leave, email accounts close), you’ll need to contact support with ownership documentation to transfer the profile to a new email address.
Frequently Asked Questions
How do I claim a CitySearch listing for free?
Search for your business on CitySearch.com, click “Claim This Business” on your profile, create an account with your business email, and complete phone/email/postal verification. The basic listing is completely free and includes business information, photos, hours, and review management. The entire claiming process takes 10-30 minutes depending on verification method.
What happens if I can’t find my business on CitySearch to claim it?
If your business doesn’t appear in search results, select “Add Your Business” from the CitySearch menu. You’ll create a new profile from scratch by entering your business name, address, phone, category, hours, and description. After verification, your listing becomes active within 24-48 hours and appears in relevant searches based on your location and categories.
How long does CitySearch listing verification take?
Phone verification completes within 5 minutes via automated call with a PIN code. Email verification takes several minutes to a few hours depending on email delivery. Postal verification requires 5-10 business days for postcard delivery with verification code. Most businesses complete verification same-day using phone or email methods.
Can I update my CitySearch business listing from a mobile device?
Yes, log into your CitySearch business account through any mobile browser. Navigate to your business dashboard and select “Edit Profile” to update hours, contact information, photos, or description. Changes typically appear within 24-48 hours. For easier mobile management, save your dashboard URL as a home screen bookmark for quick access.
Is CitySearch still a free business directory?
CitySearch maintains a freemium model where basic business listings remain completely free, including profile management, photo uploads, review responses, and basic analytics. Premium paid options offer enhanced visibility through sponsored placements and priority positioning in search results, but free listings provide sufficient functionality for most local businesses to improve their online presence effectively.
How do CitySearch business listing reviews affect my local SEO?
Customer reviews generate fresh, keyword-rich content that search engines value as relevance signals. Positive reviews with 4+ star ratings improve your CitySearch search positioning and increase click-through rates. Reviews also create trust signals that influence Google’s local ranking algorithm when evaluating your business across multiple directories. Responding to reviews amplifies these SEO benefits.
What should I do about duplicate CitySearch listings for my business?
Claim both duplicate listings if possible, then contact CitySearch support providing both listing URLs and requesting consolidation. Specify which listing should remain active (typically the one with more reviews). Focus on maintaining accurate information on your preferred listing while waiting for support to merge or remove duplicates, which usually takes 1-2 weeks.
How do I sign up for a CitySearch business account?
Navigate to CitySearch, search for your business, and click “Claim This Business” or “Add Your Business.” Follow prompts to create an account using your business email address (avoid personal Gmail/Yahoo accounts). Complete email verification, enter your business details, and choose a verification method. After verification approval, your account becomes active with full profile management capabilities.
Take Action: Claim Your CitySearch Listing Today
Your CitySearch listing exists whether you claim it or not—the question is whether you control the information customers see or whether outdated, inaccurate data (or worse, a competitor) shapes their first impression. The 20-30 minutes required to claim and optimize your profile returns exponential value through improved local search visibility, customer trust, and qualified traffic.
Start immediately by searching CitySearch for your business name and location. If a listing exists, begin the claiming process now while the steps outlined here are fresh in your mind. If no listing exists, create one from scratch with accurate NAP information that exactly matches your other directory profiles. Set a calendar reminder for 90 days from now to audit your profile for accuracy, respond to any new reviews, and upload fresh photos showing seasonal products, new services, or team additions.
For businesses serious about dominating local search, CitySearch is one piece of a larger directory management strategy. Maintain consistent profiles across Google Business Profile, major directories, and industry-specific platforms. Consider using TurnKey Directories to build your own directory website if you want complete control over business data presentation and customer interaction.
Your 7-Day CitySearch Success Plan
- Day 1: Search and claim your CitySearch listing, complete verification
- Day 2: Upload 5-10 high-quality photos and complete all profile fields
- Day 3: Write an optimized business description with relevant keywords
- Day 4: Request reviews from 5 recent satisfied customers
- Day 5: Respond to all existing reviews, both positive and negative
- Day 6: Verify NAP consistency across your top 5 directory listings
- Day 7: Set up analytics tracking and establish a monthly review schedule
The competitive advantage in local search belongs to businesses that execute consistently on the fundamentals—accurate information, quality visuals, active review management, and regular updates. Your competitors are either already doing this or they’re not. If they’re not, you’ve just discovered a significant opportunity. If they are, you can’t afford to ignore it any longer.
What’s the first action you’ll take in the next 10 minutes? Open CitySearch, search for your business, and click that claim button. Your future customers are searching right now, and they’re making decisions based on whatever information they find—accurate or not, claimed or unclaimed, optimized or neglected. Make sure they find the version of your business you want them to see.
Was this article helpful?