How to Install and Activate a WordPress Plugin: A Beginner’s Guide
Generating summary...
You’ve decided it’s time to add new functionality to your WordPress site—maybe a contact form, an SEO toolkit, or a security scanner. But if you’re new to WordPress, the sheer number of plugins (over 60,000 in the official directory alone) can feel overwhelming. Where do you start? How do you know which ones are safe? And what’s the actual process for getting a plugin installed and running without breaking your site?
Here’s something most beginner guides won’t tell you upfront: installing a plugin is the easy part. The real challenge lies in choosing the right plugin, verifying it won’t conflict with your existing setup, and maintaining it over time. I’ve seen countless WordPress sites slow to a crawl or even crash because someone installed five plugins that all tried to do the same thing, or worse, picked one that hadn’t been updated in three years. The good news? With a systematic approach and a few best practices, you can avoid these pitfalls entirely and unlock WordPress’s full potential safely.
TL;DR – Quick Takeaways
- Always back up first – Never install or update a plugin without a current backup of your site
- Three installation methods – Install from the WordPress directory (easiest), upload a ZIP file (for premium plugins), or use FTP/SFTP (advanced)
- Check compatibility before activating – Verify the plugin’s last update date, active installations, and WordPress version compatibility
- Test in staging when possible – Major sites should test new plugins in a staging environment before going live
- Fewer is better – Quality over quantity; each plugin adds overhead, so choose multipurpose solutions when practical
Before You Install a Plugin: The Pre-Flight Checklist
Most plugin problems don’t happen during installation—they happen because someone skipped the research phase. Think of this like hiring a contractor: you wouldn’t let someone rewire your house without checking their credentials first, right? The same logic applies to WordPress plugins, which literally have access to your entire database and codebase.

Define Your Goal and Required Features
Start by writing down exactly what you need the plugin to do. Are you looking for a contact form, or do you also need spam protection, GDPR compliance, and third-party integrations? This clarity prevents “plugin bloat”—the accumulation of overlapping plugins that slow your site and create maintenance headaches.
For example, if you need both a contact form and an email marketing signup, look for a single plugin that handles both (like WPForms or Gravity Forms) rather than installing three separate plugins. I learned this the hard way when a client’s site had four different form plugins, each adding its own CSS and JavaScript files on every page load.
Assess Compatibility and Risks
When you find a candidate plugin, inspect these key indicators in its listing:
- Last Updated: If it hasn’t been updated in over a year, that’s a red flag (unless it’s a simple plugin with no security concerns)
- Active Installations: More users usually means more testing and faster bug fixes. Plugins with 100,000+ active installations have a track record
- Compatibility Note: Check if it’s tested with your current WordPress version. A “not tested” warning doesn’t always mean it won’t work, but proceed with caution
- Reviews and Support: Skim recent reviews for recurring complaints. Check the support forum—are developer responses recent and helpful?
According to WordPress.org’s plugin management documentation, these compatibility checks are your first line of defense against broken sites. A plugin that was abandoned two years ago might have unpatched security vulnerabilities or conflicts with newer PHP versions.
Backup Best Practices: Your Safety Net
Here’s a truth that sounds obvious but is ignored constantly: back up before every plugin install or update. Not “once a week.” Not “when you remember.” Before every change.
Why? Because plugins can conflict with your theme, your hosting environment, or other plugins in ways that aren’t predictable until they happen. I once watched a seemingly innocent SEO plugin break an entire e-commerce site’s checkout process because it rewrote URLs in an unexpected way. The client had no recent backup, and recovery took days.
Source Trust and Security Considerations
Not all plugin sources are created equal. The WordPress Plugin Directory (at wordpress.org/plugins) is the safest bet because every plugin submitted there goes through code review. Premium marketplaces like CodeCanyon or vendor sites (like WooCommerce or Yoast) are generally trustworthy, but do your homework.
What to avoid: random blogs offering “nulled” (pirated) premium plugins. These often contain malware or backdoors. Saving $50 on a plugin isn’t worth losing your entire site (or your users’ data) to hackers. According to security research from sources like TechRadar, even plugins with millions of installations can have security flaws, so staying vigilant and keeping plugins updated is critical.
How to Find Plugins From Within WordPress
WordPress makes plugin discovery surprisingly easy—you don’t need to leave your admin dashboard. The built-in plugin installer connects directly to the official WordPress Plugin Directory, giving you search, filtering, and one-click installation.
Automatic Installation From the WordPress Plugin Directory
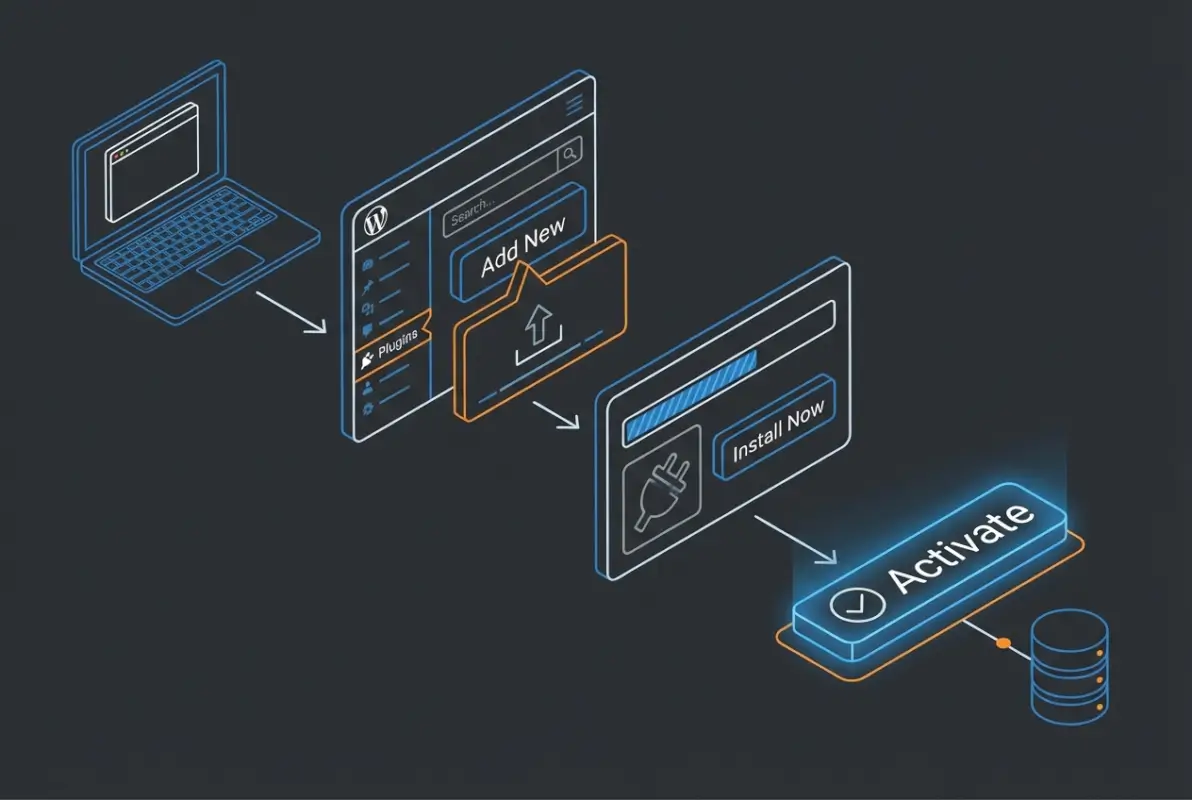
This is the method you’ll use 90% of the time. Here’s the exact workflow:
- Log into your WordPress admin dashboard
- Navigate to Plugins → Add New in the left sidebar
- Use the search box (top right) to enter keywords related to your need (e.g., “contact form,” “SEO,” “security”)
- Browse results. Click More Details on any plugin to see its full description, screenshots, changelog, and reviews
- Once you’ve chosen, click Install Now. WordPress downloads and installs the plugin in seconds
- After installation completes, the button changes to Activate. Click it to enable the plugin
That’s it—no FTP required, no file uploads, just point and click. But don’t rush through step 4. Actually read the plugin’s details page. Check the “Last Updated” date, the number of active installations, and whether it’s compatible with your WordPress version.
Using the WordPress Admin to Discover Plugins
The Add New screen also offers browsing by category. If you’re not sure exactly what you need, click tabs like Featured, Popular, or Recommended to see curated lists. You can also filter by tags or search for specific functionality (e.g., “WooCommerce” if you need e-commerce integrations).
Reading user reviews here is invaluable. Look for patterns—if ten people mention “slows down my site,” take that seriously. If the developer responds promptly to support questions in the reviews, that’s a good sign.
Premium or External Plugins: ZIP Uploads
Not every plugin lives in the WordPress Directory. Premium plugins (purchased from vendors) or custom-built plugins come as ZIP files. To install these:
- Go to Plugins → Add New
- Click the Upload Plugin button at the top of the page
- Click Choose File and select the plugin ZIP from your computer
- Click Install Now. WordPress uploads and unpacks the ZIP
- Click Activate once the installation finishes
Only upload ZIPs from sources you trust. If you’re buying a premium plugin, purchase directly from the developer’s official site, not from third-party resellers or “free download” sites. For more details on this method, you can explore how to install a WordPress plugin from a ZIP file.
SFTP/FTP Installation: The Advanced Route
Occasionally you’ll need to upload a plugin manually via SFTP or FTP (for example, if the WordPress admin is inaccessible due to a server error, or if you’re deploying a custom plugin). Here’s the process:
- Download and unzip the plugin on your local computer
- Connect to your web server using an FTP/SFTP client (like FileZilla or Cyberduck)
- Navigate to
/wp-content/plugins/on your server - Upload the entire plugin folder (the one you unzipped) into the plugins directory
- Return to your WordPress admin, go to Plugins → Installed Plugins, find the newly uploaded plugin, and click Activate
This method is rarely necessary for everyday users, but it’s a lifesaver when troubleshooting. If a plugin crashes your site and you can’t access the admin, you can use FTP to rename the plugin’s folder (which deactivates it) and restore access.
| Installation Method | Ease of Use | Best For | When to Use |
|---|---|---|---|
| Directory Install | Easiest | Free plugins from WordPress.org | 90% of the time |
| ZIP Upload | Easy | Premium or custom plugins | Purchased plugins not in the directory |
| FTP/SFTP | Advanced | Troubleshooting or manual deployments | Admin access is broken or for version control workflows |
How to Install and Activate a Plugin: Two Core Paths
Let’s break down the two most common installation paths in detail. Whether you’re grabbing a free plugin from the directory or uploading a premium ZIP, the activation step is the same—but the setup that follows can vary widely.
Path A: Install Directly From the Directory (Easiest)
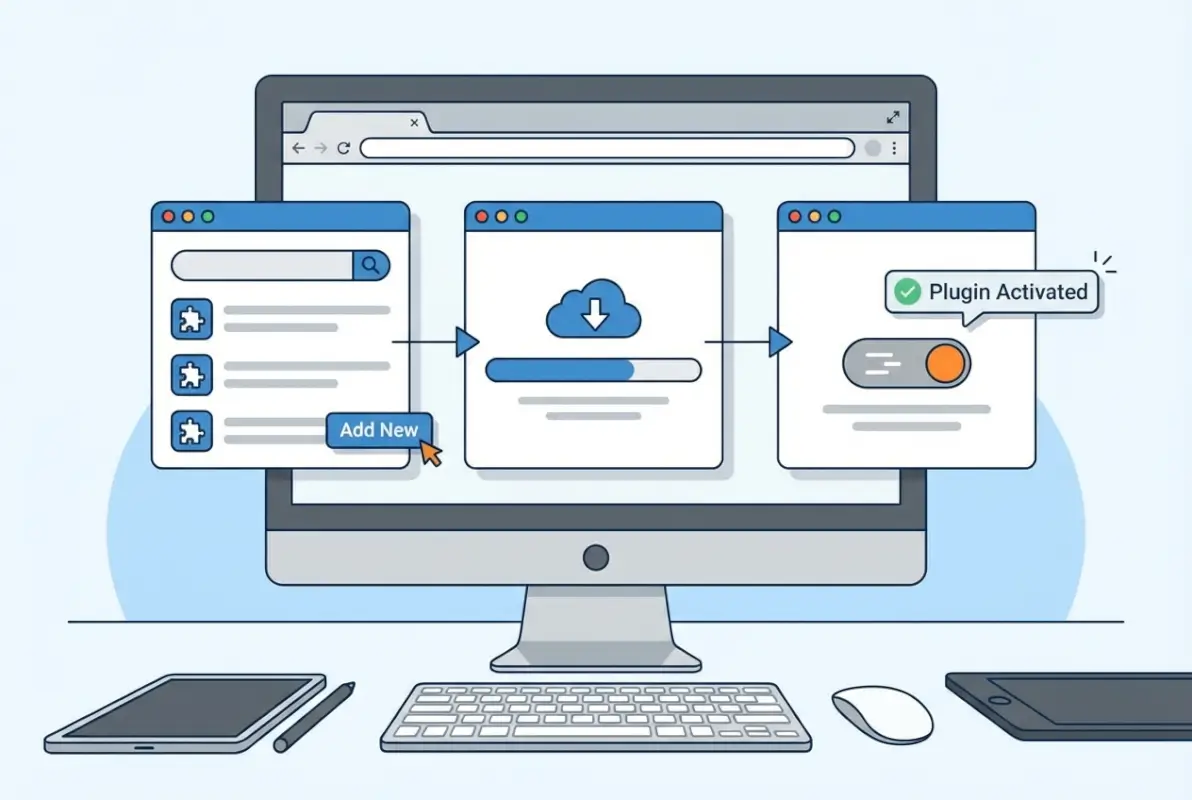
This is your default method. It’s fast, safe, and requires zero technical knowledge beyond clicking a few buttons. Here’s the step-by-step again, with a bit more context:
- Plugins → Add New: From your WordPress dashboard, click this menu item. You’ll land on a page showing featured plugins
- Search: Type keywords into the search box (top right). Be specific—”Yoast SEO” or “WPForms” will get you better results than just “SEO” or “forms”
- Review Details: Click the plugin’s name or “More Details” to open a popup with full info. Read the description, check the “Last Updated” timestamp, and scan recent reviews
- Install Now: If you’re satisfied, click the blue Install Now button. WordPress downloads the plugin (usually in under 10 seconds)
- Activate: Once installed, the button changes to Activate. Click it. The plugin is now live on your site
After activation, many plugins will either redirect you to a setup wizard or add a new menu item in your WordPress admin sidebar. Don’t skip the setup—this is where you configure critical settings like API keys, display options, or security rules.
Path B: Upload a ZIP File (Premium or External Plugin)
Premium plugins (those you’ve purchased) or custom plugins built by a developer come as ZIP files. Here’s how to get them onto your site:
- Plugins → Add New → Upload Plugin: Click the Upload Plugin button at the top of the Add New screen
- Choose File: Click Choose File and navigate to the ZIP file on your computer. Make sure it’s a valid plugin ZIP (it should contain a folder with PHP files, not just random files)
- Install Now: Click this button. WordPress uploads the ZIP, unpacks it into
/wp-content/plugins/, and confirms installation - Activate: Click Activate. The plugin is now active
- Configure: Check for a setup wizard or new admin menu item. Premium plugins often require a license key—enter it now to unlock updates and support
One thing to watch out for: some vendors package their plugin ZIPs inside another ZIP file (for example, the download might include documentation and the plugin ZIP together). If WordPress gives you an error saying “not a valid plugin,” unzip the download on your computer and look for the actual plugin ZIP inside.
Path C: Manual/FTP/SFTP Installation (Rarely Needed)
If you’re comfortable with FTP or need to bypass the WordPress admin (say, after a plugin crash), manual installation is straightforward:
- Unzip the plugin on your local machine so you have a folder (e.g.,
my-plugin/) - Connect via FTP/SFTP to your WordPress hosting server
- Navigate to
/wp-content/plugins/on the server - Upload the plugin folder into the
plugins/directory - Activate via WordPress admin: Go to Plugins → Installed Plugins, find your new plugin, and click Activate
This method is useful if you’re deploying plugins via Git, working in a version-controlled environment, or troubleshooting a site where the admin is inaccessible. For day-to-day use though, stick with the admin interface.
problematic-plugin to problematic-plugin-OFF). This instantly deactivates it and usually restores access.Post-Installation: Configure and Verify
Clicking “Activate” is just the beginning. A plugin isn’t truly “installed” until you’ve configured it, tested it, and confirmed it doesn’t conflict with your existing setup. This phase is where beginners often stumble, because they assume activation equals completion.
Activate and Basic Configuration
After activation, most plugins will guide you through initial setup. Common patterns include:
- Setup Wizard: Plugins like Yoast SEO or WooCommerce launch a multi-step wizard to configure core settings. Don’t skip this—it’s the fastest way to get started correctly
- New Admin Menu: Look for a new item in your WordPress sidebar (often with the plugin’s name or icon). This is where you’ll manage plugin settings
- Dashboard Notices: Some plugins display a banner asking you to complete setup or enter a license key. Address these promptly
Take the time to explore the plugin’s settings. Even “simple” plugins often have options that drastically affect behavior—like where a contact form sends notifications, or whether a caching plugin minifies CSS.
Test for Conflicts
Here’s where many sites break: Plugin A conflicts with Plugin B (or with your theme), causing errors, layout glitches, or performance issues. The good news is you can catch most conflicts with a simple test:
- Check the front-end: Visit your site in an incognito/private browser window (to bypass caching). Does everything look normal? Any error messages?
- Test key functionality: If you installed a form plugin, submit a test form. If it’s an SEO plugin, check that page titles and meta descriptions appear correctly
- Check the browser console: Right-click → Inspect → Console tab. Look for JavaScript errors (red text). If you see errors referencing the new plugin, investigate
- Monitor admin performance: Does your WordPress dashboard load slower after activation? That’s a red flag
If you suspect a conflict, temporarily deactivate all other plugins except the new one, and switch to a default WordPress theme (like Twenty Twenty-Four). If the issue disappears, reactivate plugins one by one to identify the culprit.
Performance and Security Checks
Plugins can slow your site or introduce security vulnerabilities if they’re poorly coded. After installing a plugin, run these quick checks:
- Page Speed Test: Use Google PageSpeed Insights or GTmetrix to test your homepage before and after plugin activation. If load time jumps by more than half a second, the plugin may be poorly optimized
- Security Scan: Tools like Wordfence or Sucuri can scan for known vulnerabilities. If you’ve installed a plugin with a sketchy reputation, a scan can catch malware or backdoors
- Database Impact: Some plugins create tons of database entries or auto-load heavy options. Use a plugin like Query Monitor to see if the new plugin is running slow database queries
If a plugin significantly hurts performance, look for a lighter alternative or optimize its settings (many caching/optimization plugins let you exclude certain scripts or defer loading).
Ongoing Maintenance: Keep Your Plugins Healthy
Plugins aren’t “install and forget.” They require regular maintenance:
- Update regularly: WordPress will notify you of plugin updates in the dashboard. Apply them promptly—updates often patch security flaws
- Remove unused plugins: If you deactivated a plugin months ago and haven’t touched it since, delete it. Inactive plugins still clutter your file system and can be exploited if they have vulnerabilities
- Review plugin health quarterly: Every few months, audit your plugin list. Are they all still necessary? Are any abandoned (not updated in over a year)? Replace or remove as needed
I like to set a calendar reminder every quarter to review plugins, check for updates, and confirm that all my backups are working. It’s boring maintenance work, but it prevents emergencies down the road.
Best Practices for Plugin Management
The difference between a well-maintained WordPress site and a bloated, slow, insecure one often comes down to plugin management discipline. Let’s cover the habits that separate pros from amateurs.

Permissions and Hosting Considerations
Not all plugins work on all hosting setups. Before installing a plugin, verify:
- PHP Version: Some plugins require PHP 7.4 or newer. Check your hosting control panel (or ask your host) to confirm your PHP version
- Memory Limit: WordPress’s default PHP memory limit is sometimes too low for complex plugins (especially page builders). If you see “memory exhausted” errors, you may need to increase the limit in
wp-config.phpor via hosting settings - Server Permissions: Plugins that write files (like caching plugins) need write permissions on certain directories. Most hosts configure this correctly, but shared hosting can be restrictive
If you’re on managed WordPress hosting (like WP Engine or Kinsta), some features may be disabled (e.g., certain caching plugins) because the host already provides that functionality at the server level.
Backup Strategy: Your Insurance Policy
I can’t emphasize this enough: backups aren’t optional. They’re your insurance policy against plugin conflicts, hacks, or user errors. Implement a backup strategy that includes:
- Automated Scheduled Backups: Use a plugin like UpdraftPlus, BackWPup, or your hosting provider’s backup service to run daily or weekly backups
- Off-Site Storage: Store backups in cloud storage (Google Drive, Dropbox, Amazon S3), not just on your web server. If the server fails, local backups are useless
- Manual Pre-Change Backups: Before installing a new plugin or updating a critical one, manually trigger a backup. It takes 30 seconds and can save hours of recovery work
Test your backups occasionally by restoring to a staging site. You’d be surprised how many people discover their backup plugin was misconfigured only when they need it most.
Security Hygiene: Reduce Your Attack Surface
Plugins are one of the most common entry points for WordPress hacks. To minimize risk:
- Only Install From Trusted Sources: Stick to the WordPress Directory or established premium vendors. Avoid nulled plugins
- Keep Everything Updated: Outdated plugins are low-hanging fruit for attackers. Enable auto-updates for minor releases if your host supports it
- Audit Active Plugins Regularly: Remove any plugin you’re not actively using. Fewer plugins means fewer potential vulnerabilities
- Use a Security Plugin: Tools like Wordfence or Sucuri can monitor for malware, block brute-force attacks, and alert you to vulnerabilities in your installed plugins
If you run a business directory site or manage client sites, consider investing in professional security monitoring. The cost of a breach (downtime, data loss, reputation damage) far exceeds the cost of proactive security. For more on building secure directory sites, check out guidance on how to build a local business directory with security in mind.
Version Control and Staging: The Pro Approach
If you’re managing a professional site (or multiple client sites), adopt a version control and staging workflow:
- Staging Environment: Create a clone of your live site where you can test plugin installs, updates, and configuration changes without risk. Many hosts (like SiteGround, WP Engine) offer one-click staging
- Version Control (Git): Track your WordPress plugins in a Git repository. This lets you roll back changes, collaborate with developers, and maintain a history of what changed when
- Change Log: Keep a simple log of plugin installs and updates. When something breaks, you’ll know exactly what changed
For example, I always test major plugin updates (like WooCommerce or Elementor) in staging first. If the update breaks something, I can troubleshoot in staging, then deploy the fix to production once it’s stable. This approach has saved me from countless late-night emergencies.
| Practice | Beginner | Intermediate | Advanced |
|---|---|---|---|
| Backups | Manual before changes | Automated weekly to cloud | Daily automated + versioned backups |
| Testing | Test on live site (with backup) | Use staging environment | Staging + automated testing suite |
| Updates | Manual when prompted | Auto-updates for minor releases | Managed via CI/CD pipeline |
| Security | Security plugin installed | Monitored logs, firewall rules | Professional monitoring + WAF |
Troubleshooting Common Plugin Issues
Even with careful planning, plugin issues happen. Here’s how to diagnose and fix the most common problems without panicking (or calling an expensive developer).
Plugin Conflicts or White Screen of Death
The dreaded white screen means PHP encountered a fatal error and stopped rendering your site. If this happens immediately after activating a plugin, that plugin is almost certainly the culprit. Here’s how to recover:
- Access via FTP/SFTP: Connect to your server using an FTP client
- Navigate to
/wp-content/plugins/ - Rename the problematic plugin’s folder (e.g., change
bad-plugintobad-plugin-disabled). This deactivates it instantly - Try accessing your site again. If it loads, you’ve confirmed the plugin was the issue
- Re-rename the folder to restore the original name (but don’t activate yet)
- Check error logs: Look in
/wp-content/debug.log(if debugging is enabled) or your hosting control panel’s error logs to see what went wrong
If multiple plugins might be at fault, rename the entire plugins folder to plugins-disabled, restore access, then re-enable plugins one at a time to isolate the conflict.
define('WP_DEBUG', true); to wp-config.php) to see detailed error messages. This helps you (or a developer) diagnose conflicts quickly.Incompatibility Notices
Sometimes WordPress displays a notice saying a plugin “hasn’t been tested with your version of WordPress.” This doesn’t always mean it won’t work—many plugins continue functioning fine even without explicit testing. However, proceed cautiously:
- If the plugin hasn’t been updated in over two years, look for an actively maintained alternative
- Check the plugin’s support forum to see if others have reported issues with the current WordPress version
- Test thoroughly in staging before using on a live site
If you rely on a critical plugin that’s no longer maintained, consider hiring a developer to fork and maintain it for you, or budget time to migrate to a supported alternative. I’ve seen businesses lose functionality overnight when an abandoned plugin finally broke after a WordPress core update.
Performance and Caching Considerations
Some plugins don’t play nice with caching layers. Common symptoms include:
- Changes you make in the plugin settings don’t appear on the front-end
- The site loads slowly even though you installed a “speed” plugin
- Dynamic content (like user logins or shopping carts) behaves erratically
If you use a caching plugin (like WP Super Cache or W3 Total Cache), clear the cache after installing or configuring a new plugin. For advanced setups, you may need to exclude certain pages or scripts from caching (check your caching plugin’s documentation).
Also watch out for plugin stacking: running multiple caching plugins or multiple SEO plugins at once often causes conflicts rather than benefits. Stick to one plugin per major function (one caching plugin, one SEO plugin, etc.).
Best Practices Recap: Build a Sustainable Plugin Strategy
If you take nothing else from this guide, remember these principles:
- Backup before every change: Automate backups and make a manual one before plugin installs or updates
- Choose quality over quantity: Ten mediocre plugins hurt more than help. Prioritize well-maintained, multipurpose plugins
- Vet before you install: Check last updated date, active installations, reviews, and compatibility
- Test in staging: For business-critical sites, never test new plugins or updates on live traffic without a staging environment
- Keep everything updated: Outdated plugins are the #1 security risk in WordPress. Update promptly and remove unused plugins
- Monitor performance: Use speed testing tools before and after plugin changes to catch performance regressions early
- Maintain good hygiene: Quarterly audits, regular backups, and proactive security monitoring prevent most WordPress disasters
If you’re building something like a business directory or membership site, these practices become even more important because your site’s functionality depends on plugins working together seamlessly. For example, when setting up a business directory that can skyrocket your success, you’ll likely need plugins for listings, payments, and user management—all of which must coexist without conflict.
Frequently Asked Questions About Installing WordPress Plugins
How do I install a WordPress plugin?
To install a plugin, log into your WordPress dashboard, navigate to Plugins → Add New, search for the plugin by name or keyword, click Install Now, then Activate. For premium or external plugins, use the Upload Plugin button to upload a ZIP file, then activate after installation completes.
How do I activate a WordPress plugin after installation?
After installation completes, WordPress displays an Activate button where the Install Now button was. Click Activate to enable the plugin on your site. You can also activate plugins from the Plugins → Installed Plugins screen by clicking Activate next to any inactive plugin.
What should I do if a plugin doesn’t work after an update?
First, clear your site cache. If the problem persists, deactivate the plugin, check for conflicting plugins or theme issues, and review the plugin’s changelog for known bugs. If necessary, restore from your pre-update backup and contact the plugin developer for support before trying again.
Can I install plugins on WordPress.com versus WordPress.org sites?
WordPress.com free and lower-tier plans do not allow plugin installation—you’re limited to built-in features. Only WordPress.com Business and eCommerce plans support plugins. Self-hosted WordPress.org sites have full plugin installation capabilities from day one.
Do I need FTP or SFTP to install WordPress plugins?
No, most users install plugins entirely through the WordPress admin interface without ever touching FTP. FTP/SFTP is only needed for advanced scenarios like manual uploads, troubleshooting a broken site, or deploying custom plugins via version control systems.
How do I know if a plugin is safe to install?
Check the plugin’s last update date (within the last year is ideal), active installation count (higher is generally safer), user ratings and reviews, and compatibility with your WordPress version. Only download from the official WordPress Plugin Directory or reputable premium vendors, never from nulled or piracy sites.
Can I use multiple plugins together on the same site?
Yes, WordPress is designed to support multiple plugins simultaneously. However, test for conflicts after installing each new plugin. Avoid installing multiple plugins that do the same thing (e.g., two SEO plugins or two caching plugins) as they often conflict and degrade performance.
Should I back up my site before installing or updating plugins?
Absolutely. Always create a backup before installing a new plugin or updating an existing one. Plugin updates can occasionally cause conflicts or bugs, and having a recent backup lets you restore your site quickly if something goes wrong.
What if a plugin stops being updated by its developer?
If a plugin hasn’t been updated in over a year, assess the risk. Check if it still works with the current WordPress version and whether there are security vulnerabilities. For critical plugins, plan to migrate to an actively maintained alternative before the abandoned plugin breaks.
Are ZIP uploads from external sources secure?
Only if the source is trustworthy. Purchase premium plugins directly from the official developer site, not third-party marketplaces or free download sites. Nulled plugins often contain malware or backdoors. Always scan downloaded ZIPs with antivirus software before uploading.
How many plugins should I have on my WordPress site?
There’s no magic number—quality matters more than quantity. A well-optimized site might run smoothly with 20+ plugins, while a poorly coded plugin can slow down a site on its own. Focus on necessity, performance impact, and maintenance. Remove any plugin you’re not actively using.
Can plugins slow down my website?
Yes, especially poorly coded plugins or those that load heavy scripts on every page. Use performance testing tools like Google PageSpeed Insights before and after installing a plugin to measure impact. If a plugin significantly slows your site, look for a lighter alternative or optimize its settings.
Final Thoughts: Start Small, Build Smart
Installing and activating a WordPress plugin is mechanically simple—a few clicks and you’re done. But as we’ve explored, the real skill lies in choosing the right plugins, maintaining them properly, and keeping your site secure and performant over time. It’s not glamorous work, but it’s the foundation of every successful WordPress site.
If you’re just getting started, my advice is this: install one plugin at a time, test it thoroughly, and get comfortable with how it works before moving to the next one. Don’t rush to install every cool plugin you see recommended in blog posts (including this one). Start with the essentials—security, backups, and maybe a contact form—then expand as you learn what your site truly needs.
For those building specialized sites like business directories, the plugin choices become even more strategic. You’ll want to explore how plugins integrate with directory-specific features, payment systems, and user management. Resources like guidance on Cal Poly business directory expert tips or business directory fundraiser strategies can help you think through plugin requirements for these specialized use cases.
Your Action Plan
Today: Set up automated backups if you haven’t already. Install a backup plugin like UpdraftPlus and configure it to save to cloud storage.
This Week: Audit your current plugins. Remove any you’re not using, update the rest, and test your site’s performance.
This Month: If you manage a critical site, set up a staging environment and practice testing plugin updates there before pushing to production.
WordPress’s plugin ecosystem is one of its greatest strengths—it lets you build almost anything without writing a line of code. But with that power comes responsibility: the responsibility to choose wisely, maintain diligently, and always have a backup plan. Master these fundamentals, and you’ll build WordPress sites that are not just functional, but resilient, secure, and scalable for years to come.
Now go forth and extend that WordPress site—just remember to back up first.
Was this article helpful?