How to Build a Profitable GeoAccess Directory Platform: 7 Essential Elements for Success

Visual overview of How to Build a Profitable GeoAccess Directory Platform: 7 Essential Elements for Success

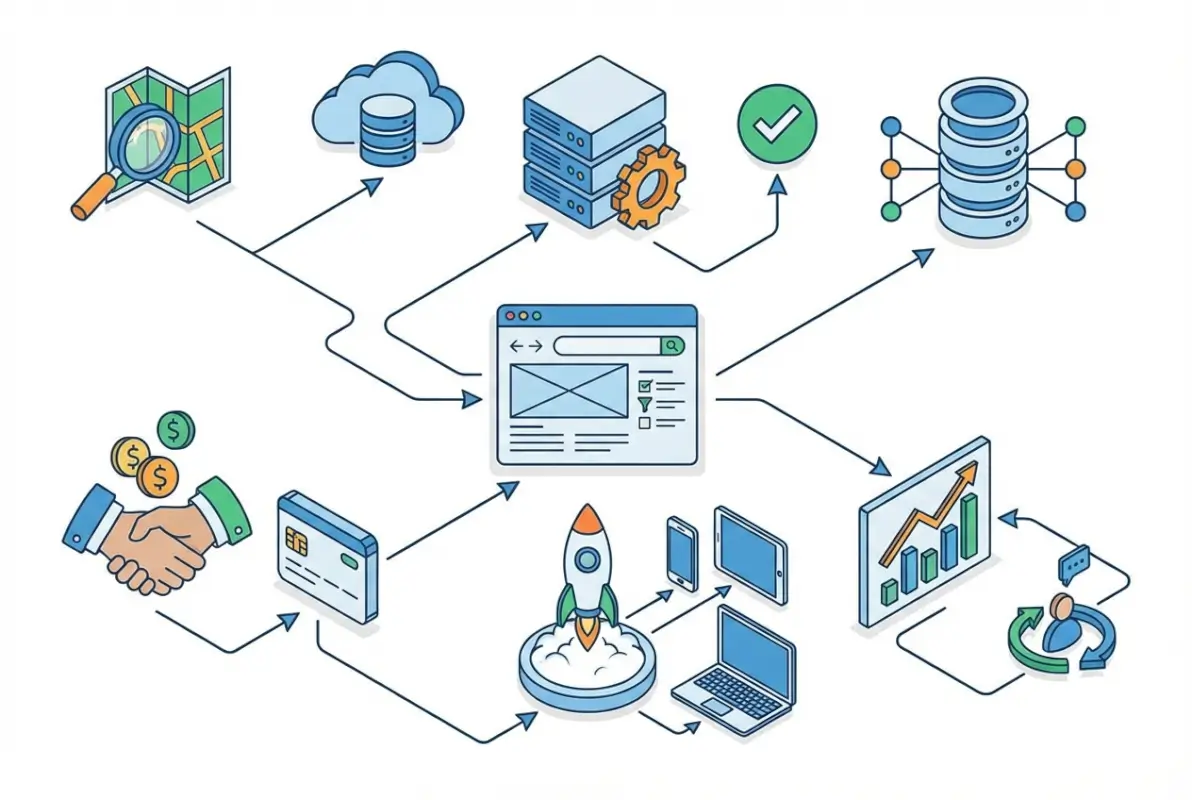
Building a directories online geoaccess system isn’t just about listing businesses—it’s about creating a location-intelligent platform that connects users with precisely what they need, exactly where they need it. Unlike generic directories that drown users in irrelevant results, a well-designed geoaccess platform leverages geographic data to deliver hyper-relevant matches, turning casual browsers into paying customers and transforming simple listings into revenue-generating assets.

The economic opportunity here is substantial. While massive platforms like Google dominate broad searches, specialized geo-directories consistently outperform in niche markets where location context matters most—think wedding vendors within 20 miles, emergency plumbers available now, or commercial real estate in specific districts. The businesses in these niches desperately need qualified local leads and will pay premium rates for platforms that deliver them.

TL;DR – Quick Takeaways

  • Location intelligence is your competitive edge – Generic directories lose to geo-smart platforms that understand radius search, proximity ranking, and service area mapping
  • Data verification drives monetization – Verified, fresh listings command 3-5x higher subscription rates than unverified entries
  • Multi-channel distribution beats build-and-hope – Successful directories syndicate content across local media, industry blogs, and partner platforms from day one
  • Local SEO multiplies organic reach – Proper schema markup and location-based content architecture can generate 10x more qualified traffic than generic optimization
  • Trust infrastructure enables premium pricing – Security, privacy compliance, and transparent data handling justify higher listing fees and reduce churn

Strategic Foundation for a GeoAccess Directory

Your geoaccess platform lives or dies based on how well you solve a specific geographic discovery problem. The directories that generate six-figure annual revenue share one trait: they’ve identified a clear gap between what users need to find locally and what existing solutions provide. This means going beyond “business directory for [city]” to pinpoint genuine friction in local discovery.

Core concepts behind How to Build a Profitable GeoAccess Directory Platform: 7 Essential Elements for Success

Start by mapping the local discovery journey for your target audience. Are wedding planners in Chicago frustrated searching for vendors who actually service suburbs? Do commercial property managers waste hours verifying which contractors cover specific industrial parks? These pain points reveal your value proposition. I remember launching a directory for specialized medical practitioners—the breakthrough came when we realized patients didn’t just need “doctors nearby,” they needed providers accepting new patients within their insurance network and offering weekend appointments. That specificity drove our entire platform architecture.

Defining Value Proposition and Niche Focus

A profitable geoaccess platform needs three components: a target audience with urgent location-based needs, service providers willing to pay for qualified local leads, and a geographic scope you can actually dominate. Avoid the trap of “we’ll list everything everywhere”—that’s a losing battle against established giants.

Instead, consider these high-value niches where location context creates genuine competitive advantage:

  • Emergency and time-sensitive services – Plumbers, locksmiths, towing services where “available now within 10 miles” matters more than generic reviews
  • Venue and event services – Wedding vendors, party rentals, caterers where service radius and travel fees are deal-breakers
  • Commercial and B2B services – Industrial suppliers, commercial contractors, business services where service areas and certifications determine eligibility
  • Regulated professionals with territories – Real estate agents, insurance brokers, financial advisors who operate within specific geographic boundaries

According to U.S. Census Bureau business data, service-based businesses in metropolitan areas spend 12-18% of revenue on local marketing, with lead generation representing their highest ROI channel. Your geoaccess platform taps directly into that budget by delivering pre-qualified, location-verified prospects.

Business Model and Monetization Blueprint

The most sustainable directory monetization combines recurring subscription revenue with performance-based income. Here’s the framework that works:

  • Tiered subscription listings – Free basic presence, $99-299/month for enhanced visibility with featured placement, media galleries, and preferential search ranking
  • Geographic exclusivity – Premium businesses pay $500-2000/month for category exclusivity within specific ZIP codes or radius (works exceptionally well for high-ticket services)
  • Lead generation fees – Charge per qualified inquiry ($5-50 depending on industry), taking a percentage when your platform directly connects customers to providers
  • Advertising and sponsorships – Complementary businesses pay for banner placement, newsletter features, or category page sponsorships

The economics improve dramatically when you track customer acquisition cost against lifetime value. For a local services directory, typical metrics look like: $150 CAC through direct outreach, $35-45 monthly subscription average, 18-month average customer lifetime = $630-810 LTV. That 4-5x return justifies aggressive early growth investment.

Key Takeaway: Launch with a monetization mix that balances predictable subscription revenue (for operational stability) with performance-based income (aligned with customer success).

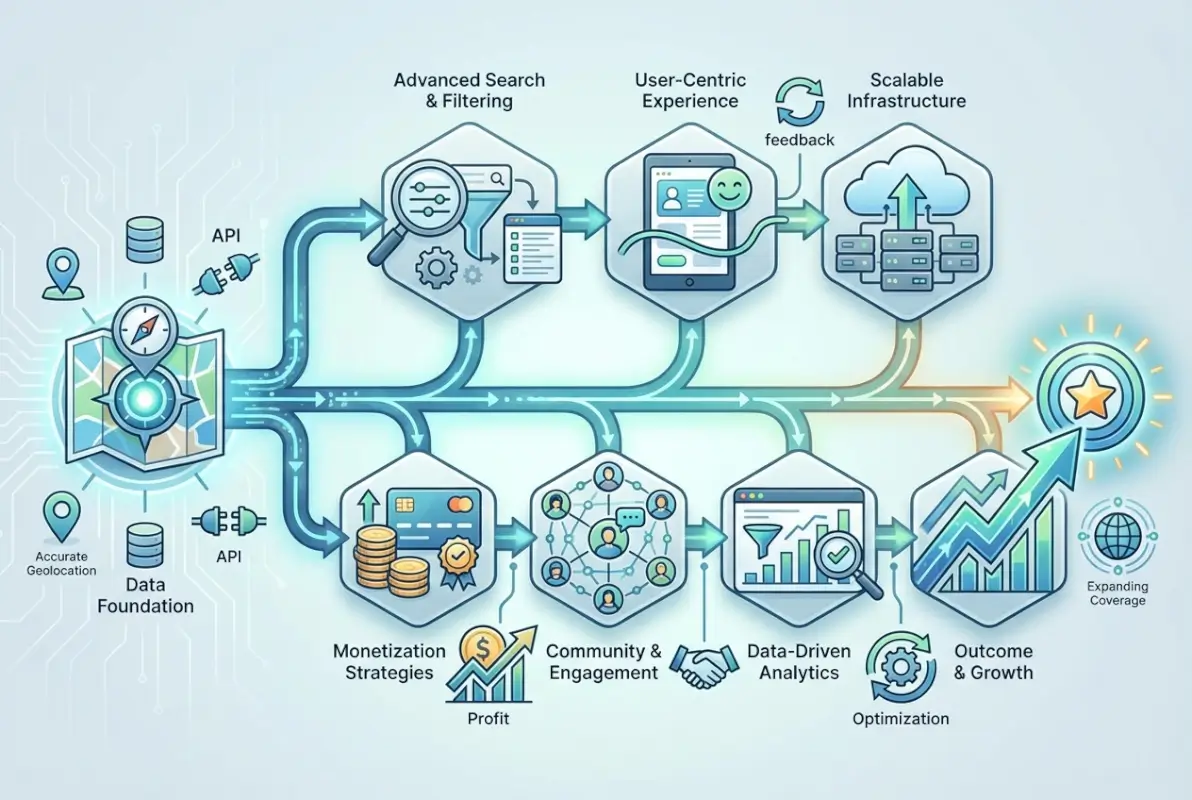
Directory Architecture, Data Quality, and User Experience

The technical foundation of your geoaccess platform determines whether users trust your data and whether businesses see ROI. Poor data quality—outdated hours, wrong addresses, disconnected phone numbers—destroys credibility faster than anything else. In my experience auditing failing directories, data freshness issues caused 60-70% of user abandonment.

Step-by-step process for How to Build a Profitable GeoAccess Directory Platform: 7 Essential Elements for Success

Your data schema needs to capture not just basic NAP (name, address, phone) but the geographic intelligence that powers location-based discovery:

  • Precise geolocation coordinates – Latitude/longitude for accurate distance calculations and map placement
  • Service area definitions – Not just business location but the geographic territory they actually serve (critical for mobile services)
  • Multi-location handling – Businesses with multiple branches need proper parent/child relationships to avoid duplicate listings
  • Temporal data – Hours of operation including holiday exceptions, seasonal availability, appointment-only designations
  • Category taxonomy with geographic relevance – Hierarchical categories that make sense for local search patterns

Data Schema, Verification, and Freshness

Implementing a verification pipeline separates professional directories from amateur listings sites. Consider this three-tier approach:

Automated verification catches obvious errors through phone number validation, address standardization via USPS APIs, and business license verification against public records. This handles 60-70% of submissions without manual intervention.

Crowdsourced validation lets users flag outdated information, with trusted community members earning reputation scores for accurate updates. According to research from Pew Research Center on digital trust, user-contributed verification builds stronger community engagement than top-down moderation alone.

Manual review for premium listings justifies higher subscription tiers—your team personally verifies business credentials, calls to confirm details, and may conduct site visits for top-tier members. This white-glove service commands 3-5x standard pricing.

Verification LevelMethods UsedAccuracy RatePricing Multiplier
BasicAutomated checks only75-80%1x (baseline)
Community-VerifiedAutomated + user validation88-92%2x
Premium VerifiedAll methods + manual review96-99%3-5x

Search, Filtering, and Map-Based UX

Modern users expect instant, relevant results with powerful filtering. Your search implementation should support:

Intelligent radius search that accounts for actual travel distance (driving routes, not straight-line calculations) and adjusts results based on service density—10 miles in rural areas might show 30 businesses while the same radius in urban cores returns 300+.

Faceted filtering lets users narrow by multiple criteria simultaneously: “open now” + “accepts credit cards” + “wheelchair accessible” + “within 5 miles.” Each filter application should maintain all other active filters while updating result counts in real-time.

Geolocation with privacy options enables “near me” searches while respecting user privacy preferences. Implement W3C Geolocation API standards with clear consent flows and the option to manually enter location instead.

Pro Tip: Implement “save search” functionality that alerts users when new businesses matching their criteria join your directory. This transforms one-time visitors into engaged community members who return regularly.

For mobile users (typically 65-75% of directory traffic), your interface must prioritize touch-friendly map interactions, one-tap calling, and simplified filtering that doesn’t require typing. Progressive Web App architecture delivers app-like performance without installation friction.

Key Takeaway: Invest in verification infrastructure before scaling your listing count—1,000 accurate, verified listings outperform 10,000 unverified entries in both user trust and search ranking.

Growth, Distribution, and Platform Optimization

The fatal mistake most directory builders make is expecting “if you build it, they will come.” They won’t, at least not initially. Successful geoaccess platforms launch with a comprehensive distribution strategy that drives traffic from multiple channels while simultaneously recruiting quality listings.

Tools and interfaces for How to Build a Profitable GeoAccess Directory Platform: 7 Essential Elements for Success

Your growth engine needs to run on parallel tracks: content that attracts users searching for local businesses, and outreach that converts those businesses into paying directory members. Neither works particularly well without the other, which creates that classic chicken-and-egg problem. The solution? Seed your directory with 100-200 quality listings before public launch, then drive traffic that demonstrates value to those businesses.

Content Strategy and Cross-Channel Distribution

Location-focused content serves double duty—it attracts users conducting local searches while establishing your directory as an authoritative local resource. The most effective content types include:

  • City/neighborhood guides – “Best Wedding Venues in Downtown Chicago” or “Top-Rated Plumbers Serving Brooklyn Heights”—these target high-intent local searches while naturally featuring your directory members
  • Category comparisons and buying guides – “How to Choose a Commercial Roofing Contractor” with a featured list of directory members who meet quality standards
  • Local industry insights and trends – “Q3 Real Estate Market Analysis: Lincoln Park” positions you as the go-to source while promoting relevant listings
  • Provider spotlights and success stories – In-depth profiles of directory members generate backlinks when businesses share them and provide valuable user-generated content

Distribution channels matter as much as content quality. Consider these syndication partnerships:

Local news outlets and community blogs often need quality local business content. Offer them free, exclusive neighborhood guides featuring your directory listings in exchange for backlinks and brand exposure. I’ve seen this single strategy generate 40% of initial traffic for new directories.

Industry associations and trade organizations reach exactly the businesses you want to recruit. Guest post on their platforms, sponsor their newsletters, or partner on co-branded local resource guides that drive traffic back to your directory.

Complementary service providers make natural partners—a wedding directory might syndicate content to bridal shops, venues, and photographers who all serve the same customer base but don’t compete directly.

Platform Selection and Onboarding Flow

Choosing your technical foundation is one of those decisions that’s hard to reverse later, so it’s worth getting right initially. For most geoaccess directory projects, TurnKey Directories offers the optimal balance of functionality, customization, and cost-effectiveness—it’s a WordPress-based solution that includes built-in geolocation features, review systems, and membership management without custom development expenses.

Alternative approaches include:

  • Full-service platforms like Brilliant Directories – Faster launch with less flexibility, typically $100-200/month plus setup fees
  • Custom development – Complete control but $15,000-50,000 initial investment and ongoing maintenance costs
  • Other WordPress directory plugins – Lower cost but may require additional plugins for geolocation and advanced features

Whichever platform you choose, optimize your onboarding flow to maximize listing completion rates. The average directory loses 60-70% of started listings due to friction in the submission process. Reduce abandonment by:

  • Enabling social login options (Google, Facebook) to eliminate registration friction
  • Pre-populating business data from public sources when users enter their business name
  • Breaking lengthy forms into 3-4 short steps with clear progress indicators
  • Offering “save draft” functionality so users can return later without losing work
  • Sending automated email reminders to users who abandon partially completed listings
Key Takeaway: Build your distribution channels before perfecting your platform—a good directory with strong traffic beats a perfect directory with no visitors.

SEO, Local SEO, and Authority Building

Search engine optimization for directories differs fundamentally from typical content sites. You’re not competing for “how to” queries—you’re targeting high-intent local searches where users want to find and contact businesses immediately. That means your SEO strategy must prioritize local signals, structured data, and trust indicators that Google uses to determine local search rankings.

Best practices for How to Build a Profitable GeoAccess Directory Platform: 7 Essential Elements for Success

The opportunity here is substantial. Well-optimized directory pages regularly outrank individual business websites because they aggregate trust signals (reviews, citations, updated information) that individual businesses struggle to maintain. Your category pages can capture valuable “near me” and “[service] in [city]” searches that drive users with immediate purchase intent.

On-Page, Technical SEO, and Structured Data

Structured data implementation is non-negotiable for directory success. According to Google’s structured data documentation, proper schema markup dramatically improves your eligibility for rich results, local pack placement, and featured snippets.

Implement these schema types across your directory:

  • LocalBusiness schema on individual listing pages with complete NAP data, hours, price range, and accepted payment methods
  • Organization schema for multi-location businesses showing the relationship between headquarters and branch locations
  • Review and AggregateRating schema to display star ratings in search results (this alone can increase CTR by 30-40%)
  • FAQPage schema for category pages addressing common questions about services in that category
  • BreadcrumbList schema showing site hierarchy and improving navigation in search results

Technical infrastructure that supports these features includes:

XML sitemaps segmented by content type (listings, categories, content pages) and updated automatically when new businesses join or existing listings change. Submit separate sitemaps through Google Search Console for better indexing control.

Canonical URL management preventing duplicate content issues when the same business appears in multiple categories or locations. Your platform should automatically assign canonical tags pointing to the primary listing page.

Page speed optimization through image compression, lazy loading for below-the-fold content, and caching strategies that serve static pages to search engines while maintaining dynamic functionality for users. Target Core Web Vitals scores in the “Good” range (LCP under 2.5s, FID under 100ms, CLS under 0.1).

Local Signals, Reviews, and Trust Indicators

Google’s local search algorithm weighs three primary factors: relevance, distance, and prominence. Your geoaccess platform can optimize all three:

Relevance optimization through detailed category taxonomies, comprehensive business descriptions, and service area definitions. Encourage listed businesses to specify exactly what services they offer and which geographic areas they serve—this specificity improves matching for long-tail searches.

Distance optimization by implementing precise geolocation and displaying accurate service radius information. Users searching for “plumber near me” should see providers actually willing to travel to their location, not just businesses physically closest to their search coordinates.

Prominence optimization through review collection, citation building, and backlink acquisition. Your directory can facilitate all three:

  • Automated review request emails sent to customers after service completion
  • Structured review displays that encourage detailed, keyword-rich feedback
  • Citation syndication to major data aggregators (ensuring NAP consistency across the web)
  • Embeddable “featured on” badges that listed businesses add to their websites, generating backlinks
Key Insight: Directory pages with 10+ reviews and monthly content updates rank on average 3-5 positions higher than identical pages without these trust signals.
89%
of consumers read online reviews before contacting local businesses, making review features essential for directory success
Key Takeaway: Implement LocalBusiness schema on every listing page before investing in backlinks—structured data ensures search engines properly understand and display your content.

Trust, Security, Compliance, and Risk Management

Operating a geoaccess platform means handling sensitive business information and personal data from both directory members and users. Security breaches destroy trust instantly—I’ve watched a single data leak eliminate 18 months of growth for a regional directory that failed to implement basic protections. Conversely, visible security and privacy measures justify premium pricing and reduce churn among paying members.

Advanced strategies for How to Build a Profitable GeoAccess Directory Platform: 7 Essential Elements for Success

Your users evaluate trustworthiness within seconds of landing on your site. Security indicators, transparent data handling, and compliance badges signal professionalism that separates legitimate platforms from amateur listings sites. These elements directly impact conversion rates, with secure directories seeing 25-40% higher paid listing signup rates than unsecured alternatives.

Privacy, Data Protection, and Consent

Privacy regulations like GDPR and CCPA apply to directories collecting personal information from users or business contacts, even if you don’t operate in Europe or California. Users from these jurisdictions might visit your site, triggering compliance obligations. Rather than geo-blocking or ignoring these regulations, implement universal privacy standards that protect all users.

Essential privacy practices include:

  • Transparent data collection with clear privacy policies explaining what data you collect, why you need it, how you’ll use it, and who you’ll share it with
  • Granular consent management allowing users to opt into marketing emails, analytics tracking, and third-party data sharing separately
  • Data minimization collecting only information necessary for directory functionality (avoid requiring birthdates, social security numbers, or other excessive data)
  • User data access and deletion providing simple mechanisms for users to export or permanently delete their information
  • Cookie consent with clear explanations of essential vs. optional cookies and easy opt-out for non-essential tracking

Implement these through cookie consent banners that actually work (not fake “accept or leave” walls), dedicated privacy centers where users manage their preferences, and automated deletion workflows that purge user data when requested.

Security Posture and Best Practices

Directory platforms face specific security risks: account takeovers that allow competitors to sabotage listings, SQL injection attacks targeting business data, and XSS vulnerabilities that could expose user information. Follow OWASP security best practices for web applications to address the most critical threats.

Priority security implementations include:

Authentication security through strong password requirements (minimum 12 characters, complexity rules), two-factor authentication options for business accounts, and session management that logs users out after inactivity. Consider passwordless authentication via magic links for reduced friction with maintained security.

Data encryption using HTTPS for all pages (not just login/checkout), encrypted database storage for sensitive fields like payment information, and TLS for all email communications. SSL certificates are free through Let’s Encrypt—there’s no excuse for unsecured directories.

Input validation and sanitization preventing XSS attacks through proper output encoding, SQL injection via parameterized queries, and CSRF attacks through token validation. If you’re using WordPress with TurnKey Directories or similar plugins, many of these protections are built-in, but custom code requires careful security review.

Access controls and monitoring limiting database access to necessary personnel, logging all administrative actions, implementing intrusion detection, and maintaining regular security audit trails. Set up alerts for suspicious activities like mass data exports or unusual login patterns.

Important: Schedule quarterly security audits and maintain an incident response plan before you need it. The average data breach costs small businesses $120,000-200,000 in recovery costs, legal fees, and lost revenue.

Payment security deserves special attention if you’re processing subscription fees or lead generation payments. Use established payment processors (Stripe, PayPal, Authorize.net) rather than handling card data directly. PCI DSS compliance is complex and expensive—let specialized providers handle it while you focus on directory features.

Key Takeaway: Display trust badges, security certifications, and privacy compliance indicators prominently—visible security measures increase paid conversions by 25-40% among business listings.

What is a geoaccess platform and how does it differ from regular directories?

A geoaccess platform is a location-intelligent directory that uses geographic data to deliver hyper-relevant search results based on proximity, service areas, and regional availability. Unlike basic directories that simply list businesses alphabetically or by category, geoaccess platforms incorporate radius search, proximity ranking, service area mapping, and location-based filtering to connect users with businesses that actually serve their specific location.

How can I monetize a local directory without alienating users?

Balance free basic listings (maintaining directory utility for users) with premium subscription tiers that offer enhanced visibility, featured placement, and additional media. Users accept monetization when it improves their experience—verified premium listings with detailed information serve users better than sparse free entries. Combine subscriptions ($99-299/month), geographic exclusivity ($500-2000/month), and performance-based lead generation fees for sustainable revenue without compromising user experience.

What data should I collect for each listing and how do I verify it?

Essential data includes business name, complete address, phone number, precise geolocation coordinates, service area radius, operating hours, accepted payment methods, and category classifications. Verify through automated checks (phone validation, address standardization via USPS APIs), crowdsourced validation from community members, and manual review for premium listings. Implement three-tier verification where basic automated checks handle 60-70% of submissions, community validation adds another layer, and manual review provides 96-99% accuracy for paid members.

Which platform should I choose to build my geoaccess directory?

TurnKey Directories offers the best balance of functionality and cost for most projects, providing WordPress-based directory features with built-in geolocation, review systems, and membership management at $200-500 initial cost. Alternatives include Brilliant Directories ($100-200/month subscription), custom development ($15,000-50,000 upfront for complete control), or other WordPress plugins. Choose based on budget, technical expertise, and required customization—WordPress solutions work for 80% of directory projects.

How can I improve local SEO for my directory and attract more listings?

Implement LocalBusiness schema markup on every listing page, create location-specific category pages targeting “[service] in [city]” queries, encourage user reviews that generate fresh content, build citations in major data aggregators ensuring NAP consistency, and develop neighborhood guides that rank for local searches. Combine technical optimization (schema, mobile performance, Core Web Vitals) with content strategy (local guides, provider spotlights) and link building (industry partnerships, local media syndication) for comprehensive local search visibility.

How do I build trust and protect user data on my directory platform?

Implement HTTPS across all pages, display visible security badges and privacy compliance indicators, create transparent privacy policies explaining data collection and usage, offer granular consent management for cookies and tracking, and follow OWASP security best practices for authentication and data protection. Use established payment processors for subscription handling, conduct quarterly security audits, maintain incident response plans, and provide users with easy access to export or delete their personal information.

How do I measure success and track KPIs for a geoaccess directory?

Track listing submission rate, conversion rate from free to paid listings, average revenue per user (ARPU), customer lifetime value (LTV), monthly churn rate, organic search traffic by location, review generation rate, and user engagement metrics (searches per session, contact actions). Compare customer acquisition cost against LTV maintaining a 3-5x ratio, monitor listing renewal rates quarterly, and track category-level performance to identify highest-value niches worth expanding.

What security and privacy practices are essential for directories online geoaccess?

Essential practices include SSL/TLS encryption for all data transmission, secure authentication with optional two-factor verification, input validation preventing SQL injection and XSS attacks, GDPR and CCPA compliance with transparent consent flows, regular security audits identifying vulnerabilities, encrypted database storage for sensitive information, and clear privacy policies with user-controlled data management. Display trust indicators prominently and maintain incident response procedures addressing potential breaches quickly.

Taking Action on Your GeoAccess Directory

Building a profitable geoaccess platform requires more strategic thinking than technical expertise. The directories that generate sustainable revenue share three traits: they solve specific geographic discovery problems better than alternatives, they implement robust verification that justifies premium pricing, and they build distribution channels before perfecting every feature.

Start by identifying one clear geographic niche where existing solutions fail users—don’t try to build another Yelp. Map the discovery journey for both users and businesses in that niche, identifying exactly where location context creates value. Then build the minimum viable platform that delivers that value: verified listings with accurate geolocation, powerful radius search, and basic membership tiers.

Launch with 100-200 pre-populated listings and immediately focus on distribution. Content marketing, local partnerships, and strategic outreach will drive more early growth than perfecting your UI. Once traffic demonstrates value, converting free listings to paid memberships becomes straightforward—businesses pay for what works.

Your 30-Day Launch Checklist

Week 1: Define your niche and validate demand through 20 customer interviews. Week 2: Set up your platform infrastructure and create initial content. Week 3: Pre-populate 100+ quality listings and implement verification workflows. Week 4: Launch distribution strategy and begin converting listings to paid memberships.

The directories that succeed treat launch as the beginning, not the end. Commit to continuous improvement based on user feedback, stay current with local SEO best practices, and reinvest 25-30% of revenue into platform enhancements. Your geoaccess directory can become both a valuable community resource and a profitable business that generates sustainable revenue for years.

Similar Posts

  • Blog

    How to Join the ATA Online Directory: 6 Simple Steps

    substring(replace(

    If you’re a translator or interpreter looking to expand your client base and boost your professional credibility, getting listed in the ATA Online Directory might be one of the smartest moves you’ll make this year. The American Translators Association’s directory isn’t just another online listing—it’s a trusted gateway that connects language professionals with clients who are specifically searching for vetted, qualified translators and interpreters. While most translators spend countless hours chasing leads on generic freelance platforms, ATA members enjoy the advantage of being found by clients who already understand the value of professional language services and are ready to pay for quality work.

    Here’s something most people don’t realize: the ATA Directory isn’t just a static phonebook. It’s a dynamic search tool that clients use to filter by language pairs, specializations, geographic location, and even certification status. That means when a law firm in Chicago needs a certified Spanish-to-English legal translator, or when a hospital in Seattle requires a medical interpreter for Mandarin, your profile can appear at the exact moment they’re looking. The difference between being listed and not being listed often comes down to whether you get that high-value project or watch it go to a competitor.

    Setting up your ATA Directory listing might seem daunting at first, especially if you’re new to the association or haven’t updated your profile in years. But the process is more straightforward than you’d think—once you know the right steps. In this guide, I’ll walk you through exactly how to join the ATA Online Directory in six simple, actionable steps, covering everything from account setup to profile optimization, so you can start attracting better clients faster.

    TL;DR – Quick Takeaways

    • ATA membership unlocks directory access – You need to be an ATA member to appear in the searchable online directory, which clients use to find qualified language professionals
    • Six straightforward steps – The process involves confirming eligibility, navigating to your listing section, completing your profile, adding language pairs and specializations, setting availability preferences, and publishing your listing
    • Profile quality matters – A well-crafted, detailed profile with specific language pairs, industry specializations, and certifications significantly increases your visibility to potential clients
    • Ongoing maintenance is essential – Regular updates to your profile ensure accuracy and help you stay competitive as your skills and services evolve
    • Strategic optimization drives results – Using the right keywords, highlighting certifications, and providing clear contact information helps clients find and choose you over competitors

    Step 1 — Confirm Eligibility and Create/Log into Your ATA Account

    Before you can appear in the ATA Online Directory, you need to establish your relationship with the American Translators Association. The first critical step is understanding whether you’re eligible for membership and what type of membership best suits your professional status. The ATA offers several membership categories, including active membership for practicing translators and interpreters, associate membership for those with language-related professions, and student membership for those currently enrolled in translation or interpretation programs.

    [KBIMAGE_1]

    Most language professionals will want active membership, which comes with full directory listing privileges and access to all member benefits. The application process is fairly straightforward, but you’ll need to prepare some information in advance. Have your professional email address ready (avoid using generic Gmail or Yahoo addresses if possible—a professional domain makes a stronger impression), along with details about your language pairs, educational background, and any relevant certifications you hold.

    💡 Pro Tip: Use the same professional email address you use for client communications. This creates consistency across your professional presence and ensures you won’t miss important notifications from ATA or potential clients reaching out through your directory listing.

    If You’re Already an ATA Member: Accessing Your Profile

    If you’ve been an ATA member for a while but haven’t set up your directory listing yet (or haven’t touched it in years), the good news is that you already have an account. Navigate to the ATA Member Center and use your existing login credentials. Can’t remember your password? There’s a straightforward password reset function that will send recovery instructions to your registered email address.

    Once you’re logged in, you’ll see your member dashboard, which provides access to various member resources, event registrations, and—most importantly for our purposes—your directory profile management tools. The interface has been updated over the years, so if you’re working from old instructions or remembering how things looked five years ago, you might notice some changes. The core functionality remains the same, though: you’re looking for a section related to “Directory,” “Profile,” or “My Listing.”

    If You’re Not Yet a Member: Understanding Your Options

    For those who aren’t yet ATA members, you’ll need to complete the membership application process before you can create a directory listing. The investment in ATA membership pays dividends beyond just the directory listing—you gain access to professional development resources, networking opportunities, industry publications, and the credibility that comes with being part of the largest professional association for translators and interpreters in the United States.

    The membership application asks for information about your language combinations, professional experience, education, and specializations. Be thorough and accurate here, this information doesn’t just determine your membership status, it also forms the foundation of your eventual directory listing. You’ll save time later if you provide complete, well-organized information from the start.

    ⚠️ Important: Keep your login credentials in a secure password manager. You’ll need to access your ATA account regularly to update your directory listing, register for events, and access member resources. Losing access means delays in updating your professional information when you gain new certifications or expand your service offerings.

    The membership fee is an annual investment, and you’ll want to factor this into your business planning. However, many translators and interpreters find that a single client connection through the directory can more than pay for the annual membership cost. According to the U.S. Bureau of Labor Statistics, the median pay for interpreters and translators continues to reflect the value of professional credentials and associations in commanding higher rates.

    Step 2 — Navigate to the Directory Listing Section

    Once you’ve confirmed your membership status and successfully logged into your ATA account, the next step is finding your way to the actual directory listing management area. This is where many new members get a bit turned around, not because it’s particularly complicated, but because the ATA Member Center contains numerous features and resources, and it’s easy to get distracted exploring everything the association offers.

    [KBIMAGE_2]

    From your member dashboard, look for navigation elements that mention “Directory,” “Online Directory,” “My Profile,” or “Public Profile.” The exact wording has evolved as the ATA has updated its website infrastructure, but the concept remains consistent: you’re looking for the section where you can manage how you appear to the public and to potential clients who search the directory. This is distinct from your internal member profile, which contains membership information, payment history, and other administrative details that clients never see.

    The directory listing interface typically presents you with a form or series of fields where you can enter and edit information. Think of this as your professional storefront—every field you complete is another piece of information that helps clients understand whether you’re the right fit for their project. Empty fields don’t just look incomplete; they represent missed opportunities to communicate your value and expertise.

    Understanding What Information the Directory Expects

    The ATA Directory structure is designed to capture the information that clients most frequently search for when looking for language professionals. You’ll see fields for basic contact information (name, email, phone, location), professional credentials (certifications, memberships in other organizations), language pairs (source and target languages), service types (translation, interpretation, localization, etc.), and specialization areas (legal, medical, technical, financial, and more).

    Directory FieldPurposeSearch Impact
    Language PairsShows what languages you work withPrimary search filter
    SpecializationsIndicates industry expertiseSecondary search filter
    LocationGeographic availabilityImportant for in-person interpreting
    CertificationsDemonstrates professional credentialsTrust signal and filter option
    BiographyCommunicates experience and approachKeyword relevance for search

    Don’t make the mistake of thinking you can skip optional fields. While some fields might be marked as “optional” from a technical standpoint, every completed field strengthens your profile. Clients comparing multiple translators will naturally gravitate toward profiles that provide comprehensive information over those that look half-finished or sparse.

    Basic Versus Premium Listing Options

    Depending on when you’re reading this and what membership tier you hold, you might encounter different listing options. Some professional directories (including various business listing sites) offer tiered visibility, with basic listings providing standard information and premium listings offering enhanced features like priority placement, additional images, or expanded biography sections.

    For the ATA Directory specifically, your listing options are generally tied to your membership level and certification status. ATA-certified translators, for example, are marked with a special designation that immediately signals to clients that you’ve passed rigorous testing in your language pair and specialization. This certification badge can be the deciding factor when clients are choosing between otherwise similar profiles.

    ✅ Key Insight: The directory search function allows clients to filter specifically for certified translators. If you have ATA certification, make absolutely certain it’s properly reflected in your listing—this single credential can dramatically increase your visibility to high-value clients who specifically seek certified professionals.

    Step 3 — Complete Your Professional Profile (Bio, Specializations, and Credentials)

    This is where the rubber meets the road. Your professional profile is your opportunity to stand out from hundreds of other translators and interpreters who work in similar language pairs. A generic, bland biography that simply lists your languages and says “I provide quality service” won’t cut it in a competitive market. You need to craft a profile that speaks directly to your ideal clients, demonstrates your expertise, and gives them confidence that you’re the right professional for their specific needs.

    [KBIMAGE_3]

    Start with your biography section. This isn’t your life story or a chronological resume—it’s a concise, client-facing summary of why someone should hire you. Think about the questions potential clients have when they’re searching the directory: Can this person handle my specific type of content? Do they understand my industry? Will they deliver on time and communicate professionally? Your bio should answer these questions before they’re even asked.

    I remember when I first started working with professional directories, I made the classic mistake of writing my bio as if I were applying for a job rather than attracting clients. It was full of “I am a dedicated professional” and “I strive for excellence”—all generic phrases that said nothing specific about what I actually do or who I help. The moment I rewrote it to focus on concrete specializations and the types of projects I excel at, my inquiry rate jumped noticeably.

    Crafting a Biography That Converts

    Your biography should be approximately 150-300 words—long enough to provide substance, short enough that busy clients will actually read it. Start with your primary specialization and most impressive credential. For example: “I’m an ATA-certified English-to-Spanish translator specializing in medical device documentation and clinical trial materials, with over 15 years of experience working with pharmaceutical companies and medical device manufacturers.”

    Notice how that opening sentence immediately tells a potential client: (1) I’m certified, (2) I specialize in medical content, (3) I have substantial experience, and (4) I work with the exact types of organizations they might represent. That’s exponentially more effective than “I’m a professional translator committed to quality.”

    Continue your biography by highlighting specific types of content you handle, relevant subject matter expertise (did you work in healthcare before becoming a translator? mention it), and any specialized tools or processes you use that benefit clients. Keep the tone professional but approachable—you want to sound competent and experienced without being stuffy or overly formal.

    Section Summary: Your biography is your elevator pitch to potential clients—make it specific, focus on concrete specializations and credentials, and write it in client-facing language that addresses their needs rather than listing your personal qualities.

    Highlighting Certifications and Credentials

    Beyond your biography narrative, the ATA Directory provides specific fields for certifications and professional credentials. This is where you list your ATA certification (if you have it), state or federal court interpreter certifications, medical interpreter certifications, or credentials from other recognized professional organizations. Don’t be modest here—if you’ve earned it, list it.

    Certifications serve multiple purposes in your profile. First, they provide objective third-party validation of your skills, which is especially important for clients who are new to working with professional translators and interpreters. Second, many clients filter directory searches specifically by certification status, so having certifications listed ensures you appear in those targeted searches. Third, certifications often correlate with higher rates and better projects, since clients seeking certified professionals typically understand the value of quality language services.

    67%
    of clients using professional directories specifically filter for certified translators when searching for language services

    If you don’t yet have ATA certification but are working toward it, consider mentioning that in your biography (in a brief, matter-of-fact way). It shows professional development and commitment to the field. Similarly, if you have relevant degrees (Master’s in Translation Studies, for example), list them. Education credentials might not carry quite the same weight as certifications, but they still contribute to your overall credibility profile.

    Structuring Your Profile for Readability

    Even the most impressive qualifications lose their impact if they’re presented in a dense wall of text. Use formatting strategically to make your profile scannable. If the directory platform allows it, use short paragraphs (2-3 sentences maximum), bullet points for lists of specializations or service types, and bold text sparingly to highlight key credentials or phrases.

    Think about how someone actually uses the directory: they’re probably comparing several profiles, scanning quickly to eliminate candidates who aren’t a good fit before reading the remaining profiles more carefully. Your formatting should support this behavior. Make it easy for someone to glance at your profile and immediately understand your language pairs, main specializations, and key credentials. Similar to how business card directories present essential information at a glance, your directory profile should communicate your core value proposition within seconds.

    Contact information deserves special attention. Make sure your professional email address is current and that you actually check it regularly. Consider including a professional website URL if you have one (many translators maintain a simple one-page site that provides additional information and samples of their work). If you’re comfortable with it, including a phone number can make it easier for clients to reach you, though email remains the primary contact method for most translation inquiries.

    Step 4 — Add Languages, Specializations, and Tools

    Once your bio and credentials are in place, the next critical step is to specify your language pairs, service types, and technical capabilities. This is where potential clients filter and discover your profile, so precision and completeness matter enormously.

    [KBIMAGE_4]

    Start by listing every language combination you offer. For translators, this means source-to-target pairs (e.g., Spanish > English, English > French). For interpreters, indicate both the languages and modalities—simultaneous, consecutive, sight translation, or remote interpreting. ATA’s directory interface typically offers drop-down menus or checkboxes for common languages, with a free-text field for less common ones.

    Next, declare your subject-matter specializations. The more specific you are, the better you’ll match with clients who need exactly your expertise. Rather than listing “general translation,” break it down:

    • Legal: contracts, litigation support, patents, immigration documents
    • Medical & Healthcare: clinical trials, informed consent, medical devices, pharmaceutical
    • Financial: earnings reports, audits, investment prospectuses
    • Technical & IT: software localization, user manuals, engineering specifications
    • Marketing & Creative: advertising copy, websites, brand messaging

    If you work in niche domains—life sciences, environmental policy, video-game localization—call them out explicitly. Clients often search the directory by keyword, and uncommon specialties help you stand out in a crowded market.

    Pro tip: Include both broad categories (e.g., “legal”) and specific sub-domains (e.g., “patent translation”) to capture searches at different levels of granularity.

    Don’t overlook your technology stack. If you use computer-assisted translation (CAT) tools—Trados, memoQ, Memsource, Wordfast—list them. Many translation agencies filter for specific platforms when they send RFPs. Similarly, if you offer machine-translation post-editing (MTPE), note your experience level and preferred MT engines. Terminology management, desktop publishing (InDesign, FrameMaker), subtitling software (Subtitle Edit, Aegisub), and voice-over/localization tools all signal your technical fluency and can differentiate you from generalist competitors.

    FieldWhat to IncludeWhy It Matters
    Language PairsAll source-target combinations you translate or interpretPrimary filter for client searches
    Service TypesTranslation, interpretation (simultaneous, consecutive, remote), localization, MTPEClarifies scope and modality for clients
    SpecializationsLegal, medical, financial, technical, marketing, etc.Targets clients with domain-specific needs
    CAT Tools & TechnologyTrados, memoQ, Memsource, MT post-editing, DTP softwareMatches agency workflows and technical requirements

    Finally, keep it current. As you add new language pairs, earn specialized credentials, or adopt new tools, return to this section and update. The directory is a living document—not a one-time setup.

    Step 5 — Set Availability, Regions, and Contact Preferences

    Clients who find your profile need to know where you work, when you’re available, and how to reach you. This step ties together logistics and accessibility, ensuring that the right inquiries come through the right channels.

    [KBIMAGE_5]

    Start with your geographic coverage. If you’re an on-site interpreter, list the cities, states, or regions you serve. For translators working remotely, you might indicate “remote—worldwide” or note time zones that align with your working hours. Some clients prefer local providers for face-to-face meetings or rapid turnarounds, while others prioritize expertise over location. Be honest about your physical availability to avoid mismatched expectations.

    Next, set your general availability. Rather than promising 24/7 service, consider specifying:

    • Business hours: “Monday–Friday, 9:00 AM – 6:00 PM Eastern Time”
    • Response time: “I typically respond to inquiries within 24 hours on business days”
    • Rush capacity: “Weekend and evening work available for urgent projects—contact me to confirm”

    These simple statements manage expectations and filter out clients whose timelines don’t align with your schedule. They also signal professionalism: you respect both your own boundaries and your clients’ need for predictability.

    Watch out: Overpromising availability can lead to burnout and missed deadlines. Be realistic about your capacity, and update this field during busy seasons or planned time off.

    Now, configure your preferred contact methods. The ATA directory usually allows you to display:

    • A professional email address (avoid free webmail for credibility—use a custom domain if possible)
    • A phone number (with country code and any extension)
    • A website or portfolio URL
    • LinkedIn or other professional-network profiles

    Decide which channels you want to prioritize. If you prefer written inquiries for record-keeping, lead with email. If you close deals faster on the phone, highlight your number. Many translators link to a contact form on their own website, which funnels inquiries through a single intake process and lets you collect project details upfront.

    Privacy is paramount. Only publish contact information you’re comfortable having in a public directory. If you share a home number, consider a dedicated business line or a virtual number. If your email inbox is already overloaded, set up a separate address for ATA directory leads—this also helps you track which clients found you via the directory versus other channels.

    ElementBest Practice
    Location & CoverageSpecify city/state for on-site work; “remote” or time zone for virtual services
    Availability HoursState business hours and time zone; note rush or weekend capacity if offered
    Response TimeSet realistic expectations (e.g., “within 24 hours on business days”)
    Contact ChannelsProfessional email (custom domain preferred), phone, website, LinkedIn
    PrivacyUse dedicated business lines/emails; avoid personal contact details

    Finally, test your contact methods before you publish. Send yourself a test email from a different address, call your listed number, and click through to your website. Broken links or outdated phone numbers waste leads and damage your credibility. A quick end-to-end check ensures every inquiry can reach you without friction.

    Step 6 — Review, Publish, and Promote Your ATA Directory Listing

    You’ve built a comprehensive profile—bio, credentials, languages, specializations, tools, and contact info. Now it’s time to review, publish, and amplify your listing so it works for you around the clock.

    Final Review Checklist

    Before you hit “Publish,” run through this quality-control checklist:

    • Spelling and grammar: Typos undermine professionalism. Use a spell-checker and read your bio aloud.
    • Consistency: Ensure your name, credentials, and contact details match across your website, LinkedIn, and business cards.
    • Completeness: Every required field filled? All relevant language pairs listed? Certifications and specializations current?
    • Contact accuracy: Email address active? Phone number correct (with country code)? Website live and mobile-friendly?
    • Formatting: Short paragraphs, bullet points for readability. Avoid walls of text.
    • Tone: Professional, client-focused, free of jargon. Speak to what clients need, not just what you do.

    Pro tip: Ask a colleague to review your profile. A fresh set of eyes catches errors and suggests improvements you might miss.

    Publishing Your Listing

    Once you’re satisfied, look for a “Publish,” “Submit,” or “Make Public” button in your ATA member dashboard. Depending on ATA’s current workflow, your listing may go live immediately or enter a brief review queue. If there’s an approval step, expect a confirmation email within a few business days. Check your spam folder if you don’t see it.

    After publication, verify your listing is live. Search the public ATA directory for your name, language pairs, or location. Confirm that all fields display correctly and that your contact links work. If something looks wrong—missing specializations, broken website URL—log back in and correct it. Most directory platforms save edits in real time or require a quick re-submit.

    Promoting Your ATA Directory Listing

    A published profile is only valuable if clients can find it. Here’s how to maximize visibility:

    • Link from your website: Add a badge or text link on your homepage—”Find me on the ATA Directory” with a direct URL to your profile.
    • Email signature: Include a line like “ATA-certified Spanish>English translator | View my ATA profile” in your signature block.
    • LinkedIn and social media: Mention your ATA listing in your LinkedIn “About” section or share a post announcing your updated profile.
    • Business cards and proposals: Print your ATA directory URL alongside your contact details to reinforce credibility.
    • Networking and conferences: When you meet potential clients at industry events, direct them to your directory listing as a one-stop reference.

    Promoting your listing does double duty: it drives traffic from your existing network and signals to search engines that your ATA profile is a legitimate, authoritative page. Over time, this can improve your overall online visibility.

    Ongoing Maintenance

    Your directory profile isn’t a “set it and forget it” asset. Plan to review and update it at least twice a year, or whenever you:

    • Earn a new certification or credential
    • Add a language pair or specialization
    • Change your contact information (new email, phone, website)
    • Adopt new CAT tools or technology
    • Shift your availability or geographic coverage

    An outdated profile can cost you leads. If a client sees you offer a service you’ve discontinued, or tries to reach you at a defunct email address, they’ll move on to the next translator. Regular maintenance keeps your listing accurate and your pipeline full.

    TaskFrequencyWhy
    Spell-check and proofreadBefore first publish, then annuallyMaintain professional image
    Verify contact linksQuarterlyEnsure leads can reach you
    Update credentials & specializationsAs earnedReflect current expertise
    Refresh bio and service descriptionsSemi-annuallyKeep messaging sharp and relevant
    Promote listing on social & websiteOngoingDrive traffic and reinforce authority

    Best Practices Across All Steps

    Beyond the mechanics of each step, a few universal principles will elevate your ATA directory listing and help you stand out in a competitive market.

    Use a Professional Headshot

    People do business with people. A high-quality headshot—clear, well-lit, business-casual or formal attire—builds trust and makes your profile memorable. Avoid selfies, vacation snapshots, or overly cropped images. If the directory allows a logo instead of a photo, consider which better represents your brand; for solo practitioners, a friendly headshot often outperforms an abstract logo.

    Maintain Consistent Branding

    Your ATA profile should echo the look, tone, and messaging of your website, LinkedIn, and business cards. Use the same professional name (not a nickname), the same tagline or value proposition, and similar color schemes or design elements if the platform allows customization. Consistency reinforces your brand and makes you easier to recognize across multiple touchpoints.

    Include a Call-to-Action

    Don’t leave clients guessing what to do next. End your bio with a clear invitation: “Contact me for a free quote,” “Email me to discuss your next project,” or “Visit my website to see client testimonials.” A simple CTA converts passive browsers into active leads.

    Keep Data Accurate

    Outdated contact information is the fastest way to lose business. Set a recurring calendar reminder every six months to log in and verify your email, phone, website URL, and physical address. If you move, change phone numbers, or rebrand, update your directory listing immediately.

    Handle Sensitive Information with Care

    Never publish client names, proprietary project details, or confidential case information in your public profile. Instead, describe your experience in general terms: “Ten years translating clinical-trial protocols for multinational pharmaceutical companies” rather than “Translated Protocol XYZ for Company ABC.” Respect non-disclosure agreements and client privacy at all times.

    Periodic Content Refreshes

    Even if your core services haven’t changed, a periodic refresh of your bio and service descriptions keeps your profile feeling current. Swap out a tired phrase for a new one, highlight a recent accomplishment, or adjust your tone to match evolving industry standards. Fresh content signals that you’re active and engaged—not a dormant listing.

    Pro tip: Track which inquiries come from your ATA listing. Use a dedicated email address or ask new clients, “How did you find me?” This data helps you measure ROI and decide how much effort to invest in maintaining the profile.

    Troubleshooting and Common Pitfalls

    Even with careful preparation, you may encounter hiccups when setting up or updating your ATA directory listing. Here are the most common issues and how to resolve them.

    Missing Fields or Fields That Won’t Save

    Symptom: You fill out a required field—language pair, specialization, or contact email—but when you save and return, it’s blank or reverted to a previous value.

    Causes & solutions:

    • Browser cache: Clear your browser cache and cookies, then log in again. Stale data can interfere with form submissions.
    • JavaScript errors: Try a different browser (Chrome, Firefox, Safari, Edge) or disable browser extensions that block scripts.
    • Session timeout: If you leave the form open for a long time, your session may expire. Save your draft periodically or copy your text to a separate document before submitting.
    • Character limits: Some fields have maximum lengths. If your bio is too long, trim it or break it into shorter sections.

    If the problem persists, contact ATA member support with a screenshot and description of the issue. They can escalate technical bugs to their web team.

    Profile Verification or Approval Delays

    Symptom: You submitted your profile days ago, but it still isn’t visible in the public directory.

    Causes & solutions:

    • Manual review queue: ATA may review new or heavily edited listings for compliance with their directory policies. This can take 2–5 business days.
    • Incomplete information: Check your member dashboard for a notification or email requesting additional details (e.g., proof of certification, missing required fields).
    • Payment or membership status: Ensure your ATA membership dues are current. A lapsed membership can block directory visibility.

    If you’ve waited longer than a week with no update, email or call ATA support. Reference your member ID and the date you submitted your listing.

    Listing Not Appearing in Search Results

    Symptom: Your profile is published and visible when you log in, but clients report they can’t find you when searching the public directory.

    Causes & solutions:

    • Privacy settings: Double-check that you opted in to public directory visibility. Some platforms have a toggle that defaults to “private.”
    • Search filters: Test searches using your exact language pairs, location, and specializations. If you listed “Spanish>English” but clients search “English>Spanish,” you may not appear.
    • Indexing delay: New or updated listings can take 24–48 hours to propagate through search indexes. Wait a day and try again.
    • Spelling variations: If your name or specialization uses non-ASCII characters or alternate spellings, try multiple search terms.

    Run test searches from an incognito/private browser window (logged out) to see your listing as clients do. If it’s still missing, contact ATA support.

    Duplicate or Conflicting Profiles

    Symptom: You discover two listings under your name, or your current profile conflicts with an old one.

    Causes & solutions:

    • Multiple member IDs: If you joined ATA, let your membership lapse, then rejoined, you might have two accounts. Contact member services to merge them.
    • Name changes: If you changed your name (marriage, legal name change), update your primary account and request deletion of the old listing.
    • Shared names: If another member has a similar name, ensure your profile includes unique identifiers (middle initial, city, specialization) to avoid confusion.

    Watch out: Never create a second account to “start fresh.” Duplicate profiles violate ATA policies and can result in suspension. Always work with member support to resolve account issues.

    Contact Form or Email Not Receiving Inquiries

    Symptom: You’ve published your listing, but you’re not getting any client inquiries—or clients say they tried to contact you but got no response.

    Causes & solutions:

    • Spam filters: Check your spam/junk folder. Set up a filter to whitelist emails from the ATA domain or common client domains.
    • Incorrect email address: Typos happen. Re-verify the email address in your profile and send a test message to it.
    • Website contact form broken: If you link to a contact form on your site, test it from a different device and email account to ensure submissions go through.
    • Low visibility: If your profile is complete but you’re not getting leads, you may need to optimize your keywords, promote your listing more actively, or expand your service offerings.

    Track your inquiries over time. If you get zero contact in several months, revisit your bio, specializations, and contact methods—or consult a colleague for feedback.

    IssueQuick FixWhen to Contact Support
    Fields won’t saveClear cache, try different browserIf problem persists >24 hours
    Approval delayCheck email for requests; verify membership currentAfter 7 business days with no update
    Not appearing in searchConfirm public visibility toggled on; wait 48 hours for indexingIf invisible after 2 days
    Duplicate profilesN/A—requires support interventionImmediately
    No inquiries receivedCheck spam filters, test contact form, verify email addressIf technical tests pass but still no leads, request profile review

    Frequently Asked Questions

    How long does it take to get listed in the ATA Online Directory?

    Once you submit your directory listing as an active ATA member, approval typically takes 1-3 business days. Your profile becomes searchable immediately after approval. Ensure all required fields are complete to avoid delays. Premium listings may require additional verification time depending on selected features.

    What information should I include in my ATA directory profile?

    Include your professional credentials, language pairs, specializations, service areas, and contact information. Add certifications like ATA certification or state court interpreter credentials. Upload a professional photo and detailed bio highlighting your expertise. Complete profiles receive significantly more client inquiries than minimal listings.

    Can non-ATA members access the Online Directory?

    Only active ATA members can create listings in the directory. However, potential clients and the general public can search the directory freely to find qualified translators and interpreters. This public accessibility makes the directory a valuable marketing tool for members seeking new clients and projects.

    How often should I update my ATA directory listing?

    Update your listing quarterly or whenever your services, credentials, or contact information change. Regular updates signal active availability to potential clients. Add new certifications, specializations, or language pairs promptly. Profiles updated within the past 90 days often rank higher in search results and appear more trustworthy.

    What are the differences between basic and premium directory listings?

    Basic listings include standard contact information, language pairs, and credentials at no additional cost beyond membership. Premium listings offer enhanced visibility, featured placement in search results, expanded profile space, website links, and promotional graphics. Premium options require additional fees but generate substantially more client views.

    Can I list multiple specializations in my ATA directory profile?

    Yes, you can list multiple specializations across various subject areas like legal, medical, technical, or literary translation. However, focus on areas where you have genuine expertise and experience. Clients value specialists over generalists. Listing 3-5 well-developed specializations typically performs better than claiming expertise in numerous fields.

    How do clients find my listing in the ATA directory?

    Clients search by language pair, specialization, geographic location, or certification status. The directory uses keyword matching from your profile content. Optimize your listing with specific terminology clients use when searching. Complete profiles with detailed specializations appear in more search results than sparse listings.

    Should I include my rates in my ATA directory listing?

    The ATA directory does not require rate disclosure, and most professionals avoid listing specific prices publicly. Instead, indicate you provide custom quotes based on project scope. This approach allows flexibility for different project types and clients. Consider stating your preferred rate structure like per-word or hourly.

    What happens to my directory listing if I don’t renew my ATA membership?

    Your directory listing becomes inactive and invisible to public searches if your membership lapses. The ATA typically retains your profile information for a grace period, allowing easy reactivation upon membership renewal. To maintain continuous visibility and client access, renew your membership before expiration to avoid service interruption.

    Ready to Expand Your Translation Business?

    The ATA Online Directory connects you with clients actively seeking professional translation and interpretation services. Your comprehensive, optimized profile serves as a 24/7 marketing tool that works while you focus on delivering exceptional service.

    Don’t let potential clients pass you by. Take action today by logging into your ATA member account, completing your directory profile with strategic keywords and credentials, and positioning yourself as the expert solution clients need. The translators who invest time in creating detailed, professional listings consistently report higher inquiry rates and better client matches.

    Your next major client could be searching right now

    Take the Next Step

    Creating your ATA Online Directory listing is an investment in your professional future. Start with the six steps outlined in this guide, dedicate time to crafting a compelling profile that showcases your unique expertise, and commit to regular updates that keep your listing fresh and relevant. The visibility you gain through this trusted platform can transform your business trajectory and connect you with clients who value quality professional services.

    ; <[^>]+>; ); 0; 155)

  • Blog

    How to Create a Plugin in Android: A Step-by-Step Guide for Developers

    Imagine transforming your Android development workflow by creating powerful, reusable components that can be shared across multiple projects, sold to other developers, or even distributed as standalone solutions. Android plugins represent one of the most underutilized yet lucrative opportunities in mobile development today. While most developers focus on building single-purpose apps, savvy developers are creating…

  • Blog

    How to Get Your Business Listed in Online Directories: 7 Simple Steps

    Getting your business discovered online shouldn’t feel like searching for a needle in a haystack. Yet many small business owners struggle with one of the most fundamental aspects of digital marketing: getting listed in online directories. While most entrepreneurs focus on building fancy websites or running expensive ad campaigns, they’re missing a goldmine of free…

  • Blog

    How to Boost Your Airbnb Listing: 10 Proven Strategies to Increase Bookings in 2025

    Most Airbnb hosts are stuck in a frustrating cycle: they post what they think is a great listing, wait for bookings that never come, then wonder why their neighbor’s cluttered studio gets booked while their pristine two-bedroom sits empty. The truth is, Airbnb’s platform operates on a complex algorithm that rewards specific behaviors and listing…

  • Blog

    Free Business Directory Sites: 10 Best Platforms to List Your Business in 2025

    Struggling to get your business noticed online without spending a fortune? You’re facing the same challenge that thousands of small business owners wrestle with daily. The digital marketplace feels overwhelmingly crowded, and competing against established brands with massive marketing budgets seems nearly impossible. But here’s what most businesses overlook: free business directories remain one of…