How to Install a Purchased WordPress Plugin: A Step-by-Step Guide
Generating summary...
You’ve just clicked “purchase” on a premium WordPress plugin that promises to solve a critical problem for your site, maybe it’s a powerful page builder, an advanced SEO tool, or a membership management system. The download button appears, you grab the ZIP file, and then reality hits: what do I actually do with this file? Unlike free plugins from the WordPress repository that install with a single click, purchased plugins require a few extra steps, license activation, and often a bit of troubleshooting. Get this process wrong and you could face broken sites, licensing headaches, or security vulnerabilities that leave your investment worthless.
Here’s the thing most tutorials won’t tell you upfront: the installation itself is usually straightforward, it’s everything around the installation that trips people up. Verifying license keys, handling conflicts with existing plugins, ensuring compatibility with your theme, and setting up proper update mechanisms, these are the make-or-break details. With WordPress powering over 40% of the web and thousands of premium plugins available from independent vendors, getting this right matters not just for your site’s functionality but for its long-term security and performance.
TL;DR – Quick Takeaways
- Always back up first – Database and files, no exceptions before installing any premium plugin
- Verify compatibility – Check WordPress version, PHP requirements, and theme compatibility before upload
- Test on staging – Never install directly to production; staging environments catch conflicts early
- License activation matters – Most premium plugins require valid license keys for updates and support access
- Three installation methods – Admin dashboard ZIP upload (easiest), FTP/SFTP (advanced), or Composer (developer workflows)
- Post-install validation – Run health checks, measure performance impact, and document configuration for your team
Prerequisites and Best Practices
Before you even think about uploading that plugin ZIP file, you need to do some homework. I learned this the hard way years ago when I installed a purchased form builder on a client site without checking compatibility, it immediately white-screened their homepage because their hosting still ran PHP 5.6 and the plugin required 7.4. That fifteen-minute mistake cost me three hours of emergency fixes and one very unhappy client.
Confirm plugin purchase and license validity
First things first: make absolutely certain your purchase went through and you have a valid license. Log into the vendor’s account portal or check your email for a purchase confirmation. You should have received a download link and a license key (sometimes called a purchase code or activation token). If you bought from a marketplace like CodeCanyon, your purchase code lives in your downloads section, don’t lose it because you’ll need it for activation and support requests.
Some vendors issue time-limited download links for security reasons. If yours has expired, most account portals let you regenerate a fresh download link. Keep your license key in a password manager, you’ll reference it multiple times during the plugin’s lifecycle.
Check WordPress version compatibility and PHP version
Premium plugins typically list minimum requirements in their documentation or sales page. You need to verify three critical compatibility points:
- WordPress version: Check your current WordPress version under Dashboard → Updates. If the plugin requires 6.0+ and you’re running 5.8, you’ll need to update WordPress first (after backing up, of course).
- PHP version: Navigate to Tools → Site Health → Info → Server to see your PHP version. Many modern premium plugins require PHP 7.4 or higher. If you’re below that threshold, contact your hosting provider about upgrading.
- Required PHP extensions: Some plugins need specific PHP modules like
mbstring,gd, orcurl. The Site Health tool usually flags missing extensions.
Backup your site (files and database) before installation
This isn’t optional, it’s mandatory. Every professional WordPress developer backs up before making changes, and installing a premium plugin counts as a significant change. You need both:
- Database backup: All your posts, pages, settings, and user data lives here. Use a plugin like UpdraftPlus, BackWPup, or your host’s built-in backup tool.
- File backup: Your entire
wp-contentdirectory including themes, plugins, and uploads. Store this backup somewhere other than your server (cloud storage, external drive, or backup service).
If something goes sideways during installation, a conflict breaks your site, or the plugin doesn’t work as expected, you can restore this backup and be back online in minutes instead of hours. I keep automated daily backups running on all my sites, but I always take a manual backup before any plugin installation or update.
Environment Preparation Tips
Professional WordPress management isn’t just about clicking buttons in the admin dashboard, it’s about creating controlled environments where you can test changes safely. This preparation phase separates hobbyists from professionals, and it’s where most installation problems get prevented rather than fixed.
Use a staging site for testing (recommended)
A staging site is an exact copy of your live site that exists in a separate environment where visitors can’t see it. You install and test the premium plugin on staging first, verify it works correctly, then deploy to production with confidence. Most quality hosting providers (WP Engine, Kinsta, SiteGround, Flywheel) include one-click staging environments. If yours doesn’t, plugins like WP Staging can create them.
The staging workflow looks like this: backup live site → create staging copy → install and configure plugin on staging → test thoroughly → deploy to production → monitor for issues. It adds maybe thirty minutes to your process but prevents catastrophic production failures.
Ensure you have FTP/SFTP access or admin credentials
You’ll need admin-level WordPress access (the username/password to log into /wp-admin/). For some installation methods and troubleshooting scenarios, you’ll also need FTP or SFTP credentials:
- FTP/SFTP hostname: Usually your domain or an IP address
- Username and password: Provided by your hosting company
- Port: Typically 21 for FTP, 22 for SFTP
- Connection type: Use SFTP or FTPS (secure) instead of plain FTP whenever possible
Your hosting control panel (cPanel, Plesk, or custom dashboard) contains these credentials. Some hosts like WP Engine use SFTP exclusively for security. Keep an FTP client like FileZilla or Cyberduck installed and configured because you’ll need it eventually, especially if the plugin causes issues that prevent admin access.
Disable conflicting plugins temporarily if troubleshooting
If you suspect compatibility issues, disable all other plugins before installing the premium one. This creates a clean environment where conflicts can’t occur. After successful installation, re-enable plugins one by one to identify any that clash with your new premium plugin. This systematic approach pinpoints problems faster than guessing which plugin might be causing issues.
Security and Trust Considerations
Premium plugin installation introduces code from third-party vendors into your WordPress core. That code runs with significant privileges and can access your database, files, and potentially sensitive customer data. Security due diligence isn’t paranoia, it’s basic risk management that protects your investment and your users.
Verify vendor legitimacy and plugin updates
Before purchasing (or right after, if you already did), research the vendor’s reputation. Check how long they’ve been in business, read reviews from multiple sources, and verify they actively maintain their products. Red flags include:
- No recent updates (plugins abandoned for 12+ months pose security risks)
- Poor support ratings or unanswered support tickets
- Limited or missing documentation
- Extremely cheap prices that seem too good to be true (often indicate nulled or pirated versions)
Legitimate vendors maintain regular update schedules, provide comprehensive documentation, and respond to support requests within reasonable timeframes. The best premium plugin developers publish changelogs that detail security patches, bug fixes, and new features.
Use official download sources and avoid untrusted ZIPs
Only download plugins directly from the vendor’s official website, their authorized marketplace listing (like CodeCanyon), or your verified account portal. Never download “nulled” or “cracked” premium plugins from file-sharing sites, forums, or torrent networks. These frequently contain:
- Malware, backdoors, or cryptocurrency miners
- Code that phones home to malicious servers
- Disabled licensing that prevents updates (leaving security holes unpatched)
- Modified functionality that breaks or behaves unpredictably
Beyond the security nightmare, using nulled plugins is illegal (copyright infringement) and unethical. It also means you get zero support, no updates, and you’re on your own when things break. The few dollars you “save” isn’t worth the risk to your site, your business, or your reputation. For help setting up legitimate business structures, check out guidance on how to register a company properly.
Keep WordPress core, themes, and plugins updated
Security is a moving target. Vulnerabilities get discovered constantly, and developers release patches to fix them. Your responsibility doesn’t end at installation, it continues through the plugin’s lifecycle. Enable automatic updates where possible (WordPress supports this for plugins), and review update changelogs before applying them to production.
| Update Priority | Timeframe | Risk if Delayed |
|---|---|---|
| Security patches | Within 24-48 hours | High: exploitation, data breach |
| Bug fixes | Within 1-2 weeks | Medium: functionality issues |
| Feature updates | Test on staging first | Low: missed enhancements |
| Major version updates | Plan and schedule | Variable: compatibility risks |
Coordinate updates across WordPress core, your theme, and all plugins. Sometimes a premium plugin requires a newer WordPress version to access new features or security improvements. Test major updates on staging before production deployment.
Obtaining the Premium Plugin Package
You’ve done your homework, prepared your environment, and verified security. Now it’s time to actually get your hands on the plugin files. This step seems simple but has a few potential snags worth understanding before you encounter them.
From vendor’s account portal
Most professional plugin vendors provide a customer account portal or dashboard where you can access all your purchases. Log in with the credentials you created during checkout, navigate to your purchases or downloads section, and look for:
- Download button: Usually labeled “Download Plugin” or “Download Latest Version”
- License key: Often displayed on the same page, sometimes requiring you to click “View License” or similar
- Documentation links: Installation guides, video tutorials, and configuration documentation
- Version history: Some vendors let you download previous versions if the latest has bugs
The downloaded file will be a ZIP archive, typically named something like premium-plugin-name-v1.2.3.zip. Don’t unzip this file, WordPress needs the ZIP format for installation. Save it somewhere you can easily find it (your Downloads folder works fine).
From email delivery (download link and license key)
After purchase, you’ll receive a confirmation email containing a download link and your license information. These emails usually come immediately but can take a few minutes during high-traffic periods. Check your spam folder if nothing arrives within 15 minutes.
Email delivery has one significant limitation: download links often expire after 24-72 hours for security reasons. If your link expired, don’t panic, just log into the vendor’s account portal and generate a new one. This expiration is actually a security feature because it prevents unauthorized downloads if someone gains access to your email.
What to do if download link expires or license is invalid
Link expired? Log into your account portal and re-download. License showing as invalid? Common causes include:
- Typos when entering the license key (copy-paste instead of typing)
- Using the license on more sites than your purchase allows (most have a site limit)
- Expired subscription for plugins that require annual renewals
- Vendor’s license server temporarily offline (rare but happens)
If you’ve verified the license is correct and it still won’t activate, contact vendor support with your purchase receipt. Legitimate vendors resolve license issues quickly because they want you successfully using their product.
Installation Methods (Choose What Matches Your Setup)
WordPress offers multiple paths to install plugins, and your choice depends on your technical comfort level, hosting environment, and specific situation. Most users should stick with the dashboard upload method, it’s simple, visual, and works reliably. FTP and Composer methods exist for specific scenarios where dashboard access isn’t available or you’re managing sophisticated development workflows.
Install from the WordPress admin dashboard (Upload ZIP)
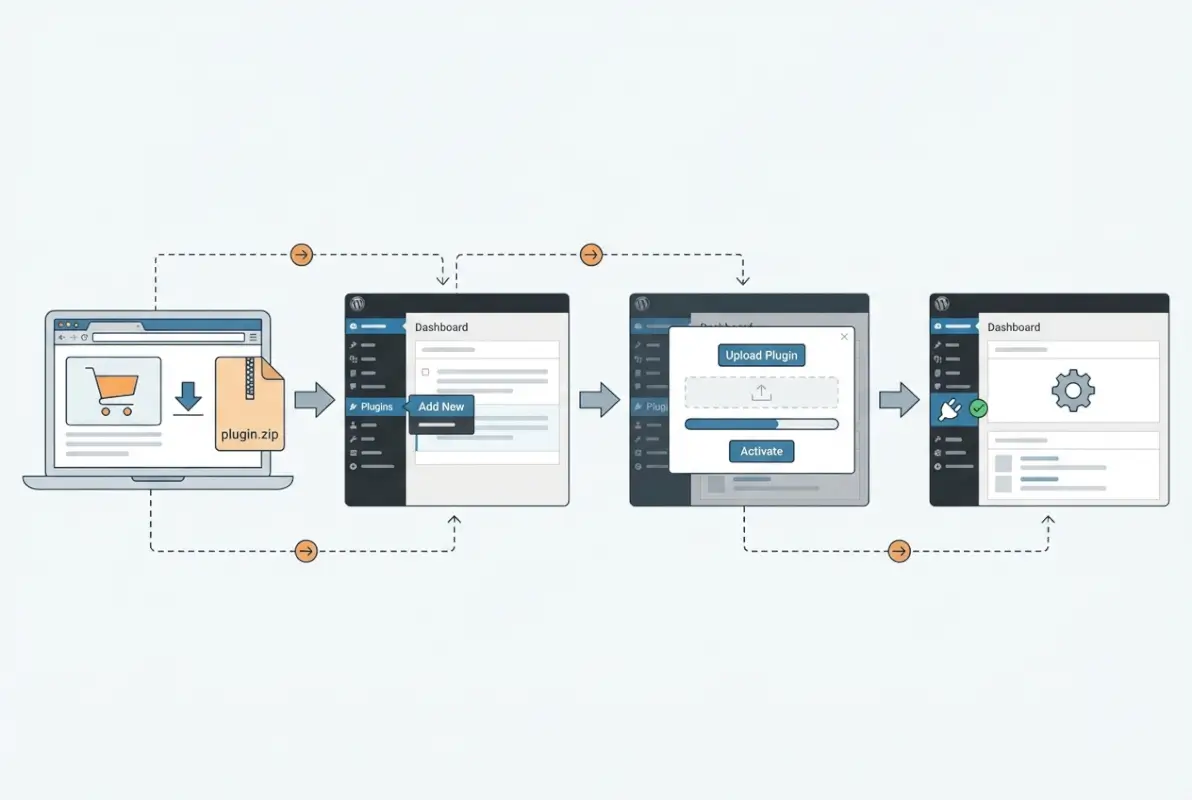
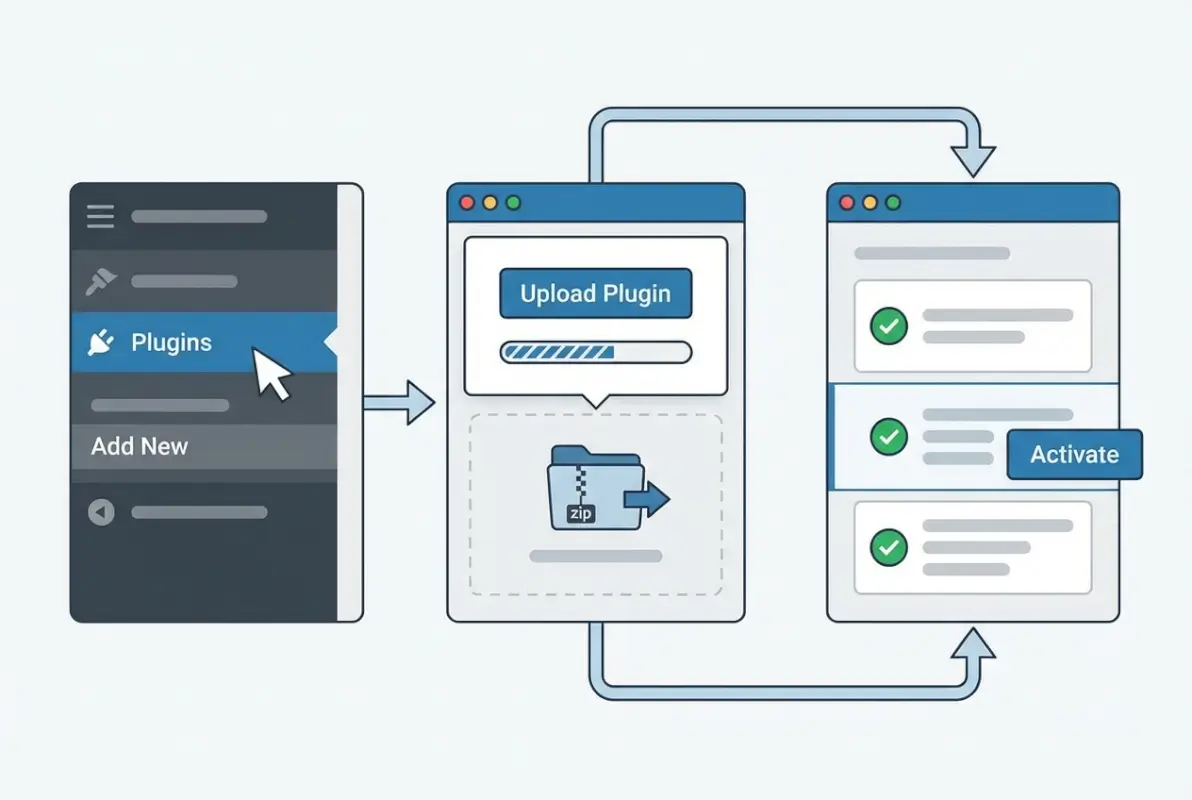
This is the standard method for premium plugins and what I recommend for 90% of situations. Here’s the step-by-step process:
- Log into your WordPress admin dashboard (yourdomain.com/wp-admin/)
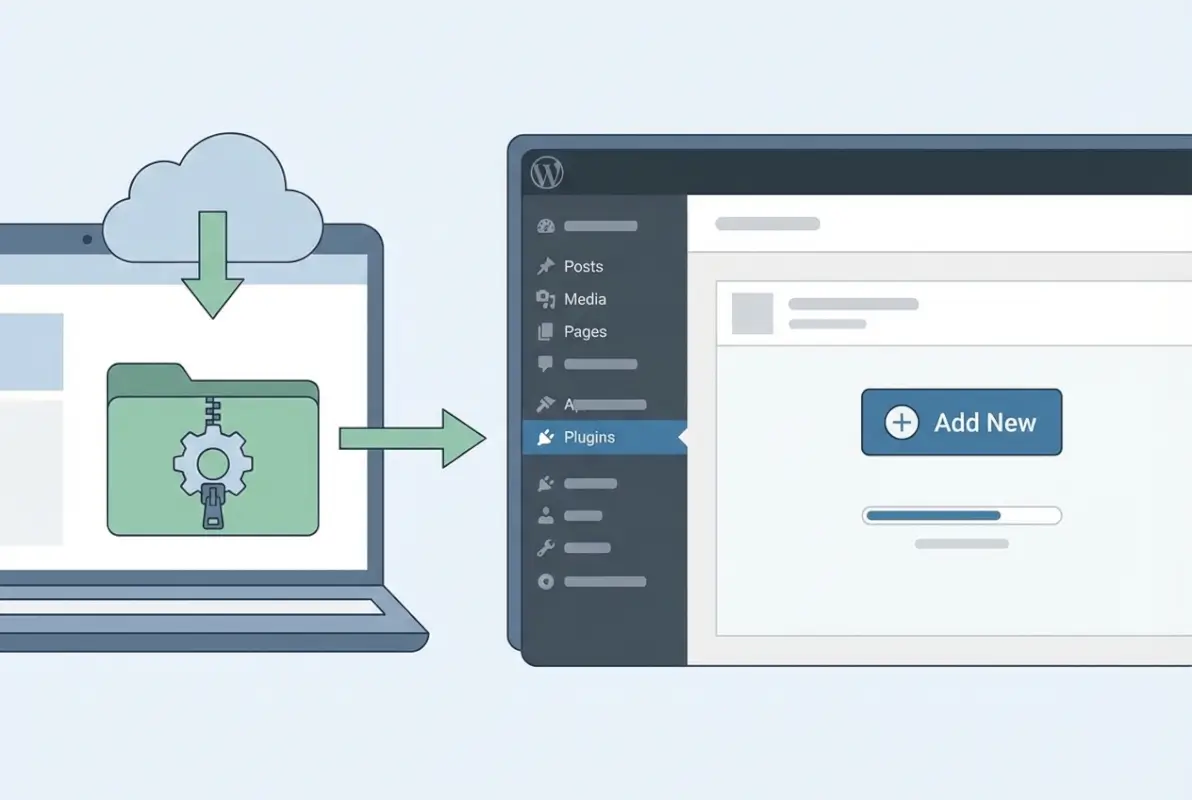
- Navigate to Plugins → Add New in the left sidebar
- Click the Upload Plugin button at the top of the page (next to “Add Plugins”)
- Click Choose File and select the ZIP file you downloaded from the vendor
- Click Install Now and wait while WordPress uploads and extracts the plugin
- Once extraction completes, click Activate Plugin
WordPress will display success or error messages during this process. If you see “Plugin installed successfully!” you’re good to proceed to activation. The entire process typically takes 30-60 seconds depending on plugin size and your internet connection speed. For more detailed guidance on professional plugin installation, you might find this comprehensive tutorial helpful.
After activation, most premium plugins add a new menu item in your admin sidebar (often under Settings or as a top-level menu). This is where you’ll enter your license key and configure the plugin’s options.
Post-install checks (license activation, required PHP modules, optional add-ons)
Immediately after activation, navigate to the plugin’s settings page and look for the license activation section. You’ll need to:
- Paste your license key into the designated field
- Click “Activate License” or similar button
- Wait for confirmation that activation succeeded
License activation connects your site to the vendor’s update server, enabling automatic updates and support access. Some plugins also check for required PHP modules at this stage and display warnings if anything’s missing.
Many premium plugins include optional add-ons or extensions. Don’t install everything immediately, add only what you actually need to avoid bloat and potential conflicts. You can always enable more features later as your requirements evolve.
Install via FTP/SFTP (advanced)
FTP installation becomes necessary when you can’t access the WordPress admin dashboard (white screen, fatal error, or security lockout). This method requires comfort with FTP clients and server file structures, if you’re not confident here, ask your hosting provider’s support team for help.
Process overview:
- Download and unzip the plugin ZIP file on your local computer
- Connect to your server using FileZilla, Cyberduck, or your preferred FTP/SFTP client
- Navigate to
/wp-content/plugins/directory - Upload the entire unzipped plugin folder into the plugins directory
- Once upload completes, log into WordPress admin (if accessible) and activate the plugin from Plugins → Installed Plugins
Common FTP issues include incorrect permissions (directories should be 755, files should be 644), connection timeouts on slow connections, and accidentally uploading to the wrong directory. If uploads keep failing, check with your host about firewall rules or IP restrictions that might block your FTP connection.
/wp-content/plugins/premium-plugin-name/ containing all the plugin’s files.Install via composer or developer tooling (for advanced environments)
Composer is a PHP dependency manager that some development teams use for WordPress sites with complex deployment pipelines. This method only makes sense if you’re already using Composer for WordPress development and understand how private package repositories work.
To install premium plugins via Composer, you typically need:
- A private package repository or vendor-specific Composer endpoint
- Authentication tokens in your composer.json config
- The plugin’s package name and version constraints
Most premium plugin vendors don’t officially support Composer installation because it complicates license validation, but some enterprise-focused plugins do provide Composer repositories. Check the vendor’s documentation for developer-specific installation instructions if your workflow requires this approach.
Post-Install Configuration and Validation
The plugin is installed and activated, but you’re not done yet. Configuration, compatibility testing, and performance validation separate successful implementations from installations that cause problems down the road. This phase determines whether your investment pays off or becomes a maintenance headache, so it’s worth doing thoroughly.
Set global plugin options and default behaviors
Navigate to the plugin’s settings or configuration page (location varies by plugin but is usually under Settings or as its own top-level menu). You’ll find options grouped into categories like:
- General Settings: Core functionality, default behaviors, feature toggles
- Display Options: Visual appearance, layout choices, responsive settings
- Integration Settings: Connections to other plugins, third-party services, or APIs
- Advanced Options: Developer features, custom code hooks, performance settings
Don’t feel pressured to configure everything immediately. Start with the essential settings you need for your use case, then explore advanced options as you become familiar with the plugin. Many premium plugins include sensible defaults that work fine for most sites.
Document your configuration choices, especially non-obvious settings or customizations. When you (or a team member) revisit this plugin in six months, you’ll want to remember why certain options are configured the way they are. I keep a simple text file or wiki page for each site documenting plugin configurations and customization decisions. Understanding how to structure site components properly helps maintain this documentation over time.
Configure per-site or per-page settings
Some premium plugins require per-page configuration in addition to global settings. Page builders, for example, need you to design individual pages. Membership plugins require setting access rules for specific content. SEO plugins need per-post optimization.
Create a test page or post to experiment with the plugin’s features before deploying to important content. This sandbox approach lets you understand the plugin’s capabilities and limitations without risking your live pages. Once you’re comfortable with the interface and behavior, apply it to your actual content strategically.
Integrate with other plugins (compatibility considerations)
Premium plugins often need to work alongside other tools in your WordPress ecosystem: your theme, your SEO plugin, your caching plugin, your form builder, and so on. Check the vendor’s documentation for known compatibility issues and recommended configurations.
Common integration points to verify:
- Caching plugins: May need exclusions for dynamic plugin features
- Security plugins: Might block necessary AJAX requests or API calls
- CDN services: Could require URL adjustments for plugin assets
- Page builders: Sometimes conflict with other page builders or theme builders
Test the plugin’s core functionality immediately after installation. If it’s a form builder, submit a test form. If it’s a booking system, make a test reservation. If it’s a page builder, create a test page. This immediate validation catches integration issues before they affect real users.
Compatibility and Performance Checks
Installation success doesn’t guarantee the plugin won’t cause problems elsewhere on your site. Performance degradation, theme conflicts, and subtle functionality breaks often don’t show up immediately, they reveal themselves gradually through user complaints or analytics anomalies. Systematic validation catches these issues before they impact visitors or revenue.
Run a quick site health check (WordPress Health Tool)
WordPress includes a built-in health monitoring tool at Tools → Site Health. Run this immediately after plugin installation to identify any new warnings or critical issues. The tool checks:
- PHP and WordPress version compatibility
- Required and recommended PHP extensions
- Database optimization opportunities
- File and directory permissions
- Background update capability
Address any new critical issues before moving forward. Warnings are less urgent but still worth reviewing, they often indicate optimization opportunities or potential future problems. The Site Health tool provides context and suggested fixes for most issues it identifies.
Test on staging first, then roll to production
If you installed on staging (as recommended earlier), now’s the time to thoroughly test before deploying to production. Your testing checklist should include:
- Core plugin functionality (does it do what you bought it for?)
- Mobile responsiveness (test on actual devices, not just browser developer tools)
- Form submissions and user interactions
- Critical site flows (checkout process, contact forms, lead generation)
- Performance on key pages (measure load times before and after)
- Conflict checks (test with all other plugins active)
Once staging validation passes, deploy to production during a low-traffic period. Monitor closely for the first few hours after deployment, have your backup ready in case you need to roll back.
Measure site impact (load times, CPU/memory usage)
Premium plugins add code, database queries, and processing overhead. Some are well-optimized and add minimal overhead, others can significantly slow your site. Measure before-and-after performance to quantify the impact:
- Page load time: Use Pingdom Tools or WebPageTest to measure real-world load times
- Database queries: Use the Query Monitor plugin to count database queries and identify slow queries
- Time to Interactive: Chrome DevTools or Google PageSpeed Insights measure when the page becomes usable
- Server resource usage: Check your hosting dashboard for CPU and memory consumption spikes
| Performance Metric | Acceptable Impact | Concerning Impact |
|---|---|---|
| Page load time increase | Under 200ms | Over 500ms |
| Additional database queries | Under 5 per page | Over 15 per page |
| JavaScript file size | Under 100KB | Over 300KB |
| CSS file size | Under 50KB | Over 150KB |
If performance impact exceeds acceptable levels, investigate optimization options. Many premium plugins include performance settings (lazy loading, minification, conditional loading) that reduce overhead. Some poorly-coded plugins simply can’t be optimized, in which case you might need to find an alternative solution.
Security Hardening After Installation
Premium plugins execute with the same privileges as WordPress itself, which means a vulnerable or compromised plugin can access your entire database, all uploaded files, and potentially your server’s file system. Post-install security hardening reduces this attack surface and limits potential damage if the plugin contains vulnerabilities (discovered later or present from the start).
Review exposed endpoints and REST API access if relevant
Modern WordPress plugins often register REST API endpoints for AJAX functionality, mobile app integration, or third-party service connections. These endpoints can become security vulnerabilities if they lack proper authentication or input validation. Use a tool like REST API Console to enumerate the endpoints your new plugin registered.
Check the plugin’s documentation to understand what each endpoint does and whether it requires authentication. Endpoints that accept POST requests or modify data should always require authentication and nonce validation. If the plugin exposes unauthenticated endpoints that seem risky, contact the vendor for clarification or consider implementing custom security rules.
Limit plugin access to admin roles if needed
Not every user on your site needs access to every plugin’s settings. WordPress’s role and capability system lets you restrict plugin access to administrators only (or other appropriate roles). Plugins like User Role Editor give you granular control over which roles can access specific plugin features.
Review the plugin’s permissions and capabilities, especially for plugins that handle sensitive data (payment processing, customer information, analytics). Remove capabilities from roles that don’t need them, this limits damage if a lower-privileged account gets compromised.
Schedule regular updates and vulnerability monitoring
Subscribe to the vendor’s security announcements or newsletter so you’re notified immediately when security patches are released. Many vendors also maintain security advisories on their website or publish notices through WordPress plugin monitoring services.
Consider using a security monitoring service like Wordfence or Patchstack that tracks known plugin vulnerabilities and alerts you when patches are available. These services maintain databases of security issues across thousands of plugins and can warn you before public exploits appear.
Troubleshooting Guide
Even with perfect preparation, things occasionally go wrong during plugin installation. Most issues fall into a few common categories with straightforward solutions, once you know what to look for. This troubleshooting guide covers the problems I’ve encountered most frequently over years of WordPress development.
ZIP file corruption or extraction errors
If WordPress displays errors like “The package could not be installed” or “Incompatible Archive,” the ZIP file might be corrupted or improperly formatted. Try these fixes:
- Re-download the ZIP: Sometimes downloads get interrupted or corrupted, grab a fresh copy from the vendor
- Verify ZIP integrity: Try opening the ZIP on your computer; if it won’t extract locally, it won’t work on WordPress either
- Check for extra wrapping: Some vendors accidentally nest the plugin folder inside another folder in the ZIP (should be plugin-name.zip containing plugin-name folder, not plugin-name.zip containing another zip or extra wrapper folder)
- File size limits: Your server might have upload_max_filesize restrictions; if the plugin ZIP is large, increase this limit in php.ini or ask your host to do it
If dashboard upload keeps failing, use the FTP method instead, it bypasses PHP upload restrictions entirely and works even when dashboard upload can’t handle large files.
License activation failures
You’ve entered your license key correctly but it shows as invalid or won’t activate. Common causes include:
- Already active on too many sites: Most premium plugin licenses limit how many sites can use a single key; deactivate on an unused site before activating on the new one
- Subscription expired: Some plugins require active annual subscriptions for updates and support; renew your subscription to reactivate the license
- Incorrect license format: Ensure you’re copying the entire key without extra spaces or line breaks; some keys are case-sensitive
- Vendor server issues: Occasionally license servers go down for maintenance; wait an hour and try again
If none of these fixes work, contact vendor support with your purchase receipt. They can manually activate your license or investigate server-side issues preventing validation. Legitimate vendors respond to license problems quickly because it directly affects their product’s usability.
Plugin conflicts after activation
Your site broke, displays errors, or behaves strangely after activating the premium plugin. This usually indicates a conflict with another plugin or your theme. Systematic troubleshooting identifies the culprit:
- Deactivate the premium plugin to confirm it’s the cause (does your site work normally again?)
- Switch to a default WordPress theme temporarily (like Twenty Twenty-Four) and reactivate the premium plugin
- If it works with the default theme, your theme has a compatibility issue with the plugin
- If it still breaks with the default theme, deactivate all other plugins except the premium one
- If it works now, reactivate other plugins one by one until you find the conflict
Once you’ve identified the conflicting plugin or theme, check both products’ documentation for known compatibility issues and solutions. Sometimes a simple setting adjustment resolves the conflict, other times you’ll need to choose between the two products or find an alternative.
Maintenance and Ongoing Management
Installation is just the beginning of your relationship with a premium plugin. Long-term success requires regular maintenance, update management, and staying informed about compatibility changes. The effort you invest here determines whether your premium plugin remains an asset or becomes a liability over time. When building sustainable processes, tools that help promote business directories effectively often share these same maintenance principles.
Enabling auto-updates (where supported)
WordPress 5.5 and newer support automatic updates for plugins. Enable this for premium plugins that have proven stability, the convenience of staying current usually outweighs the small risk of update-related issues (especially if you’re running backups). You can enable auto-updates from Plugins → Installed Plugins by clicking “Enable auto-updates” for each plugin.
Some premium plugins don’t support WordPress auto-updates because they use custom update mechanisms tied to license validation. In these cases, the plugin will notify you in the WordPress admin when updates are available, and you’ll install them manually through the plugin’s update interface.
I recommend auto-updates for security-focused plugins (firewalls, backup tools) where staying current is critical, but manual updates for complex plugins (page builders, e-commerce) where you want to test before deploying. The right balance depends on your risk tolerance and backup frequency.
Monitoring plugin changelogs and compatibility notes
Before installing any update, read the changelog. Vendors publish these to communicate what’s changing, and they often include critical information about breaking changes, new requirements, or compatibility updates. Look for:
- Security fixes: Install these immediately (within 24-48 hours)
- Breaking changes: Features that changed behavior or removed functionality; might require configuration adjustments
- New requirements: Increased PHP version requirements, new dependencies, or changed minimum WordPress version
- Known issues: Bugs introduced in this version that might affect your use case
Responsible vendors publish changelogs on their website, in the plugin’s readme file, and often in the update notification within WordPress. If a vendor doesn’t publish changelogs, that’s a red flag about their development practices and professionalism.
Scheduling periodic plugin health audits
Every 3-6 months, conduct a comprehensive audit of all your premium plugins:
- Verify all licenses are active and valid
- Check for updates you might have missed
- Review whether you’re actually using all installed plugins (remove unused ones)
- Confirm support subscriptions are current if needed
- Test key functionality to ensure nothing broke
- Review performance impact (has it changed over time?)
This regular maintenance catches problems before they become crises. It’s also an opportunity to evaluate whether a premium plugin still meets your needs or if better alternatives have emerged, the WordPress ecosystem evolves quickly and a plugin that was best-in-class two years ago might have been surpassed by newer solutions.
Rollout and Governance (Multi-Site or Enterprise)
Managing premium plugins across multiple WordPress sites introduces complexity that single-site workflows don’t address. Whether you’re running a WordPress multisite network or managing dozens of independent installations, standardized processes prevent chaos and reduce security risk.
Centralized license management and bulk activation
Track all premium plugin licenses in a centralized system (spreadsheet, password manager with shared vaults, or dedicated license management software). Document for each license:
- Plugin name and vendor
- License key and purchase date
- Renewal date and cost
- Sites where it’s installed
- Site limit for the license
- Support access credentials
Some enterprise-focused premium plugins offer license management dashboards that let you activate/deactivate across multiple sites from one interface. If you manage many sites, prioritize vendors who offer this functionality because manual per-site license management becomes unsustainable at scale.
Standardized staging-to-production processes
Establish and document a standard operating procedure for rolling out premium plugins across your site portfolio:
- Test on a representative staging environment (similar to production in terms of theme, plugins, and configuration)
- Validate functionality and performance
- Document configuration steps and settings
- Schedule deployment to production during maintenance windows
- Deploy to a small subset of sites first (pilot group)
- Monitor pilot sites for 48-72 hours
- Roll out to remaining sites once validation passes
This phased approach catches issues before they affect your entire portfolio. When you discover a problem on the pilot sites, you’ve only touched a small percentage of your infrastructure instead of breaking everything simultaneously. Implementing strategies similar to those used to populate business directories can help structure these systematic rollouts.
Change control, audit logging, and rollback procedures
Enterprise environments need accountability and traceability for all changes. Implement these governance controls:
- Change approval process: New plugin installations require documented business justification and manager approval
- Audit logging: Track who installed what plugin where and when (WordPress activity log plugins help here)
- Rollback procedures: Document exact steps to remove a problematic plugin and restore previous state
- Configuration documentation: Maintain runbooks for each premium plugin’s setup and configuration
These processes might seem like bureaucratic overhead, but they prevent disasters at scale. When you’re managing 50+ sites and someone installs an incompatible plugin that breaks them all, proper change control and rollback procedures are the difference between a 30-minute incident and a week-long nightmare.
Quick-Start Cheat Sheet
Here’s your condensed reference for premium plugin installation, bookmark this section for quick access during future installations:
- Pre-Installation:
- ✓ Verify license validity and download plugin ZIP
- ✓ Check WordPress and PHP version compatibility
- ✓ Back up database and files
- ✓ Create or switch to staging site
- Installation:
- ✓ Navigate to Plugins → Add New → Upload Plugin
- ✓ Select ZIP file and click Install Now
- ✓ Activate plugin after installation completes
- Configuration:
- ✓ Enter license key and activate
- ✓ Configure essential settings
- ✓ Test core functionality
- Validation:
- ✓ Run WordPress Site Health check
- ✓ Measure performance impact
- ✓ Test on staging before production
- Ongoing:
- ✓ Enable auto-updates if appropriate
- ✓ Monitor vendor changelogs
- ✓ Schedule quarterly audits
Frequently Asked Questions
How do I know if a purchased WordPress plugin is compatible with my WordPress version?
Check the vendor’s documentation or product page for minimum WordPress version requirements. Then navigate to Dashboard → Updates to see your current WordPress version. The plugin sales page typically lists requirements like “WordPress 5.8 or higher.” If your version is older, update WordPress on a staging site first to test compatibility before updating production.
Can I install a premium plugin without internet access or via FTP only?
Yes, you can install premium plugins entirely via FTP without using the WordPress admin dashboard. Download and unzip the plugin on your computer, then upload the unzipped folder to your server’s /wp-content/plugins/ directory via FTP. Afterward, log into WordPress admin and activate the plugin from the Plugins page. License activation might still require internet access depending on the vendor’s system.
What should I do if license activation fails after installation?
First verify you’re copying the complete license key without extra spaces. Check if your subscription expired or if you’ve exceeded the site limit for your license. Try deactivating the license on an old site if you’ve reached the limit. If the key is definitely correct, wait an hour in case the vendor’s license server is temporarily down, then contact vendor support with your purchase receipt if problems persist.
Do premium plugins require ongoing subscriptions or renewals?
It depends on the vendor’s business model. Some premium plugins charge one-time fees with lifetime updates, others require annual subscription renewals for continued updates and support. Many vendors offer the plugin indefinitely after purchase but require renewal for updates and support access. Check the terms on the product page before purchasing to understand the long-term cost. Support and update access typically cease if you don’t renew, though the plugin continues functioning.
How do I safely test a purchased plugin on a staging site?
Create a staging copy of your production site through your hosting provider’s control panel or using a plugin like WP Staging. Install and configure the premium plugin on staging exactly as you would on production. Test thoroughly for conflicts, performance issues, and functionality. Once validated, deploy to production during low-traffic hours and monitor closely. Staging environments prevent installation issues from affecting real visitors.
How often should I update a premium plugin, and how do I handle updates?
Install security updates within 24-48 hours of release. Apply bug fix updates within 1-2 weeks after testing on staging. Feature updates can wait until you need the new functionality. Always read the changelog before updating to check for breaking changes or new requirements. Test major version updates on staging before production deployment. Enable WordPress auto-updates for stable plugins you trust, or manually update through the plugin’s update interface.
What are best practices to avoid plugin conflicts after installation?
Test the premium plugin on staging with your exact production theme and plugin configuration before going live. Check the vendor’s documentation for known conflicts. After installation, verify core functionality immediately. If you encounter issues, systematically disable other plugins one by one to identify conflicts. Keep all plugins updated since many conflicts are resolved in newer versions. Choose well-maintained plugins from reputable vendors.
How can I verify that a plugin’s source is trustworthy?
Only download from the vendor’s official website or verified marketplace listings like CodeCanyon. Research the vendor’s reputation through reviews, support forum activity, and update history. Check how long they’ve been in business and whether they actively maintain their products. Avoid “nulled” or “cracked” plugins from file-sharing sites, these often contain malware. Verify the vendor provides documentation, support channels, and regular updates.
What should I do if a plugin causes site performance issues?
First measure the impact objectively using tools like Pingdom or Query Monitor to identify specific bottlenecks. Check the plugin’s performance settings for optimization options like lazy loading or conditional loading. Review caching plugin exclusions and CDN configurations. If performance remains unacceptable, contact vendor support for optimization guidance. Consider whether the plugin’s features justify the performance cost, or look for lighter-weight alternatives. Always test on staging before removing plugins from production.
Are there public resources for plugin comparison and support quality?
WordPress.org plugin repository includes user reviews and ratings for free plugins. For premium plugins, check independent review sites, WordPress community forums, and Facebook groups where users discuss experiences. The WP Mayor and similar WordPress-focused blogs publish detailed plugin comparisons. Trust Pilot and similar platforms sometimes have vendor reviews. When evaluating support quality, check the vendor’s support forum for response times and resolution rates before purchasing.
Ready to Master Premium Plugin Installation?
Installing purchased WordPress plugins doesn’t have to be complicated or risky. Follow this systematic approach (backup first, test on staging, validate thoroughly) and you’ll confidently deploy premium plugins that enhance your site instead of breaking it.
The WordPress ecosystem isn’t going anywhere, it continues powering a massive percentage of the web. Your investment in learning proper plugin management pays dividends through every site you build and maintain. Start with one plugin installation following this guide completely, then develop your own streamlined process based on what works for your workflow.
Most importantly: don’t skip the staging environment. That single habit prevents 90% of plugin-related disasters and makes you look like a professional instead of someone who gambles with production sites.
Was this article helpful?