
How to Create WordPress Contact Forms with FluentForm (Complete 2024 Guide)

Generating summary...
Most WordPress form builders force you to choose between simplicity and power. The simple ones lack essential features. The powerful ones overwhelm you with complexity. FluentForm breaks this pattern by delivering professional-grade functionality through an interface that actually makes sense.
After building hundreds of forms across client sites over the past few years, I’ve found that the plugin you choose matters less than how well it matches your workflow. FluentForm wins because it gets out of your way – letting you build what you need without forcing you to become a developer or settle for cookie-cutter templates.
TL;DR – Quick Takeaways
- Installation takes under 2 minutes – available free from the WordPress plugin directory
- Drag-and-drop builder with 30+ field types in the free version, 65+ in Pro
- Conditional logic and multi-step forms included at no cost (competitors charge for these)
- Integrates with 20+ services free – email marketing, CRMs, payment processors
- Performance-focused design won’t slow down your site like bloated alternatives
Why FluentForm Remains a Top Choice for WordPress Users in 2024
The WordPress form plugin landscape has matured significantly, yet FluentForm continues gaining market share against established competitors. This isn’t accidental – the plugin addresses real pain points that other solutions ignore or handle poorly.
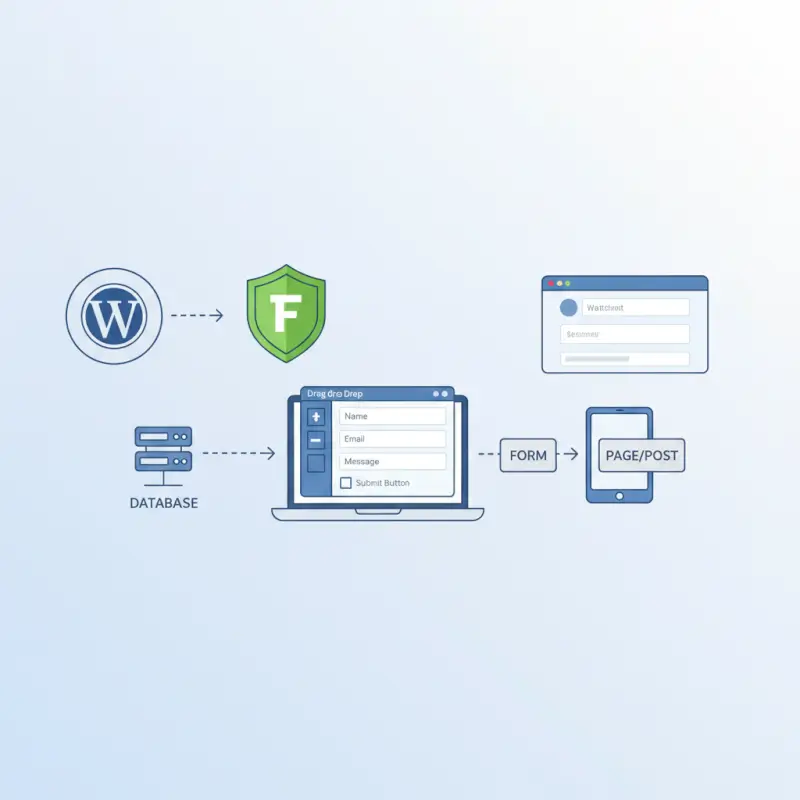
FluentForm’s core strength lies in its interface design. Where competitors present you with overwhelming option panels or restrict you to rigid templates, FluentForm uses a visual builder that mirrors how you actually think about forms. Fields live on the left, form canvas in the center, settings on the right. Everything is exactly where your brain expects it to be.
The free version includes features that most competitors reserve for premium tiers. Conditional logic – showing or hiding fields based on user responses – ships standard. Multi-step forms that break long questionnaires into manageable sections cost you nothing. AJAX submissions that don’t require page reloads work out of the box. According to WordPress form plugin market research from Statista, this feature accessibility has helped FluentForm capture significant adoption among small business users who can’t justify premium plugin budgets.
Core Advantages of FluentForm
The drag-and-drop builder responds instantly, with no lag between actions and results. You grab a field type, drop it where you want it, click to configure settings. The visual feedback is immediate and accurate – what you see in the builder matches what visitors see on your site.
Form styling happens through visual controls rather than CSS hunting. Want your submit button purple instead of blue? Click the button, adjust the color picker, done. Need more spacing between fields? Drag a slider. The styling panel gives you enough control to match any brand without requiring design expertise.
Performance optimization runs deep in FluentForm’s architecture. The plugin loads only the JavaScript and CSS needed for the specific form on each page, nothing more. Many competing plugins dump their entire codebase on every page whether you have a form present or not. This bloat adds seconds to page load times, hurting both user experience and search rankings.
Where FluentForm Fits Among Other Form Plugins
Contact Form 7 remains popular because it’s free and simple, but it lacks visual building – you edit shortcode-like markup rather than dragging fields. For basic contact forms this works fine. For anything more complex, you’re either adding multiple plugins or giving up.
WPForms offers a similar drag-and-drop experience to FluentForm, but with a narrower feature set in the free version. Conditional logic requires the premium tier. Payment integration requires premium. Multi-page forms require premium. WPForms positions itself as beginner-friendly, which sometimes means “limited unless you pay.”
Gravity Forms sits at the premium end of the market with no free version. It’s powerful and reliable, backed by years of development and a large user base. The interface feels dated compared to newer solutions, and the pricing ($59/year minimum) puts it out of reach for many users. If you’re building forms for enterprise clients who need bulletproof reliability and don’t mind the learning curve, Gravity Forms delivers. For most WordPress sites, it’s overkill.
| Feature | FluentForm | Contact Form 7 | WPForms |
|---|---|---|---|
| Visual Builder | ✓ Free | ✗ Code only | ✓ Free |
| Conditional Logic | ✓ Free | Add-on required | ✗ Premium only |
| Multi-step Forms | ✓ Free | ✗ Not available | ✗ Premium only |
| Starting Price | Free / $49/yr Pro | Free | Free / $49.50/yr Pro |
FluentForm carved out its position by offering premium features free while maintaining an interface that doesn’t sacrifice power for simplicity. You get the visual convenience of WPForms with the feature depth that typically requires paying for Gravity Forms.
How to Build Optimized Contact Forms with FluentForm
Creating your first form with FluentForm takes less time than reading most plugin documentation. The process follows a logical flow from installation through publishing, with each step clearly marked and easy to reverse if you change your mind.
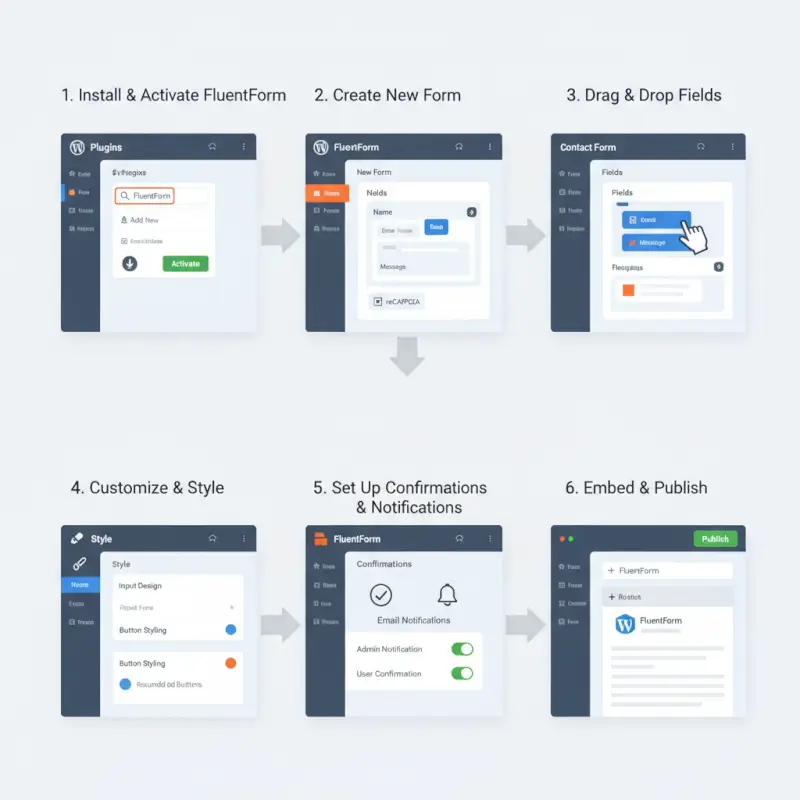
Start by installing FluentForm from your WordPress dashboard under Plugins > Add New. Search “FluentForm,” click Install Now, then Activate. A new “Fluent Forms” menu appears in your sidebar – this is your control center for all form operations.
Click “Add New Form” and you’ll see a template library. For contact forms, select the “Contact Form” template rather than starting blank. Templates give you a solid foundation you can modify, saving 10-15 minutes of field placement and configuration. The template includes name, email, subject, and message fields with sensible defaults already configured.
Quick-Start Setup and Essential Form Types
The form editor opens with your template loaded. The field library on the left shows all available inputs – text, email, phone, dropdown, checkbox, radio buttons, file upload, and dozens more. Simply drag a field type onto your form canvas to add it.
Click any field to edit its properties in the right sidebar. Here you control the label text, placeholder text, whether the field is required, default values, and validation rules. For email fields, FluentForm automatically applies email format validation. For phone fields, you can set format requirements like (XXX) XXX-XXXX.
Rearrange fields by dragging them up or down. Delete fields by clicking the trash icon that appears when you hover. Duplicate fields with the copy icon – useful when you need multiple text inputs with similar settings.
Beyond contact forms, FluentForm handles diverse use cases through specialized field combinations:
- Event registration forms – combine name/email with date pickers, dropdown menus for session selection, and payment fields if charging admission
- Survey forms – use rating scales, matrix fields, and open-ended text areas to collect feedback
- Job applications – add file upload fields for resumes, dropdown menus for position selection, and long-text areas for cover letters
- Booking forms – integrate date/time pickers with conditional fields that show different options based on service selected
Multi-step forms break long questionnaires into manageable chunks. In the form editor, click “Settings” then enable “Step Form” under Form Attributes. Add step breaks by dragging the “Step” element onto your canvas wherever you want to start a new page. Each step gets its own navigation buttons and progress indicator.
Research from Pew Research Center on web usage trends shows that users abandon forms primarily due to length perception. Multi-step formatting reduces this abandonment by showing only 3-5 fields at a time, making even lengthy applications feel manageable.
Performance, Accessibility, and Security Considerations
Form performance directly impacts both user experience and search engine rankings. Every form adds code to your pages – JavaScript for validation and interactivity, CSS for styling. Poorly optimized plugins can add 100KB+ of resources that slow page loads by seconds.
FluentForm uses conditional loading, meaning it only loads resources on pages that actually contain forms. If you have a form on your contact page but not your homepage, FluentForm won’t add any code to the homepage. Enable this in FluentForm > Settings > General Settings > “Disable CSS Loading on the Frontend” if you’re handling styling through your theme.
For accessibility compliance following W3C HTML forms and accessibility guidelines, FluentForm automatically adds proper ARIA labels and ensures keyboard navigation works correctly. However, you should still test your forms with screen readers and verify that:
- Every field has a visible label (not just placeholder text)
- Error messages clearly identify which field has the problem
- Required fields are marked with more than just color (use the asterisk or “required” text)
- Success messages are announced to screen readers
Security protection comes in multiple layers. First, enable Google reCAPTCHA v3 in FluentForm > Settings > reCAPTCHA to block automated bot submissions. Unlike older reCAPTCHA versions that annoy users with “click all the traffic lights” challenges, v3 runs invisibly in the background and scores submission likelihood.
Second, enable honeypot protection under form settings. This adds a hidden field that humans never see but bots typically fill out, allowing FluentForm to silently reject those submissions.
Third, limit submission frequency per user. Under Form Settings > Restrictions, you can prevent the same IP address from submitting more than once per hour (or whatever timeframe makes sense). This stops spam bombing while allowing legitimate users to resubmit if they made a mistake.
Advanced Features, Integrations, and Automation in FluentForm
FluentForm’s real power emerges when you move beyond basic contact forms into conditional logic, automated workflows, and third-party integrations. These features transform forms from simple data collectors into complete business process engines.

Conditional logic creates dynamic forms that adapt to user responses. Rather than showing every possible field to every visitor, you reveal or hide sections based on previous answers. This reduces form length perception while gathering complete information from those who need to provide it.
Conditional Logic, Surveys, and Workflow Automations
To add conditional logic, click any field and enable “Conditional Logic” in the right sidebar. You then create rules: “Show this field if [another field] [equals/contains/is greater than] [some value].”
For example, on a service request form, you might ask “What type of service do you need?” with options for Residential, Commercial, and Industrial. Based on the answer, you show different sets of follow-up questions – residential customers might see fields for property size and preferred appointment times, while commercial customers see fields for business name and project scope.
I remember building a client intake form for a law firm where this capability saved them hours of administrative work. The form asked the general nature of the case, then showed completely different questionnaires for personal injury versus contract disputes versus estate planning. Instead of three separate forms (and three separate pages to maintain), they had one intelligent form that adapted.
Survey creation benefits from FluentForm’s specialized field types. Rating scales let respondents score items from 1-10 or with star ratings. Net Promoter Score fields specifically ask the “how likely are you to recommend” question with proper 0-10 scaling. Matrix fields (available in Pro) present multiple questions with the same set of answer options in a compact grid format.
Workflow automation happens through the integrations system, but also through FluentForm’s notification settings. You can configure different email notifications based on field values. A support request form might route technical questions to your tech team, billing questions to accounting, and general inquiries to customer service – all from the same form.
Set up these routing rules under Email Notifications > Conditional Logic. Create multiple notification entries, each targeting different recipients based on the form data submitted.
Integrations with ESPs, CRM, Analytics, and Marketing Tools
FluentForm connects with major email marketing platforms, customer relationship management systems, payment processors, and automation tools. The free version includes integrations with Mailchimp, Slack, Webhook, and several others. Pro adds 40+ more including ConvertKit, ActiveCampaign, HubSpot, and Salesforce.
To connect an integration, navigate to FluentForm > Settings > Integrations. Find your platform and click Connect. Most integrations use API keys for authentication – you’ll need to copy the API key from your email marketing platform (usually found in account settings) and paste it into FluentForm’s integration settings.
Once connected, return to your form editor and click the Integrations tab. Add a new integration for that form, select your connected service, and map form fields to subscriber fields. For Mailchimp, you map which form field contains the email address, which contains the first name, etc. You can also set tags or list assignments based on conditional logic.
Payment integrations with PayPal and Stripe (Pro feature) turn forms into complete checkout systems. Add product fields to your form showing items with prices. FluentForm calculates totals automatically, applying quantity multipliers and conditional pricing. The payment field connects to your PayPal or Stripe account, processing transactions securely without storing credit card data on your server.
For directory sites using solutions like TurnKey Directories, FluentForm integrates seamlessly to capture business listing submissions, membership applications, or claim requests. The webhook integration can send form data to directory databases, creating listings automatically without manual data entry.
Google Analytics tracking requires a small code addition. Use Google Tag Manager or add the analytics event tracking code to FluentForm’s confirmation settings. This lets you track form submissions as conversion events, seeing exactly which traffic sources and pages drive form completions. According to Google SEO best practices for WordPress and forms, tracking form interactions as site engagement signals can indirectly benefit search visibility by demonstrating content value.
SEO, Analytics, and Performance: Measuring Form Impact on Site Goals
Forms serve as conversion points in your marketing funnel, but you can’t optimize what you don’t measure. Tracking form performance reveals which pages generate submissions, where users abandon the process, and how forms impact overall site metrics.

Google Analytics 4 replaced Universal Analytics with an event-based model that tracks user interactions rather than just page views. Forms fit naturally into this model as interaction events you can measure, segment, and analyze.
Tracking Form Conversions and Events
To track FluentForm submissions in Google Analytics 4, you need to send event data when users complete forms. FluentForm Pro includes built-in Google Analytics integration, but you can accomplish the same thing with free tools using Google Tag Manager.
First, set up a Tag Manager trigger that fires when a FluentForm success message appears. The trigger watches for the CSS class .ff_success_msg (which FluentForm adds to confirmation messages). When Tag Manager sees this class appear, it fires your analytics event.
Create a new tag in Tag Manager, choose Google Analytics: GA4 Event as the tag type, enter your GA4 Measurement ID, and set the event name to something like “form_submission.” Add event parameters for form_name (pulling from the page title or a data layer variable) to distinguish between different forms.
Once events flow into GA4, create conversion markers under Configure > Conversions. Mark form_submission events as conversions, allowing you to see form completions in your conversion reports and attribute them to traffic sources.
Form completion rate reveals what percentage of users who start a form actually submit it. Calculate this by tracking form_start events (when someone clicks into the first field) versus form_submission events. A completion rate below 50% typically indicates problems with form length, field complexity, or technical issues.
Reducing Form Friction: UX Copy, Validation, and Error Handling
Form abandonment happens when friction exceeds motivation. Every field you add increases cognitive load. Every unclear label creates hesitation. Every validation error without clear guidance frustrates users to the point of giving up.
Reducing friction starts with honest evaluation: does every field serve an essential purpose? Marketing teams often want to capture everything possible – company size, budget range, timeline, preferred contact method, how they heard about you. Each additional field drops completion rates by approximately 3-5%. If you’re not using the data to segment or follow up better, cut the field.
Label clarity matters more than most people realize. “Name” works fine. “Your name” or “Full name” works slightly better because it’s more specific. “What should we call you?” sounds friendly but takes longer to read and understand. Stick with clear, conventional labels unless you have a compelling reason to deviate.
Placeholder text should demonstrate format, not replace labels. Use placeholders to show examples: “john.smith@example.com” in an email field clarifies the expected format. Never use placeholders as the only indication of what a field requires – they disappear when users start typing, forcing people to delete their input if they need to check what the field wanted.
Validation error messages must specify the problem and solution. “This field is required” helps users understand what went wrong. “Email address is invalid” is better than just “Error.” Best is “Please enter a valid email address like name@example.com” because it explains both the problem and the solution.
According to research from OWASP form security best practices, client-side validation should provide immediate feedback (marking errors as users type or when they leave a field), while server-side validation provides the final security check. FluentForm does both automatically, but you can customize the error message text to match your tone.
Success messaging deserves equal attention to errors. Generic “Thank you for your submission” confirmations work, but specific next-step guidance works better: “Thanks for contacting us! We’ll respond within 24 hours. Check your email for a confirmation message.”
Compliance, Security, and Reliability for Forms in 2024
Form data protection isn’t optional anymore. Privacy regulations like GDPR and CCPA create legal requirements for how you collect, store, and use personal information. Security vulnerabilities in forms expose your site to spam, data theft, and exploitation.

FluentForm provides the tools for compliance and security, but you need to configure them correctly. The plugin doesn’t enable every protection by default because some features (like strict GDPR consent requirements) might not apply to your jurisdiction or use case.
Data Privacy and Consent Management
GDPR requires explicit consent before collecting personal data from EU residents. Even if your business operates outside Europe, if you have EU visitors, GDPR applies. CCPA creates similar requirements for California residents.
Add a consent checkbox to your forms stating what you’ll do with submitted data. FluentForm includes a dedicated Terms and Conditions field type that displays agreement text with a required checkbox. Make the text specific: “I agree to receive email updates about products and services” rather than vague “I agree to the terms and conditions.”
Store submissions only as long as you need them. FluentForm saves all submissions to your WordPress database by default, which is useful for reviewing form data but creates privacy concerns if you’re storing personal information indefinitely. Under FluentForm > Settings > General Settings > Entry Storage, you can configure automatic deletion after a specified period (30 days, 90 days, 1 year) or disable database storage entirely if you’re routing all data to external systems.
Double opt-in for email list subscriptions provides an extra consent verification layer. When someone submits a form to join your email list, send them a confirmation email with a verification link they must click before you add them to your list. This proves they own the email address and actually want to subscribe, reducing list quality issues and compliance risks.
FluentForm’s email marketing integrations support double opt-in when enabled on the email platform side. However, the form itself can’t enforce this – you need to configure it in Mailchimp, ConvertKit, or whatever ESP you’re using.
Common Security Pitfalls and Best-Practice Mitigations
Spam submissions waste your time reviewing garbage and can overwhelm your email inbox or external integrations. Beyond the obvious annoyance, high spam volumes can get your domain flagged by email providers, harming deliverability for legitimate messages.
Layer multiple spam prevention methods rather than relying on a single approach:
- Google reCAPTCHA v3 runs invisibly, scoring submissions without user interaction (enable in FluentForm > Settings > reCAPTCHA)
- Honeypot fields trap bots that auto-fill all fields including hidden ones (enable per form under Settings > Form Restrictions)
- Submission rate limiting prevents the same IP from submitting repeatedly (configure under Form Restrictions)
- Email domain validation rejects obvious fake addresses like test@test.com or user@gmail (requires custom validation)
SQL injection attacks target forms by inserting database commands into text fields, potentially exposing or deleting your entire database. FluentForm uses WordPress’s built-in sanitization functions that escape special characters, preventing SQL injection by default. Don’t bypass these protections with custom code that accepts raw user input.
Cross-site scripting (XSS) attacks inject malicious JavaScript into form submissions that executes when you view the entry in your admin area. Again, FluentForm sanitizes and escapes output automatically. Issues typically arise when developers add custom code that outputs form data without proper escaping.
File upload fields create particularly high security risks. Attackers can upload malicious scripts disguised as images or PDFs, then trigger execution to compromise your server. FluentForm restricts file uploads to specific types and sizes, but you should further limit uploads to truly necessary forms and file types. Never allow .php, .exe, or other executable formats.
Store uploaded files outside your web root if possible, or at minimum outside the WordPress directory. This prevents direct access to uploaded files via URL, requiring downloads to go through WordPress’s permission system.
Frequently Asked Questions
How do I create a simple contact form with FluentForm?
Install FluentForm from your WordPress dashboard, click Add New Form, select the Contact Form template, customize the fields by dragging and dropping, configure email notifications under the Settings tab, save your form, and paste the provided shortcode into any page or post where you want the form to appear.
Can FluentForm integrate with email marketing tools?
Yes, FluentForm integrates with 20+ email marketing platforms in the free version including Mailchimp, Slack, and Webhook, plus 40+ additional services in the Pro version such as ConvertKit, ActiveCampaign, and HubSpot. Configure integrations under FluentForm Settings, then connect them to individual forms through the Integrations tab in the form editor.
What are the differences between FluentForm free vs pro features?
The free version includes 30+ field types, conditional logic, multi-step forms, and basic integrations. Pro ($49/year) adds 65+ total fields, payment processing with PayPal and Stripe, advanced integrations with CRMs, PDF generation, quiz scoring, additional form templates, and priority support. Most users find the free version sufficient for standard forms.
How can I reduce spam on FluentForm submissions?
Enable Google reCAPTCHA v3 under FluentForm Settings for invisible bot protection, activate honeypot fields in individual form settings to trap automated submissions, configure submission rate limiting to prevent repeated spam from the same IP, and consider adding email verification for subscription forms through double opt-in workflows.
Is FluentForm accessible and mobile-friendly?
FluentForm includes proper ARIA labels and keyboard navigation support out of the box, meeting basic accessibility standards. Forms are responsive by default, adapting to mobile screens automatically. However, you should test with screen readers and on actual mobile devices to verify that your specific field combinations and custom styling maintain accessibility and usability.
How do I track form conversions in Google Analytics 4?
Set up a Google Tag Manager trigger that fires when FluentForm’s success message appears (watching for the .ff_success_msg class), create a GA4 Event tag with event name “form_submission” and relevant parameters, then mark this event as a conversion in your GA4 property under Configure > Conversions to track submissions in conversion reports.
Can I build multi-step forms with FluentForm?
Yes, multi-step forms are included in FluentForm’s free version. Edit your form, click Settings, enable “Step Form” under Form Attributes, then drag the Step element onto your canvas wherever you want to create a new page. Each step displays separately with navigation buttons and an optional progress bar showing completion percentage.
How secure are FluentForm forms on WordPress?
FluentForm uses WordPress’s built-in sanitization and validation functions to prevent SQL injection and XSS attacks automatically. It processes submissions server-side to prevent client-side bypass. Security depends on keeping the plugin updated, enabling spam protection features, restricting file upload types, and following general WordPress security best practices like strong passwords and regular updates.
Start Building Better Forms Today
FluentForm gives you the tools to create professional forms that actually convert – without the premium price tag or steep learning curve. Install it free from the WordPress plugin directory and build your first form in under 10 minutes.
Your visitors deserve forms that respect their time. Your business deserves data collection that actually works.
Was this article helpful?