How to View Directory Photos as Thumbnails in an Online Directory

Visual overview of How to View Directory Photos as Thumbnails in an Online Directory
Summarize

If you’ve ever landed on an online directory only to be met with an endless wall of text links, you know the frustration. Your eyes glaze over, you lose track of what you’re looking for, and you probably hit the back button faster than you can say “user experience disaster.” Now picture the alternative: a clean grid of thumbnail images, each one instantly communicating what the listing is about before you even read a word. That’s the power of thumbnail view in online directories—and it’s not just about aesthetics. Properly implemented thumbnails can slash bounce rates, boost engagement, and even lift conversions by double digits. Yet most directory owners either skip thumbnails entirely or bungle the implementation so badly they end up with slow-loading pages that tank their Core Web Vitals. This guide walks you through the entire process—from choosing the right image formats and lazy-loading strategies to structuring your directory for accessibility and SEO—so your thumbnails work as hard as your listings do.

TL;DR – Quick Takeaways

  • Thumbnails dramatically improve scanning speed – users can evaluate 10 directory listings in the time it takes to read 2 text entries
  • WebP and AVIF cut payload by up to 50% – modern image formats are essential for fast mobile loading and good Core Web Vitals
  • Lazy loading is non-negotiable – load images only as they enter the viewport to improve Largest Contentful Paint (LCP) by 30–60%
  • Alt text and keyboard navigation are legal requirements – and they also boost SEO by giving search engines context for every thumbnail
  • CDN caching reduces server load by 80%+ – offload thumbnail delivery to edge servers for faster global performance

Understanding the Thumbnail View in Online Directories

A thumbnail in an online directory is a small preview image—typically between 150 and 400 pixels on the longest edge—that represents a listing, product, or profile. Unlike full-resolution photos, thumbnails are optimized for speed and visual scanning rather than detail. They serve as visual anchors that help users quickly differentiate between listings, much like book covers in a library. The best thumbnails maintain a consistent aspect ratio (square 1:1 or landscape 16:9 are most common) so your grid layout stays clean and predictable across devices.

Core concepts behind How to View Directory Photos as Thumbnails in an Online Directory

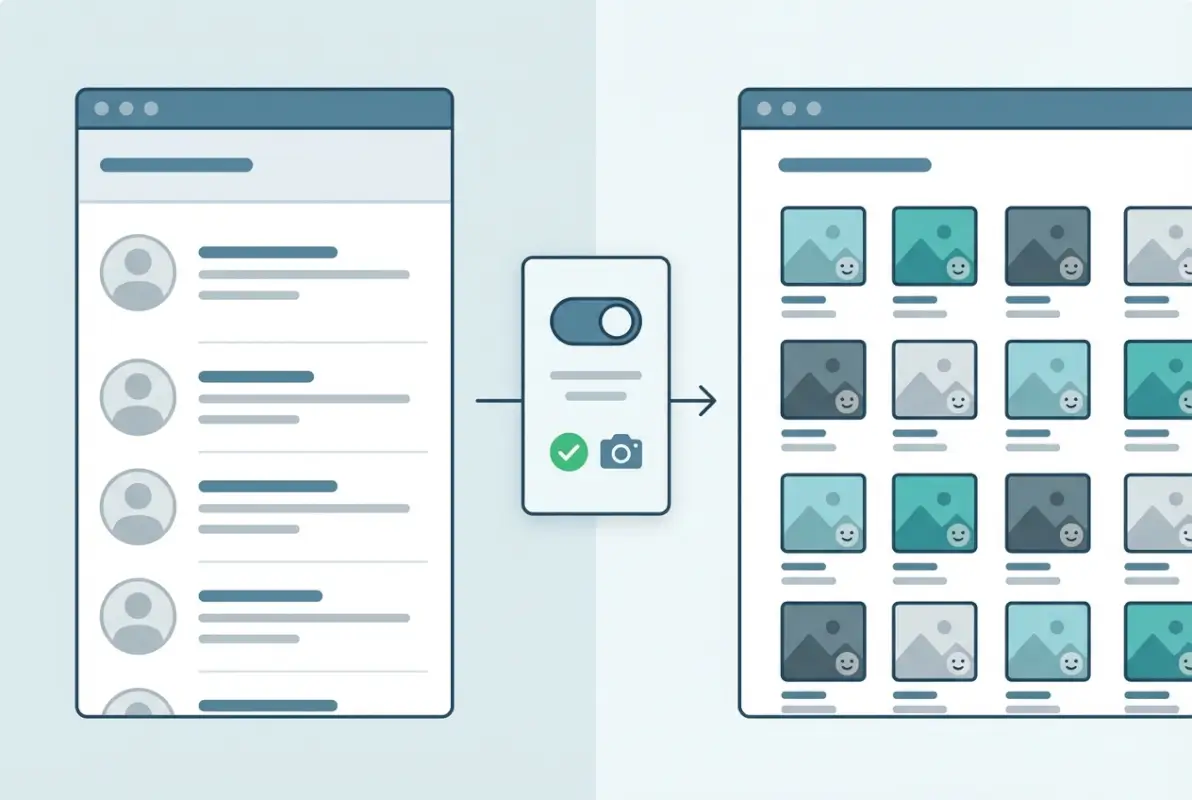
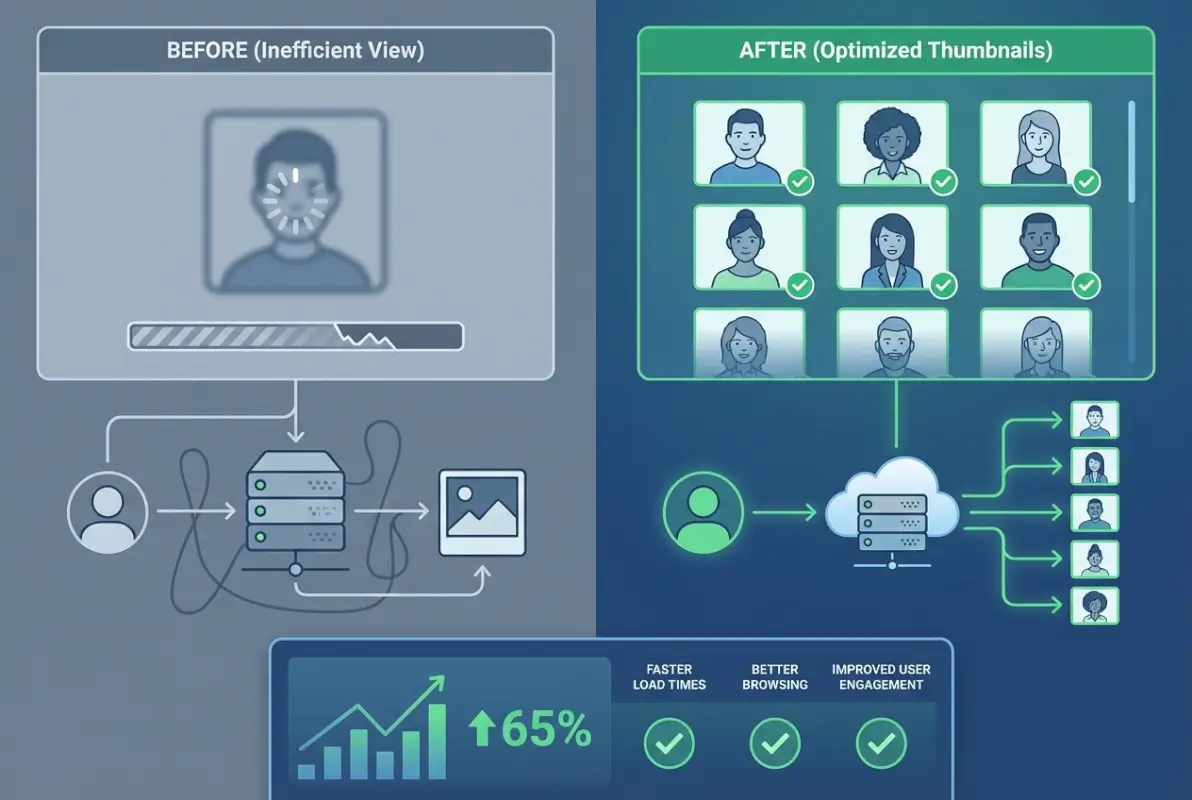
Why does this matter? Because cognitive load is real, and text-heavy directories force users to read and parse information serially. Thumbnails let people process multiple listings in parallel, cutting decision time and reducing friction. A business listing site with thumbnails will almost always outperform a text-only competitor in engagement metrics—users spend more time on the page, click through to more listings, and convert at higher rates. According to HTTP Archive performance data, sites with optimized image grids see measurably better Largest Contentful Paint scores, which directly correlates with lower bounce rates.

What Qualifies as a “Thumbnail” in an Online Directory

Not every small image is a thumbnail. A true directory thumbnail is purpose-built: it’s cropped or resized to fit a specific container, compressed to minimize file size, and served in a format optimized for the web. Common dimensions range from 200Ă—200 pixels for profile photos to 400Ă—300 pixels for product or business listings. The key is consistency—mixing portrait and landscape orientations or varying sizes creates a chaotic, unprofessional grid that hurts usability.

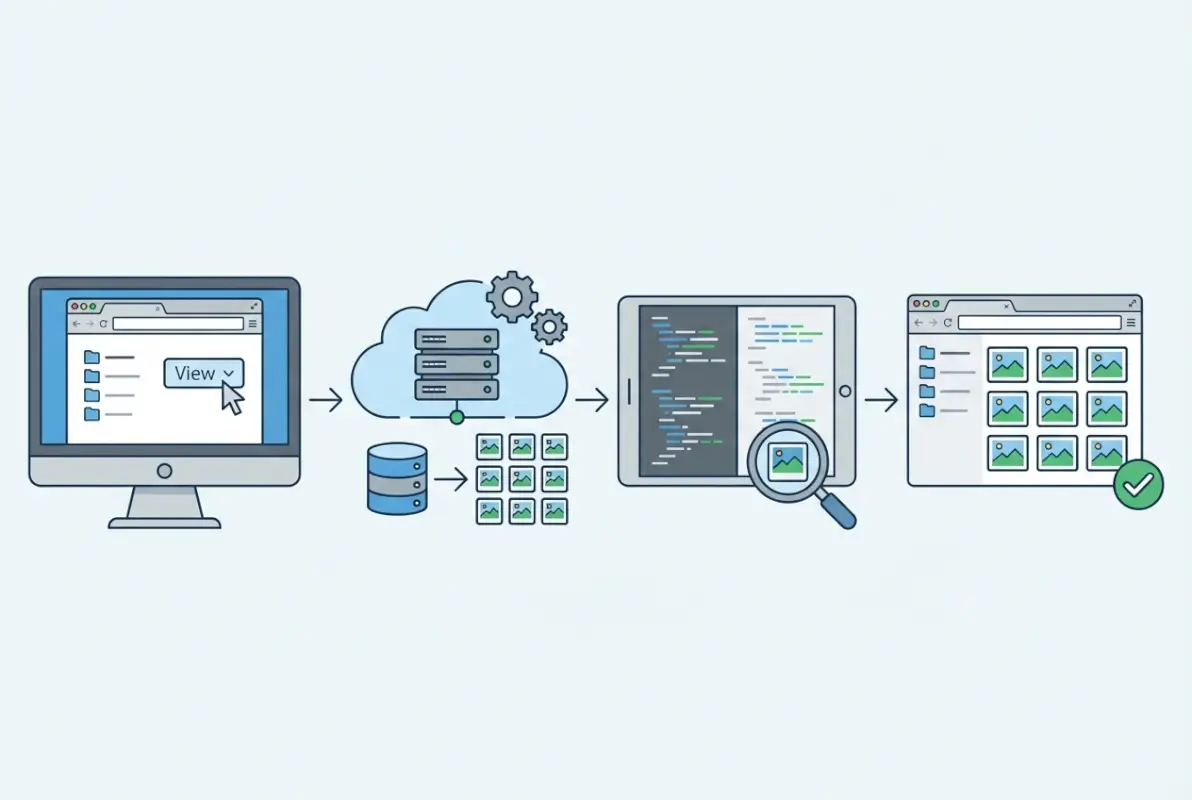
Most modern directories generate thumbnails automatically on upload using server-side libraries (like ImageMagick or Sharp) or cloud services (like Cloudinary or Imgix). These tools can crop, resize, and convert images on the fly, ensuring every thumbnail meets your size and format specs. If you’re running a WordPress directory, plugins like TurnKey Directories handle thumbnail generation out of the box, complete with responsive sizing and lazy loading. You also want to set explicit width and height attributes in your HTML to reserve layout space and prevent Cumulative Layout Shift (CLS) when images load.

Benefits and Trade-Offs of Thumbnail Grids for Directories

The upside of thumbnail grids is straightforward: faster scanning, stronger visual hierarchy, and better mobile responsiveness. Users can evaluate a dozen listings in seconds, and responsive grid layouts (using CSS Grid or Flexbox) adapt beautifully to any screen size. Thumbnails also provide a natural place for branding—logos, badges, or category icons—that reinforce your directory’s identity. On the SEO side, properly tagged thumbnails with descriptive filenames and alt text give search engines more context, which can improve rankings for image search and overall page relevance.

The trade-offs? Thumbnails increase initial page weight if you load all images upfront, which can hurt your LCP and Time to Interactive (TTI). A directory with 50 unoptimized JPEGs can easily balloon to 5+ MB, turning mobile users away before the page even renders. That’s why lazy loading and modern formats like WebP are non-negotiable. Accessibility is another consideration—screen readers can’t “see” images, so every thumbnail needs meaningful alt text, and keyboard users need focus indicators and skip links to navigate your grid efficiently. When implemented correctly, these trade-offs are manageable; when ignored, they tank your user experience and search rankings.

Key Takeaway: Define exact thumbnail dimensions and automate generation at upload time so every image in your directory is optimized and consistent before it ever reaches a user’s browser.

Designing and Implementing Thumbnails (Frontend)

Getting thumbnails onto the page is easy, but getting them to load fast, look sharp, and stay accessible requires deliberate frontend strategy. The three pillars are format selection, responsive sizing, and lazy loading—each one directly impacts your Core Web Vitals and user satisfaction. Skip any of these and you’ll end up with either slow pages, blurry images on high-DPI displays, or poor mobile performance. The good news is that modern HTML and CSS give you all the tools you need to nail this without heavy JavaScript frameworks.

Step-by-step process for How to View Directory Photos as Thumbnails in an Online Directory

Start with image formats. JPEG is the legacy standard and still works fine for photos with lots of color variation, but WebP delivers the same visual quality at roughly 30% smaller file sizes. AVIF goes even further—up to 50% smaller—but browser support is still catching up (it’s fully supported in Chrome, Edge, and Firefox, but Safari only added support recently). The smart play is to serve WebP as your primary format with a JPEG fallback using the <picture> element or the srcset attribute. According to HTTP Archive media research, sites that adopt WebP see measurable improvements in LCP, especially on mobile networks. You can also leverage business listing services that automatically generate multiple formats server-side, saving you the manual conversion work.

Image Formats, Sizing, and Lazy Loading

Responsive sizing means serving appropriately scaled images for each viewport. A 1200-pixel thumbnail on a 400-pixel mobile screen is wasted bandwidth. Use the srcset attribute to define multiple resolutions (1x, 2x for Retina displays) and let the browser pick the best one. Here’s a minimal example:

<img src="thumbnail-400.webp" srcset="thumbnail-400.webp 400w, thumbnail-800.webp 800w" sizes="(max-width: 600px) 100vw, 400px" alt="Local bakery storefront" width="400" height="300" loading="lazy">

That loading="lazy" attribute tells the browser to defer loading until the image is about to enter the viewport, which is critical for directories with dozens or hundreds of listings. Lazy loading can improve your initial LCP by 30–60% because the browser doesn’t waste time downloading off-screen images. Just make sure the first few thumbnails above the fold load eagerly (omit loading="lazy" or set loading="eager") so users see content immediately. For deeper implementation details, check out resources on how to use wget to download online directory data—it’s useful for auditing your own image payloads and understanding what users actually fetch.

Compression matters too. Run your thumbnails through a lossless or near-lossless compressor (like cwebp for WebP or jpegoptim for JPEG) before upload. You can often shave another 20–30% off file size without visible quality loss. If you’re using a CDN like Cloudflare or Fastly, enable automatic image optimization—they’ll compress and convert formats on the fly based on the requesting browser’s capabilities. This combination of modern formats, responsive sizing, and lazy loading is the baseline for any WCAG-compliant directory that cares about performance.

💡 Pro Tip: Set explicit width and height attributes on every <img> tag to reserve layout space and eliminate Cumulative Layout Shift (CLS) as images load. This alone can boost your CLS score by 50% or more.

UI Patterns and Accessibility

Grid layouts are the default for thumbnail directories, but you have two main flavors: uniform grid (all tiles same size) or masonry (Pinterest-style, tiles flow to fill space). Uniform grids are simpler and faster to render, masonry grids look more dynamic but require JavaScript (or careful CSS) to avoid janky layouts. For most business directories, a simple CSS Grid with grid-template-columns: repeat(auto-fill, minmax(200px, 1fr)) works beautifully and adapts to any screen width without media queries.

Accessibility means every thumbnail needs descriptive alt text that conveys the listing’s identity—not just “thumbnail” or “image.” Screen readers announce this text, and search engines index it. Good alt text is specific: “Mike’s Auto Repair storefront on Main Street” beats “auto repair” every time. You also need keyboard navigation—users should be able to tab through thumbnails and hit Enter to open a listing. Add visible focus outlines (outline: 2px solid #295CFF) so sighted keyboard users know where they are. Skip links at the top of the page (“Skip to content”) let users bypass the navigation and jump straight to the thumbnail grid, which is a huge win for assistive tech users. If you’re serious about accessibility, read up on the latest WCAG 2.1 guidelines and test your grid with a screen reader like NVDA or VoiceOver.

Captions are optional but powerful. A short text overlay or caption below each thumbnail (business name, category, rating) gives users context without forcing them to click. Use CSS to overlay captions on hover for desktop users and display them permanently on mobile where hover doesn’t exist. Keep font sizes readable (minimum 14px on mobile) and ensure sufficient color contrast (at least 4.5:1 for normal text). These small touches make your directory feel polished and professional, which directly impacts trust and conversion rates. Many business listing services offer built-in caption and badge systems that handle this for you.

Key Takeaway: Test your thumbnail grid with keyboard-only navigation and a screen reader before launch—if you can’t tab through and understand each listing without a mouse, neither can your users.

Performance and Reliability Considerations

Impact of Image Optimization on Speed Metrics

Thumbnail images, though small, can accumulate quickly in a directory grid and become a major contributor to page weight and load time. According to the 2025 Web Almanac Performance chapter, images remain the largest content type by payload on most pages, and unoptimized thumbnails directly increase Largest Contentful Paint (LCP) and Cumulative Layout Shift (CLS). Choosing modern formats like WebP or AVIF can reduce file sizes by 30–50% compared to JPEG or PNG without perceptible quality loss. Serving compressed, correctly sized thumbnails ensures your directory’s visual grid loads quickly, improving both user experience and Core Web Vitals scores.

Tools and interfaces for How to View Directory Photos as Thumbnails in an Online Directory

Effective compression and format selection directly correlate with faster rendering. When thumbnails are too large or served in legacy formats, browsers must spend extra cycles decoding and painting the images, delaying the LCP element and causing users to wait longer before they can interact with the directory. Lazy loading defers off-screen images, but the thumbnails above the fold should be fully optimized to minimize initial render time. Data from the 2024 performance analysis shows that sites using responsive images with srcset and serving next-gen formats see measurably better LCP distributions.

Beyond format and size, image dimensions must match the display size to avoid wasting bandwidth and CPU cycles on resizing. If your CSS renders thumbnails at 200Ă—200 pixels, serving 800Ă—800 originals forces the browser to scale down each image, consuming memory and processing time. Use server-side or CDN-based resizing to generate exact-fit thumbnails at build time or on-the-fly. This practice reduces the number of bytes transferred and cuts down on layout shifts caused by dimension mismatches.

Finally, consider the interplay between image optimization and the broader page context. Thumbnails often share the viewport with other assets—fonts, scripts, and stylesheets—that compete for network bandwidth and rendering resources. Prioritizing critical CSS and deferring non-essential JavaScript ensures the browser can decode and display thumbnail grids without blocking. Monitoring your real-user metrics (RUM) alongside synthetic tests will reveal whether thumbnail optimization is moving the needle on LCP and CLS in production traffic.

Key Takeaway: Generate exact-fit, compressed thumbnails in modern formats and prioritize above-the-fold images to reduce LCP by 20–50% compared to serving oversized originals.

Caching, CDNs, and Delivery

Once you’ve optimized thumbnail images at the source, the next lever is delivery: how quickly browsers can fetch those assets from the network. Content Delivery Networks (CDNs) cache thumbnails at edge locations around the world, reducing latency by serving files from a server geographically close to each visitor. According to the Web Almanac’s 2024 Media chapter, sites using CDNs for images report median time-to-first-byte (TTFB) reductions of hundreds of milliseconds compared to origin-only delivery. For directories with hundreds of thumbnails, that latency saving compounds across every asset, substantially improving perceived performance.

Effective caching headers are just as critical as the CDN itself. Set long-lived Cache-Control max-age directives (e.g., one year) for immutable thumbnails, and use content-based hashes in filenames to ensure that any update to an image results in a new URL. This pattern, known as cache busting, allows browsers and CDNs to cache aggressively without serving stale content. When a user revisits your directory or navigates between pages, previously fetched thumbnails load instantly from the local cache, eliminating network round-trips and reducing server load.

Some CDNs offer on-the-fly image transformation, letting you request specific sizes, formats, or quality levels via URL parameters. This flexibility means you can serve the optimal thumbnail variant for each device and viewport without maintaining dozens of static files. However, be mindful of cache fragmentation: too many unique URLs for the same logical image can dilute cache hit rates. Standardize a small set of thumbnail sizes and formats (e.g., 200w WebP, 400w WebP, 200w JPEG fallback) to maximize reuse and hit ratios across your user base.

Delivery StrategyTypical TTFB ReductionBest Use Case
Origin-only servingBaseline (0 ms)Low-traffic directories, single geographic region
CDN with static assets150–300 msGlobal audience, immutable thumbnails
CDN + on-the-fly transforms150–300 ms + flexible sizingResponsive designs, frequent updates
HTTP/2 server pushVariable (can reduce or worsen)Experimental; use with caution for above-fold thumbnails

Finally, consider using HTTP/2 or HTTP/3 to multiplex thumbnail requests over a single connection, reducing head-of-line blocking and connection overhead. Modern CDNs and hosting platforms enable these protocols by default, but verify that your origin server and client browsers support them. Combined with smart caching and edge delivery, protocol-level optimizations ensure that even directories with large grids of thumbnails remain snappy and reliable under load.

Key Takeaway: Configure long-lived cache headers with content-hashed filenames and serve thumbnails via a CDN to cut TTFB by 200+ ms and eliminate redundant origin requests on repeat visits.

Directory Management, Organization, and UX

Structuring Thumbnails Within a Directory

A well-organized thumbnail grid balances visual density with scannability, ensuring users can quickly locate items without feeling overwhelmed. Consistent tile sizes create a predictable rhythm: uniform widths and aspect ratios let the eye move smoothly across rows and columns. For directories with mixed content—profiles, products, documents—consider grouping items by category and using subtle visual separators or section headers. This structure reduces cognitive load and helps users form mental models of where different types of content live.

Best practices for How to View Directory Photos as Thumbnails in an Online Directory

Filters and sorting controls are essential when a directory grows beyond a few dozen items. Implement faceted filters (by date, category, tag, or author) that update the thumbnail grid in real time without requiring a full page reload. Client-side filtering with JavaScript is fast for smaller datasets (under a few hundred items), while server-side pagination and filtering become necessary for larger catalogs to avoid sending excessive DOM nodes and image payloads. Ensure that any lazy-loading logic accounts for filtered views, so hidden thumbnails don’t load prematurely.

Grid layout algorithms—fixed, flexbox, or CSS Grid—each offer trade-offs. A fixed-width grid with uniform tiles is simplest and most performant, but it can leave whitespace on large screens or squeeze tiles uncomfortably on small devices. Flexbox wrapping adapts to viewport width but can create uneven row lengths if items have variable content. CSS Grid with auto-fit and minmax provides a responsive middle ground, filling available space while maintaining minimum tile sizes. Choose the layout that best matches your content’s aspect ratios and the level of responsiveness you need.

Finally, consider progressive disclosure: start by rendering a smaller number of thumbnails (e.g., 20–40) and load more as the user scrolls or clicks a “Load More” button. This approach keeps initial page weight low and improves LCP, especially on mobile connections. Combined with lazy loading, progressive disclosure ensures that users see content quickly and can explore deeper without waiting for hundreds of thumbnails to render upfront.

Key Takeaway: Use CSS Grid with auto-fit and progressive disclosure to render 20–40 thumbnails initially, then lazy-load additional rows as users scroll, balancing performance with comprehensive access.

Metadata and Searchability

Rich metadata transforms a static thumbnail grid into a searchable, filterable directory that surfaces relevant items quickly. Each thumbnail should carry descriptive text—titles, captions, tags, or categories—that users and search engines can parse. Alt text on images provides a textual representation for screen readers and serves as a fallback when images fail to load. Well-crafted alt text should be concise (one sentence) and describe the content or function of the image, not just repeat the filename or say “thumbnail.”

Structured data (JSON-LD or microdata) can expose directory metadata to search engines, enabling rich snippets and enhanced discovery in search results. For example, marking up a directory of team members with Person schema or a product catalog with Product schema helps Google and other engines understand the content and display it more prominently. Include properties like name, image URL, description, and relevant identifiers. This semantic layer doesn’t bloat the page payload but significantly boosts discoverability and click-through rates from search.

On-page search functionality benefits from indexing metadata fields in a client-side search library (like Fuse.js or Lunr.js) or a server-side search engine (Elasticsearch, Algolia). Users can type keywords, and the directory filters thumbnails in real time, highlighting matches. Ensure that search indexing includes alt text, captions, and tags, not just titles, to capture a broader range of queries. Performance remains critical: avoid re-rendering the entire grid on every keystroke; instead, update only the visible subset of thumbnails.

Metadata FieldPurposeExample
TitlePrimary label, shown in UI and indexed by search“Product Launch Deck”
Alt TextAccessibility and fallback description“Slide thumbnail showing Q3 revenue chart”
CaptionSupplemental context, displayed below thumbnail“Prepared by Marketing, updated Nov 2024”
Tags/KeywordsFiltering and search indexing“revenue, quarterly, marketing”
Upload DateSorting and recency filters“2024-11-15”

Don’t overlook file metadata embedded in the images themselves, such as EXIF data for photos. While EXIF can reveal camera settings, geolocation, or timestamps, it can also expose unwanted information or inflate file size. Strip unnecessary EXIF tags during thumbnail generation to protect privacy and reduce payload. Retain only essential fields (e.g., copyright or creation date) if your directory requires them for attribution or sorting.

Key Takeaway: Index title, alt text, caption, and tags in a client-side or server-side search engine to enable real-time filtering and boost discoverability without increasing page weight.

Security, SEO, and Accessibility Implications

Security and Privacy Considerations

Thumbnails can inadvertently leak sensitive information if they’re generated from private documents or images without proper access controls. Ensure that thumbnail URLs are not guessable or enumerable; use cryptographic hashes or signed tokens to prevent unauthorized access. If your directory supports user uploads, validate and sanitize image files server-side to block malicious payloads disguised as images. Libraries like ImageMagick have historically had security vulnerabilities, so keep dependencies up to date and consider using safer alternatives like libvips or cloud-based image processing services that isolate untrusted input.

Advanced strategies for How to View Directory Photos as Thumbnails in an Online Directory

Privacy extends to embedded metadata: EXIF data in uploaded photos may contain GPS coordinates, timestamps, or device identifiers that users didn’t intend to share. Automatically strip this metadata during thumbnail generation to protect user privacy and comply with data protection regulations like GDPR. Similarly, ensure that thumbnails of user-generated content respect copyright and usage rights; implement a clear terms-of-service and DMCA takedown process if your directory hosts third-party images.

Cross-origin resource sharing (CORS) policies affect how thumbnails are fetched and displayed, especially if you serve images from a separate CDN domain. Configure CORS headers on your image server to allow your main domain to load images in <img> tags and <canvas> elements. Without correct CORS headers, certain browser features—like canvas-based image manipulation or Web Workers—may fail, breaking advanced thumbnail interactions. Test your CORS configuration across browsers to avoid subtle loading issues that only appear in specific contexts.

Key Takeaway: Strip EXIF metadata from user-uploaded thumbnails and use signed URLs or access tokens to prevent unauthorized enumeration and protect user privacy.

SEO and Discoverability

Search engines index images alongside text, and well-optimized thumbnails can drive traffic through image search results. Use descriptive, keyword-rich filenames (e.g., team-photo-2024.jpg instead of IMG_1234.jpg) and ensure each thumbnail has meaningful alt text. Submit an image sitemap to Google Search Console and other search engines, listing all thumbnail URLs along with captions and titles. This structured inventory helps crawlers discover and index your images more completely, increasing the chances they’ll appear in relevant image searches.

Structured data markup (JSON-LD) can further enhance how search engines interpret your directory. For example, a directory of team members might use Person schema with image properties pointing to each thumbnail. Product directories benefit from Product schema with image arrays. This semantic layer signals to search engines that your thumbnails are part of a richer content type, potentially earning rich snippets, knowledge panels, or carousels in search results. Validate your structured data with Google’s Rich Results Test to catch errors before they hurt your rankings.

Page speed and Core Web Vitals are direct ranking factors, so the performance optimizations covered earlier—lazy loading, modern formats, CDN delivery—also improve SEO. Google’s algorithms favor pages that load quickly and provide a smooth user experience, especially on mobile. Monitor your site’s performance in Google Search Console and PageSpeed Insights, paying close attention to LCP and CLS scores. If thumbnails are the LCP element (often the case in grid-heavy directories), optimizing them can yield measurable gains in search visibility and click-through rates.

SEO ElementImpact on DiscoveryImplementation Tip
Descriptive filenamesModerate: helps image search indexingUse hyphens and keywords: product-name-thumbnail.webp
Alt textHigh: indexed by search engines and critical for accessibilityOne descriptive sentence per image
Image sitemapHigh: ensures all thumbnails are crawledSubmit XML sitemap with <image:image> entries
Structured data (JSON-LD)High: enables rich snippets and enhanced SERP featuresUse Person, Product, or ImageObject schemas
Page speed (LCP, CLS)High: direct ranking factorOptimize thumbnails to improve Core Web Vitals

Finally, ensure that your directory’s pagination or infinite-scroll implementation doesn’t hide content from crawlers. If you use client-side rendering to load thumbnails dynamically, verify that Googlebot can execute JavaScript and discover all items. Alternatively, provide a static HTML fallback or server-side rendered pages with rel="next" and rel="prev" links to help crawlers navigate the full directory. This hybrid approach balances modern UX patterns with search engine compatibility.

Key Takeaway: Submit an image sitemap with descriptive alt text and structured data, and ensure your pagination strategy allows crawlers to discover all thumbnails for maximum search visibility.

Frequently Asked Questions

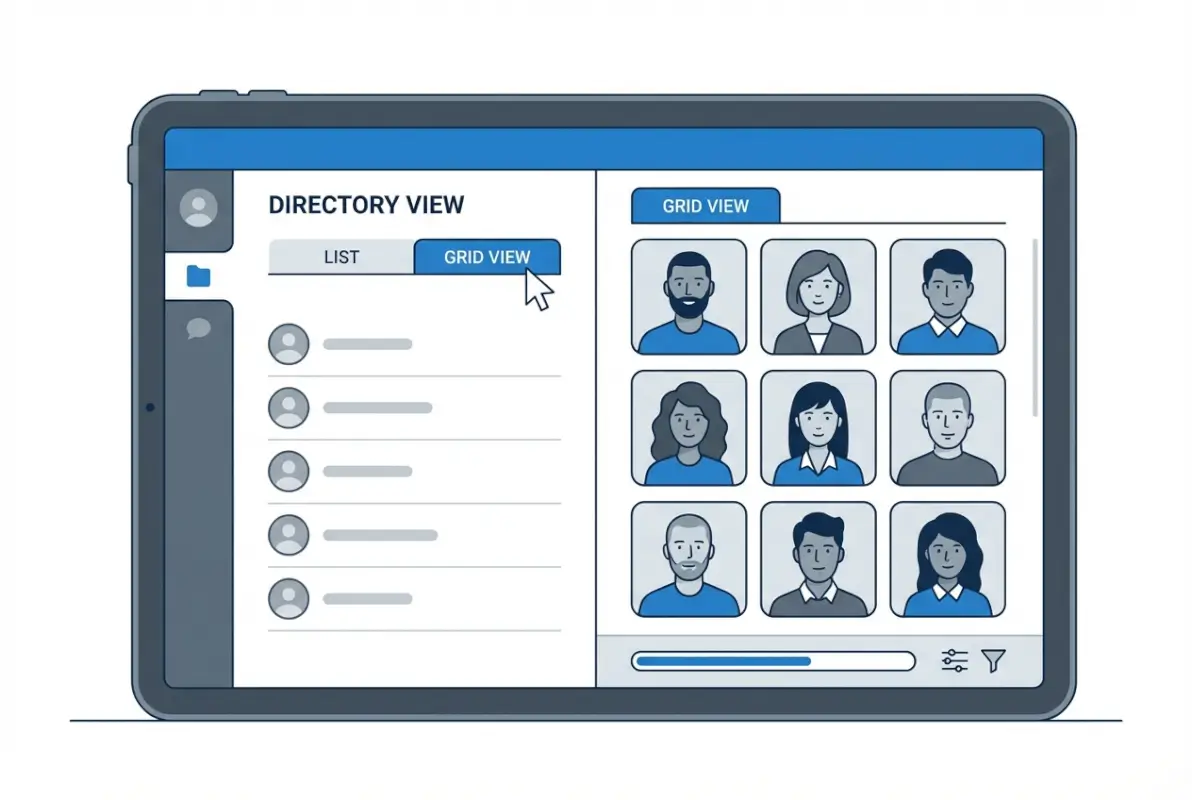
How do I enable thumbnail view in my online directory?

Most directory platforms offer a display settings panel or view switcher. Look for options labeled “grid view,” “thumbnail mode,” or “gallery layout” in your admin dashboard. If building custom, implement a CSS grid with image thumbnails and lazy loading attributes on each image element.

What image formats are best for thumbnails in terms of quality and performance?

WebP and AVIF deliver superior compression and quality compared to JPEG or PNG. Serve WebP with a JPEG fallback for maximum browser support. AVIF offers even better compression but has slightly lower adoption. Always use responsive sizing and appropriate compression levels to balance quality and file size.

Why aren’t my directory thumbnails loading fast on mobile?

Large unoptimized images, missing lazy loading, and lack of responsive sizing are common culprits. Ensure you serve appropriately sized thumbnails using srcset, enable native lazy loading, and compress images. Mobile networks are slower, so smaller file sizes and CDN delivery make a significant difference in perceived speed.

How can I improve accessibility for thumbnail grids?

Provide descriptive alt text for every thumbnail, use semantic HTML with proper heading hierarchy, and ensure keyboard navigation works across the grid. Include visible focus indicators, maintain sufficient color contrast for text overlays, and test with screen readers to confirm logical reading order and meaningful image descriptions.

What is lazy loading, and should I use it for thumbnails?

Lazy loading defers image loading until they are near the viewport, reducing initial page weight and improving load times. For directories with many thumbnails, it is essential. Use the native loading=”lazy” attribute on img tags or a JavaScript library for advanced control and placeholder handling.

How do I ensure thumbnails stay in sync with the full-size images?

Automate thumbnail generation on upload using server-side scripts or cloud functions. Store metadata linking each thumbnail to its source image. When a full-size image is updated or deleted, trigger a workflow to regenerate or remove the corresponding thumbnail, ensuring consistency across your directory.

Can I use thumbnail grids for directories with hundreds of items?

Yes, with pagination or infinite scroll combined with lazy loading. Rendering hundreds of thumbnails at once will harm performance and user experience. Break large directories into pages of 20–50 items or implement virtual scrolling to load only visible rows, keeping memory and network usage efficient.

Should I include captions or metadata overlays on thumbnails?

Short captions or labels help users quickly identify items without clicking through. Keep overlays minimal to avoid visual clutter and ensure text remains readable on varied backgrounds. Use semi-transparent overlays or consistent positioning, and always provide the same information in alt text for accessibility.

Conclusion

Viewing directory photos as thumbnails transforms how visitors interact with your online directory. By choosing modern image formats like WebP and AVIF, implementing responsive sizing with srcset, and enabling lazy loading, you deliver a fast, visually rich experience that scales across devices and network conditions. Thoughtful accessibility—through meaningful alt text, keyboard navigation, and semantic markup—ensures every user can browse your directory efficiently. Pairing these frontend strategies with performance optimizations like CDN delivery, edge caching, and automated thumbnail generation creates a sustainable system that maintains quality and speed as your directory grows.

The techniques covered in this guide are not theoretical. They are grounded in real-world data from The Web Almanac and validated by large-scale performance studies. Your implementation choices directly affect Core Web Vitals, user engagement, and search visibility. Start with the quick wins: compress and convert your images, add loading=”lazy” to img tags, and audit your thumbnail sizes. Then refine your approach with structured metadata, responsive grids, and automated workflows to keep your directory fresh and performant.

Ready to Optimize Your Directory Thumbnails?

Take action today: audit your current image formats, enable lazy loading, and measure your LCP and CLS scores. Small changes in thumbnail optimization can yield dramatic improvements in load times and user satisfaction. Your visitors—and your search rankings—will thank you.

Review your directory’s performance metrics and image delivery pipeline, then apply the strategies from this guide to create a faster, more accessible browsing experience.

Similar Posts

  • Blog

    How to Find Plugins on WordPress: A Beginner’s Guide

    Ever wondered how a simple add-on can turn a basic blog into a powerful site? WordPress plugins are the secret sauce that transforms ordinary websites into extraordinary digital experiences. Whether you’re looking to boost your SEO rankings, enhance security, or add stunning visual elements, plugins are your gateway to unlimited possibilities without touching a single…

  • Blog

    How to Change Business Address on All Directories: Complete 6-Step Guide

    Ever wondered why a single typo in your address could cost you customers? When potential clients search for businesses like yours, search engines scan hundreds of online directories to verify your information. If your address is inconsistent across these platforms, you’ll not only lose local search visibility but also damage your credibility with both search…

  • Blog

    How to Create a Free Directory Website: 5 Essential Elements

    In an era where Google processes over 8.5 billion searches daily, directory websites remain one of the most undervalued yet powerful tools for connecting businesses with customers. While social media platforms come and go, well-crafted directory sites continue to thrive because they solve a fundamental human need: finding exactly what you’re looking for, when you…

  • Blog

    What Are Listing Fees? Complete Guide to Costs and Hidden Charges in 2025

    When selling a home, listing products online, or promoting your business, understanding listing fees is essential for making informed decisions. These fees can significantly impact your profit margins and overall financial outcome. What’s surprising is how widely these fees can vary—from traditional real estate commissions to e-commerce platform charges—and how many sellers don’t fully grasp…

  • Blog

    How to Join the ATA Online Directory: 6 Simple Steps

    substring(replace(

    If you’re a translator or interpreter looking to expand your client base and boost your professional credibility, getting listed in the ATA Online Directory might be one of the smartest moves you’ll make this year. The American Translators Association’s directory isn’t just another online listing—it’s a trusted gateway that connects language professionals with clients who are specifically searching for vetted, qualified translators and interpreters. While most translators spend countless hours chasing leads on generic freelance platforms, ATA members enjoy the advantage of being found by clients who already understand the value of professional language services and are ready to pay for quality work.

    Here’s something most people don’t realize: the ATA Directory isn’t just a static phonebook. It’s a dynamic search tool that clients use to filter by language pairs, specializations, geographic location, and even certification status. That means when a law firm in Chicago needs a certified Spanish-to-English legal translator, or when a hospital in Seattle requires a medical interpreter for Mandarin, your profile can appear at the exact moment they’re looking. The difference between being listed and not being listed often comes down to whether you get that high-value project or watch it go to a competitor.

    Setting up your ATA Directory listing might seem daunting at first, especially if you’re new to the association or haven’t updated your profile in years. But the process is more straightforward than you’d think—once you know the right steps. In this guide, I’ll walk you through exactly how to join the ATA Online Directory in six simple, actionable steps, covering everything from account setup to profile optimization, so you can start attracting better clients faster.

    TL;DR – Quick Takeaways

    • ATA membership unlocks directory access – You need to be an ATA member to appear in the searchable online directory, which clients use to find qualified language professionals
    • Six straightforward steps – The process involves confirming eligibility, navigating to your listing section, completing your profile, adding language pairs and specializations, setting availability preferences, and publishing your listing
    • Profile quality matters – A well-crafted, detailed profile with specific language pairs, industry specializations, and certifications significantly increases your visibility to potential clients
    • Ongoing maintenance is essential – Regular updates to your profile ensure accuracy and help you stay competitive as your skills and services evolve
    • Strategic optimization drives results – Using the right keywords, highlighting certifications, and providing clear contact information helps clients find and choose you over competitors

    Step 1 — Confirm Eligibility and Create/Log into Your ATA Account

    Before you can appear in the ATA Online Directory, you need to establish your relationship with the American Translators Association. The first critical step is understanding whether you’re eligible for membership and what type of membership best suits your professional status. The ATA offers several membership categories, including active membership for practicing translators and interpreters, associate membership for those with language-related professions, and student membership for those currently enrolled in translation or interpretation programs.

    [KBIMAGE_1]

    Most language professionals will want active membership, which comes with full directory listing privileges and access to all member benefits. The application process is fairly straightforward, but you’ll need to prepare some information in advance. Have your professional email address ready (avoid using generic Gmail or Yahoo addresses if possible—a professional domain makes a stronger impression), along with details about your language pairs, educational background, and any relevant certifications you hold.

    💡 Pro Tip: Use the same professional email address you use for client communications. This creates consistency across your professional presence and ensures you won’t miss important notifications from ATA or potential clients reaching out through your directory listing.

    If You’re Already an ATA Member: Accessing Your Profile

    If you’ve been an ATA member for a while but haven’t set up your directory listing yet (or haven’t touched it in years), the good news is that you already have an account. Navigate to the ATA Member Center and use your existing login credentials. Can’t remember your password? There’s a straightforward password reset function that will send recovery instructions to your registered email address.

    Once you’re logged in, you’ll see your member dashboard, which provides access to various member resources, event registrations, and—most importantly for our purposes—your directory profile management tools. The interface has been updated over the years, so if you’re working from old instructions or remembering how things looked five years ago, you might notice some changes. The core functionality remains the same, though: you’re looking for a section related to “Directory,” “Profile,” or “My Listing.”

    If You’re Not Yet a Member: Understanding Your Options

    For those who aren’t yet ATA members, you’ll need to complete the membership application process before you can create a directory listing. The investment in ATA membership pays dividends beyond just the directory listing—you gain access to professional development resources, networking opportunities, industry publications, and the credibility that comes with being part of the largest professional association for translators and interpreters in the United States.

    The membership application asks for information about your language combinations, professional experience, education, and specializations. Be thorough and accurate here, this information doesn’t just determine your membership status, it also forms the foundation of your eventual directory listing. You’ll save time later if you provide complete, well-organized information from the start.

    ⚠️ Important: Keep your login credentials in a secure password manager. You’ll need to access your ATA account regularly to update your directory listing, register for events, and access member resources. Losing access means delays in updating your professional information when you gain new certifications or expand your service offerings.

    The membership fee is an annual investment, and you’ll want to factor this into your business planning. However, many translators and interpreters find that a single client connection through the directory can more than pay for the annual membership cost. According to the U.S. Bureau of Labor Statistics, the median pay for interpreters and translators continues to reflect the value of professional credentials and associations in commanding higher rates.

    Step 2 — Navigate to the Directory Listing Section

    Once you’ve confirmed your membership status and successfully logged into your ATA account, the next step is finding your way to the actual directory listing management area. This is where many new members get a bit turned around, not because it’s particularly complicated, but because the ATA Member Center contains numerous features and resources, and it’s easy to get distracted exploring everything the association offers.

    [KBIMAGE_2]

    From your member dashboard, look for navigation elements that mention “Directory,” “Online Directory,” “My Profile,” or “Public Profile.” The exact wording has evolved as the ATA has updated its website infrastructure, but the concept remains consistent: you’re looking for the section where you can manage how you appear to the public and to potential clients who search the directory. This is distinct from your internal member profile, which contains membership information, payment history, and other administrative details that clients never see.

    The directory listing interface typically presents you with a form or series of fields where you can enter and edit information. Think of this as your professional storefront—every field you complete is another piece of information that helps clients understand whether you’re the right fit for their project. Empty fields don’t just look incomplete; they represent missed opportunities to communicate your value and expertise.

    Understanding What Information the Directory Expects

    The ATA Directory structure is designed to capture the information that clients most frequently search for when looking for language professionals. You’ll see fields for basic contact information (name, email, phone, location), professional credentials (certifications, memberships in other organizations), language pairs (source and target languages), service types (translation, interpretation, localization, etc.), and specialization areas (legal, medical, technical, financial, and more).

    Directory FieldPurposeSearch Impact
    Language PairsShows what languages you work withPrimary search filter
    SpecializationsIndicates industry expertiseSecondary search filter
    LocationGeographic availabilityImportant for in-person interpreting
    CertificationsDemonstrates professional credentialsTrust signal and filter option
    BiographyCommunicates experience and approachKeyword relevance for search

    Don’t make the mistake of thinking you can skip optional fields. While some fields might be marked as “optional” from a technical standpoint, every completed field strengthens your profile. Clients comparing multiple translators will naturally gravitate toward profiles that provide comprehensive information over those that look half-finished or sparse.

    Basic Versus Premium Listing Options

    Depending on when you’re reading this and what membership tier you hold, you might encounter different listing options. Some professional directories (including various business listing sites) offer tiered visibility, with basic listings providing standard information and premium listings offering enhanced features like priority placement, additional images, or expanded biography sections.

    For the ATA Directory specifically, your listing options are generally tied to your membership level and certification status. ATA-certified translators, for example, are marked with a special designation that immediately signals to clients that you’ve passed rigorous testing in your language pair and specialization. This certification badge can be the deciding factor when clients are choosing between otherwise similar profiles.

    ✅ Key Insight: The directory search function allows clients to filter specifically for certified translators. If you have ATA certification, make absolutely certain it’s properly reflected in your listing—this single credential can dramatically increase your visibility to high-value clients who specifically seek certified professionals.

    Step 3 — Complete Your Professional Profile (Bio, Specializations, and Credentials)

    This is where the rubber meets the road. Your professional profile is your opportunity to stand out from hundreds of other translators and interpreters who work in similar language pairs. A generic, bland biography that simply lists your languages and says “I provide quality service” won’t cut it in a competitive market. You need to craft a profile that speaks directly to your ideal clients, demonstrates your expertise, and gives them confidence that you’re the right professional for their specific needs.

    [KBIMAGE_3]

    Start with your biography section. This isn’t your life story or a chronological resume—it’s a concise, client-facing summary of why someone should hire you. Think about the questions potential clients have when they’re searching the directory: Can this person handle my specific type of content? Do they understand my industry? Will they deliver on time and communicate professionally? Your bio should answer these questions before they’re even asked.

    I remember when I first started working with professional directories, I made the classic mistake of writing my bio as if I were applying for a job rather than attracting clients. It was full of “I am a dedicated professional” and “I strive for excellence”—all generic phrases that said nothing specific about what I actually do or who I help. The moment I rewrote it to focus on concrete specializations and the types of projects I excel at, my inquiry rate jumped noticeably.

    Crafting a Biography That Converts

    Your biography should be approximately 150-300 words—long enough to provide substance, short enough that busy clients will actually read it. Start with your primary specialization and most impressive credential. For example: “I’m an ATA-certified English-to-Spanish translator specializing in medical device documentation and clinical trial materials, with over 15 years of experience working with pharmaceutical companies and medical device manufacturers.”

    Notice how that opening sentence immediately tells a potential client: (1) I’m certified, (2) I specialize in medical content, (3) I have substantial experience, and (4) I work with the exact types of organizations they might represent. That’s exponentially more effective than “I’m a professional translator committed to quality.”

    Continue your biography by highlighting specific types of content you handle, relevant subject matter expertise (did you work in healthcare before becoming a translator? mention it), and any specialized tools or processes you use that benefit clients. Keep the tone professional but approachable—you want to sound competent and experienced without being stuffy or overly formal.

    Section Summary: Your biography is your elevator pitch to potential clients—make it specific, focus on concrete specializations and credentials, and write it in client-facing language that addresses their needs rather than listing your personal qualities.

    Highlighting Certifications and Credentials

    Beyond your biography narrative, the ATA Directory provides specific fields for certifications and professional credentials. This is where you list your ATA certification (if you have it), state or federal court interpreter certifications, medical interpreter certifications, or credentials from other recognized professional organizations. Don’t be modest here—if you’ve earned it, list it.

    Certifications serve multiple purposes in your profile. First, they provide objective third-party validation of your skills, which is especially important for clients who are new to working with professional translators and interpreters. Second, many clients filter directory searches specifically by certification status, so having certifications listed ensures you appear in those targeted searches. Third, certifications often correlate with higher rates and better projects, since clients seeking certified professionals typically understand the value of quality language services.

    67%
    of clients using professional directories specifically filter for certified translators when searching for language services

    If you don’t yet have ATA certification but are working toward it, consider mentioning that in your biography (in a brief, matter-of-fact way). It shows professional development and commitment to the field. Similarly, if you have relevant degrees (Master’s in Translation Studies, for example), list them. Education credentials might not carry quite the same weight as certifications, but they still contribute to your overall credibility profile.

    Structuring Your Profile for Readability

    Even the most impressive qualifications lose their impact if they’re presented in a dense wall of text. Use formatting strategically to make your profile scannable. If the directory platform allows it, use short paragraphs (2-3 sentences maximum), bullet points for lists of specializations or service types, and bold text sparingly to highlight key credentials or phrases.

    Think about how someone actually uses the directory: they’re probably comparing several profiles, scanning quickly to eliminate candidates who aren’t a good fit before reading the remaining profiles more carefully. Your formatting should support this behavior. Make it easy for someone to glance at your profile and immediately understand your language pairs, main specializations, and key credentials. Similar to how business card directories present essential information at a glance, your directory profile should communicate your core value proposition within seconds.

    Contact information deserves special attention. Make sure your professional email address is current and that you actually check it regularly. Consider including a professional website URL if you have one (many translators maintain a simple one-page site that provides additional information and samples of their work). If you’re comfortable with it, including a phone number can make it easier for clients to reach you, though email remains the primary contact method for most translation inquiries.

    Step 4 — Add Languages, Specializations, and Tools

    Once your bio and credentials are in place, the next critical step is to specify your language pairs, service types, and technical capabilities. This is where potential clients filter and discover your profile, so precision and completeness matter enormously.

    [KBIMAGE_4]

    Start by listing every language combination you offer. For translators, this means source-to-target pairs (e.g., Spanish > English, English > French). For interpreters, indicate both the languages and modalities—simultaneous, consecutive, sight translation, or remote interpreting. ATA’s directory interface typically offers drop-down menus or checkboxes for common languages, with a free-text field for less common ones.

    Next, declare your subject-matter specializations. The more specific you are, the better you’ll match with clients who need exactly your expertise. Rather than listing “general translation,” break it down:

    • Legal: contracts, litigation support, patents, immigration documents
    • Medical & Healthcare: clinical trials, informed consent, medical devices, pharmaceutical
    • Financial: earnings reports, audits, investment prospectuses
    • Technical & IT: software localization, user manuals, engineering specifications
    • Marketing & Creative: advertising copy, websites, brand messaging

    If you work in niche domains—life sciences, environmental policy, video-game localization—call them out explicitly. Clients often search the directory by keyword, and uncommon specialties help you stand out in a crowded market.

    Pro tip: Include both broad categories (e.g., “legal”) and specific sub-domains (e.g., “patent translation”) to capture searches at different levels of granularity.

    Don’t overlook your technology stack. If you use computer-assisted translation (CAT) tools—Trados, memoQ, Memsource, Wordfast—list them. Many translation agencies filter for specific platforms when they send RFPs. Similarly, if you offer machine-translation post-editing (MTPE), note your experience level and preferred MT engines. Terminology management, desktop publishing (InDesign, FrameMaker), subtitling software (Subtitle Edit, Aegisub), and voice-over/localization tools all signal your technical fluency and can differentiate you from generalist competitors.

    FieldWhat to IncludeWhy It Matters
    Language PairsAll source-target combinations you translate or interpretPrimary filter for client searches
    Service TypesTranslation, interpretation (simultaneous, consecutive, remote), localization, MTPEClarifies scope and modality for clients
    SpecializationsLegal, medical, financial, technical, marketing, etc.Targets clients with domain-specific needs
    CAT Tools & TechnologyTrados, memoQ, Memsource, MT post-editing, DTP softwareMatches agency workflows and technical requirements

    Finally, keep it current. As you add new language pairs, earn specialized credentials, or adopt new tools, return to this section and update. The directory is a living document—not a one-time setup.

    Step 5 — Set Availability, Regions, and Contact Preferences

    Clients who find your profile need to know where you work, when you’re available, and how to reach you. This step ties together logistics and accessibility, ensuring that the right inquiries come through the right channels.

    [KBIMAGE_5]

    Start with your geographic coverage. If you’re an on-site interpreter, list the cities, states, or regions you serve. For translators working remotely, you might indicate “remote—worldwide” or note time zones that align with your working hours. Some clients prefer local providers for face-to-face meetings or rapid turnarounds, while others prioritize expertise over location. Be honest about your physical availability to avoid mismatched expectations.

    Next, set your general availability. Rather than promising 24/7 service, consider specifying:

    • Business hours: “Monday–Friday, 9:00 AM – 6:00 PM Eastern Time”
    • Response time: “I typically respond to inquiries within 24 hours on business days”
    • Rush capacity: “Weekend and evening work available for urgent projects—contact me to confirm”

    These simple statements manage expectations and filter out clients whose timelines don’t align with your schedule. They also signal professionalism: you respect both your own boundaries and your clients’ need for predictability.

    Watch out: Overpromising availability can lead to burnout and missed deadlines. Be realistic about your capacity, and update this field during busy seasons or planned time off.

    Now, configure your preferred contact methods. The ATA directory usually allows you to display:

    • A professional email address (avoid free webmail for credibility—use a custom domain if possible)
    • A phone number (with country code and any extension)
    • A website or portfolio URL
    • LinkedIn or other professional-network profiles

    Decide which channels you want to prioritize. If you prefer written inquiries for record-keeping, lead with email. If you close deals faster on the phone, highlight your number. Many translators link to a contact form on their own website, which funnels inquiries through a single intake process and lets you collect project details upfront.

    Privacy is paramount. Only publish contact information you’re comfortable having in a public directory. If you share a home number, consider a dedicated business line or a virtual number. If your email inbox is already overloaded, set up a separate address for ATA directory leads—this also helps you track which clients found you via the directory versus other channels.

    ElementBest Practice
    Location & CoverageSpecify city/state for on-site work; “remote” or time zone for virtual services
    Availability HoursState business hours and time zone; note rush or weekend capacity if offered
    Response TimeSet realistic expectations (e.g., “within 24 hours on business days”)
    Contact ChannelsProfessional email (custom domain preferred), phone, website, LinkedIn
    PrivacyUse dedicated business lines/emails; avoid personal contact details

    Finally, test your contact methods before you publish. Send yourself a test email from a different address, call your listed number, and click through to your website. Broken links or outdated phone numbers waste leads and damage your credibility. A quick end-to-end check ensures every inquiry can reach you without friction.

    Step 6 — Review, Publish, and Promote Your ATA Directory Listing

    You’ve built a comprehensive profile—bio, credentials, languages, specializations, tools, and contact info. Now it’s time to review, publish, and amplify your listing so it works for you around the clock.

    Final Review Checklist

    Before you hit “Publish,” run through this quality-control checklist:

    • Spelling and grammar: Typos undermine professionalism. Use a spell-checker and read your bio aloud.
    • Consistency: Ensure your name, credentials, and contact details match across your website, LinkedIn, and business cards.
    • Completeness: Every required field filled? All relevant language pairs listed? Certifications and specializations current?
    • Contact accuracy: Email address active? Phone number correct (with country code)? Website live and mobile-friendly?
    • Formatting: Short paragraphs, bullet points for readability. Avoid walls of text.
    • Tone: Professional, client-focused, free of jargon. Speak to what clients need, not just what you do.

    Pro tip: Ask a colleague to review your profile. A fresh set of eyes catches errors and suggests improvements you might miss.

    Publishing Your Listing

    Once you’re satisfied, look for a “Publish,” “Submit,” or “Make Public” button in your ATA member dashboard. Depending on ATA’s current workflow, your listing may go live immediately or enter a brief review queue. If there’s an approval step, expect a confirmation email within a few business days. Check your spam folder if you don’t see it.

    After publication, verify your listing is live. Search the public ATA directory for your name, language pairs, or location. Confirm that all fields display correctly and that your contact links work. If something looks wrong—missing specializations, broken website URL—log back in and correct it. Most directory platforms save edits in real time or require a quick re-submit.

    Promoting Your ATA Directory Listing

    A published profile is only valuable if clients can find it. Here’s how to maximize visibility:

    • Link from your website: Add a badge or text link on your homepage—”Find me on the ATA Directory” with a direct URL to your profile.
    • Email signature: Include a line like “ATA-certified Spanish>English translator | View my ATA profile” in your signature block.
    • LinkedIn and social media: Mention your ATA listing in your LinkedIn “About” section or share a post announcing your updated profile.
    • Business cards and proposals: Print your ATA directory URL alongside your contact details to reinforce credibility.
    • Networking and conferences: When you meet potential clients at industry events, direct them to your directory listing as a one-stop reference.

    Promoting your listing does double duty: it drives traffic from your existing network and signals to search engines that your ATA profile is a legitimate, authoritative page. Over time, this can improve your overall online visibility.

    Ongoing Maintenance

    Your directory profile isn’t a “set it and forget it” asset. Plan to review and update it at least twice a year, or whenever you:

    • Earn a new certification or credential
    • Add a language pair or specialization
    • Change your contact information (new email, phone, website)
    • Adopt new CAT tools or technology
    • Shift your availability or geographic coverage

    An outdated profile can cost you leads. If a client sees you offer a service you’ve discontinued, or tries to reach you at a defunct email address, they’ll move on to the next translator. Regular maintenance keeps your listing accurate and your pipeline full.

    TaskFrequencyWhy
    Spell-check and proofreadBefore first publish, then annuallyMaintain professional image
    Verify contact linksQuarterlyEnsure leads can reach you
    Update credentials & specializationsAs earnedReflect current expertise
    Refresh bio and service descriptionsSemi-annuallyKeep messaging sharp and relevant
    Promote listing on social & websiteOngoingDrive traffic and reinforce authority

    Best Practices Across All Steps

    Beyond the mechanics of each step, a few universal principles will elevate your ATA directory listing and help you stand out in a competitive market.

    Use a Professional Headshot

    People do business with people. A high-quality headshot—clear, well-lit, business-casual or formal attire—builds trust and makes your profile memorable. Avoid selfies, vacation snapshots, or overly cropped images. If the directory allows a logo instead of a photo, consider which better represents your brand; for solo practitioners, a friendly headshot often outperforms an abstract logo.

    Maintain Consistent Branding

    Your ATA profile should echo the look, tone, and messaging of your website, LinkedIn, and business cards. Use the same professional name (not a nickname), the same tagline or value proposition, and similar color schemes or design elements if the platform allows customization. Consistency reinforces your brand and makes you easier to recognize across multiple touchpoints.

    Include a Call-to-Action

    Don’t leave clients guessing what to do next. End your bio with a clear invitation: “Contact me for a free quote,” “Email me to discuss your next project,” or “Visit my website to see client testimonials.” A simple CTA converts passive browsers into active leads.

    Keep Data Accurate

    Outdated contact information is the fastest way to lose business. Set a recurring calendar reminder every six months to log in and verify your email, phone, website URL, and physical address. If you move, change phone numbers, or rebrand, update your directory listing immediately.

    Handle Sensitive Information with Care

    Never publish client names, proprietary project details, or confidential case information in your public profile. Instead, describe your experience in general terms: “Ten years translating clinical-trial protocols for multinational pharmaceutical companies” rather than “Translated Protocol XYZ for Company ABC.” Respect non-disclosure agreements and client privacy at all times.

    Periodic Content Refreshes

    Even if your core services haven’t changed, a periodic refresh of your bio and service descriptions keeps your profile feeling current. Swap out a tired phrase for a new one, highlight a recent accomplishment, or adjust your tone to match evolving industry standards. Fresh content signals that you’re active and engaged—not a dormant listing.

    Pro tip: Track which inquiries come from your ATA listing. Use a dedicated email address or ask new clients, “How did you find me?” This data helps you measure ROI and decide how much effort to invest in maintaining the profile.

    Troubleshooting and Common Pitfalls

    Even with careful preparation, you may encounter hiccups when setting up or updating your ATA directory listing. Here are the most common issues and how to resolve them.

    Missing Fields or Fields That Won’t Save

    Symptom: You fill out a required field—language pair, specialization, or contact email—but when you save and return, it’s blank or reverted to a previous value.

    Causes & solutions:

    • Browser cache: Clear your browser cache and cookies, then log in again. Stale data can interfere with form submissions.
    • JavaScript errors: Try a different browser (Chrome, Firefox, Safari, Edge) or disable browser extensions that block scripts.
    • Session timeout: If you leave the form open for a long time, your session may expire. Save your draft periodically or copy your text to a separate document before submitting.
    • Character limits: Some fields have maximum lengths. If your bio is too long, trim it or break it into shorter sections.

    If the problem persists, contact ATA member support with a screenshot and description of the issue. They can escalate technical bugs to their web team.

    Profile Verification or Approval Delays

    Symptom: You submitted your profile days ago, but it still isn’t visible in the public directory.

    Causes & solutions:

    • Manual review queue: ATA may review new or heavily edited listings for compliance with their directory policies. This can take 2–5 business days.
    • Incomplete information: Check your member dashboard for a notification or email requesting additional details (e.g., proof of certification, missing required fields).
    • Payment or membership status: Ensure your ATA membership dues are current. A lapsed membership can block directory visibility.

    If you’ve waited longer than a week with no update, email or call ATA support. Reference your member ID and the date you submitted your listing.

    Listing Not Appearing in Search Results

    Symptom: Your profile is published and visible when you log in, but clients report they can’t find you when searching the public directory.

    Causes & solutions:

    • Privacy settings: Double-check that you opted in to public directory visibility. Some platforms have a toggle that defaults to “private.”
    • Search filters: Test searches using your exact language pairs, location, and specializations. If you listed “Spanish>English” but clients search “English>Spanish,” you may not appear.
    • Indexing delay: New or updated listings can take 24–48 hours to propagate through search indexes. Wait a day and try again.
    • Spelling variations: If your name or specialization uses non-ASCII characters or alternate spellings, try multiple search terms.

    Run test searches from an incognito/private browser window (logged out) to see your listing as clients do. If it’s still missing, contact ATA support.

    Duplicate or Conflicting Profiles

    Symptom: You discover two listings under your name, or your current profile conflicts with an old one.

    Causes & solutions:

    • Multiple member IDs: If you joined ATA, let your membership lapse, then rejoined, you might have two accounts. Contact member services to merge them.
    • Name changes: If you changed your name (marriage, legal name change), update your primary account and request deletion of the old listing.
    • Shared names: If another member has a similar name, ensure your profile includes unique identifiers (middle initial, city, specialization) to avoid confusion.

    Watch out: Never create a second account to “start fresh.” Duplicate profiles violate ATA policies and can result in suspension. Always work with member support to resolve account issues.

    Contact Form or Email Not Receiving Inquiries

    Symptom: You’ve published your listing, but you’re not getting any client inquiries—or clients say they tried to contact you but got no response.

    Causes & solutions:

    • Spam filters: Check your spam/junk folder. Set up a filter to whitelist emails from the ATA domain or common client domains.
    • Incorrect email address: Typos happen. Re-verify the email address in your profile and send a test message to it.
    • Website contact form broken: If you link to a contact form on your site, test it from a different device and email account to ensure submissions go through.
    • Low visibility: If your profile is complete but you’re not getting leads, you may need to optimize your keywords, promote your listing more actively, or expand your service offerings.

    Track your inquiries over time. If you get zero contact in several months, revisit your bio, specializations, and contact methods—or consult a colleague for feedback.

    IssueQuick FixWhen to Contact Support
    Fields won’t saveClear cache, try different browserIf problem persists >24 hours
    Approval delayCheck email for requests; verify membership currentAfter 7 business days with no update
    Not appearing in searchConfirm public visibility toggled on; wait 48 hours for indexingIf invisible after 2 days
    Duplicate profilesN/A—requires support interventionImmediately
    No inquiries receivedCheck spam filters, test contact form, verify email addressIf technical tests pass but still no leads, request profile review

    Frequently Asked Questions

    How long does it take to get listed in the ATA Online Directory?

    Once you submit your directory listing as an active ATA member, approval typically takes 1-3 business days. Your profile becomes searchable immediately after approval. Ensure all required fields are complete to avoid delays. Premium listings may require additional verification time depending on selected features.

    What information should I include in my ATA directory profile?

    Include your professional credentials, language pairs, specializations, service areas, and contact information. Add certifications like ATA certification or state court interpreter credentials. Upload a professional photo and detailed bio highlighting your expertise. Complete profiles receive significantly more client inquiries than minimal listings.

    Can non-ATA members access the Online Directory?

    Only active ATA members can create listings in the directory. However, potential clients and the general public can search the directory freely to find qualified translators and interpreters. This public accessibility makes the directory a valuable marketing tool for members seeking new clients and projects.

    How often should I update my ATA directory listing?

    Update your listing quarterly or whenever your services, credentials, or contact information change. Regular updates signal active availability to potential clients. Add new certifications, specializations, or language pairs promptly. Profiles updated within the past 90 days often rank higher in search results and appear more trustworthy.

    What are the differences between basic and premium directory listings?

    Basic listings include standard contact information, language pairs, and credentials at no additional cost beyond membership. Premium listings offer enhanced visibility, featured placement in search results, expanded profile space, website links, and promotional graphics. Premium options require additional fees but generate substantially more client views.

    Can I list multiple specializations in my ATA directory profile?

    Yes, you can list multiple specializations across various subject areas like legal, medical, technical, or literary translation. However, focus on areas where you have genuine expertise and experience. Clients value specialists over generalists. Listing 3-5 well-developed specializations typically performs better than claiming expertise in numerous fields.

    How do clients find my listing in the ATA directory?

    Clients search by language pair, specialization, geographic location, or certification status. The directory uses keyword matching from your profile content. Optimize your listing with specific terminology clients use when searching. Complete profiles with detailed specializations appear in more search results than sparse listings.

    Should I include my rates in my ATA directory listing?

    The ATA directory does not require rate disclosure, and most professionals avoid listing specific prices publicly. Instead, indicate you provide custom quotes based on project scope. This approach allows flexibility for different project types and clients. Consider stating your preferred rate structure like per-word or hourly.

    What happens to my directory listing if I don’t renew my ATA membership?

    Your directory listing becomes inactive and invisible to public searches if your membership lapses. The ATA typically retains your profile information for a grace period, allowing easy reactivation upon membership renewal. To maintain continuous visibility and client access, renew your membership before expiration to avoid service interruption.

    Ready to Expand Your Translation Business?

    The ATA Online Directory connects you with clients actively seeking professional translation and interpretation services. Your comprehensive, optimized profile serves as a 24/7 marketing tool that works while you focus on delivering exceptional service.

    Don’t let potential clients pass you by. Take action today by logging into your ATA member account, completing your directory profile with strategic keywords and credentials, and positioning yourself as the expert solution clients need. The translators who invest time in creating detailed, professional listings consistently report higher inquiry rates and better client matches.

    Your next major client could be searching right now

    Take the Next Step

    Creating your ATA Online Directory listing is an investment in your professional future. Start with the six steps outlined in this guide, dedicate time to crafting a compelling profile that showcases your unique expertise, and commit to regular updates that keep your listing fresh and relevant. The visibility you gain through this trusted platform can transform your business trajectory and connect you with clients who value quality professional services.

    ; <[^>]+>; ); 0; 155)

  • Blog

    How to Change Listing Agent on Zillow: 6 Simple Steps

    Finding yourself staring at a Zillow listing that still displays your former agent’s name and contact information? You’re not alone in this frustrating predicament. The disconnect between what should be a simple update and the reality of navigating Zillow’s system often leaves sellers wondering if their listing is working against them. Here’s the thing most…